Applying mTLS Authentication Policy
In this scenario, the implementation of the mTLS Authentication (Mutual Transport Layer Security Authentication) policy will be explained.
Since two-way TLS authentication will be done, certificates must be created for the client and server.
In a production environment, it is recommended to purchase certificates from a Certificate Authority. However, for testing or demo purposes, using self-signed certificates will suffice. In this article, we will use Java's keytool to generate self-signed certificates.
To run "keytool" commands, you must be in the path where Java is installed or the "bin" directory of Java must be defined in your environment variables.
It is recommended to use Java version 1.8.400 or later for the correct generation of secret keys.
If Apinizer is behind NGINX or a different load balancer, or if SSL offloading is done by a firewall, certificates may not reach Apinizer directly. In such cases, settings should be configured to pass the certificates to Apinizer.
Creating Certificates, Keystore, and Truststore for MTLS (Mutual TLS)
Step 1: Generating CA Certificate and Key
The CA certificate is used to sign both client and server certificates, enabling mutual authentication between both parties.
If you have the CA certificate available, you can proceed to step 2.
Genarate CA private key
openssl genpkey -algorithm RSA -out ca-key.pemThis command creates a CA private key (ca-key.pem) using the RSA algorithm. This key will be used to sign the CA certificate.
Create CA certificate
openssl req -x509 -new -nodes -key ca-key.pem -sha256 -days 365 -out ca-cert.pem -subj "/C=US/ST=California/L=San Francisco/O=MyOrg/OU=MyDept/CN=MyRootCA"This command creates a CA certificate (ca-cert.pem) that will be valid for one year (-days 365) , using the ca-key.pem . This certificate will be used to sign client and server certificates.
Files created after Step 1:
ca-key.pem: CA private keyca-cert.pem: CA certificate
Step 2: Creating Keystore and Certificate for the Server
For the server to be authenticated by the client, it needs its own certificate. This certificate must be signed by the CA .
If you have previously created the server Keystore and Truststore values, you do not need to repeat this step for new incoming clients. In this case, you can proceed to step 3.
Generate Server Private Key and CSR
openssl req -new -newkey rsa:2048 -nodes -keyout server-key.pem -out server.csr -subj "/C=US/ST=California/L=San Francisco/O=MyOrg/OU=MyDept/CN=server"This command generates a private key (server-key.pem) and a CSR (server.csr) for the server. The CSR is a certificate signing request to be signed by a CA .
Sign the CSR with the CA certificate
openssl x509 -req -in server.csr -CA ca-cert.pem -CAkey ca-key.pem -CAcreateserial -out server-cert.pem -days 365 -sha256 This command signs the server CSR(server.csr) with the CA certificate (ca-cert.pem)and CA private key (ca-cert.pem), generating a server certificate (server.csr) valid for one year.
Combine the server private key and certificate into a PFX format.
openssl pkcs12 -export -out server-keystore.pfx -inkey server-key.pem -in server-cert.pem -certfile ca-cert.pem -passout pass:changeit This command combines the server private key (server-key.pem), server certificate (server-cert.pem), and CA certificate (ca-cert.pem) into a PFX file (server-keystore.pfx). The PFX file will be used as a keystore for Java applications.
Files created after Step 2:
server-key.pem: Server private keyserver.csr: Server CSR (Certificate Signing Request)server-cert.pem: Server certificateserver-keystore.pfx: Server keystore file (in PFX format)
Step 3: Creating Keystore and Certificate for the Client
The client needs its own certificate to be authenticated by the server. This certificate must be signed by the CA (Certificate Authority).
If these operations are being performed on the server side, for the client to perform these steps, you need to share your CA certificate with the client.
Generate client private key and CSR
openssl req -new -newkey rsa:2048 -nodes -keyout client-key.pem -out client.csr -subj "/C=US/ST=California/L=San Francisco/O=MyOrg/OU=MyDept/CN=client" This command creates a private key (client-key.pem) and a CSR (client.csr) for the client. The CSR is a certificate signing request to be signed by a CA .
Sign the CSR with the CA certificate
openssl x509 -req -in client.csr -CA ca-cert.pem -CAkey ca-key.pem -CAcreateserial -out client-cert.pem -days 365 -sha256 This command signs the client CSR (client.csr) with the CA certificate (ca-cert.pem) and CA private key (ca-key.pem), creating a client certificate (client-cert.pem) that is valid for one year.
Combine the client private key and certificate into a PFX format
openssl pkcs12 -export -out client-keystore.pfx -inkey client-key.pem -in client-cert.pem -certfile ca-cert.pem -passout pass:changeit This command combines the client private key (client-key.pem), client certificate (client-cert.pem), and CA certificate (ca-cert.pem) into a PFX file (client-keystore.pfx). The PFX file will be used as a keystore for Java applications.
Files created after Step 3:
client-key.pem: Client private keyclient.csr: Client CSRclient-cert.pem: Client certificateclient-keystore.pfx: Client keystore file
Step 4: Creating TrustStore
TrustStore is used to verify the certificates of the counterpart. Both server and client sides require the CA certificate.
Import the CA certificate into the server's TrustStore. (If you have already done this step previously, you can skip this step. This operation needs to be done once on the server side and should not be repeated for each client!)
keytool -importcert -file ca-cert.pem -alias ca-cert -keystore server-truststore.pfx -storetype PKCS12 -storepass changeit -nopromptThis command imports the CA certificate (ca-cert.pem) into the server TrustStore (server-truststore.pfx). This TrustStore contains the CA certificate that the server will use to verify client certificates.
Import the CA certificate into the client TrustStore
keytool -importcert -file ca-cert.pem -alias ca-cert -keystore client-truststore.pfx -storetype PKCS12 -storepass changeit -noprompt This command imports the CA certificate (ca-cert.pem) into the client TrustStore (client-truststore.pfx). This TrustStore contains the CA certificate that the client will use to verify server certificates.
Files created after Step 4:
server-truststore.pfx: Server TrustStore file (in PFX format)client-truststore.pfx: Client TrustStore file (in PFX format)
Summary
Based on these steps, the following files were generated:
CA Side, The following files were created to sign client and server certificates:
ca-key.pem: CA private keyca-cert.pem: CA certificate
Server Side: The server's private key and CSR were generated. The CSR was signed by the CA to obtain the server certificate. This certificate and private key were converted into the server keystore file (server-keystore.pfx).
server-key.pem: Server private keyserver.csr: Server CSRserver-cert.pem: Server certificateserver-keystore.pfx: Server keystore file (PFX format)server-truststore.pfx: Server truststore file (PFX format)
Client Sied: The client's private key and CSR were generated. The CSR was signed by the CA to obtain the client certificate. This certificate and private key were converted into the client keystore file (client-keystore.pfx).
client-key.pem: Client private keyclient.csr: Client CSRclient-cert.pem: Client certificateclient-keystore.pfx: Client keystore file (PFX format)client-truststore.pfx: Client truststore file (PFX format)
Setting Up Client Certificate for Apinizer
After completing these steps, to verify the client certificate in Apinizer, you create a user-truststore.pfx file and add it to Apinizer via the KeyStores screen.
keytool -import -trustcacerts -file client-cert.pem -keypass password -storepass changeit -keystore user-truststore.pfx -deststoretype pkcs12The added user-truststore.pfx file corresponds to the client for which it was created, and it can be found on the client's Credential page in the TrustStore field under the Secret section.
.p12 and .pfx extensions actually denote the same file format - PKCS#12. PKCS#12 is a file format that typically contains a server certificate, its associated private key, and optionally any intermediate certificates.
.pfx files are commonly used on Windows platforms, while .p12 files are more prevalent on Unix or Linux-based systems. However, there is no functional difference between these two file extensions, and you do not need to perform any conversion between them; they can be used interchangeably across platforms that support PKCS#12.
- The following command can be used to convert the p12 format to jks:
keytool -importkeystore -srckeystore serverkeystore.pfx -srcstoretype pkcs12 -destkeystore serverkeystore.jks -deststoretype jks- The following command can be used to convert jks format to pfx/p12:
keytool -importkeystore -srckeystore serverkeystore.jks -srcstoretype jks -destkeystore serverkeystore.pfx -deststoretype pkcs12Uploading Created User Truststore to Apinizer
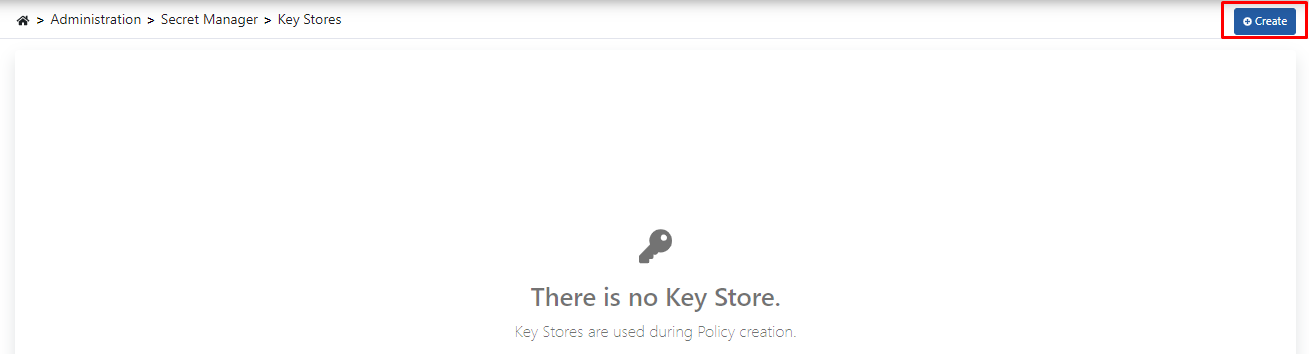
Click the Create button on the Key Stores screen.
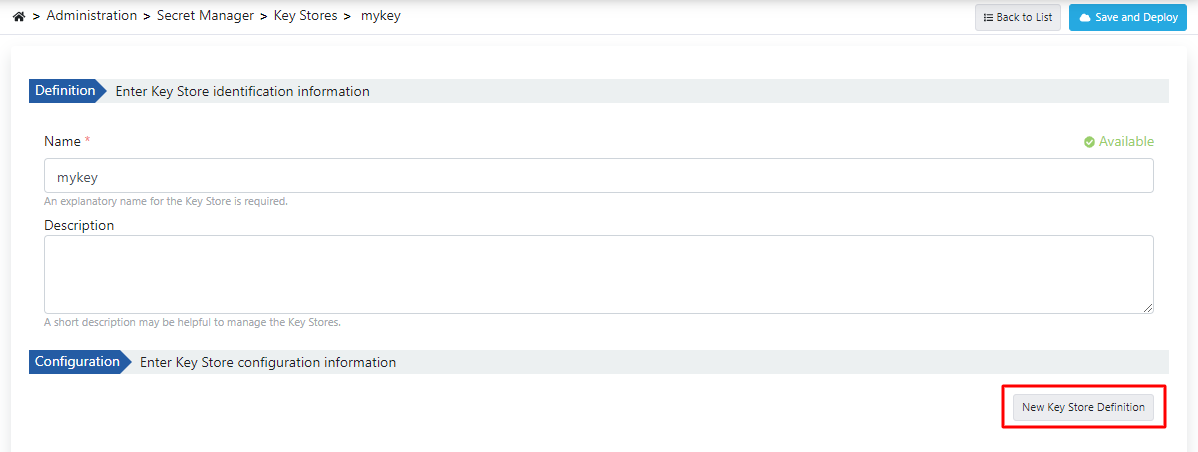
Click on the New Key Store Definition button on the screen that opens.
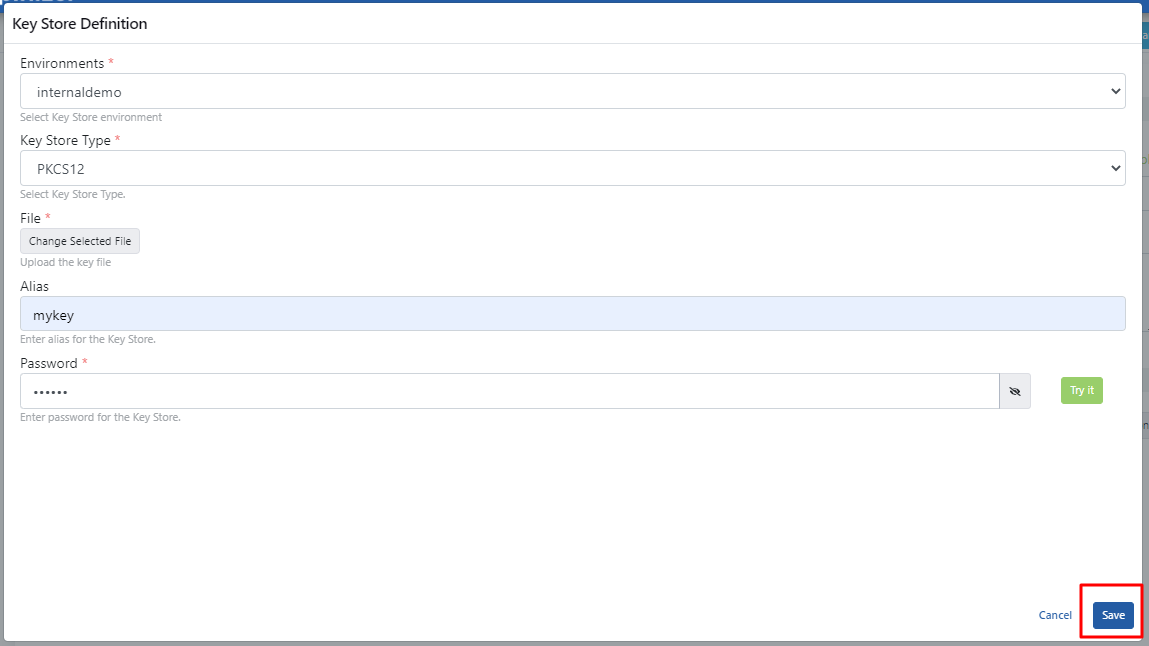
The created usertruststore.pfx file is selected and necessary information is entered. Click the Save button.
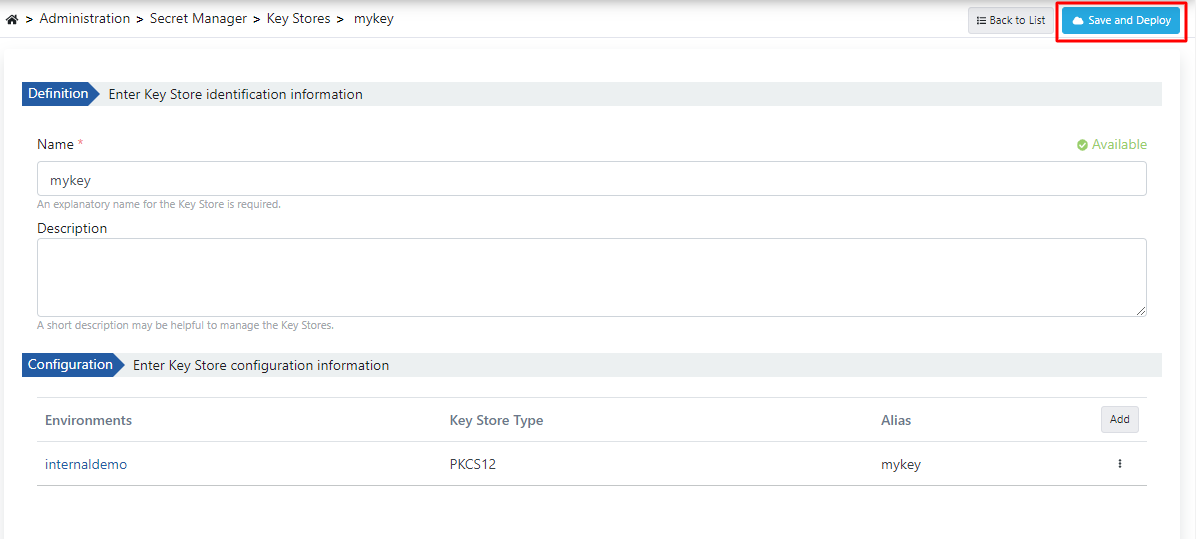
The client keystore is saved by clicking the Save and Deploy button.
Making Necessary Settings on Apinizer Environments
In order to use the mTLS policy, SSL Offloading must be done on Apinizer Environment's and the mTLS option must be selected.
For this, the HTTPS Enabled option and the mTLS options that come with it are activated on the deployment settings of the Gateway Environment.
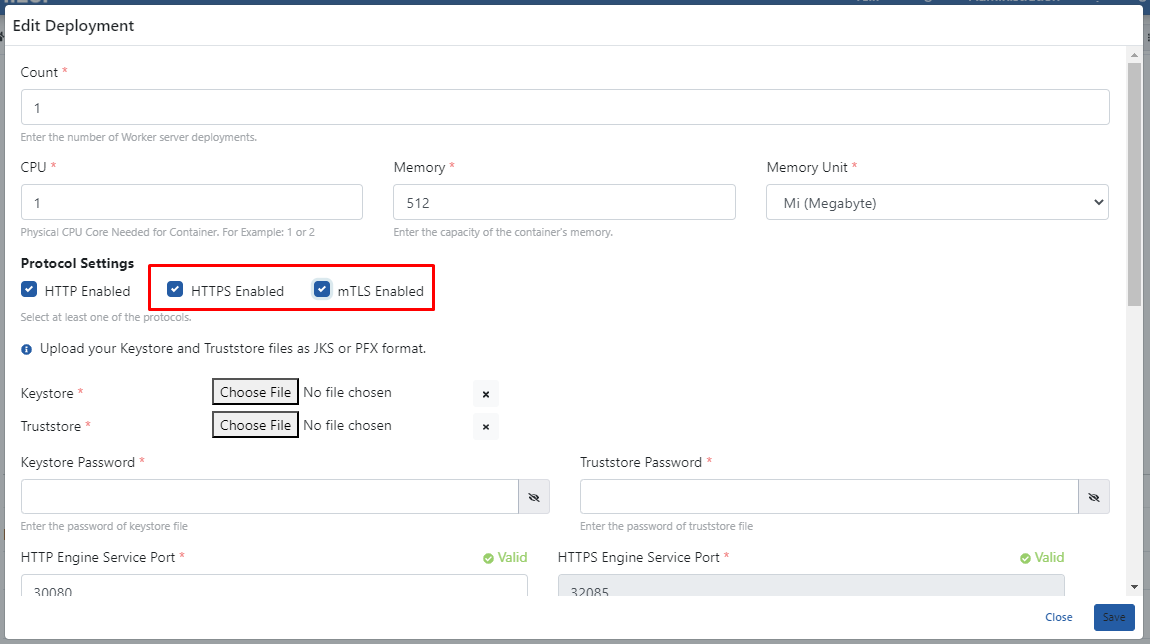
The created serverkeystore.pfx and servertruststore.pfx files are added. Password information is entered. Click the Save button.
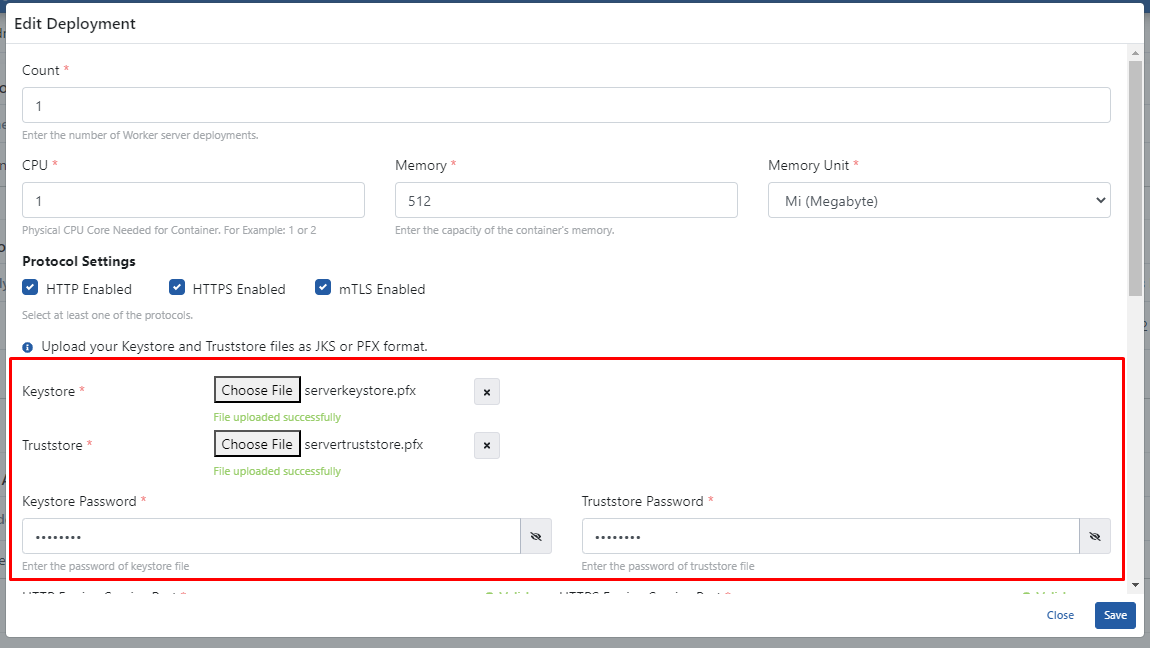
Republish is required after saving.

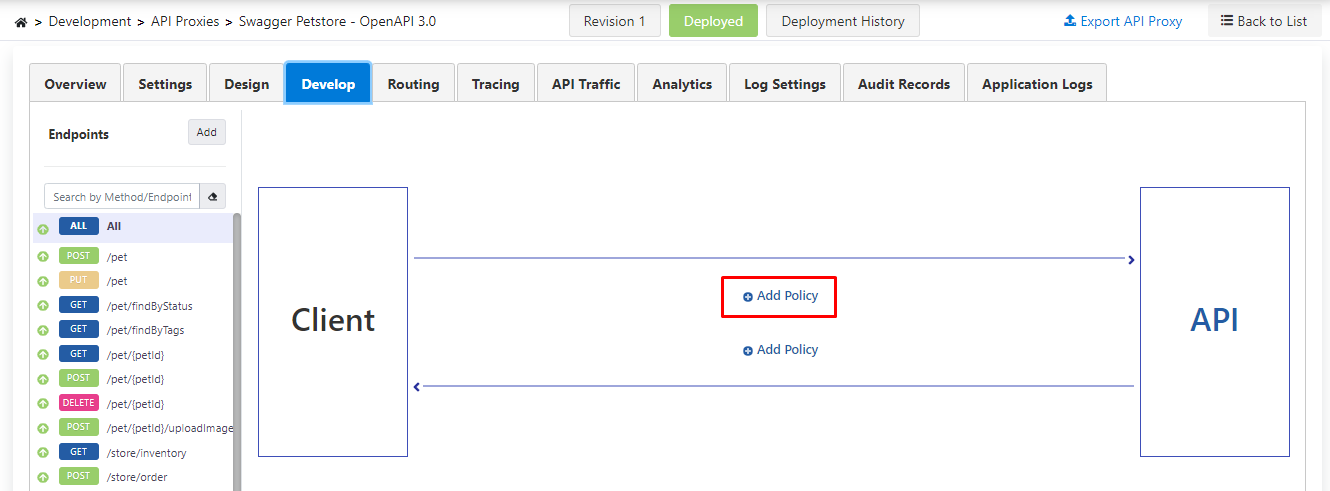
Adding mTLS Authentication Policy to API Proxy
Click the Add Policy link on the Develop tab of API Proxy.
mTLS is selected from the policies.
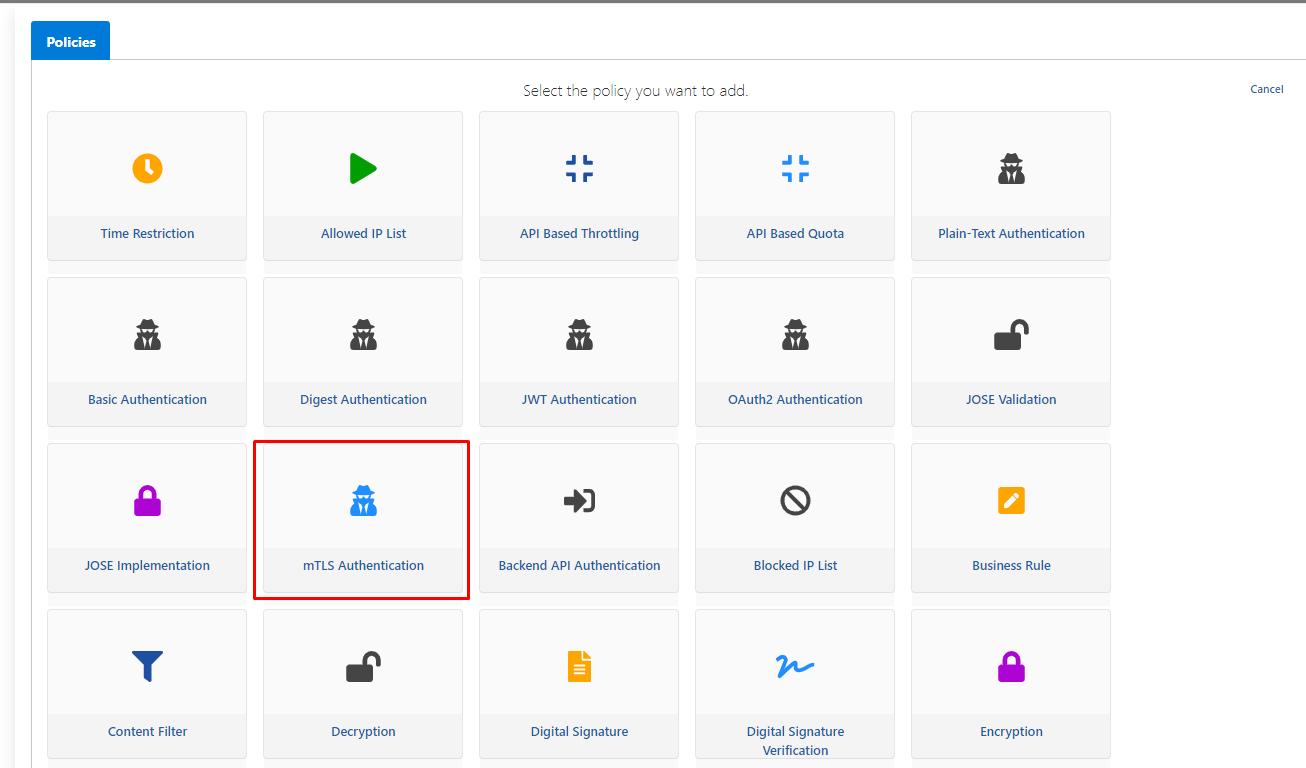
Policy settings are made as follows and the Save button is clicked.

Click mTLS Authentication for detailed information about mTLS Settings.
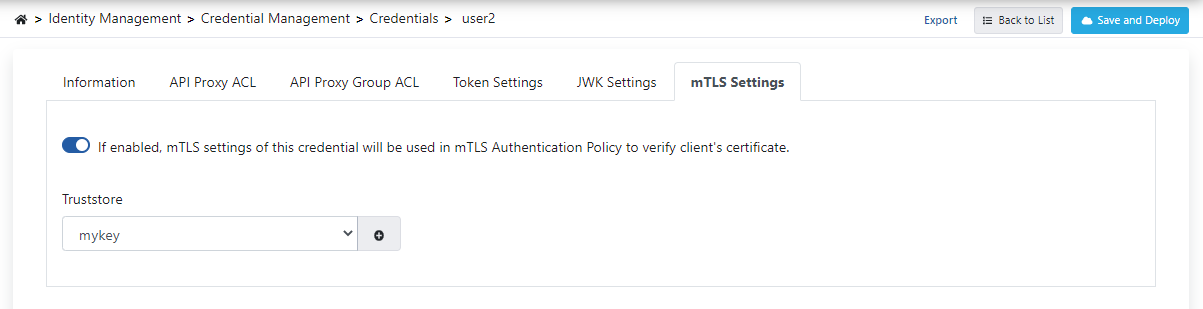
Credential's mTLS Settings
The username information of the credential must be the same as the "cn name" information in the "issuer" value in the certificate owned by the client.
API Proxy with the mTLS policy added should be added to the API Proxy ACL tab of the credential.
The truststore is added to the mTLS Settings tab of the credential, as in the image below:
Making Requests to API Proxy
API Proxy can be requested with the following client Java code sample and its pom file.
Example Java Code:
package mtls;

import org.apache.http.HttpEntity;
import org.apache.http.client.methods.CloseableHttpResponse;
import org.apache.http.client.methods.HttpGet;
import org.apache.http.conn.ssl.SSLConnectionSocketFactory;
import org.apache.http.impl.client.CloseableHttpClient;
import org.apache.http.impl.client.HttpClients;
import org.apache.http.ssl.SSLContexts;
import org.apache.http.util.EntityUtils;

import javax.net.ssl.KeyManagerFactory;
import javax.net.ssl.SSLContext;
import javax.net.ssl.TrustManagerFactory;
import java.io.FileInputStream;
import java.security.KeyStore;

public class MTLSClientTest {
    public static void main(String[] args) throws Exception {


        KeyStore keystore = KeyStore.getInstance("PKCS12");
        keystore.load(new FileInputStream("/Users/Downloads/mtls/clientkeystore.pfx"), "password".toCharArray());
        KeyManagerFactory keyManagerFactory = KeyManagerFactory.getInstance(KeyManagerFactory.getDefaultAlgorithm());
        keyManagerFactory.init(keystore, "password".toCharArray());


        SSLContext sslContext = SSLContext.getInstance("TLS");
        SSLConnectionSocketFactory sslConnectionSocketFactory;
        boolean verifyServerCertificate=true;
        if(verifyServerCertificate){
			//if verifying server certificate is needed, use this code:

            KeyStore truststore = KeyStore.getInstance("PKCS12");
            truststore.load(new FileInputStream("/Users/Downloads/mtls/clienttruststore.pfx"), "password".toCharArray());
            TrustManagerFactory trustManagerFactory = TrustManagerFactory.getInstance(TrustManagerFactory.getDefaultAlgorithm());
            trustManagerFactory.init(truststore);
            sslContext.init(keyManagerFactory.getKeyManagers(), trustManagerFactory.getTrustManagers(), null);
            sslConnectionSocketFactory = new SSLConnectionSocketFactory(sslContext);
        }else{
			//if verifying server certificate is NOT needed, use this code:

		    sslContext = SSLContexts.custom()
                    .loadKeyMaterial(keystore, "password".toCharArray())
                    .loadTrustMaterial((chain, authType) -> true) // Trust all certificates
                    .build();
            sslConnectionSocketFactory = new SSLConnectionSocketFactory(sslContext);
        }


        CloseableHttpClient httpClient = HttpClients.custom()
                .setSSLSocketFactory(sslConnectionSocketFactory)
                .build();

        HttpGet httpGet = new HttpGet("https://api.apinizer.com/apigw/mtls/pet/findByStatus?status=sold");

        try (CloseableHttpResponse response = httpClient.execute(httpGet)) {
            HttpEntity entity = response.getEntity();
            if (entity != null) {
                String responseBody = EntityUtils.toString(entity);
                System.out.println(responseBody);
            }
        } catch (Exception e) {
            e.printStackTrace();
        } finally {
            httpClient.close();
        }

    }
}Pom:
<?xml version="1.0" encoding="UTF-8"?>
<project xmlns="http://maven.apache.org/POM/4.0.0"
         xmlns:xsi="http://www.w3.org/2001/XMLSchema-instance"
         xsi:schemaLocation="http://maven.apache.org/POM/4.0.0 http://maven.apache.org/xsd/maven-4.0.0.xsd">
    <modelVersion>4.0.0</modelVersion>
    <groupId>Jose-SenderReceiver</groupId>
    <artifactId>Jose-SenderReceiver</artifactId>
    <version>1.0-SNAPSHOT</version>
    <build>
        <plugins>
            <plugin>
                <groupId>org.apache.maven.plugins</groupId>
                <artifactId>maven-compiler-plugin</artifactId>
                <configuration>
                    <source>7</source>
                    <target>7</target>
                </configuration>
            </plugin>
        </plugins>
    </build>
    <dependencies>
        <dependency>
            <groupId>com.nimbusds</groupId>
            <artifactId>nimbus-jose-jwt</artifactId>
            <version>9.25.6</version>
        </dependency>
        <dependency>
            <groupId>org.bouncycastle</groupId>
            <artifactId>bcprov-jdk15to18</artifactId>
            <version>1.69</version>
        </dependency>
        <dependency>
            <groupId>org.apache.commons</groupId>
            <artifactId>commons-text</artifactId>
            <version>1.8</version>
        </dependency>
        <!-- Apache HttpClient -->
        <dependency>
            <groupId>org.apache.httpcomponents</groupId>
            <artifactId>httpclient</artifactId>
            <version>4.5.13</version>
        </dependency>
        <!-- SSLContext for mTLS -->
        <dependency>
            <groupId>org.apache.httpcomponents</groupId>
            <artifactId>httpcore-nio</artifactId>
            <version>4.4.13</version>
        </dependency>
        <!-- BouncyCastle for mTLS -->
        <dependency>
            <groupId>org.bouncycastle</groupId>
            <artifactId>bcprov-jdk15to18</artifactId>
            <version>1.69</version>
        </dependency>
    </dependencies>
</project>