Tools
İçindekiler
Test Tools Overview
Test tools are only visible to logged-in users; they can be enabled in the portal settings.
When the menu is clicked, the test tools are listed in the popup menu as shown in the image below. Each tool opens in a separate dialog; closing the window resets the results.

JSONPath Test
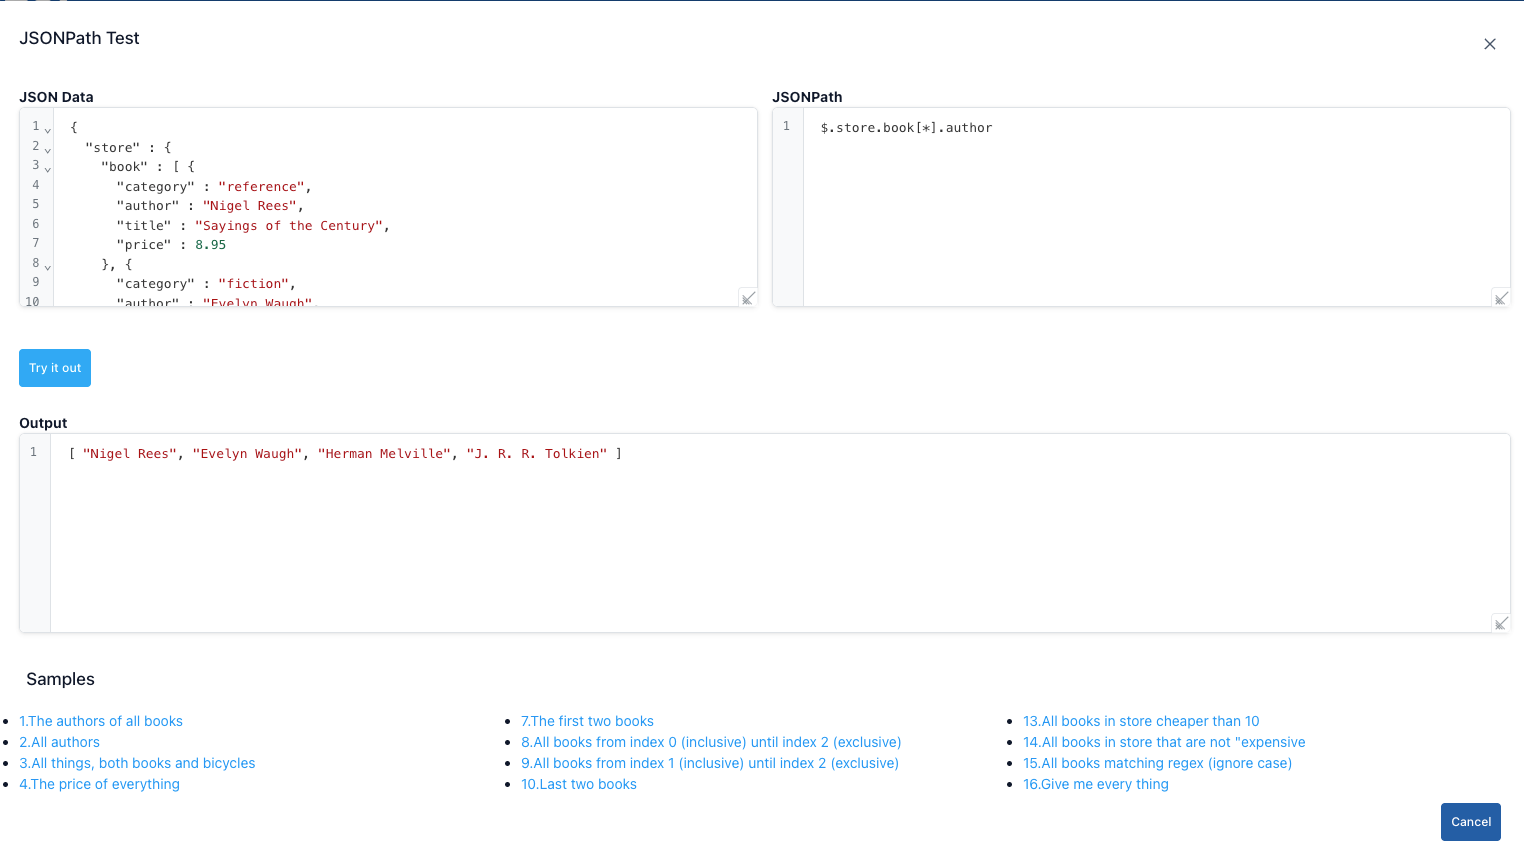
The JSONPath test screen content is as follows.
Step-by-Step Usage:
| Step | İşlev |
|---|---|
| Step 1 | Click the JSONPath option in the Test Tools menu. |
| Step 2 | Paste the entire JSON you want to query into the JSON Data field. |
| Step 3 | Type an expression such as $.store.book[*].author into the JSONPath box. |
| Step 4 | Press the Try It Out button. Matching results are listed in JSON format in the lower section. |
| Step 5 | Use the Cancel button or the close icon in the upper right to close the dialog. |
| Step 6 | If you are working with large JSON files, you can increase the dialog width by dragging it. |
XML Converter
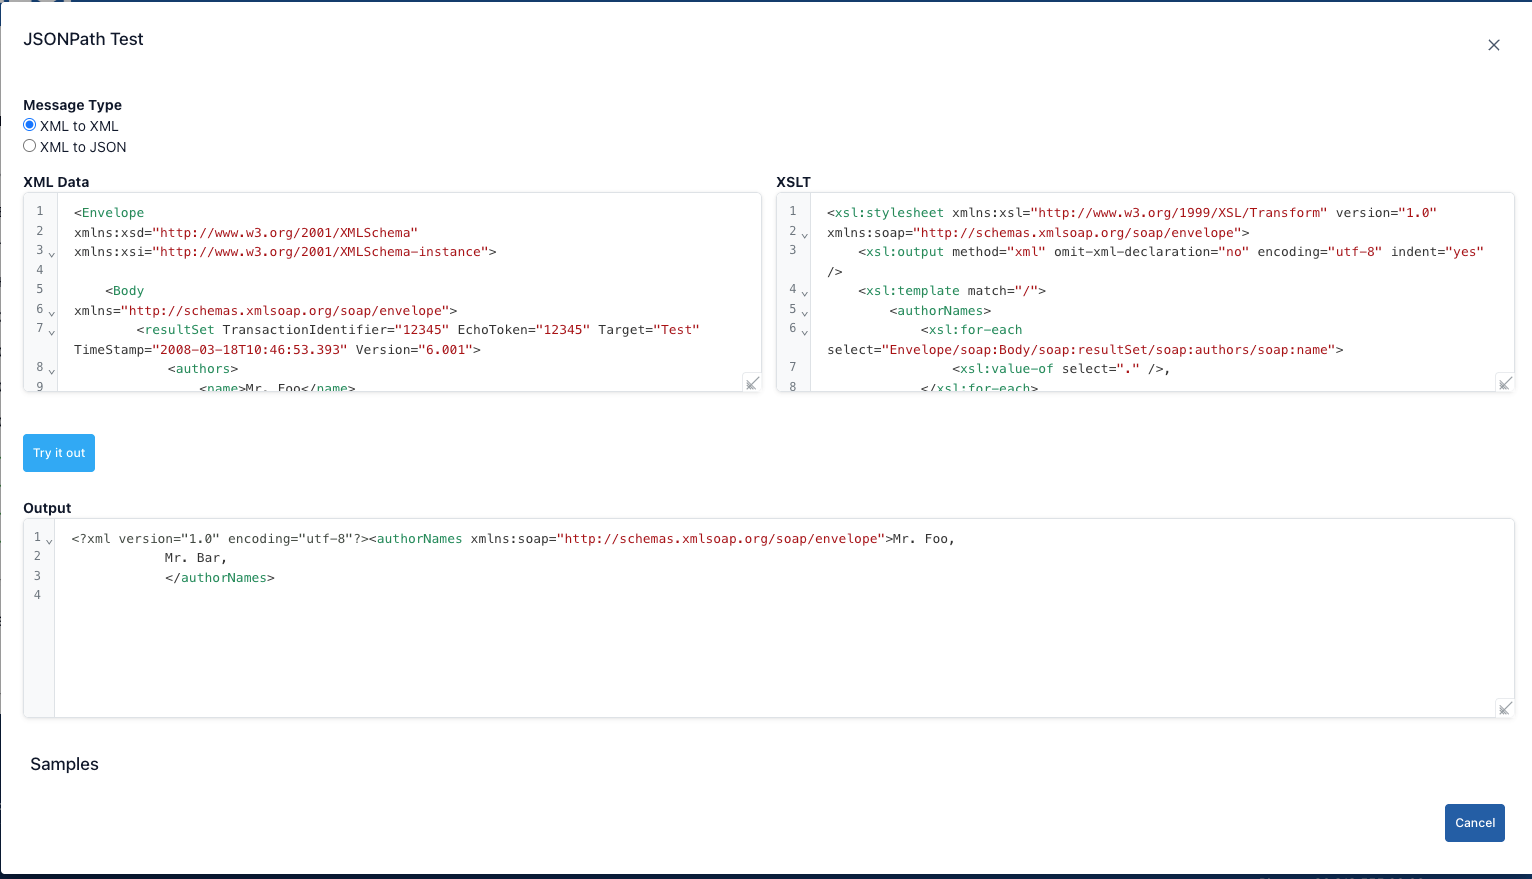
The XML Converter screen displays the following content.
Step-by-Step XML Converter Usage:
| Step | Function |
|---|---|
| Step 1 | Click the Transform XML option from the Test Tools menu. |
| Step 2 | Select either XML to XML or XML to JSON from the Message Type field at the top. |
| Step 3 | Paste the XML you want to convert into the XML Data editor, or click the links at the bottom to use one of the sample data sets. |
| Step 4 | When you click the Try button, the conversion is performed according to the type you selected, and the result is displayed in the Result panel at the bottom. |
| Step 5 | If you click the Cancel button, the dialog closes. |
XML to XML mode
- You write the transformation template in the XSLT editor that opens on the right. The output is shaped according to how the match and template rules in XSLT will match.
- When you click the Run button, XSLT is applied to the XML on the left, and the response is written as XML in the Result field.
- If you use namespaces in XSLT, place the xmlns: declarations at the beginning; otherwise, you will get a “Namespace prefix ... is not defined” error.
- To test, the sample links in the section below automatically populate both the input XML and the XSLT.
- The output editor comes with XML syntax highlighting by default; the result does not convert to JSON format.
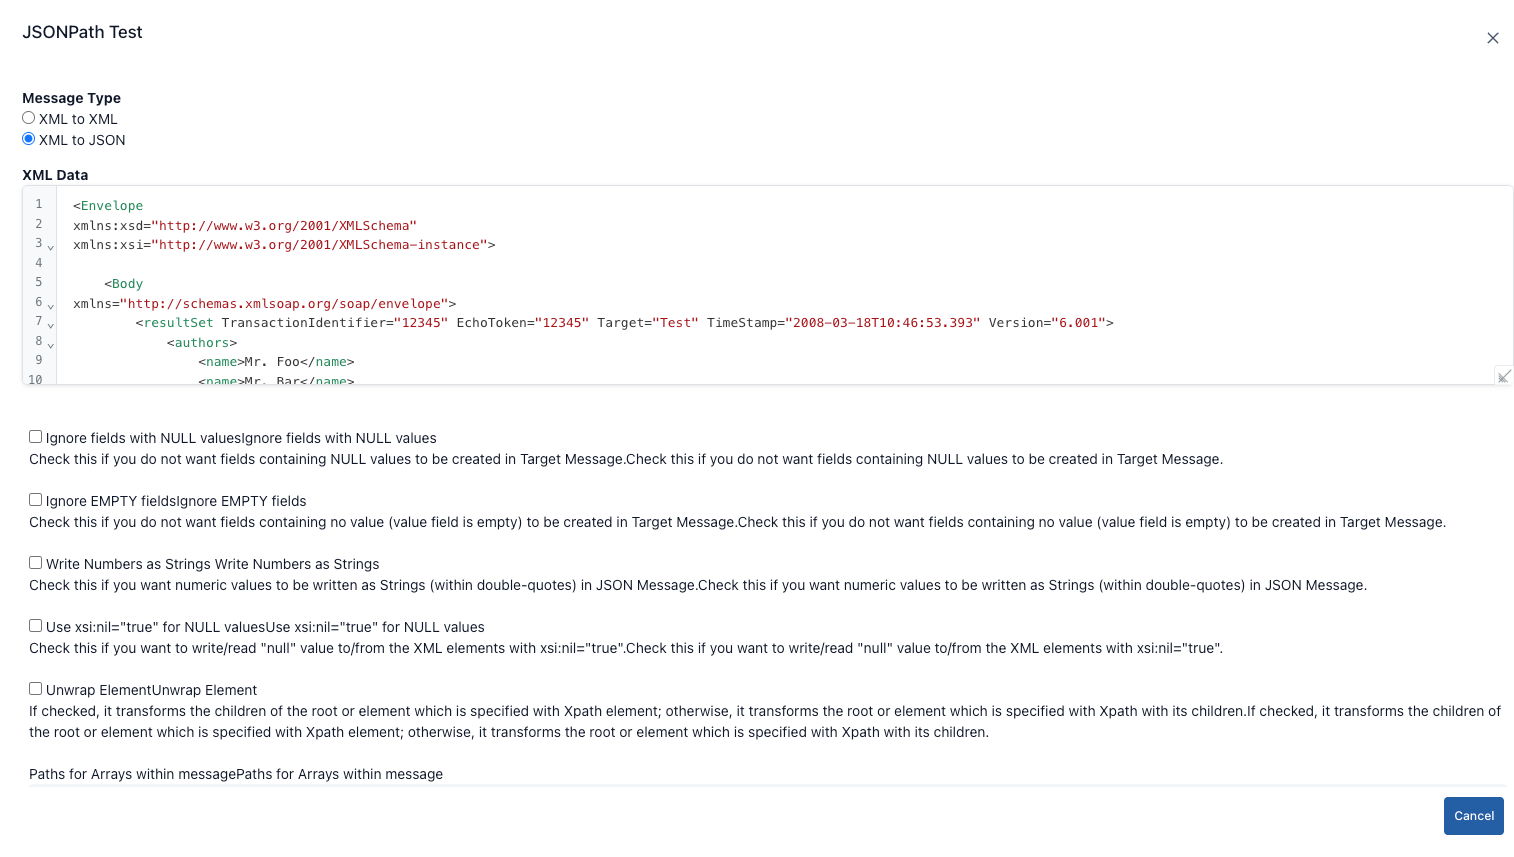
XML to JSON module
- When this option is selected, the XSLT editor is hidden and options for shaping the JSON output are displayed instead.
- Ignore NULL values: Check this if there are xsi:nil=“true” or empty elements in the XML and you do not want them transferred to JSON.
- Ignore empty values: Does not include elements containing only empty strings in the JSON.
- Write numbers as strings (Write numeric values as strings): Stores numeric values as strings in JSON output; ideal for services requiring type conversion.
- Use null for xsi:nil: Generates the actual null value instead of “null” for elements containing xsi:nil=“true”.
- Unwrap element: Returns single child nodes directly as values in JSON; prevents intermediate nodes from cluttering the output.
- Path Arrays: Enter XPath-like paths to force multiple repeating nodes into an array in JSON (e.g., /Envelope/Body/authors/name). The AutoComplete field stores the entered paths as a list.
- Options are linked to the jhi-xml-to-json-transformation component; after clicking the Den e button, the JSON output is displayed in the Results panel and the editor switches to JSON highlighting.
- If an error occurs during conversion (e.g., broken XML), the process stops and you must correct the XML before changing the relevant checkbox settings.
XPath Test
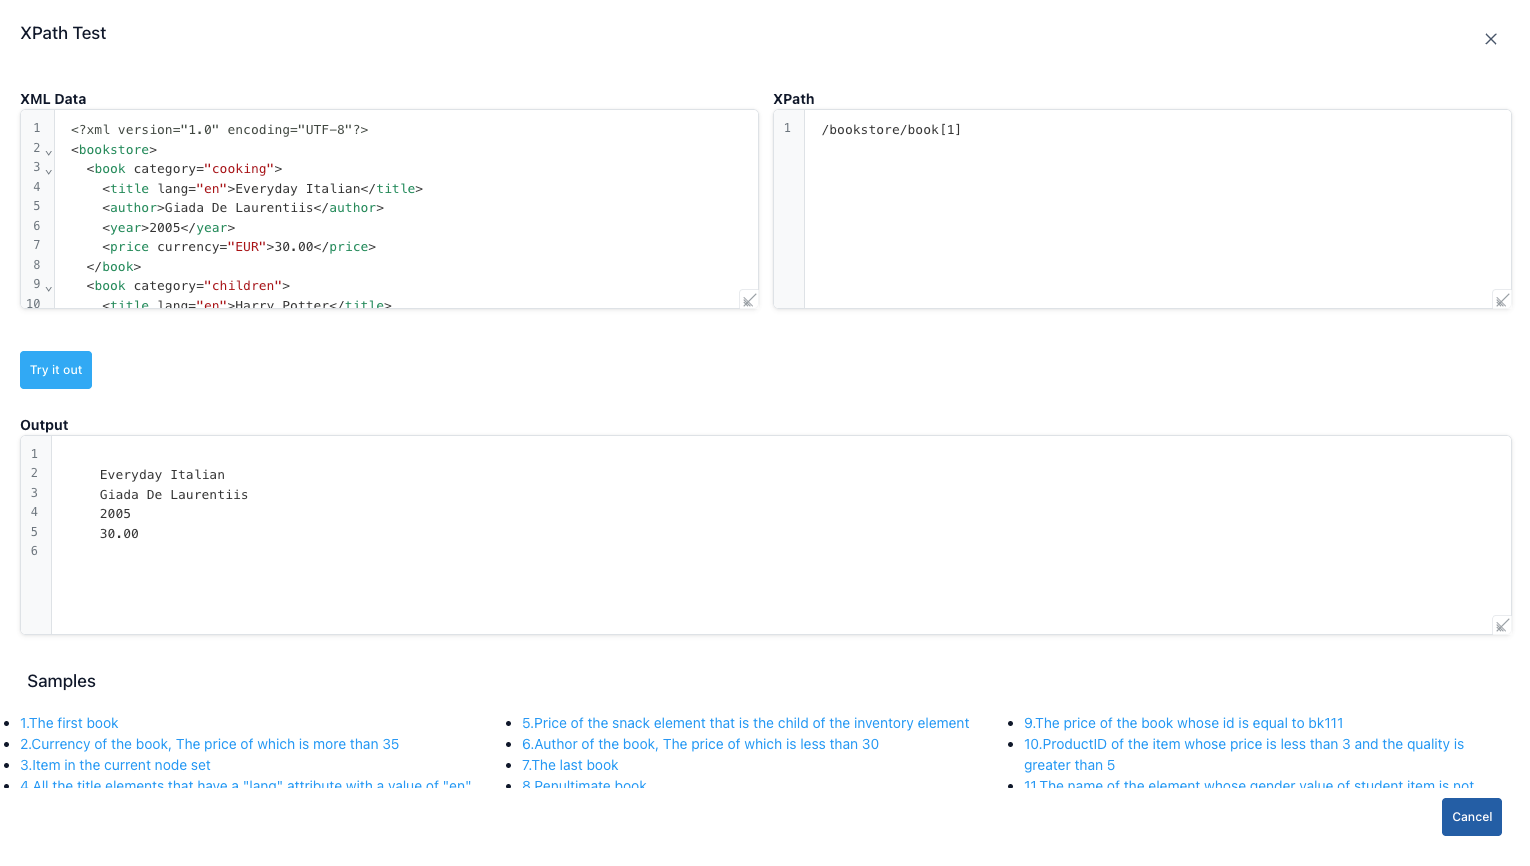
The XPATH test screen content is provided below.
Step-by-Step XPATH Usage:
| Step | Function |
|---|---|
| Step 1 | Click the XPath option in the Test Tools menu. |
| Step 2 | Paste the XML content you want to query into the XML Data section. |
| Step 3 | Enter an expression such as /catalog/book[price>10] into the XPath field. |
| Step 4 | Press the Try it out button; matching nodes will be listed below along with the <book> tags. |
| Step 5 | Click the Cancel button to close the dialog. |
Data Processing
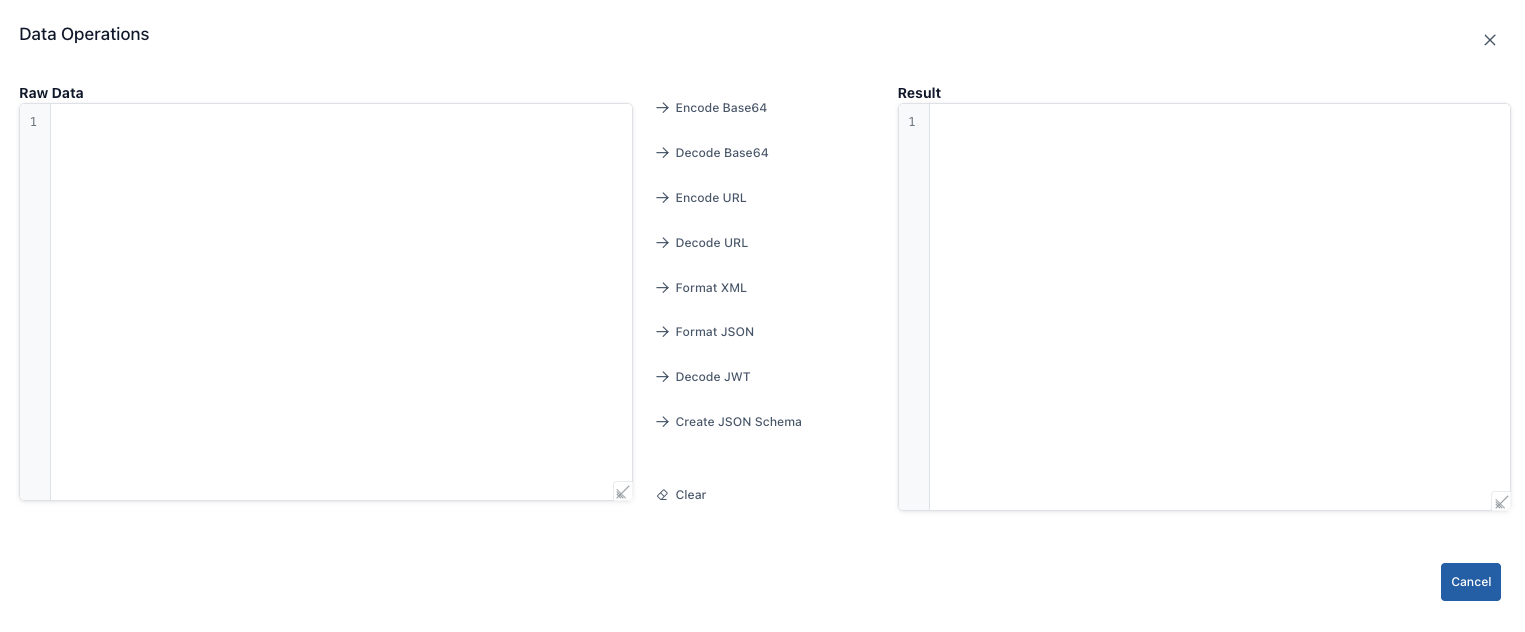
| Field | Functionality |
|---|---|
| Encode Base64 | Encodes plain text in the Raw Data field as Base64. You will see the encoded text in the Result field. Ensure it is compatible with UTF-8 to avoid issues with Unicode characters. |
| Decode Base64 | Decodes the Base64-encoded text in the Raw Data field and transfers the decoded text to the Result field. Returns an “Invalid Base64 string” error for invalid Base64 strings. |
| Encode Url | Converts raw data into a URL-safe format (e.g., replaces spaces with %20). You can use it when preparing query strings for API calls. |
| Decode Url | Converts URL-encoded text back to normal. If you try to decode text that is already unencoded, the result remains the same. |
| Format XML | Converts the XML in the Raw Data field into a readable format (adds indentation). The converted XML is written to the Result field. If any tags are missing, an error message is displayed. |
| Format JSON | Formats the JSON text. If the JSON is invalid, you will receive an error message; check the line with the error. |
| Decode JWT | It decodes the JWT token (header.payload.signature) using base64 and retrieves the header and payload in JSON format into the Result field. It does not perform signature verification; it only decodes. |
| Create JSON Schema | Generates an automatic JSON Schema draft from the sample JSON in the raw data. The draft schema is located in the results field; manual adjustments may be required. |
| Clear | Clears both the Raw Data and Result fields; prepares you for a new process. |