APIs
The APIs page lists the API Products that are published by the API Producer.
There are three types of APIs: Public, Authentication Needed, and Authentication and Permission Needed. When the API consumer is not logged into the portal application, only Public APIs are displayed.
In the list here, each API displays information such as its name, avatar, description, whether the product is subscribed to or not, whether authentication is required, and the status of access (active or inactive).
A visual of the APIs screen is provided below:

Overview
Information created by the API producer is displayed.
A visual of the Overview tab for an API is provided below:

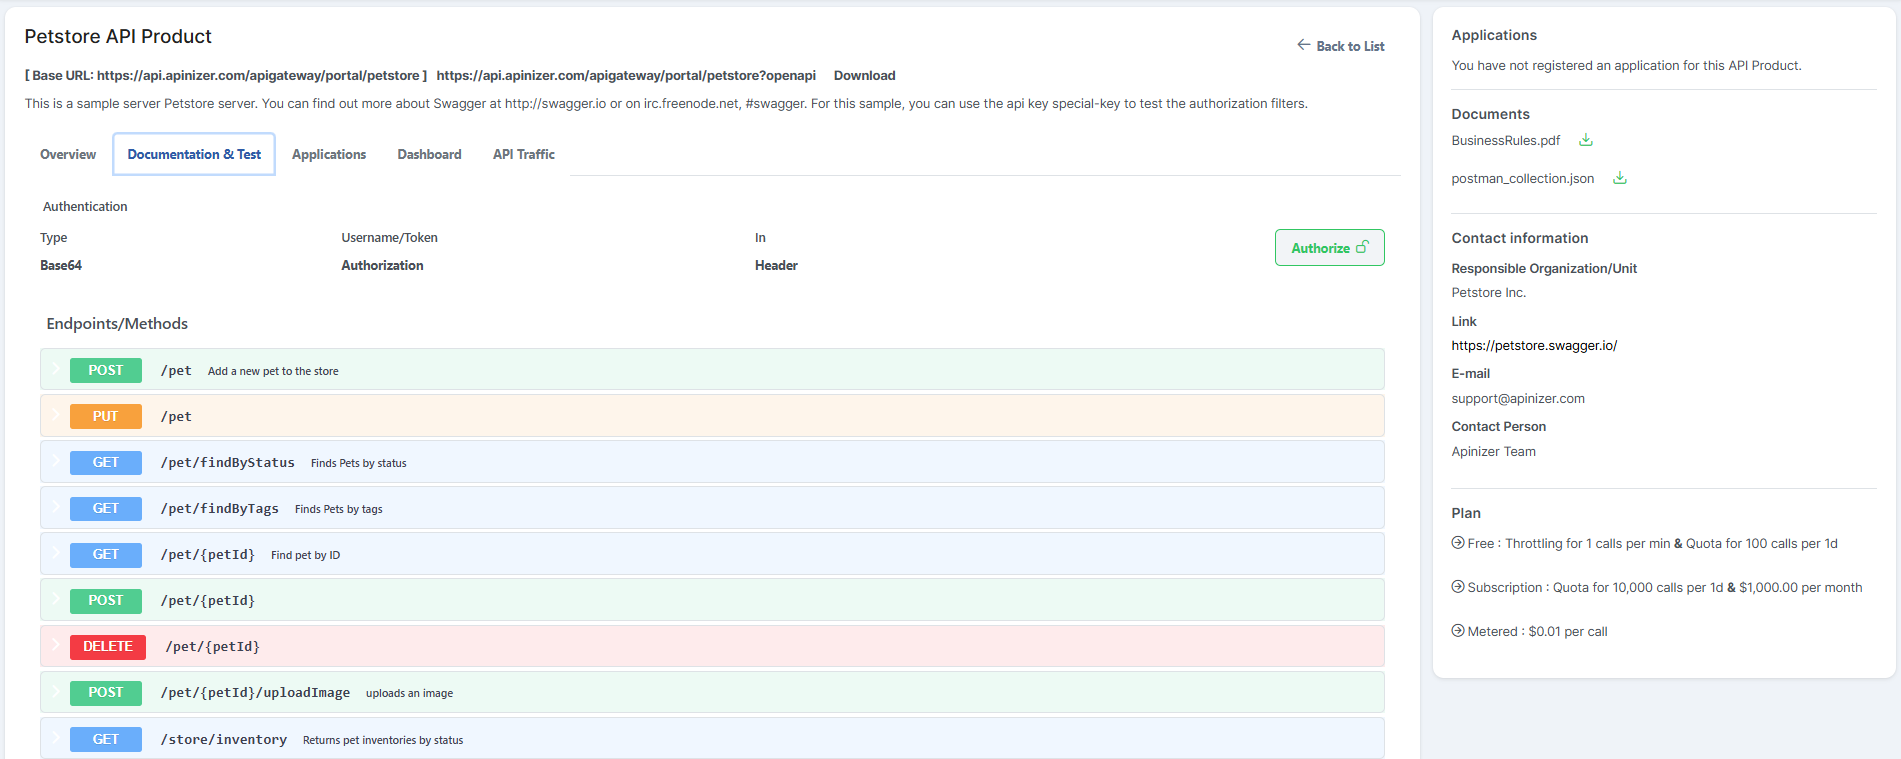
Documentation & Test
The API's API Specification can be accessed through Apinizer, and the desired endpoint can be tested.
A visual of the Documentation & Test tab for an API is provided below:
Summary, description, parameters, body and response body are displayed as endpoint information.
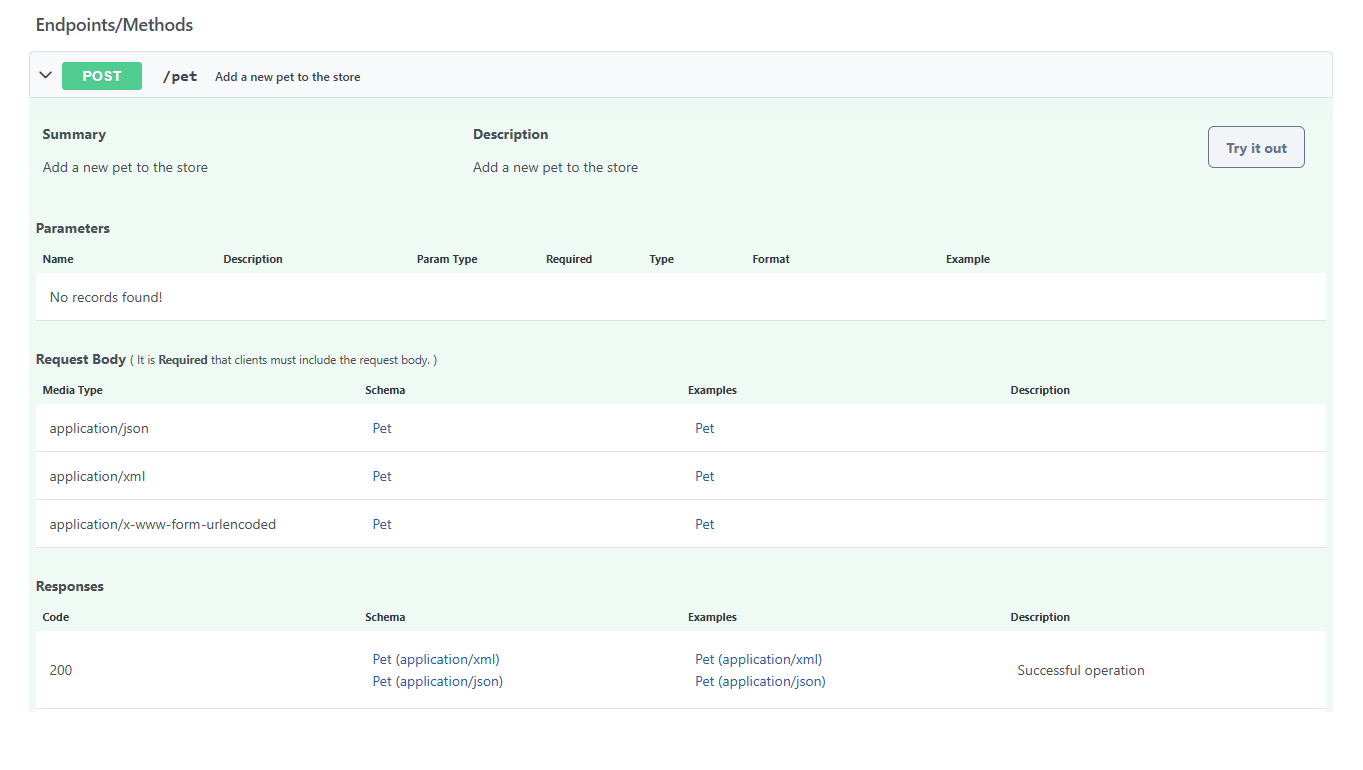
If you want to update existing information or add a new record, you can see how to do it on the Design tab page.
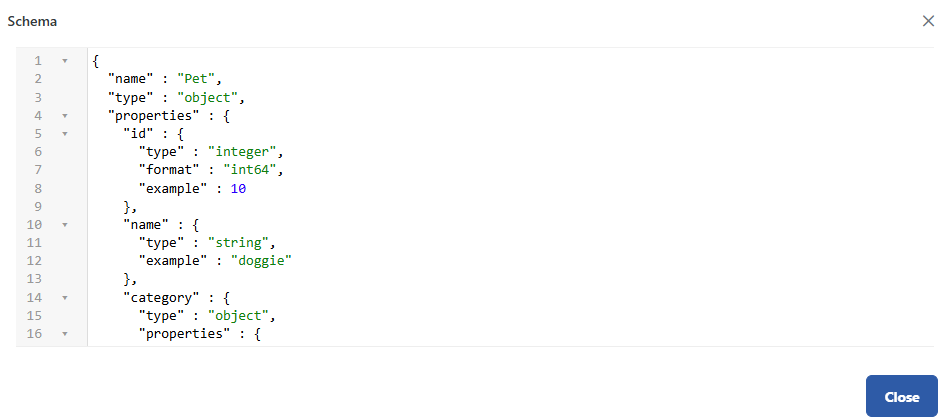
The schema field is used to display the schema information definitions for the relevant endpoint and specifies how the data should be sent.
The example field shows the sample content of the body to be sent.

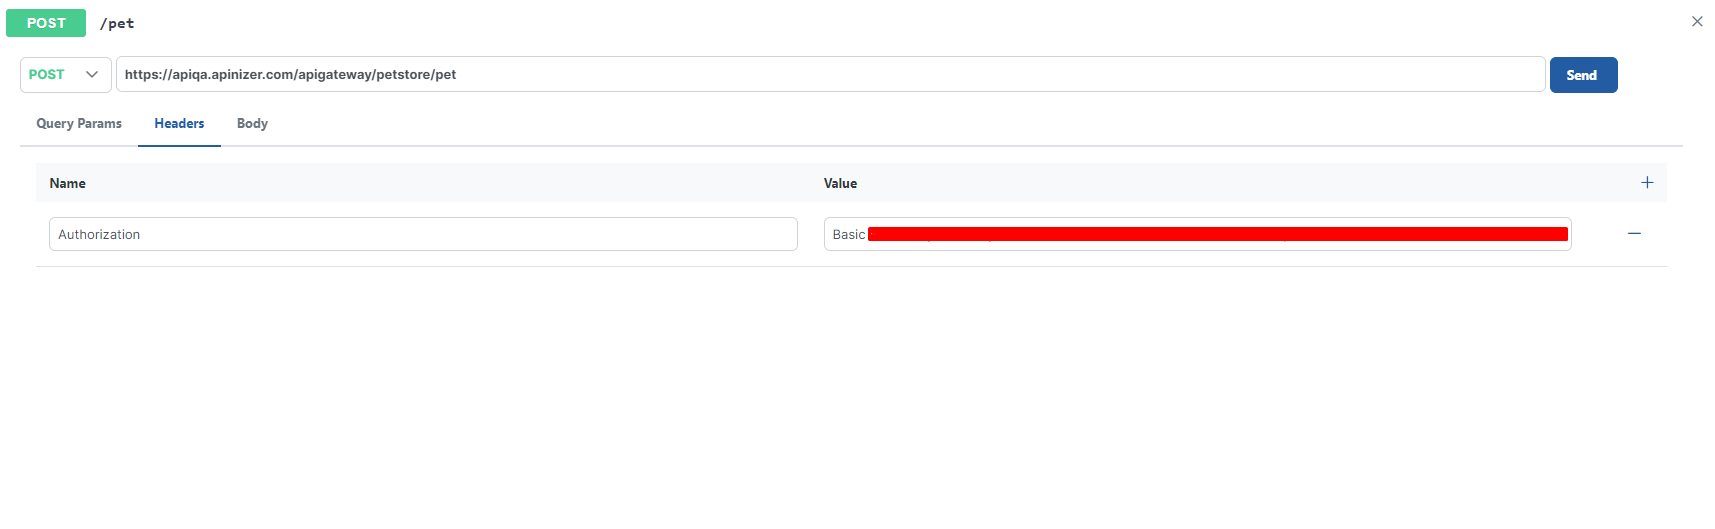
For API Portal Endpoint Testing:
When you register for an API Product and select an API Key, the authorization information will be automatically provided. This allows users to test API calls with authorization information without manually entering their API access keys.
A visual of an API's Endpoint Test, showing where the Authorization information is automatically provided, is displayed below:
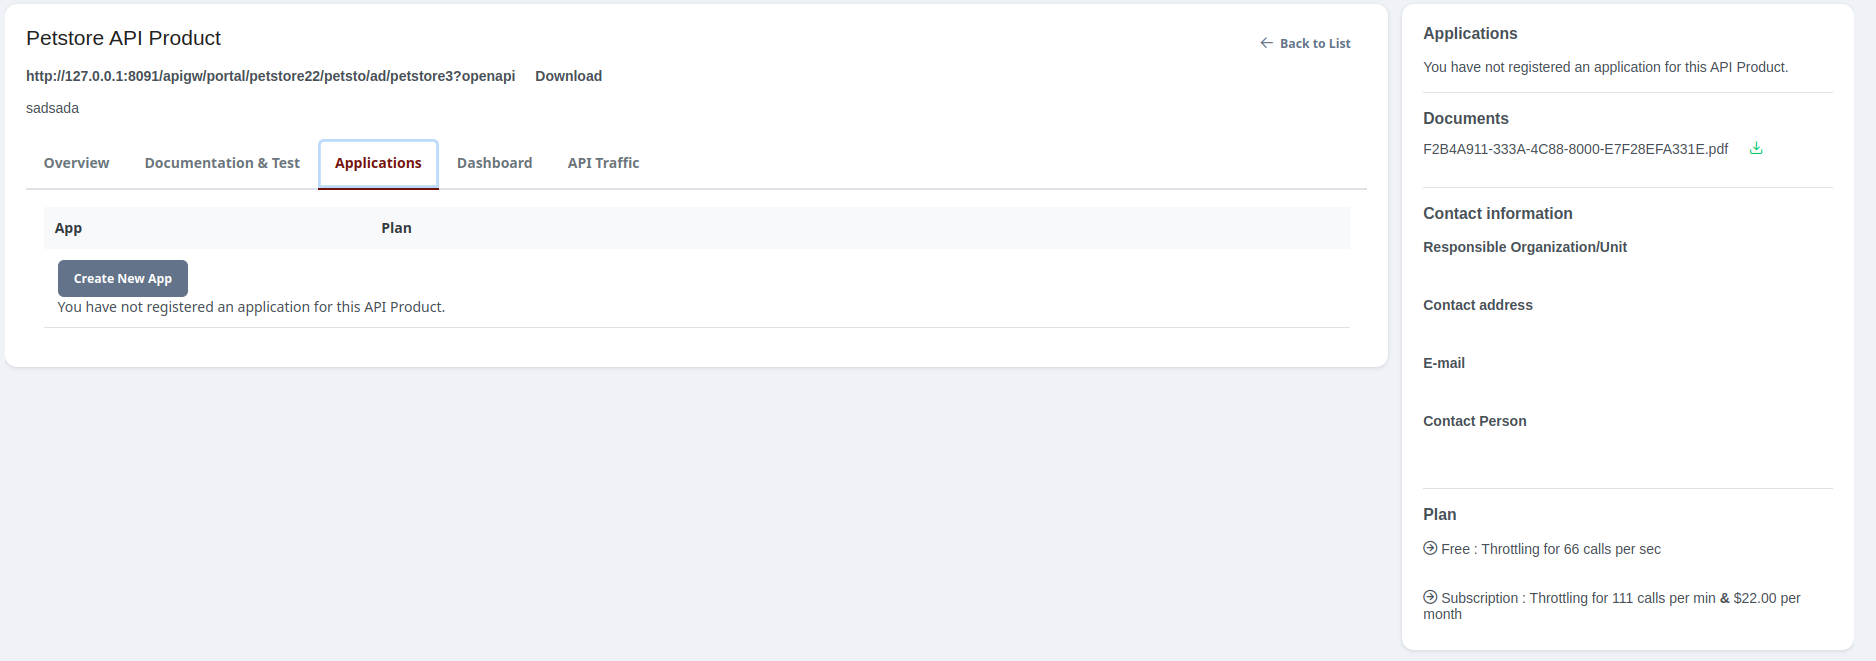
My Applications Tab (Application)
A user who logs into the portal can view their existing applications or create a new one through the My Applications tab. If the user does not have any applications yet, they are allowed to create a new application from this section. In this process, the user enters a new application name and the required information to complete the application registration. Afterwards, the user can use this newly created application for the API registration process.
For details on how a user without any applications can create an application, visit the Create, Edit, and Delete Applications page.
If the user has already created an application, they can view their existing applications under the My Applications tab and perform related actions. In this case, the Register button becomes active, and the user can register their existing application to the APIs and gain access. In other words, a user can only complete the registration step to use APIs after creating an application.
A screenshot of an API's My Applications tab is shown below:
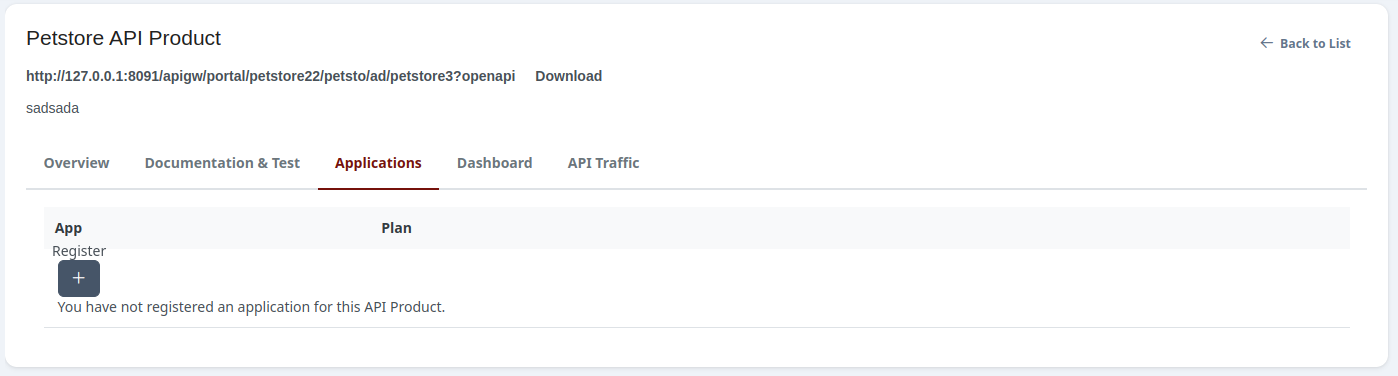
For a user who already has an application, the Register button becomes active for registering with the API. By clicking this button, the user can select their existing application and register it to the relevant APIs to gain access.
A screenshot showing the Register option in an API's My Applications tab is shown below:
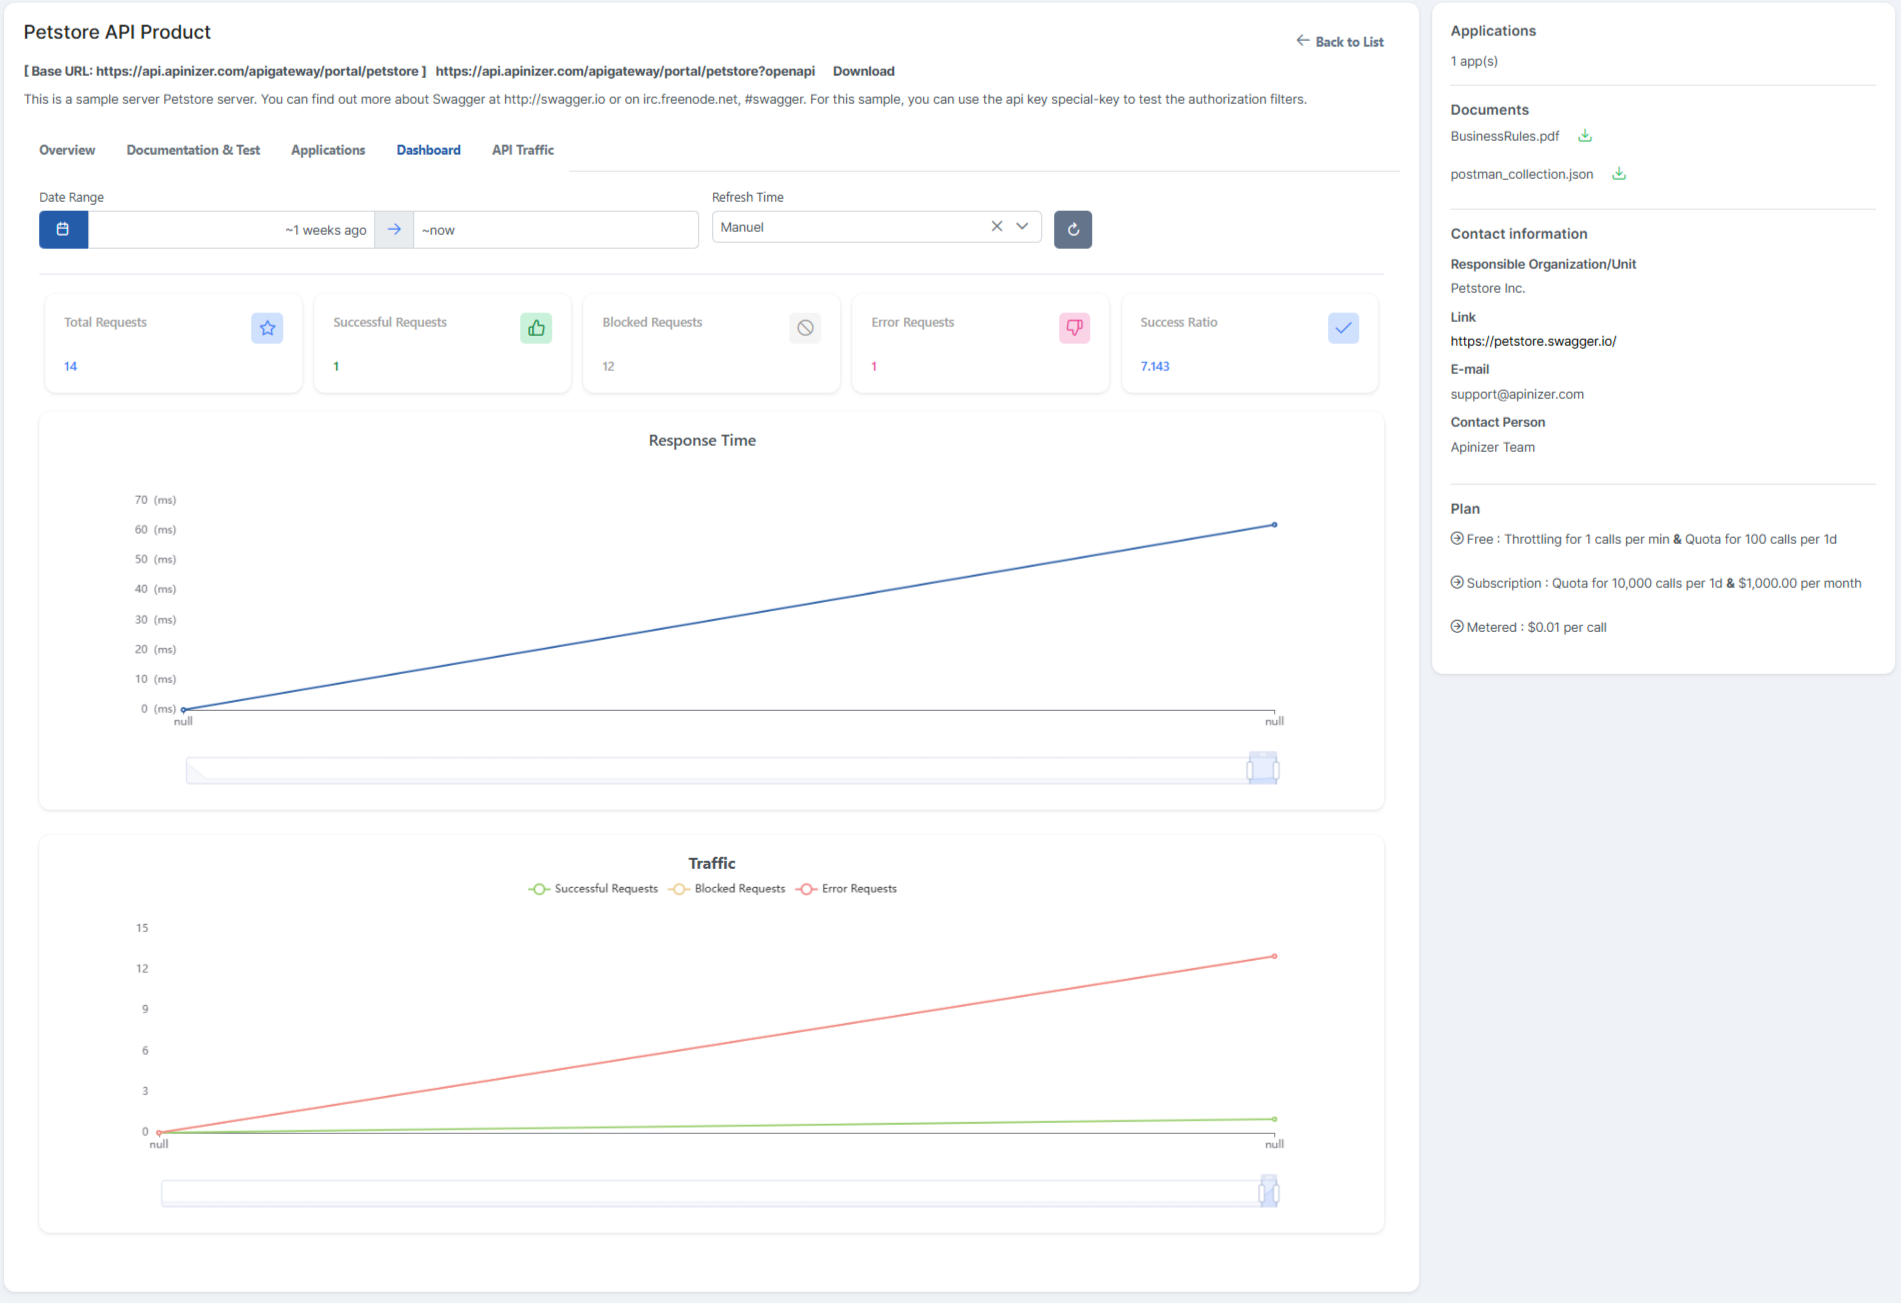
Dashboard
To activate the Dashboard tab, the option 'Allow accounts to view their Analytics information' must be enabled in the API Developer Portal ayarları. If this option is disabled, the 'Dashboard' and 'API Traffic' statuses will not be visible on the screen.
The overall status of the relevant API is monitored.
A visual of an API's Dashboard tab is provided below:
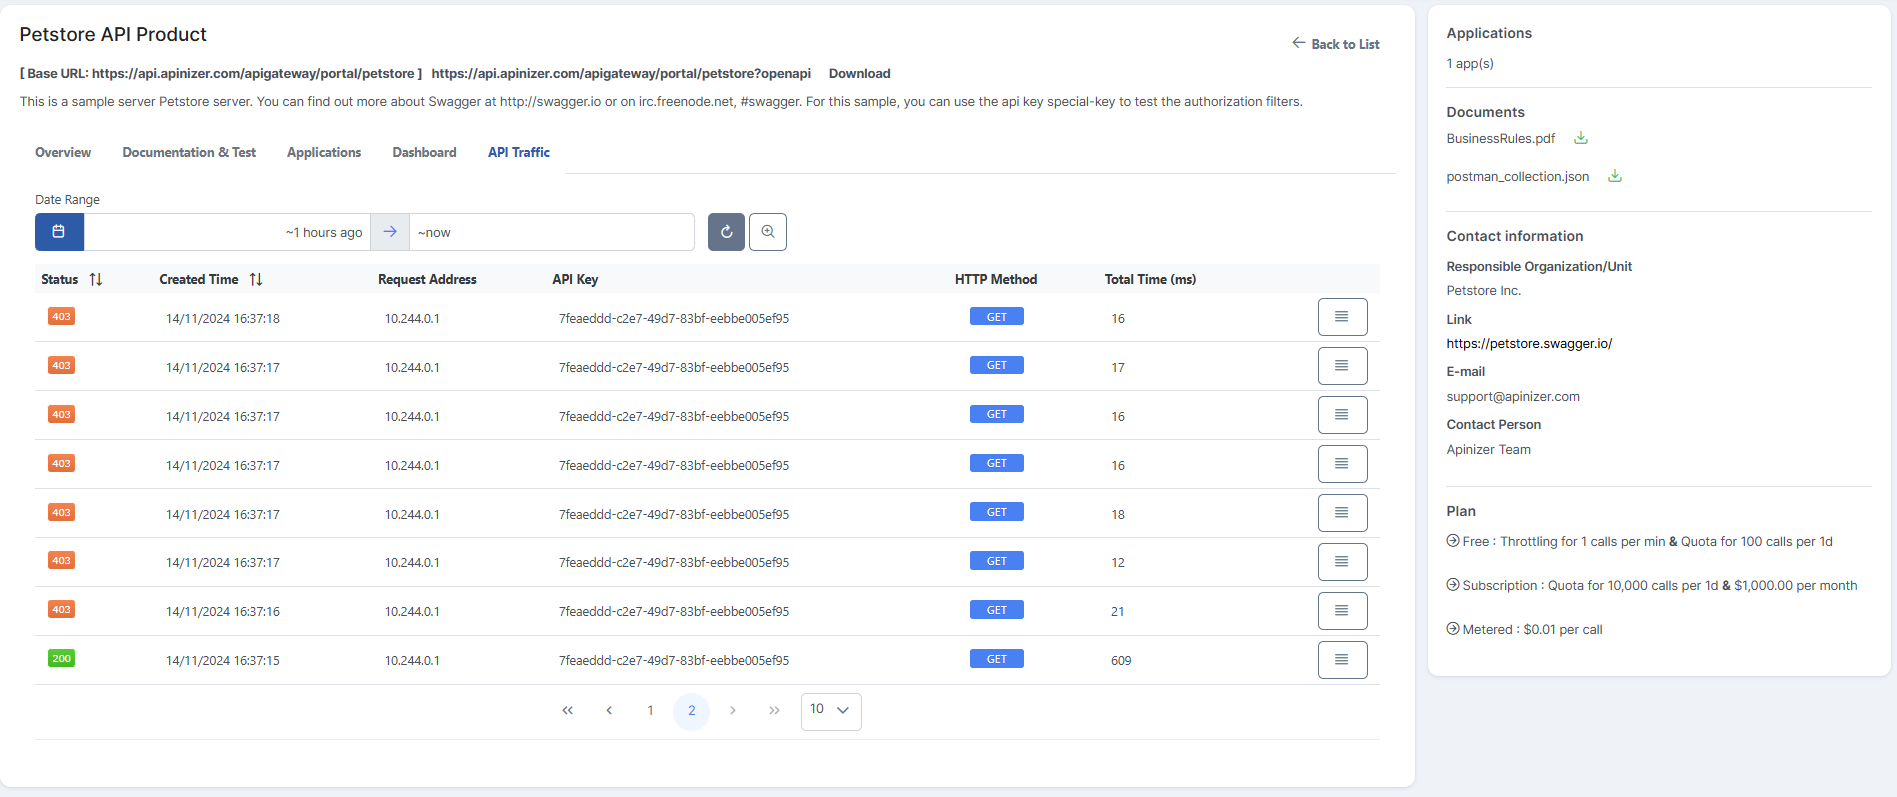
API Traffic
All requests and responses to the API are listed with their details. This particularly helps in investigating issues in the message.
A visual of an API's API Traffic tab is provided below: