Overview Tab
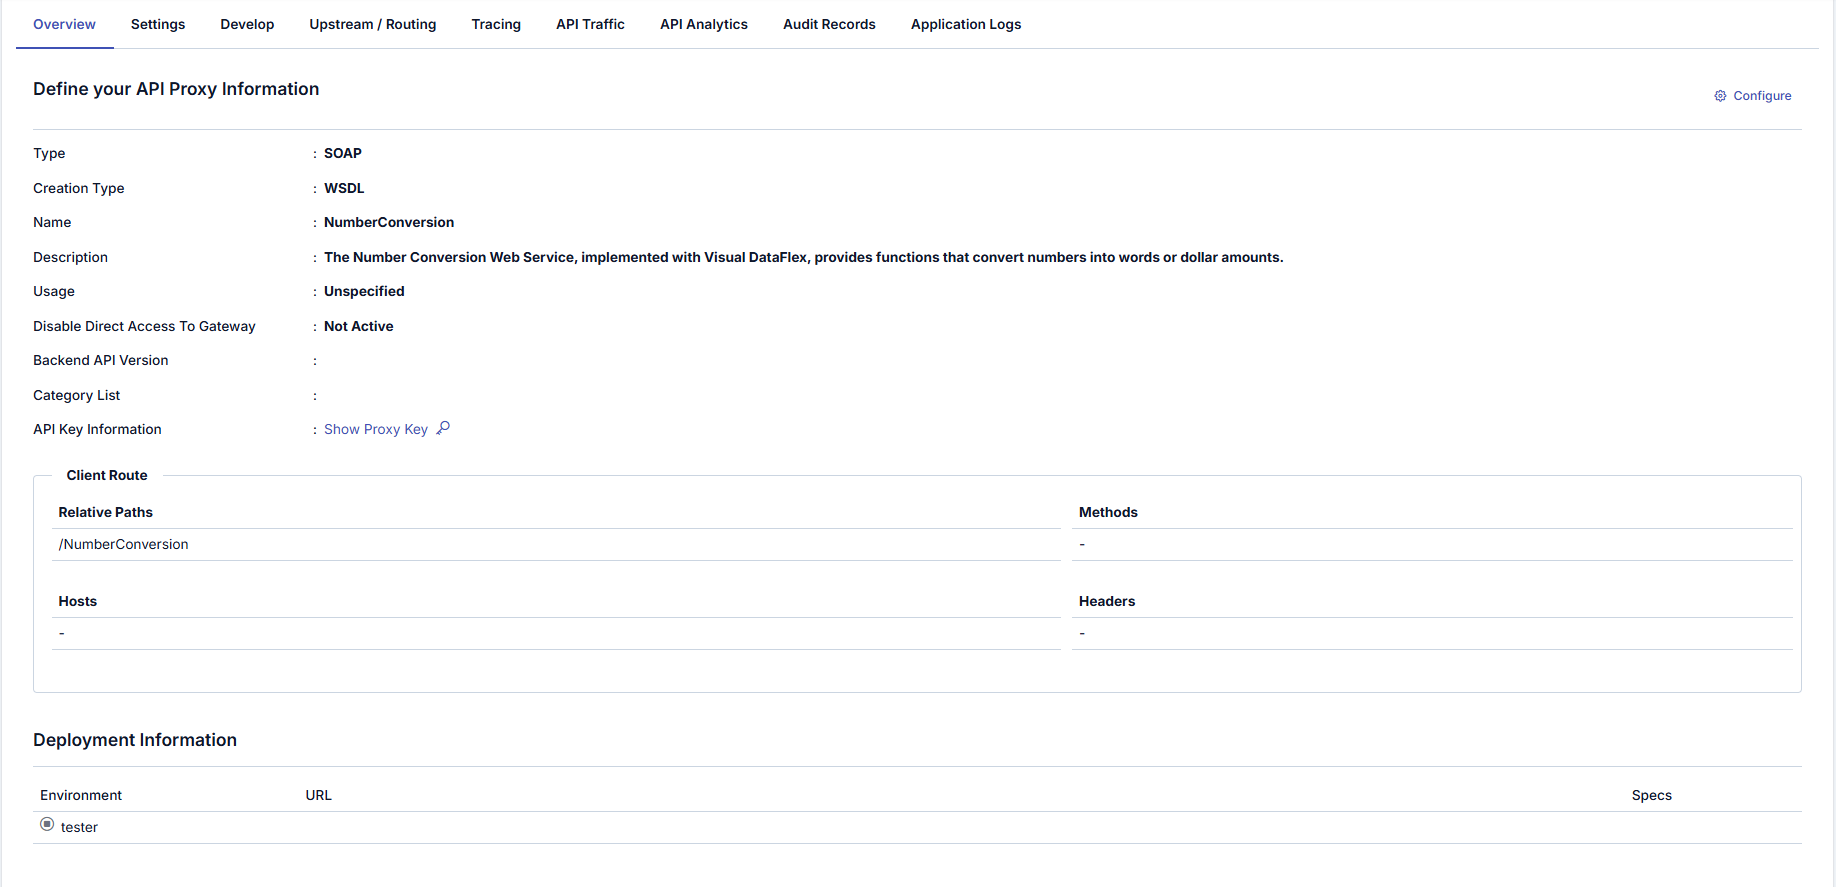
This tab contains general settings related to the selected API Proxy.
The picture below shows the Overview Tab:
If the relevant API Proxy is included in a Group, click the API Proxy Group Enabled link to go to the Group screen to which the API Proxy belongs.

The picture below shows the dialog opened by clicking the Configure button:
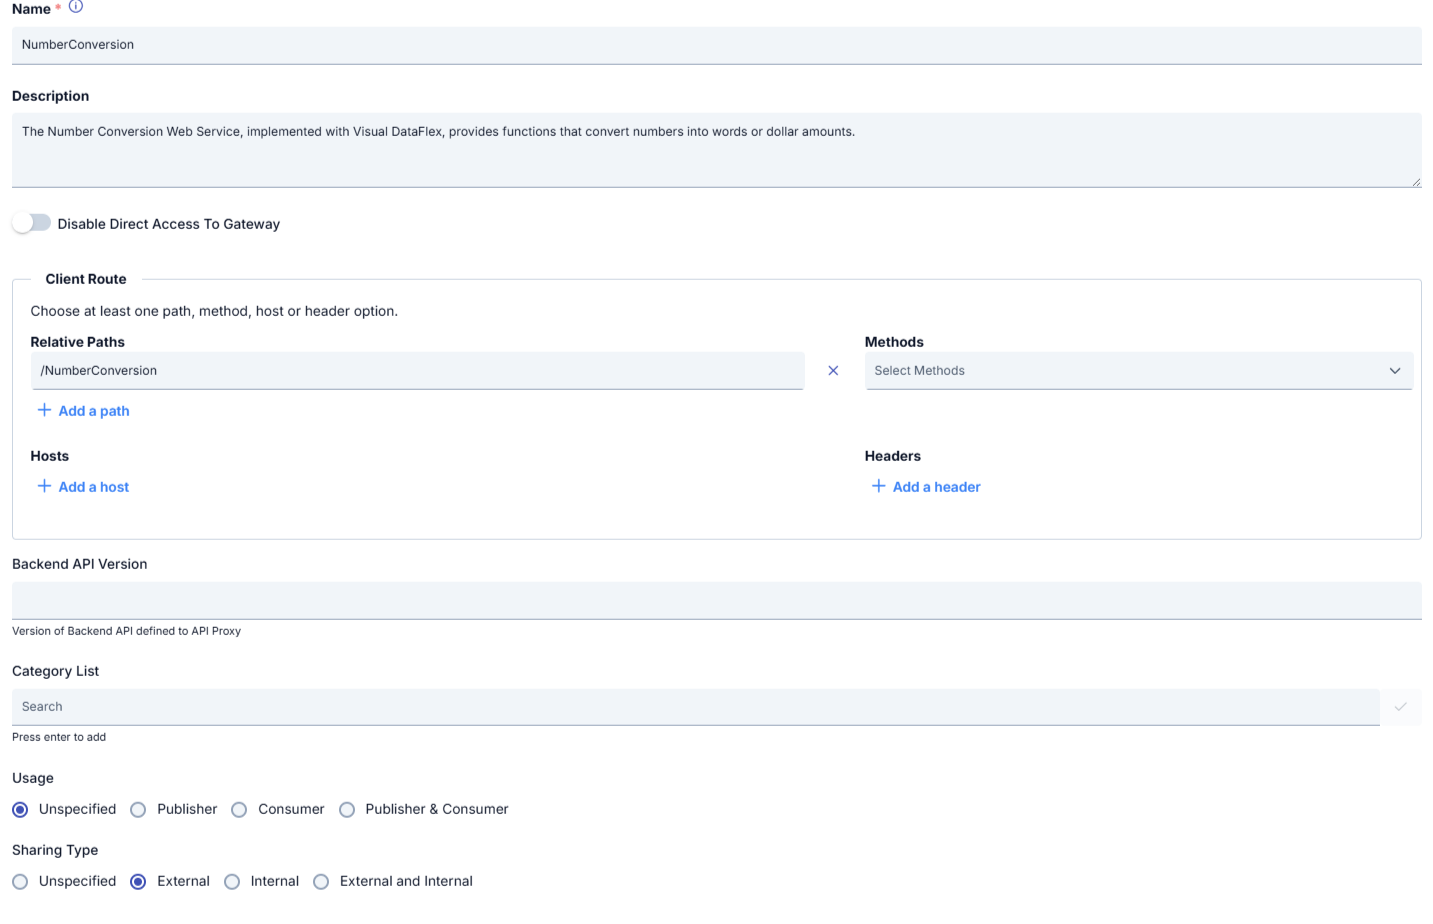
The fields used for configuration are shown in the table below.
1
| Field | Description |
|---|---|
| Name | The name given to the API Proxy by the user. This value must be unique within the project. |
| Description | Explanatory information about the API Proxy. Its purpose, logic, and functionality details are written here. |
| Disable Direct Access to Gateway | When enabled, access to backend services directly is blocked. Services can only be accessed through the API Proxy. |
| Client Route | Defines which requests will be forwarded to this API Proxy and how they will be forwarded. This section consists of the following fields: 1. Relative Paths: Defines the path(s) that will be routed to the API Proxy. Example: /NumberConversion/calculatorEach path must start with a slash ("/"). 2. Methods: Defines which HTTP methods the API Proxy will accept. Example: • GET • POST • PUT • DELETE • PATCH • Any (default) If no method is specified, all HTTP methods are allowed by default. 3. Hosts: Specifies backend host addresses for the API Proxy. It is possible to use multiple hosts. Host definition may be preferred in multi-domain structures or in specific partner-based isolations. 4. Headers: Allows API Proxy to accept requests only if specific header conditions are met. Used for header-based traffic routing or separation scenarios. For more details, see API Proxy Client Route Usage Guide |
| Backend API Version | Indicates which backend API version this API Proxy is associated with. Important for version management and compatibility. |
| Category List | Used to categorize the API Proxy. Example: • Finance • CRM • Notification • Integration Helps API Portal users quickly access relevant APIs. |
| Usage | Defines the usage type of the API Proxy. Options: • Unspecified • Publisher (Only publisher side) • Consumer (Only consumer side) • Publisher & Consumer (Both publisher and consumer) This determines how the API will be managed within the project. |
| Sharing Type | Indicates whether the API Proxy will be shared only within the project or externally. options: • Unspecified |
Sample Configuration Flow
- Enter the proxy name and description.
- Define the path (Relative Path) in the Client Route section.
- Add method, host, or header restrictions if necessary.
- Configure security settings (Disable Direct Access to Gateway, etc.).
- Select categories.
- Determine the usage and sharing type.
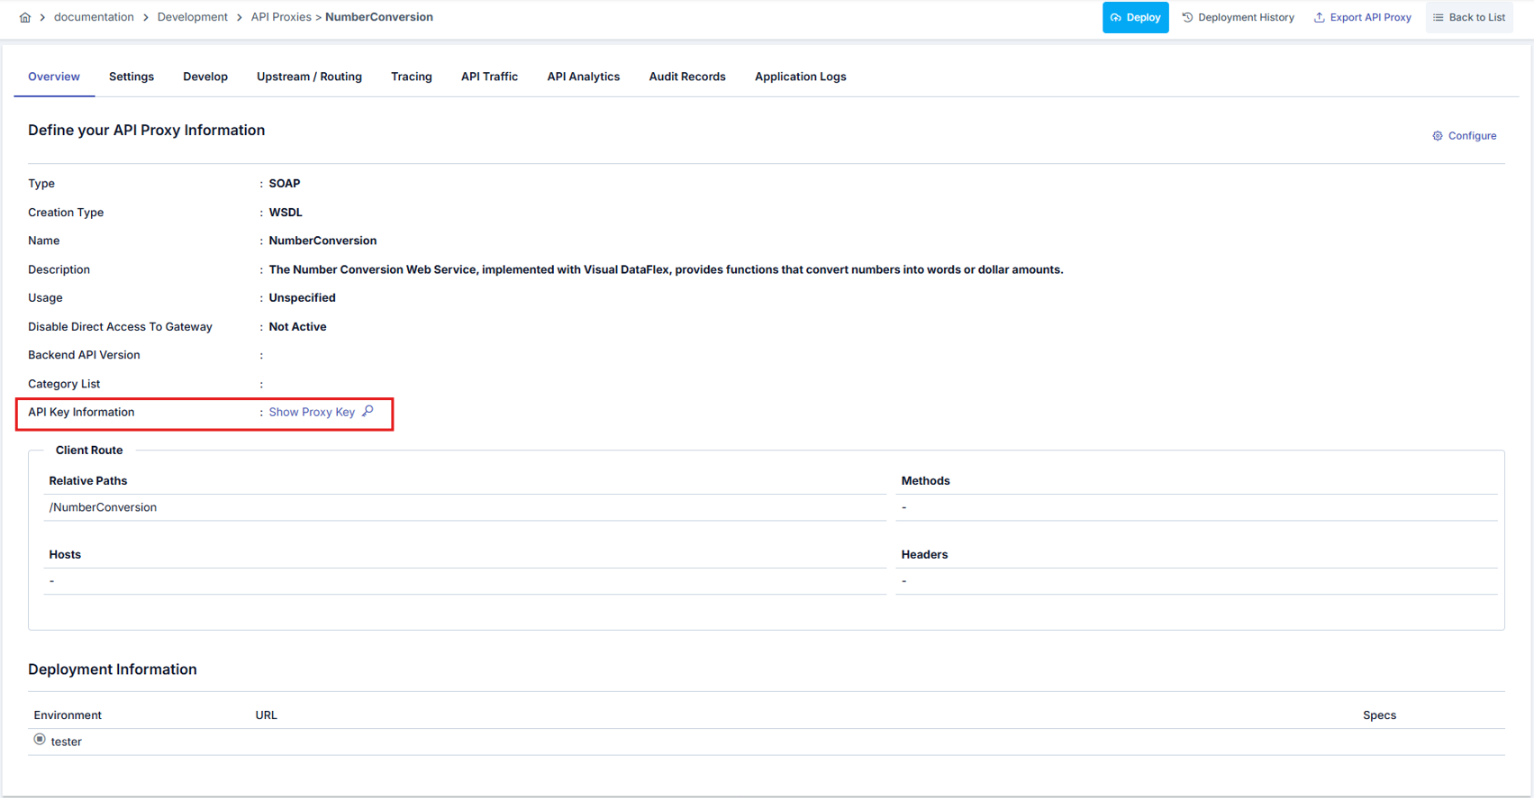
Show Proxy Key
It is the section where access keys of API Proxy are managed. Access keys are used for OAuth2 Authentication Policy.
Client Id and Client Secret values are created automatically and the user can request new ones to be created. If any of the keys are regenerated for an deployed API Proxy, the API Proxy must be redeployed for the keys to be valid.
The picture below shows the Show Proxy Key section:
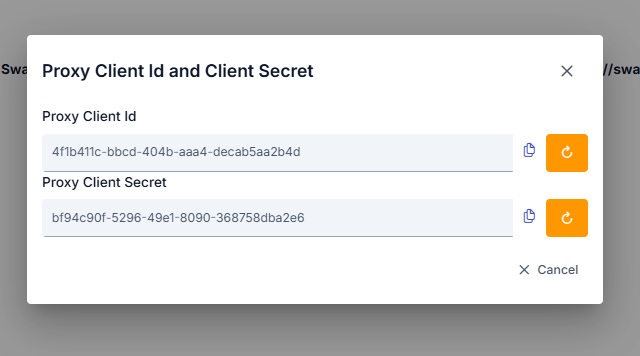
The picture below shows the dialog that opens when the Show Proxy Key button is clicked:
The image containing the confirmation dialog that appears when clicking the regenerate button next to the Client ID or Secret fields is shown below:
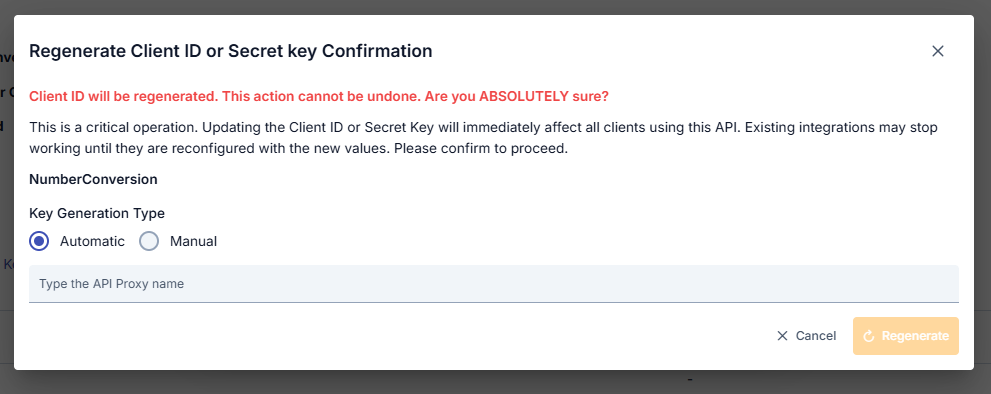
This dialog serves as a warning that regenerating the Client ID or Secret is an irreversible and critical operation. To confirm the action, you must enter the API Proxy name and select the key generation type (Automatic or Manual).
With Automatic, the system generates a new value automatically, while Manual allows you to enter your own value.
Deployment and Specification Information
The deployment section is the section where the API Proxy is deployed, and its addresses for the Environments it is deployed to are displayed. An API Proxy can be deployed to multiple Environments concurrently.
If an API Proxy Group is created from API Proxy, information about that group is also displayed in this field.
The picture below shows the Deployment section:

The Deployment fields are shown in the table below.
Field | Description |
|---|---|
Environment | It is the Environment information to which the API Proxy is deployed. |
| Access Type | It is the access type information of the API Proxy. |
URL | It is the access address of the API Proxy. It is automatically generated using the Relative Path and the access URL of the Environment it is deployed to. |
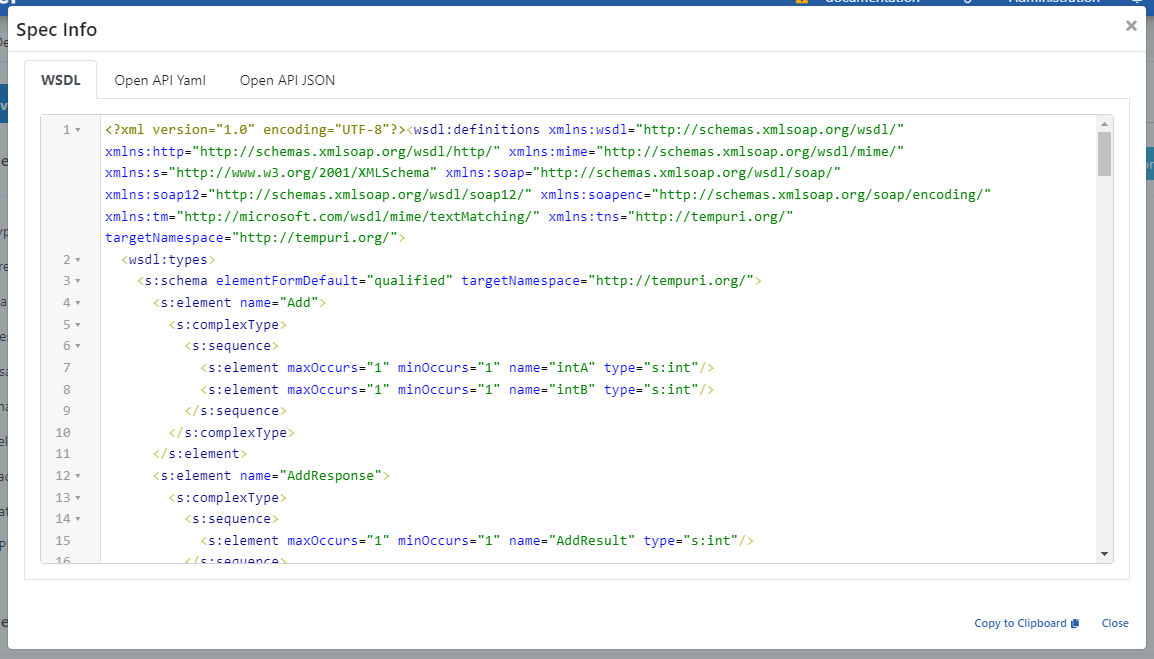
Specs | Definition files of API Proxy. For each API Proxy, definition files are generated in Swagger 2.x and OpenAPI 3.0.x formats. If the type of API Proxy is SOAP, WSDL and XSD definition files will also be generated. When the Show Specs link is clicked for any Environment, API Definition Files of the API Proxy for that environment are displayed. |
When the Show button is clicked, the dialog showing API Proxy definitions in different types and formats is given below:
If the relevant API Proxy is included in a Group and the option to Disable Direct Access to API Proxies is selected on the API Proxy Group screen, a warning box will appear in this section.

Accessing Definition Files via API Proxy
The contents of the definition files are displayed as shown in the figure above when the Show link is clicked and they can be copied from here. However, this method is for users such as API Developers, API Testers which works on the Apinizer platform. Clients (API Consumers) cannot access these interfaces.
Clients can use the URL of the API Proxies to access the definition files as follows:
Let the access URL of an API Proxy on Production Environment is https://demo.apinizer.com/apigateway/petstoreProxy.
Then, URLs below can be used to access the definition files:
Swagger 2.x (JSON)
- https://demo.apinizer.com/apigateway/petstoreProxy?swagger
- https://demo.apinizer.com/apigateway/petstoreProxy?swagger&format=json
- https://demo.apinizer.com/apigateway/petstoreProxy?swagger.json
Swagger 2.x (YAML)
- https://demo.apinizer.com/apigateway/petstoreProxy?swagger&format=yaml
- https://demo.apinizer.com/apigateway/petstoreProxy?swagger.yaml
OpenAPI 3.x (JSON)
- https://demo.apinizer.com/apigateway/petstoreProxy?openapi
- https://demo.apinizer.com/apigateway/petstoreProxy?openapi&format=json
- https://demo.apinizer.com/apigateway/petstoreProxy?openapi.json
OpenAPI 3.x (YAML)
- https://demo.apinizer.com/apigateway/petstoreProxy?openapi&format=yaml
- https://demo.apinizer.com/apigateway/petstoreProxy?openapi.yaml
WSDL (if the API Proxy is SOAP)