Contracts/Protocols
In some cases, it may be possible to open and/or use the services to be made available to the clients by making a contract/protocol.
In such cases, it may be necessary to keep the contract/protocol text with its history, to know which services and identity information are associated with this contract/protocol, and perhaps even from which contract/protocol it was created.
Apinizer meets all these needs on the contracts/protocols page, providing easy access to which client and which contract/protocol information. In addition, it also enables the discovery of expiring contracts and optionally automatic removal of access permissions for the credentials created for the contract upon contract expiration.
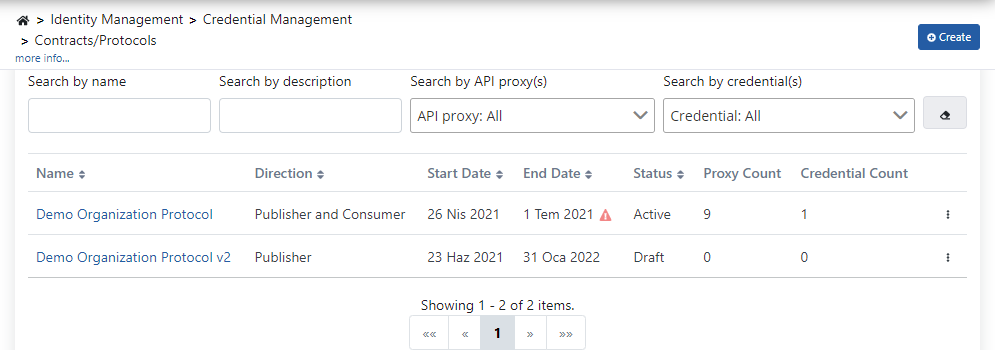
When first entering the Contracts/Protocols page, all available agreement/protocol records are listed as seen in the image below:
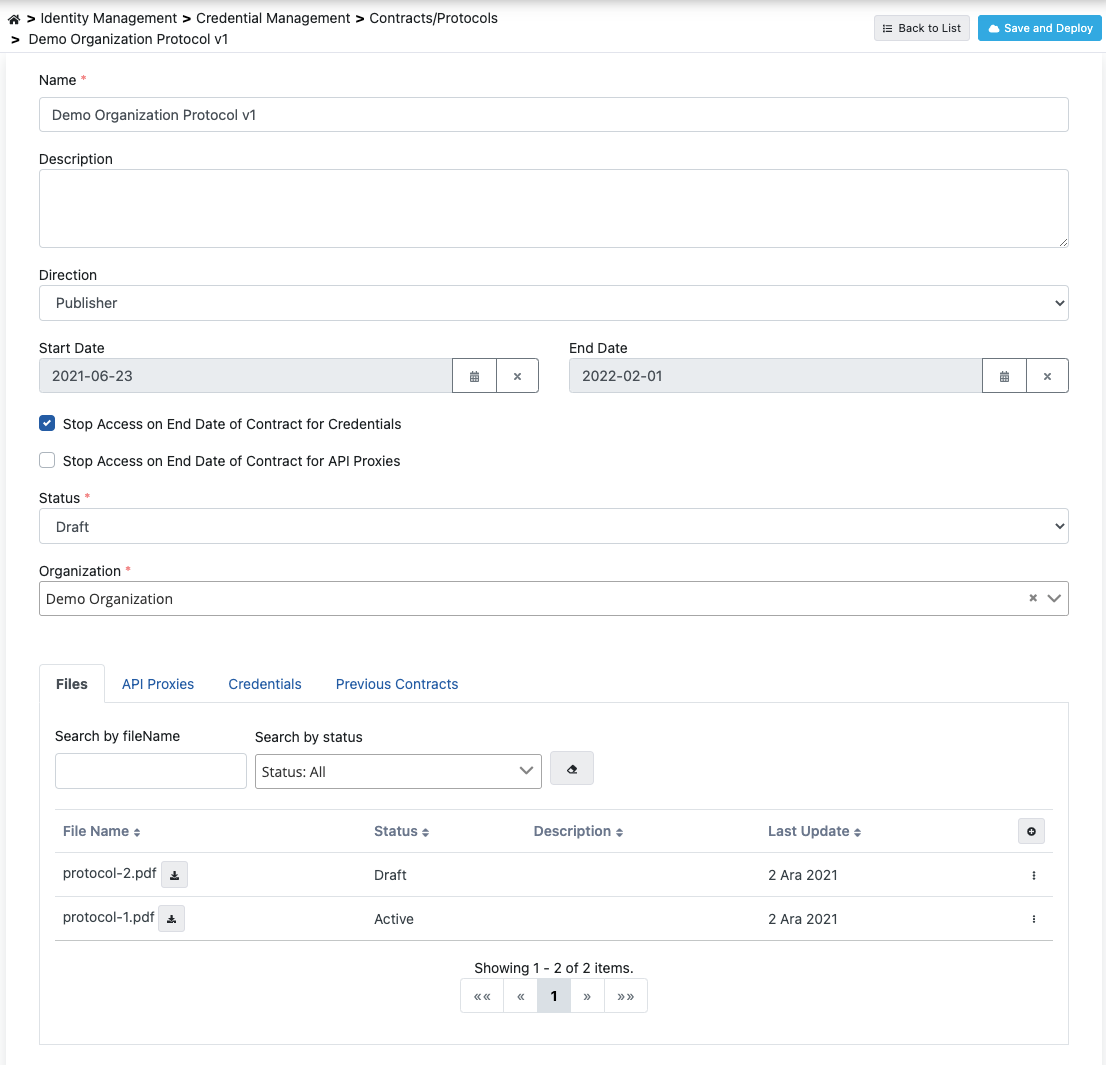
To create a new contract/protocol, click the Create button in the upper right corner and save the information in the image below and complete the contract/protocol registration.
Or, to create a new contract/protocol based on the existing contract/protocol settings, click the Add a Contract option in the detail menu of the record.

The image containing the Agreement/Protocol settings is given below:
The fields used for contract/protocol configuration are shown in the table below.
| Field | Description |
|---|---|
| Name | It is the name given to the contract/protocol. |
| Description | An optional explanation can be entered to describe what the contract/protocol includes. |
| Directon | It expresses the usage type of the contracted services (API Proxies). While evaluating this area, the relationship of the institution that owns Apinizer with the relevant services should be taken into consideration. If the institution has created the service, the Publisher, if the institution makes an existing service available to its internal applications, the Consumer, if both are in question, the Publisher and Consumer option can be selected. If no one is desired to be selected, the expression Unspecified should be used. |
| Start Date | It is the start time information of the contract. |
| End Date | It is the expiry time of the contract. |
Use End Date for Credentials | When this option is activated, the usage permission of the credentials associated with the contract/protocol will be automatically filled when the contract expires and they become unable to make new requests. Of course, for this setting to be valid, one of the authentication policies must be added on the associated API Proxy and the Security Manager option must be selected as the authentication method in this policy. |
| Stop Access on End Date of Contract for API Proxies | When this option is activated, the API Proxy usage permission associated with the contract/protocol will expire automatically and become unable to make new requests. Of course, for this setting to be valid, one of the authentication policies must be added on the associated API Proxy and the Security Manager option must be selected as the authentication method in this policy. |
| Status | It is the information of whether the contract is active or passive. |
| Organization | It is the information with which institution the contract is made. |
Files Tab
If the documents related to the contract/protocol are required to be included in the contract/protocol record, the Add button marked with red in the image above is pressed and the file is saved to the contract/protocol by entering the necessary information in the image below.

The fields used for file configuration are shown in the table below.
| Field | Description |
|---|---|
| Status | Indicates the status of the file. |
| Description | This field can be used if you want to enter a description about the file content. |
| Select File | The file you want to upload |
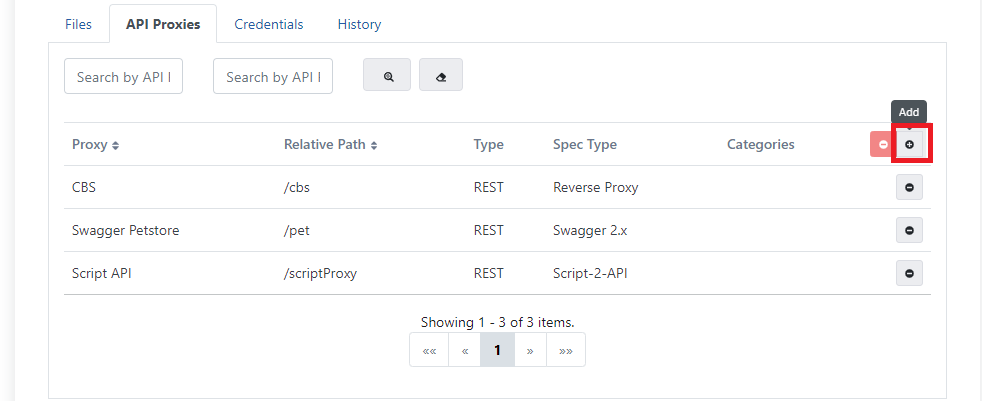
API Proxies Tab
If the API Proxies associated with the contract/protocol are required to be included in the contract/protocol record, the Add button marked in red in the image below is pressed.
When the Add button is pressed, API Proxies in the project are listed as in the image below.
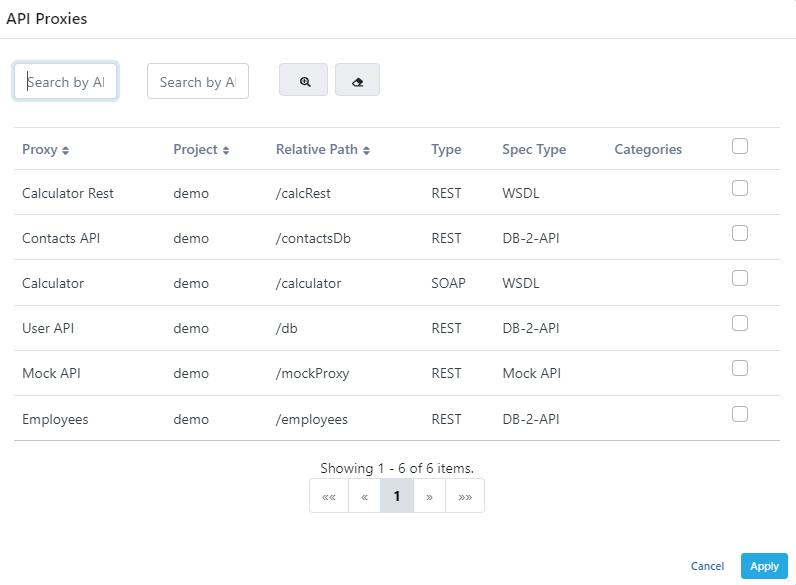
API proxies to be associated with the contract are selected from this list and saved.
Credentials Tab
If the identity information related to the contract/protocol is required to be included in the contract/protocol record, the Add button marked with red in the image below is pressed.

When the Add button is pressed, the credential list included in the project or defined globally is listed as in the image below.
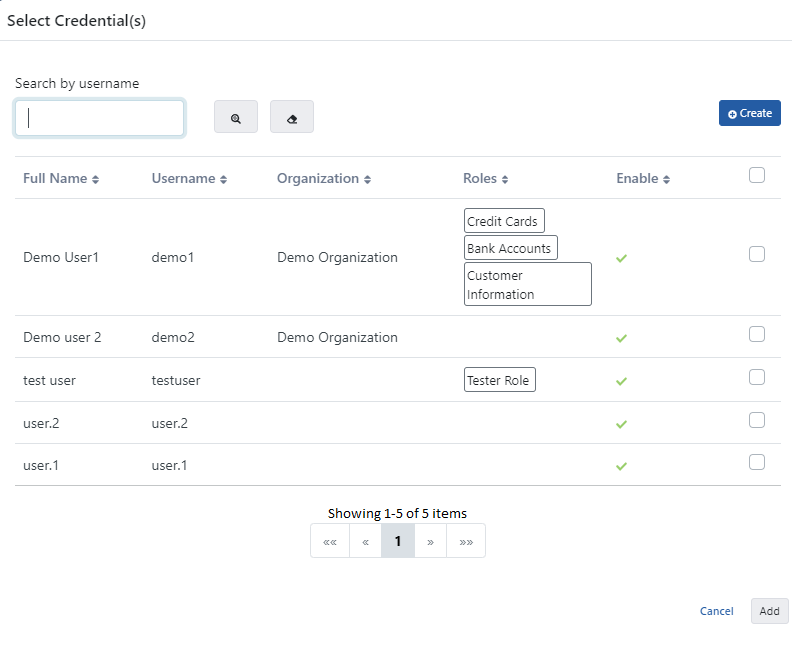
Credential information to be associated with the contract is selected from this list and saved.
If the requested credential is not in this list, a new credential can be created by pressing the Create button.
For more detailed information about the credential screen, you can visit the Credential Management page.
History Tab
This section contains the list of the contract/protocol from which the current contract/protocol is derived.
