Task Flow
Task Flow Features
Can use the output of the task that ran before it.
Can run the task once or multiple times.
Creating Task Flow
Go to the Task Flows page within API Integration under the Development tab from the navigation bar on the left side of your screen.
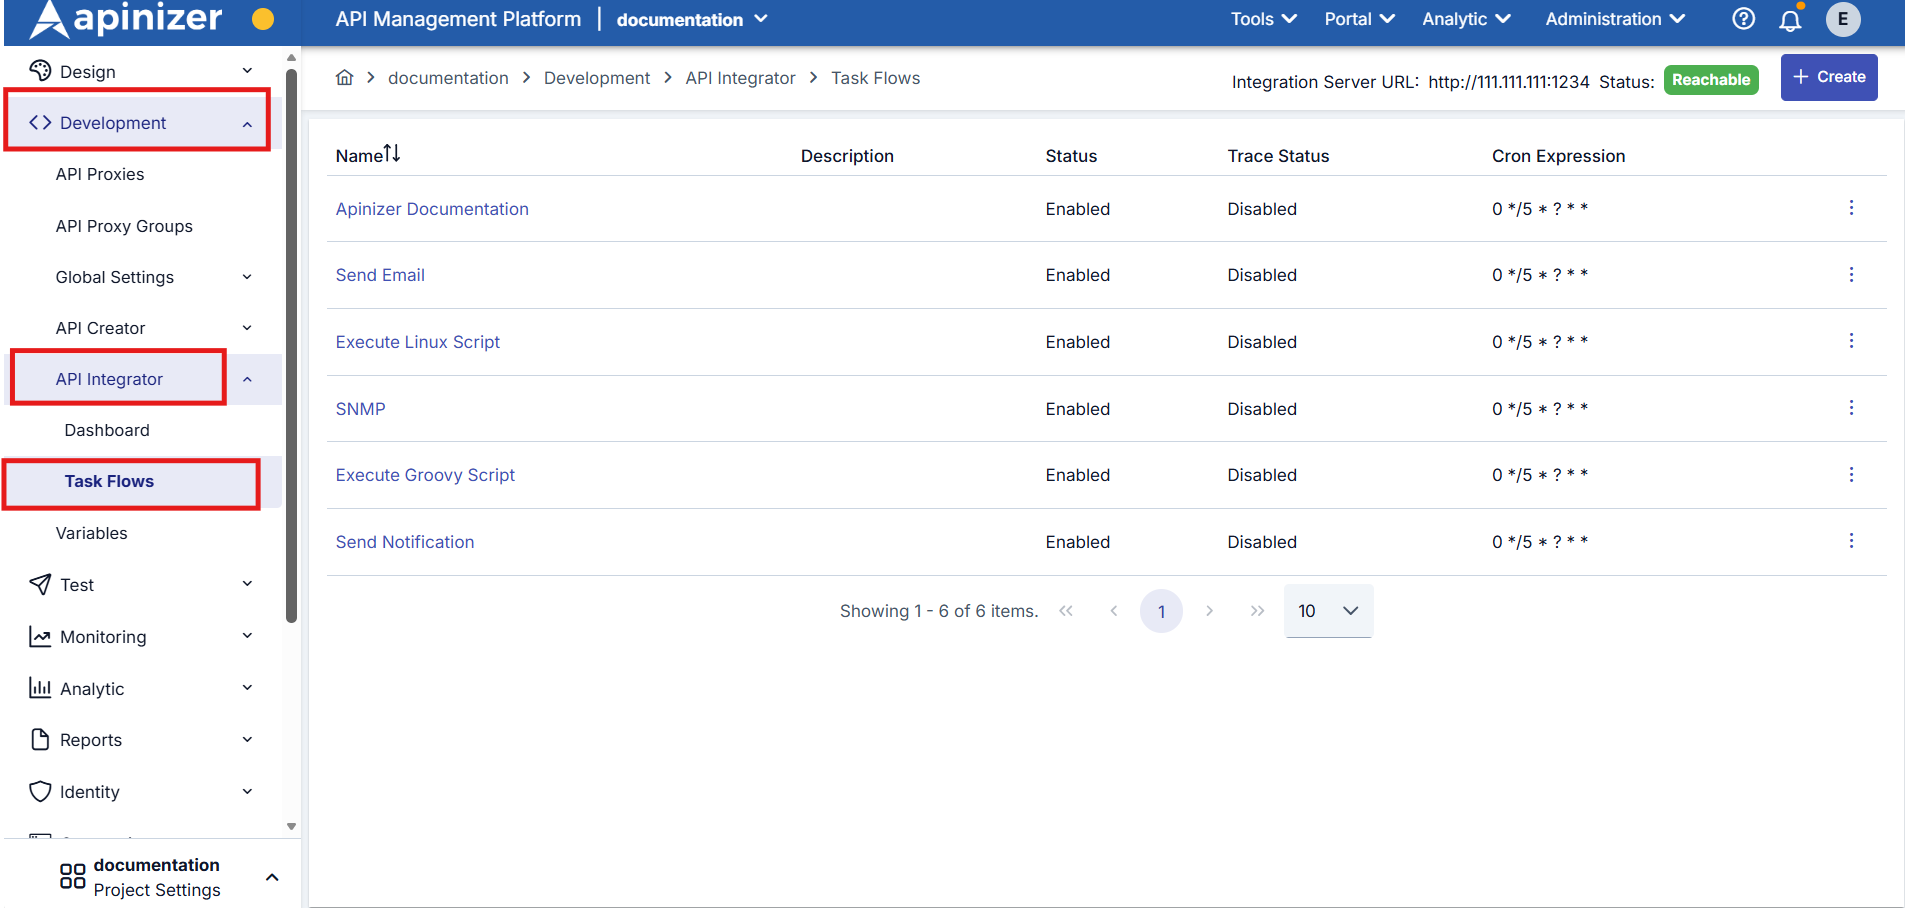
Create a new Task Flow by clicking the Create button in the top right corner.
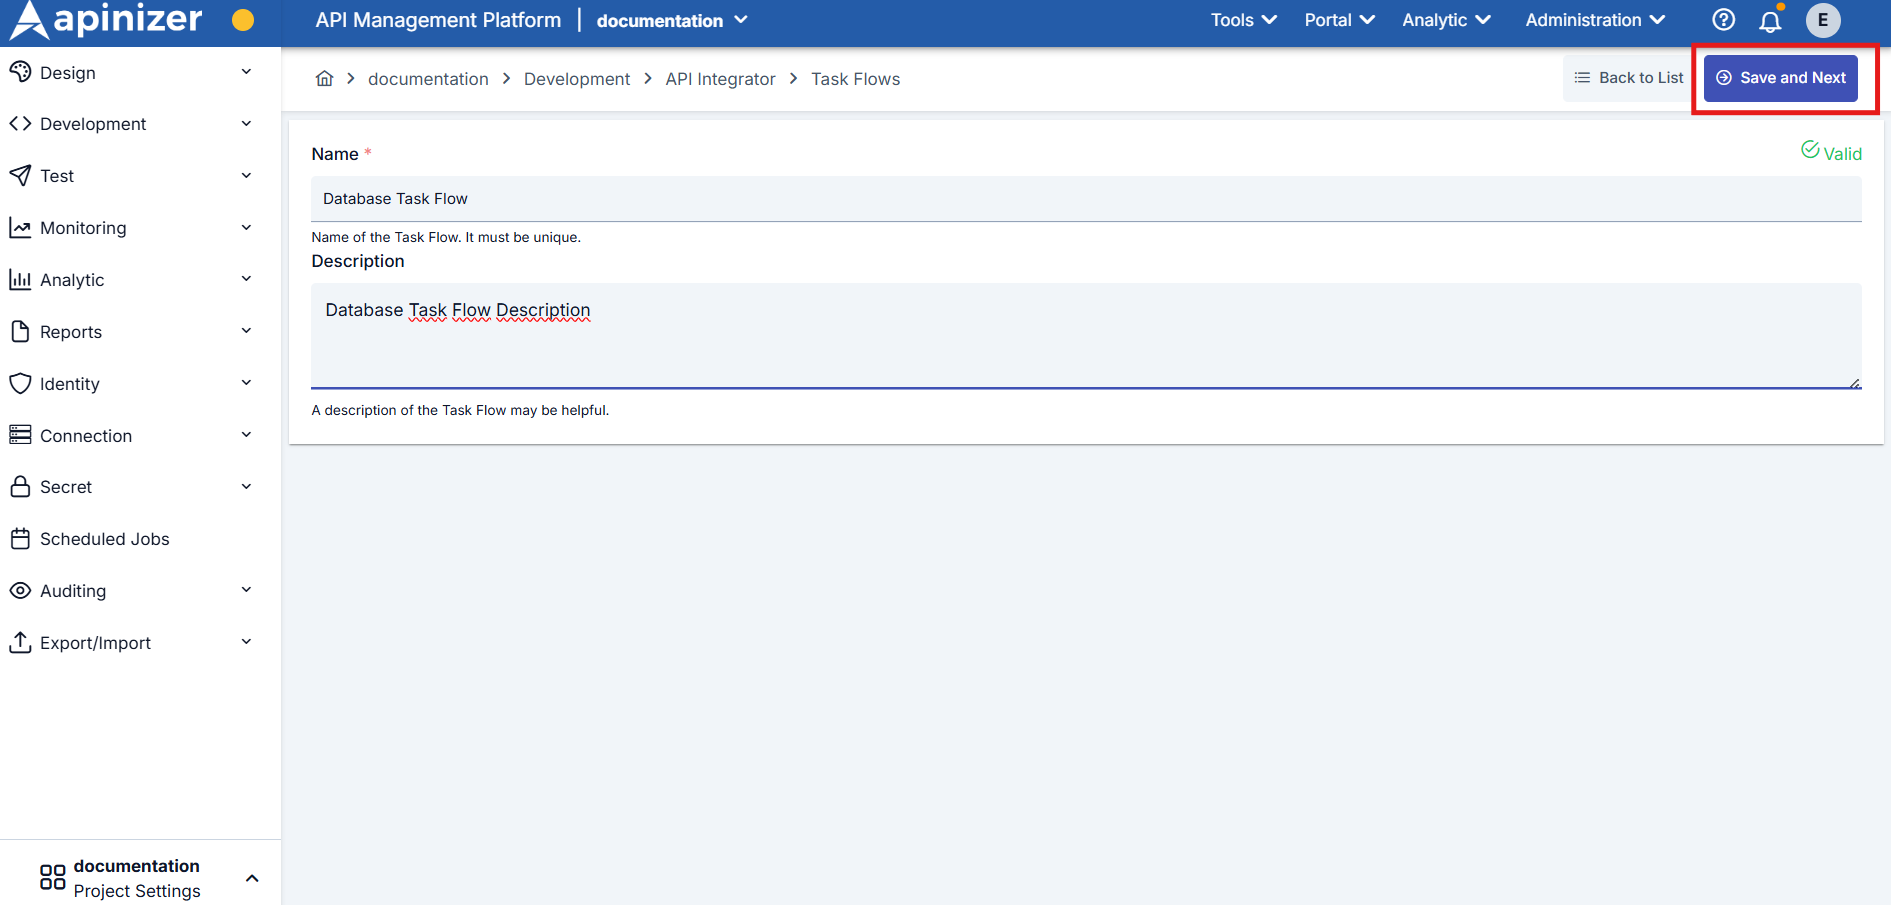
Create the task flow by naming it and clicking the Save and Next button.
Creation Form Fields
Field: Name
Type: string
Required: Yes
Unique name that identifies the task flow
Field: Description
Type: string
Required: No
Information text about the content of the task flow (optional)
Task Flow Configurations
Configuration Fields
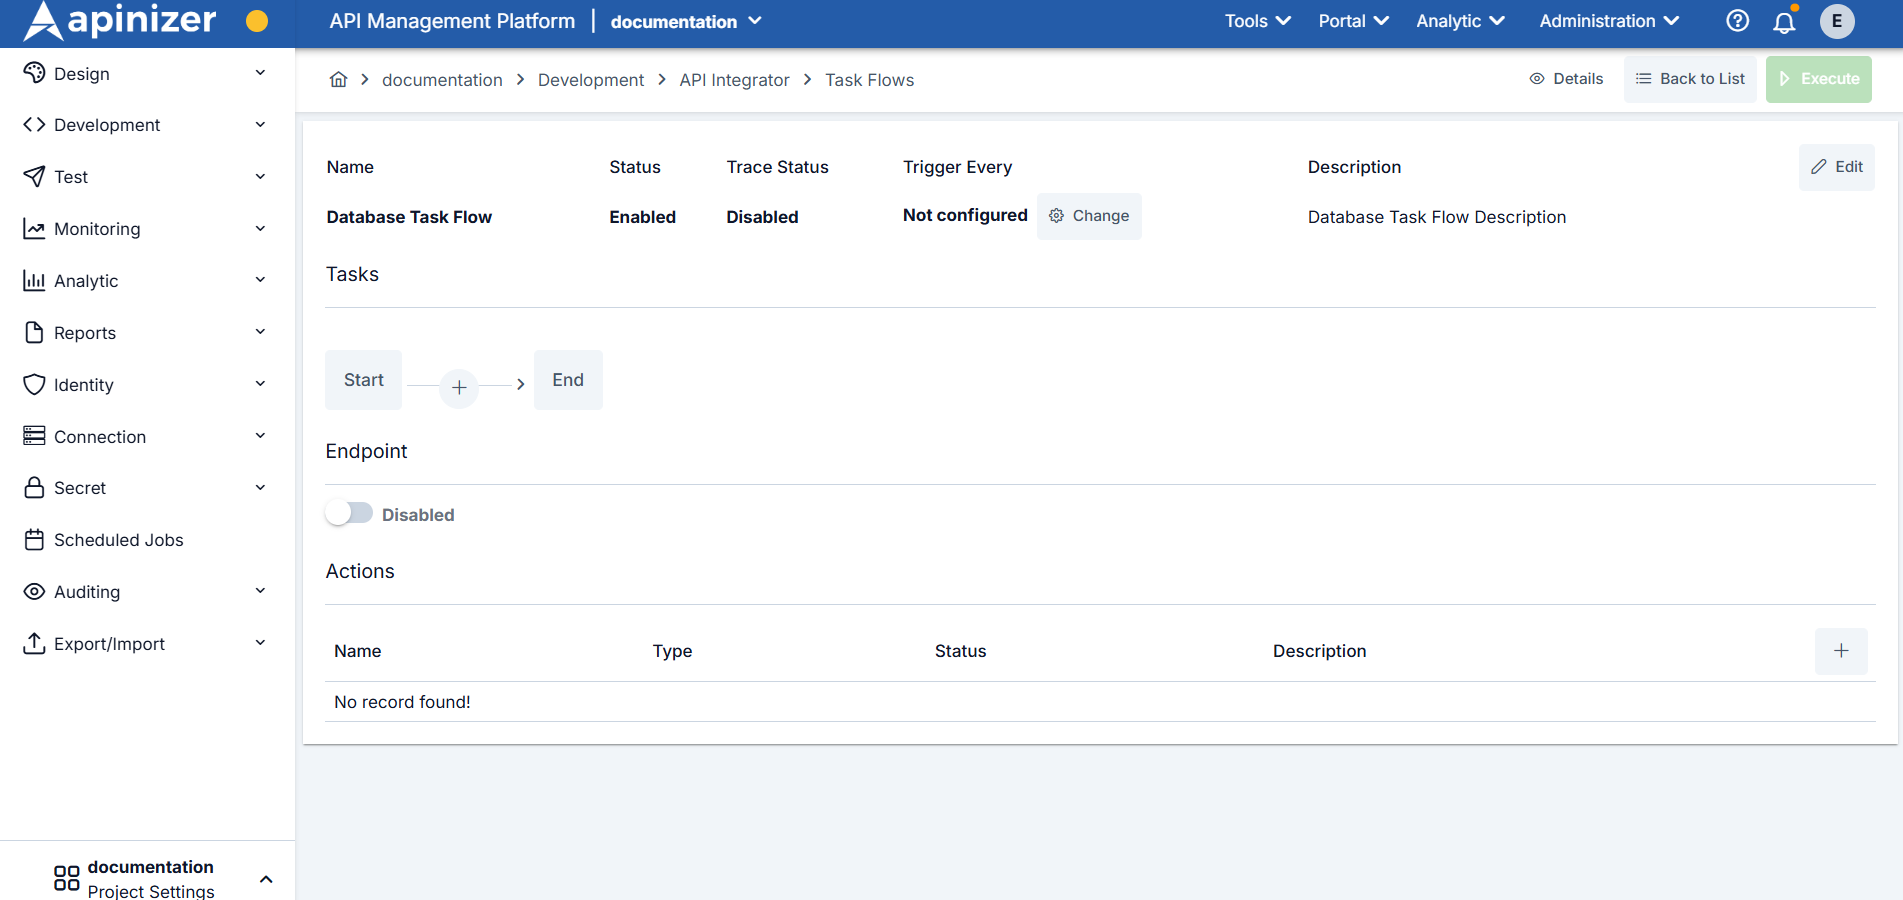
Basic Information
The name of the task flow as it appears in the list. It is required and must be unique within the project.
Description related to the task flow.
Status and Monitoring
Indicates whether the task flow is active/passive.
Indicates whether the Trace (Debugging) feature is on/off.
Triggering and Tasks
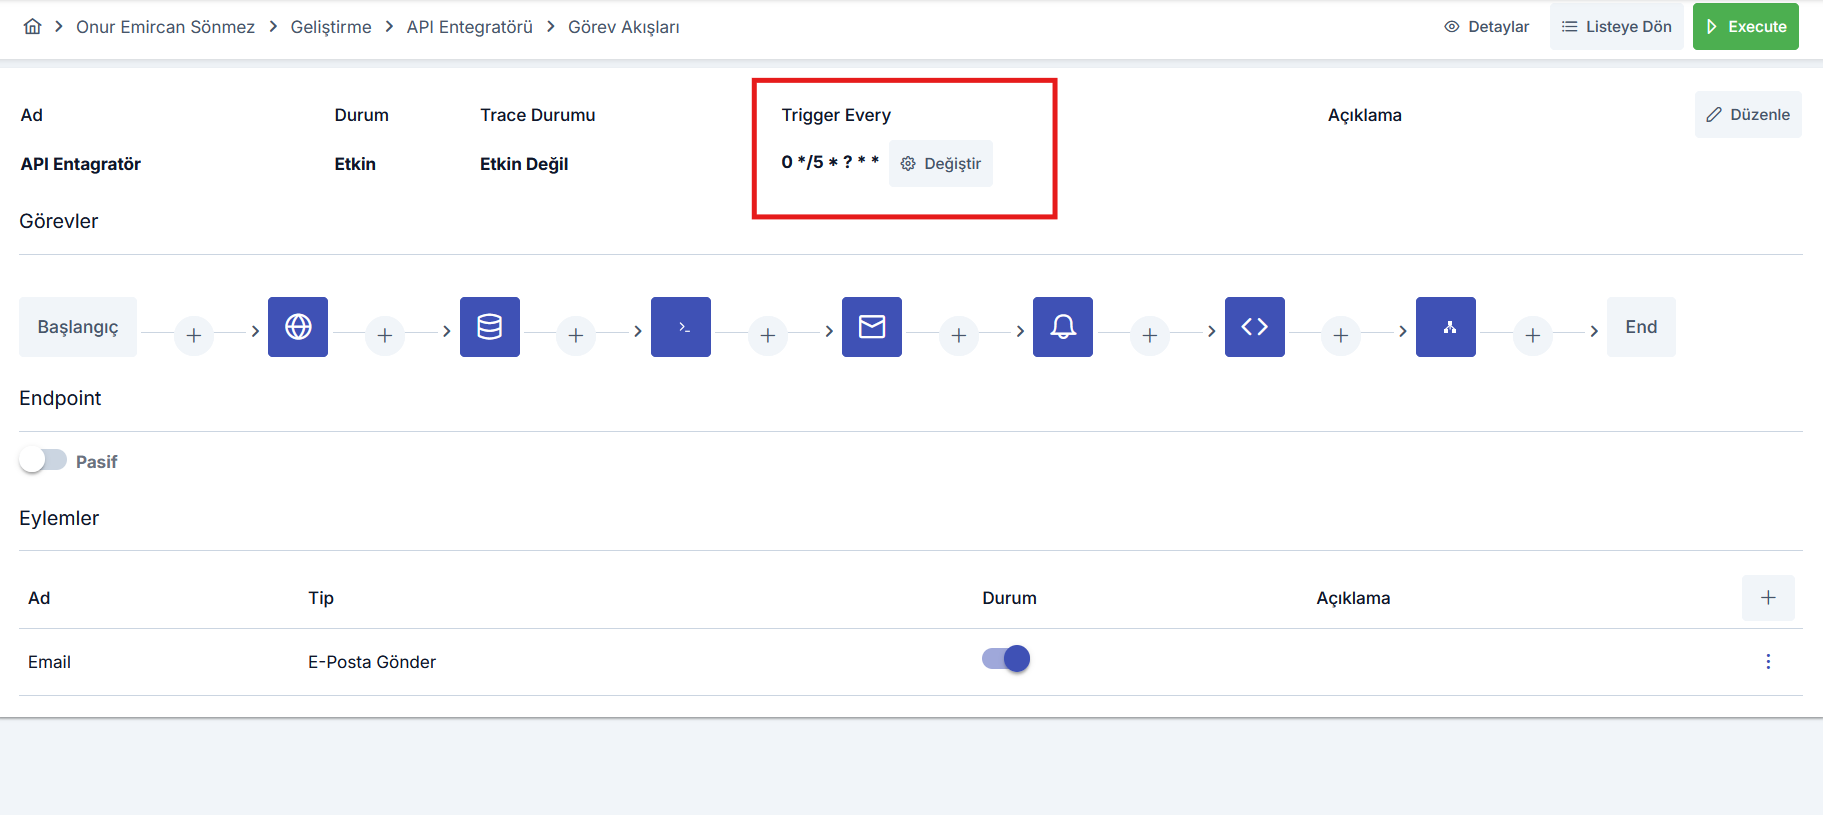
Indicates how often the task flow will be automatically triggered.
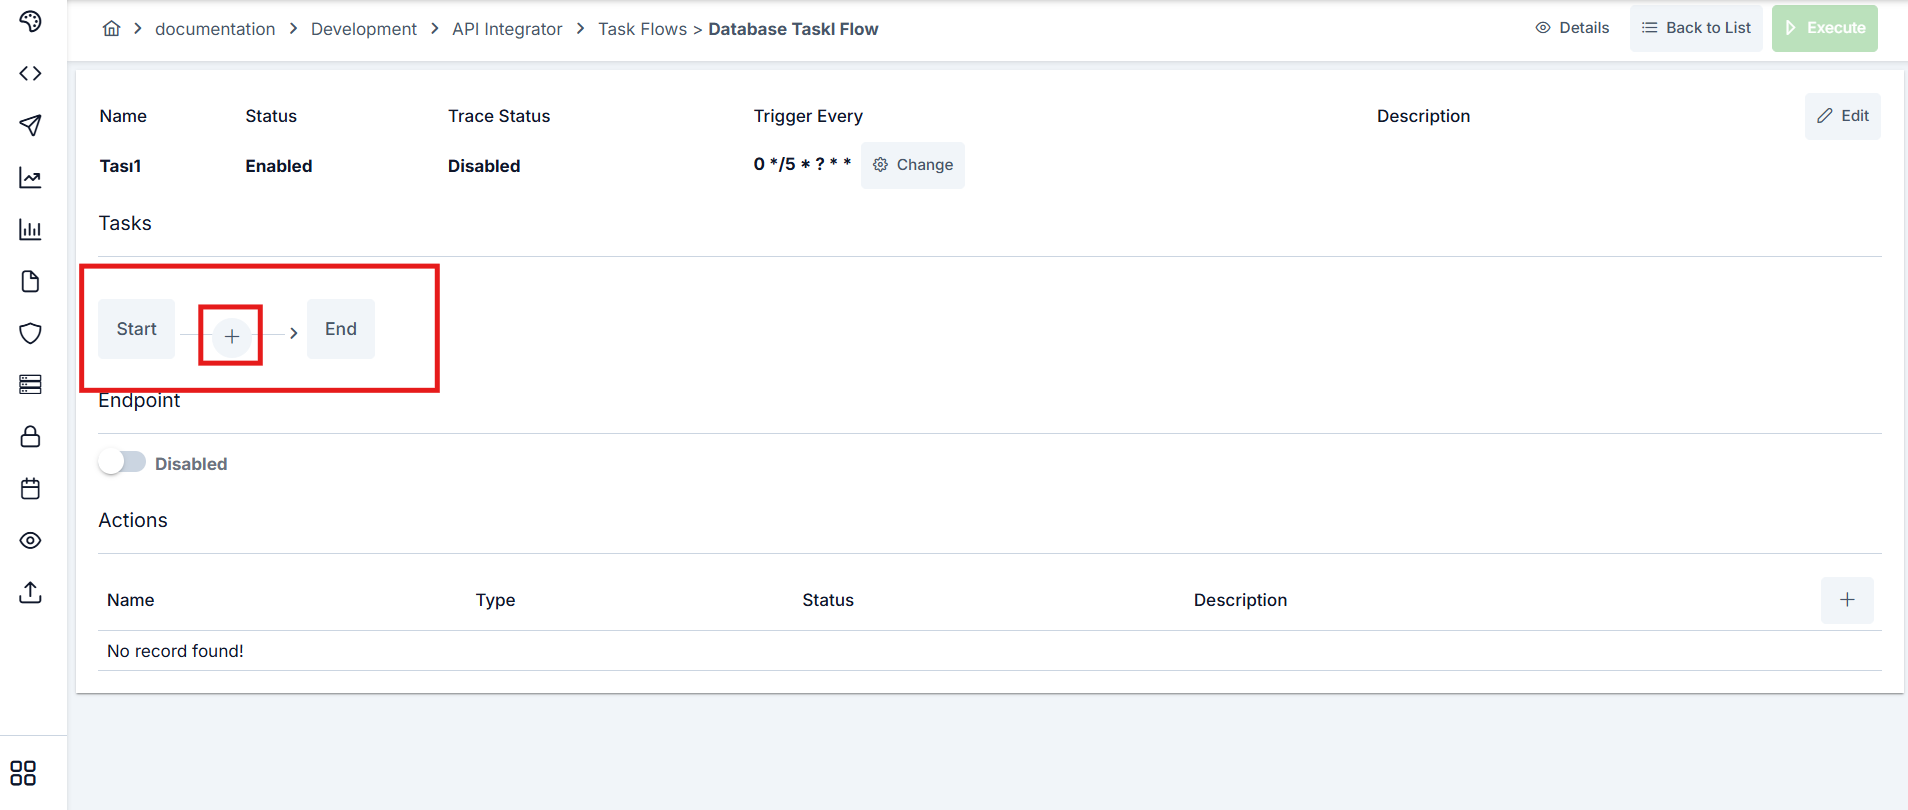
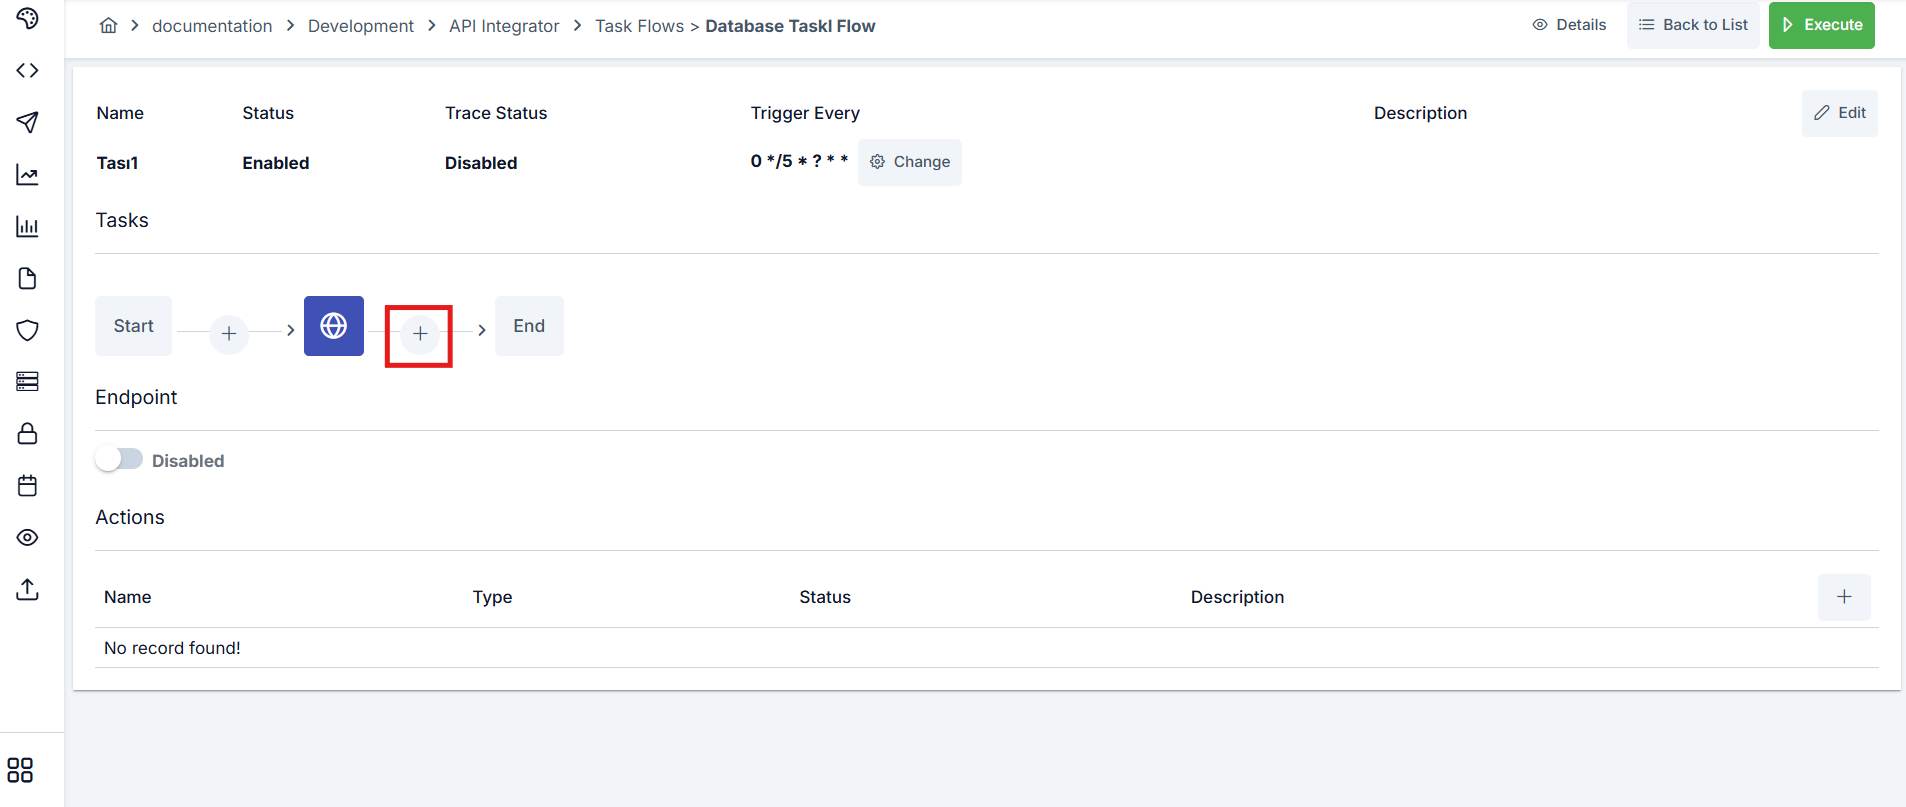
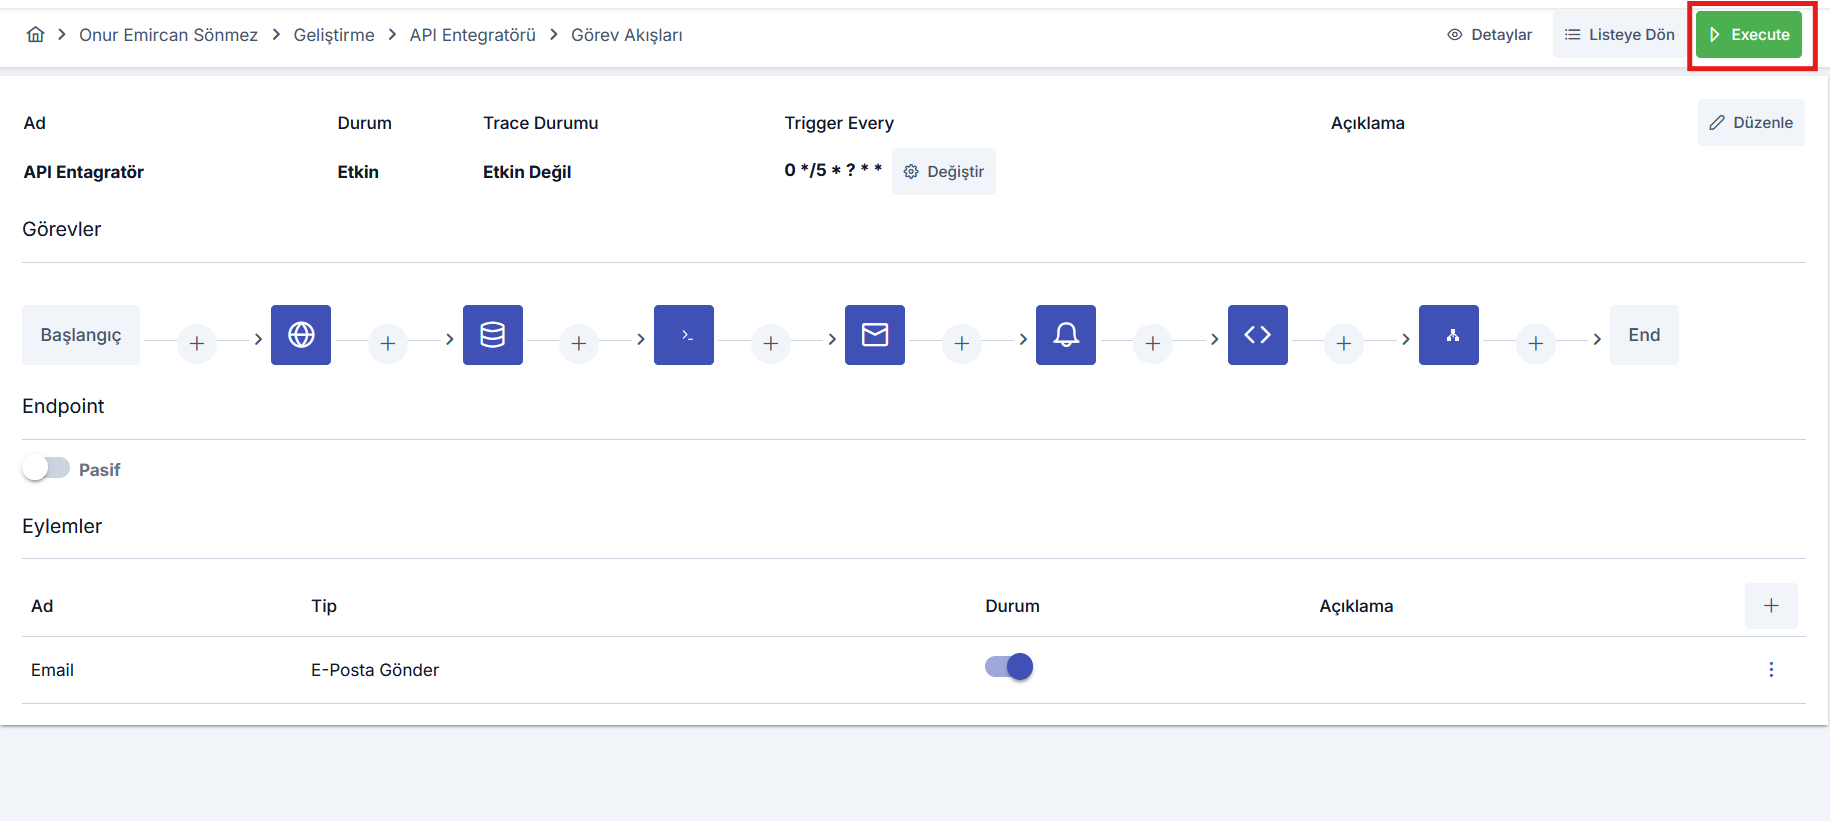
Tasks defined in the content of the task flow are shown on the graph. Addition, deletion, and configuration operations are performed from here.
Option to trigger the task flow via its REST API endpoint.
Indicates actions to be performed if an error occurs during the execution of the defined task flow.
Trigger Frequency Configuration (Trigger Every)
You can define a scheduler to automatically run the task flow at specific times.
Configuration regarding how often the created task flow should be triggered is performed through the window that opens when the Change button under Trigger Every is pressed.
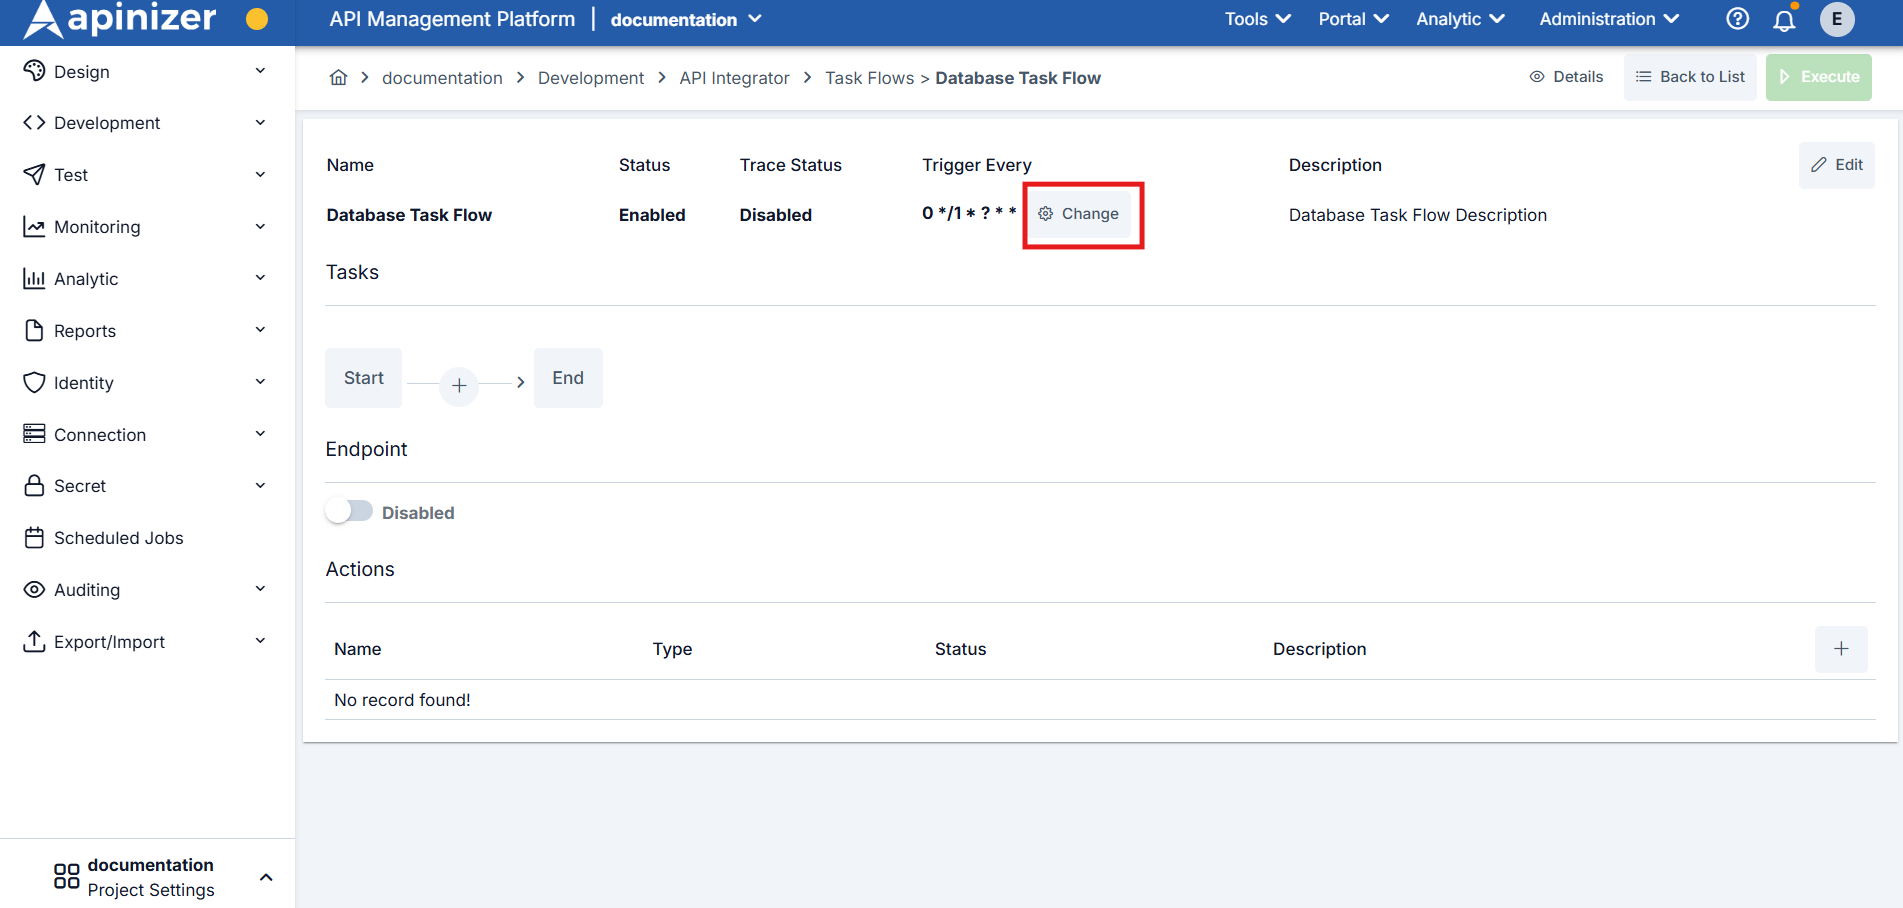
Fill the Value and Unit fields to define the scheduler configuration.
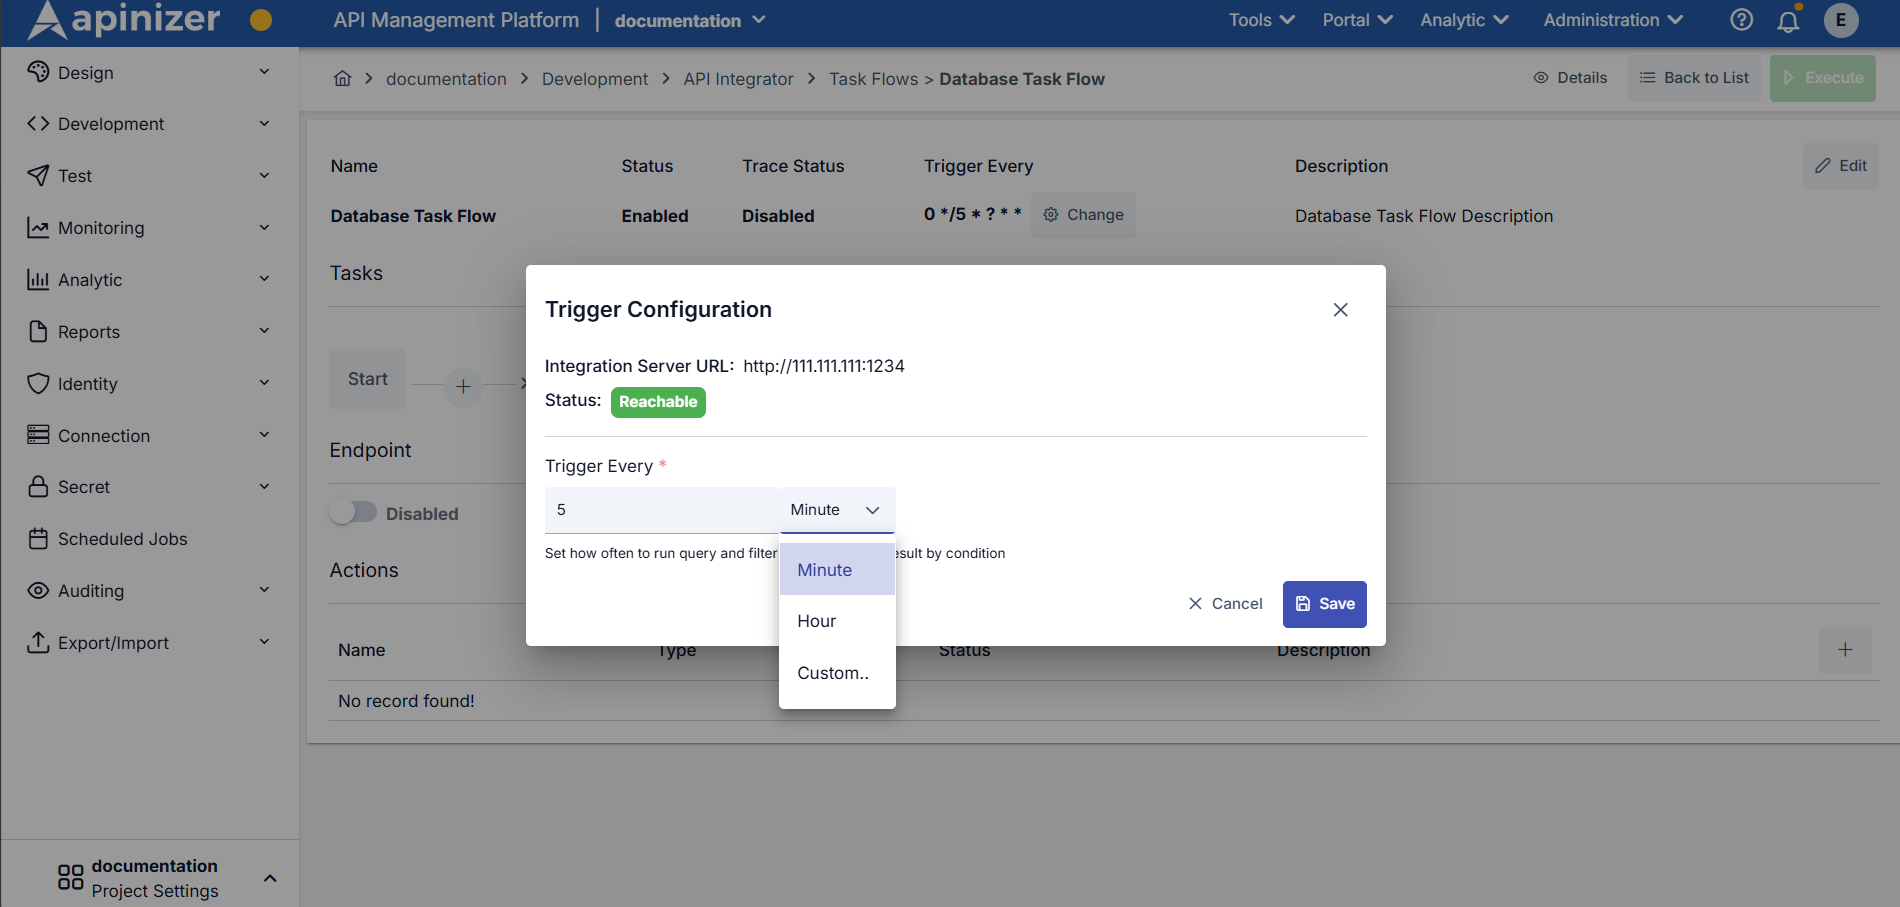
Available units:
- Minute - Minute
- Hour - Hour
- Custom - Custom Quartz Cron Expression
Scheduling can be done with the desired Quartz Cron Expression by selecting the Custom option in the scheduler definition.
Task Flow Definition Settings
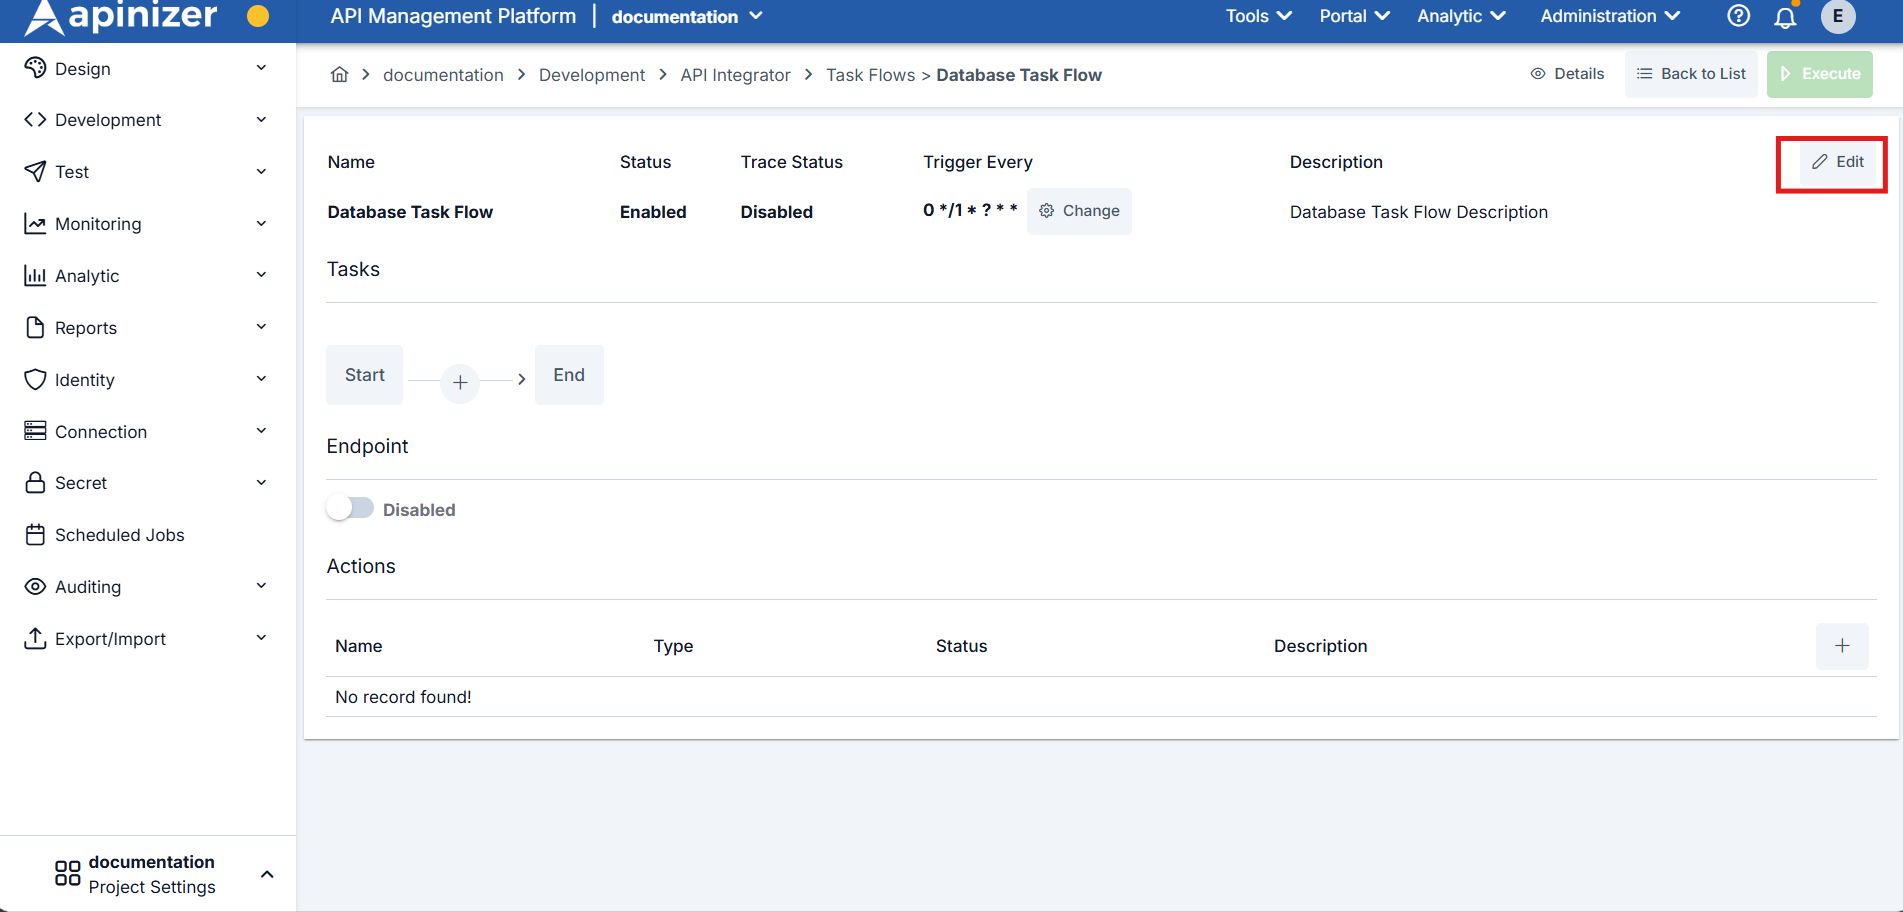
Task flow definition settings are performed through the window that opens via the Edit button in the top right corner.
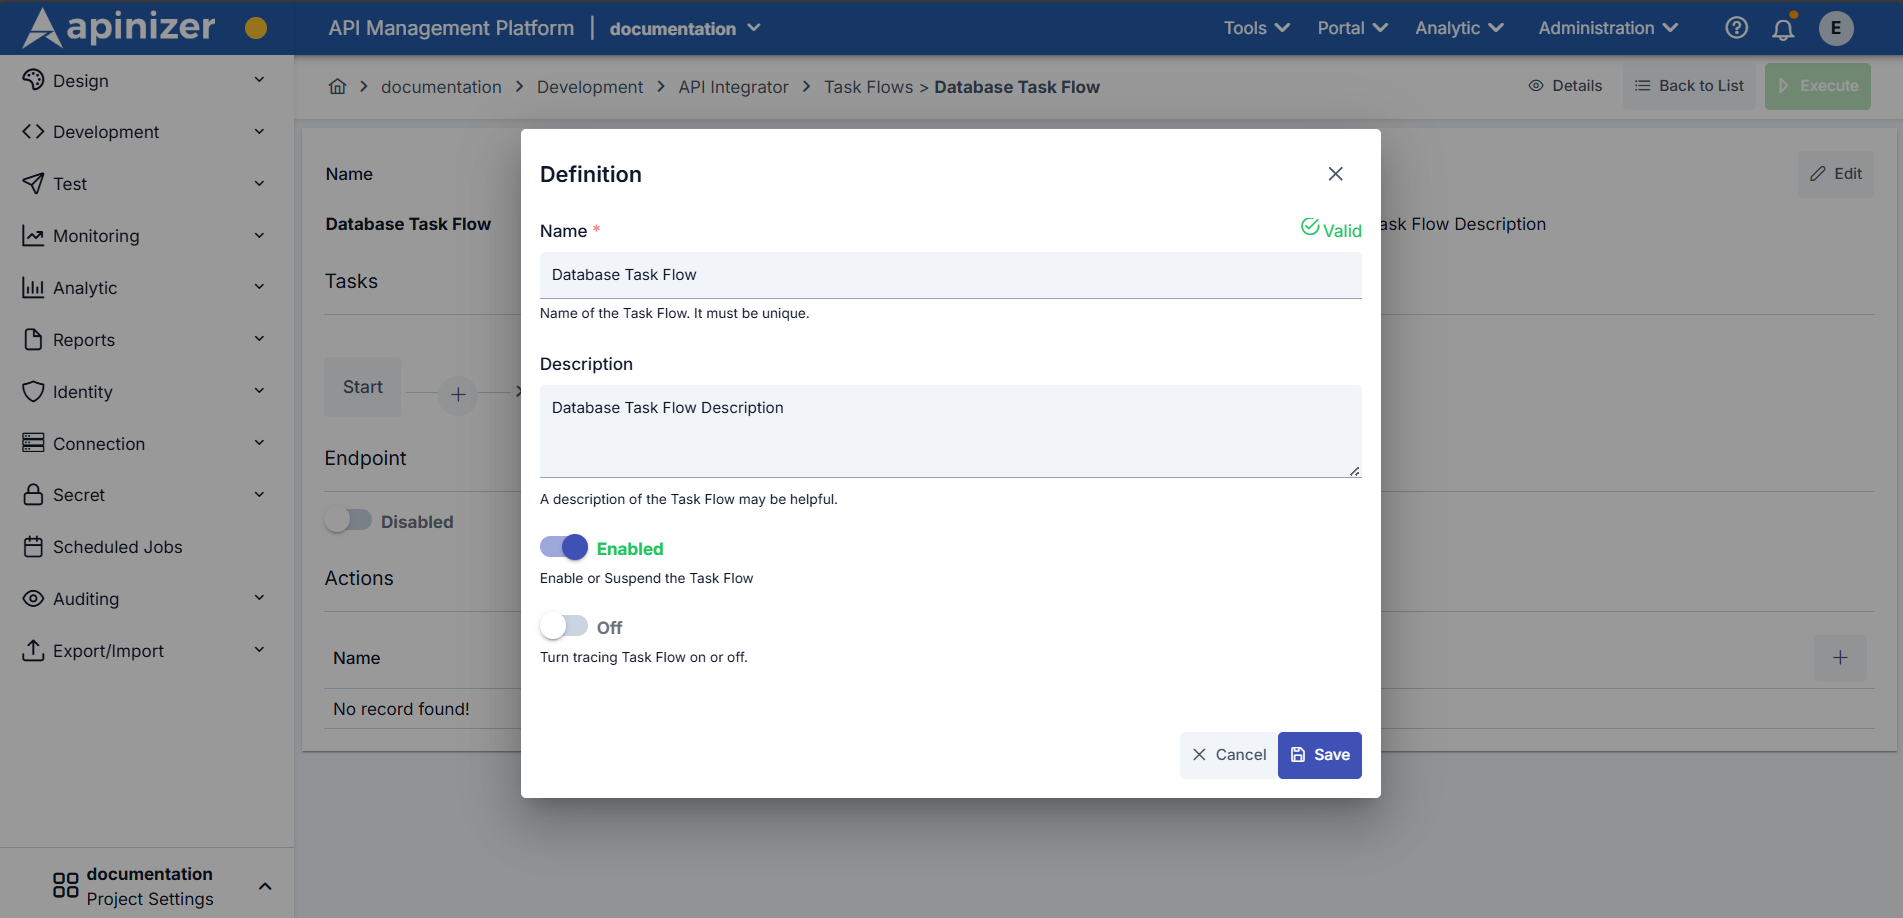
The name of the task flow as it appears in the list. It is required and must be unique within the project.
Description related to the task flow.
Active/passive status of the task flow.
Status of monitoring task flow steps. When active, data belonging to running steps is shown in logs, while when passive (suspend), detailed logging is not performed.
Task Settings��
What is a Task?
In the API Integration module, each integration operation with a system or application is called a task. Since Apinizer adopts doing integrations as much as possible with API calls, it has adopted defining a task/connection type for each endpoint that can be called via API.
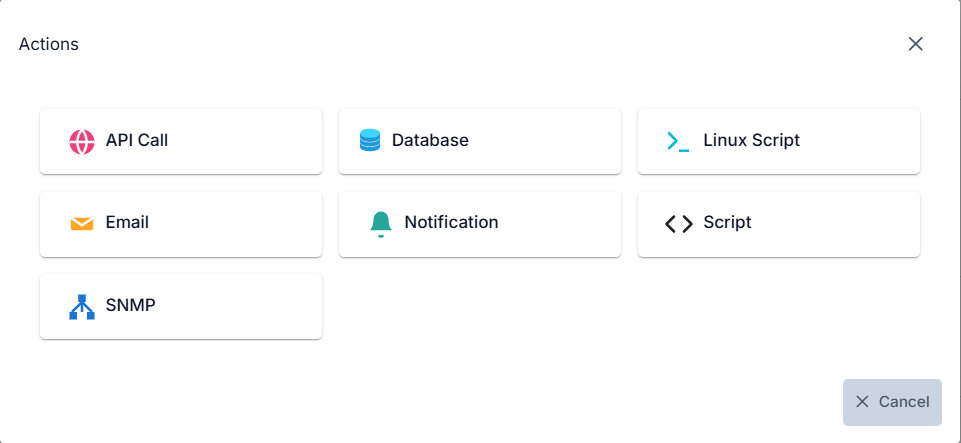
Task Types
Used for email sending
Used to send requests to external APIs
Used for database operations
Used to run Linux commands
Used to run JavaScript or Groovy scripts
Used to send notifications
Used for SNMP protocol operations
Task Definition
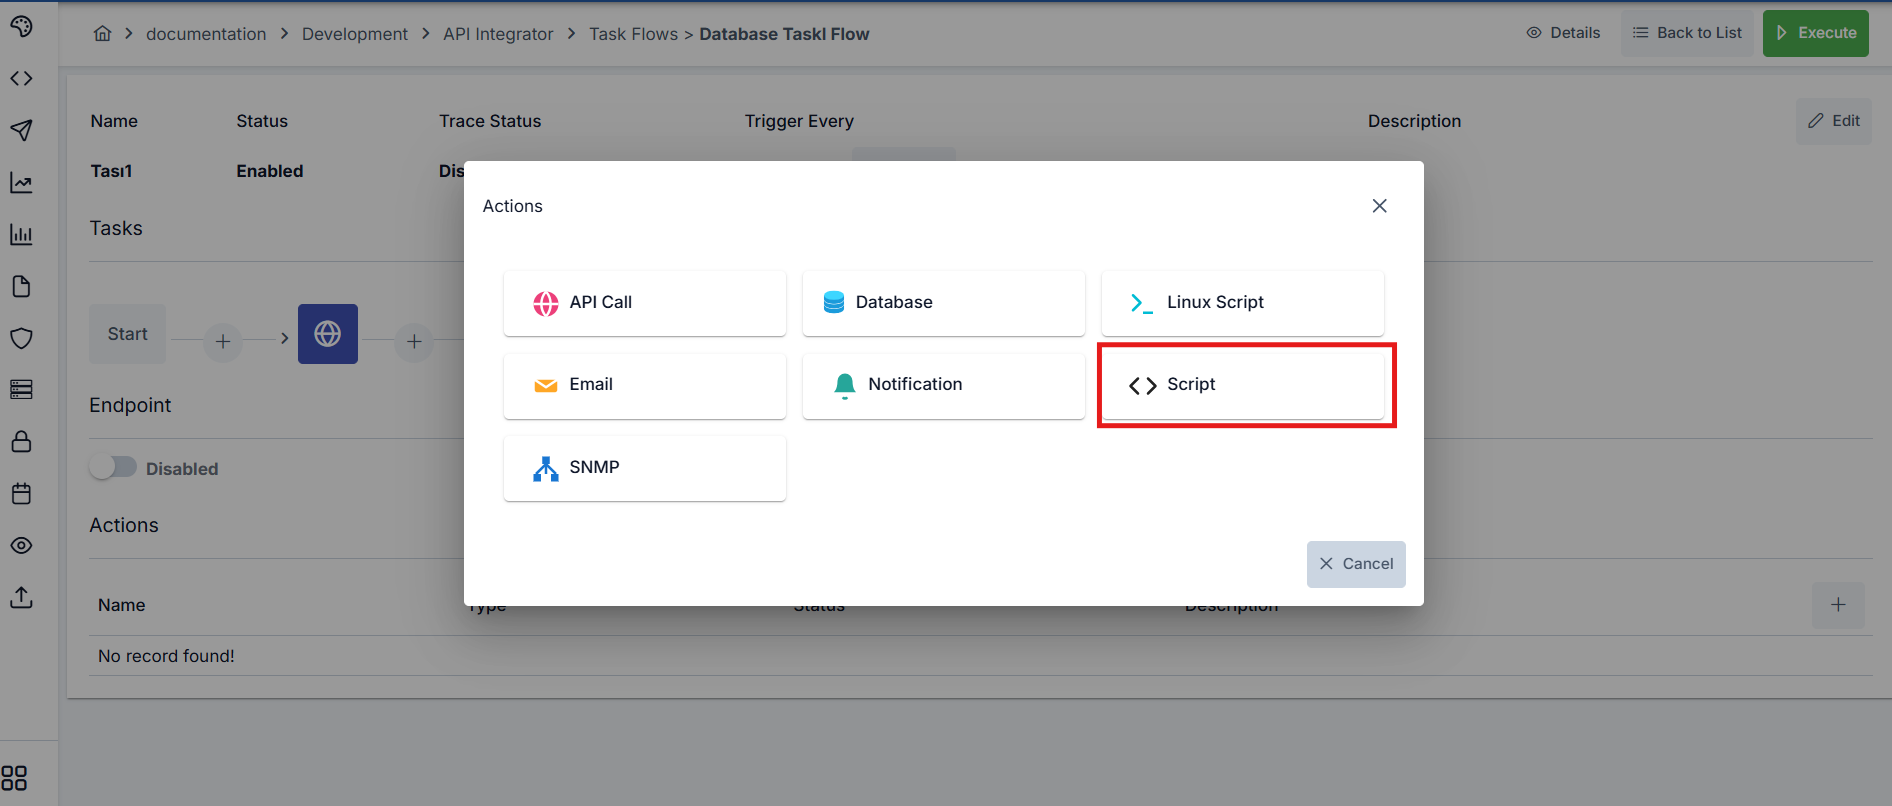
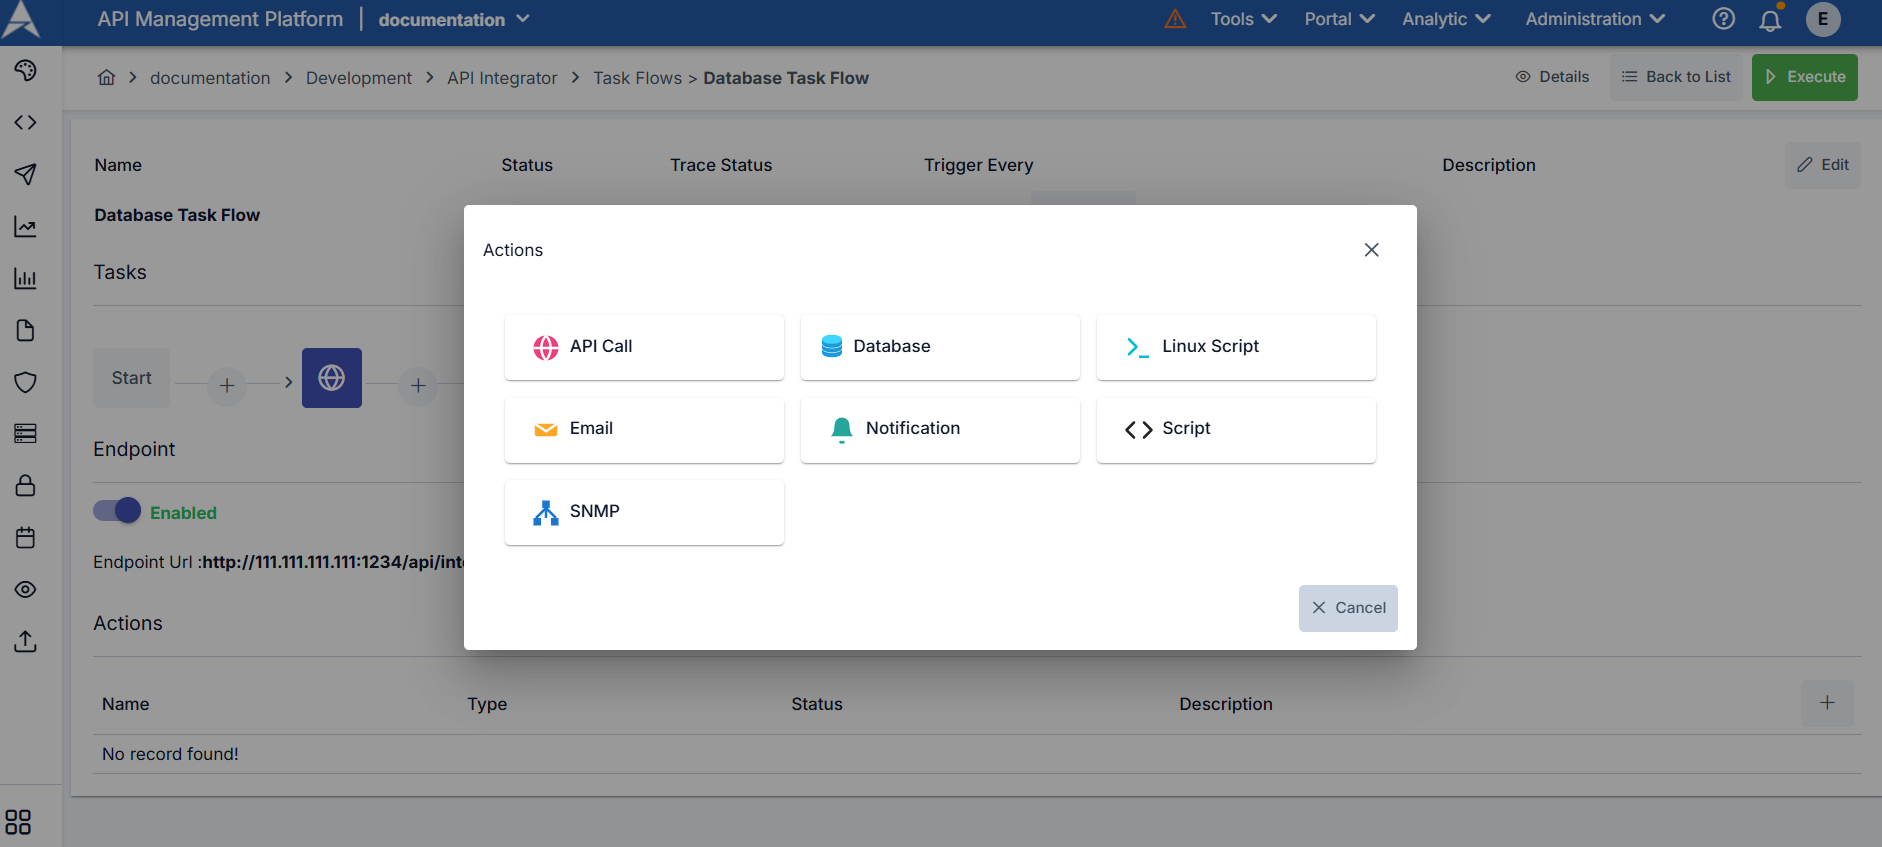
Sequentially running operations (transactions) are managed through the definition interface. To define a new task, press the + button on the schema under Tasks.
Task selection screen:
Continue with task definition by selecting the task that is desired to be added.

For example purposes, explanation will be made through the API Call example in this document.
You can see the window screen where the working steps of the task are defined in the screenshot below.
Data Transfer Between Tasks
In tasks within the task flow, the output of the previous task can be used as input for subsequent tasks. How the output of Api Call will be used as input for the Script policy added after it is shown in the screenshots below.
Output Key Usage
You can use the output of the API Call task as input for the Script policy added after it:
You can access the output of a previous API Call task within the Script task through the variable specified when defining the API Call task from within the menu button.
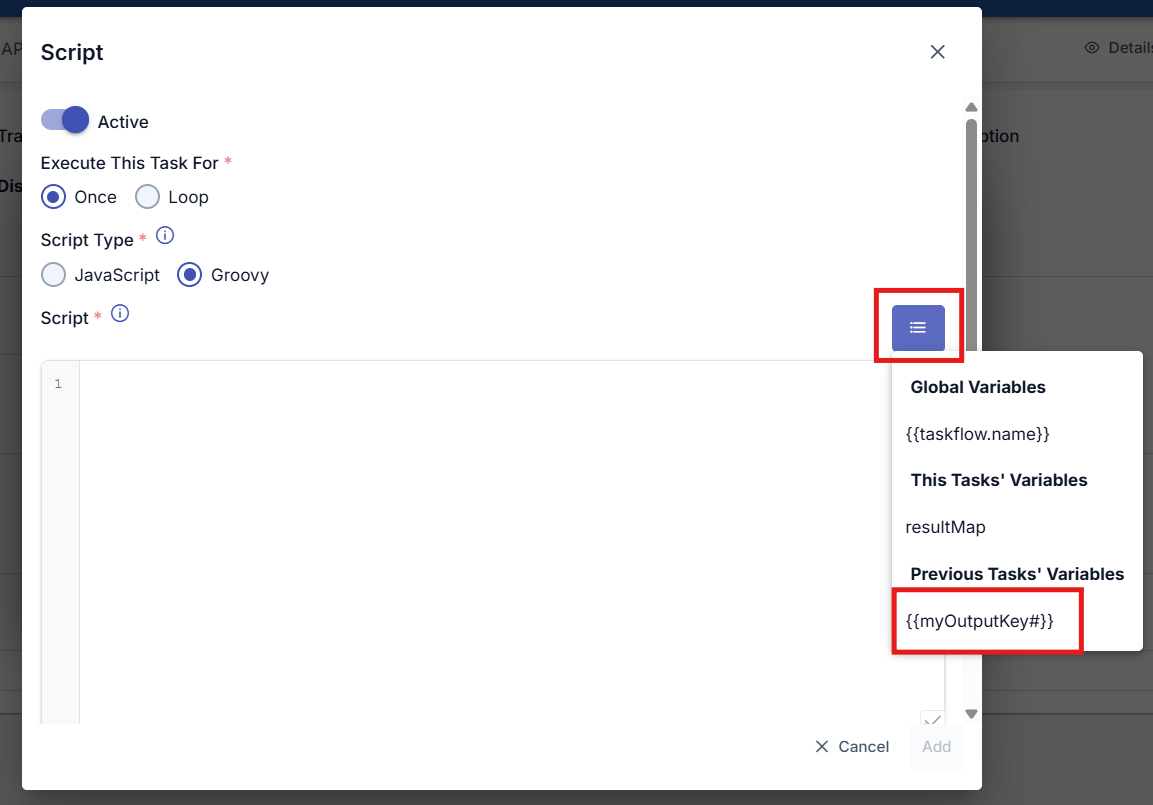
To use the output of a previous task within the current task, the variable must be used in double curly braces with a hash (#) sign at the end.
Example: {{myOutputKey#}}
As seen in the screenshot below, the needed data has been retrieved from the output variable of the Api Call task by performing filtering operations within JsonPath/XPath Syntax. This retrieved data can be used as the LOOP_VARIABLE variable within the Script task.
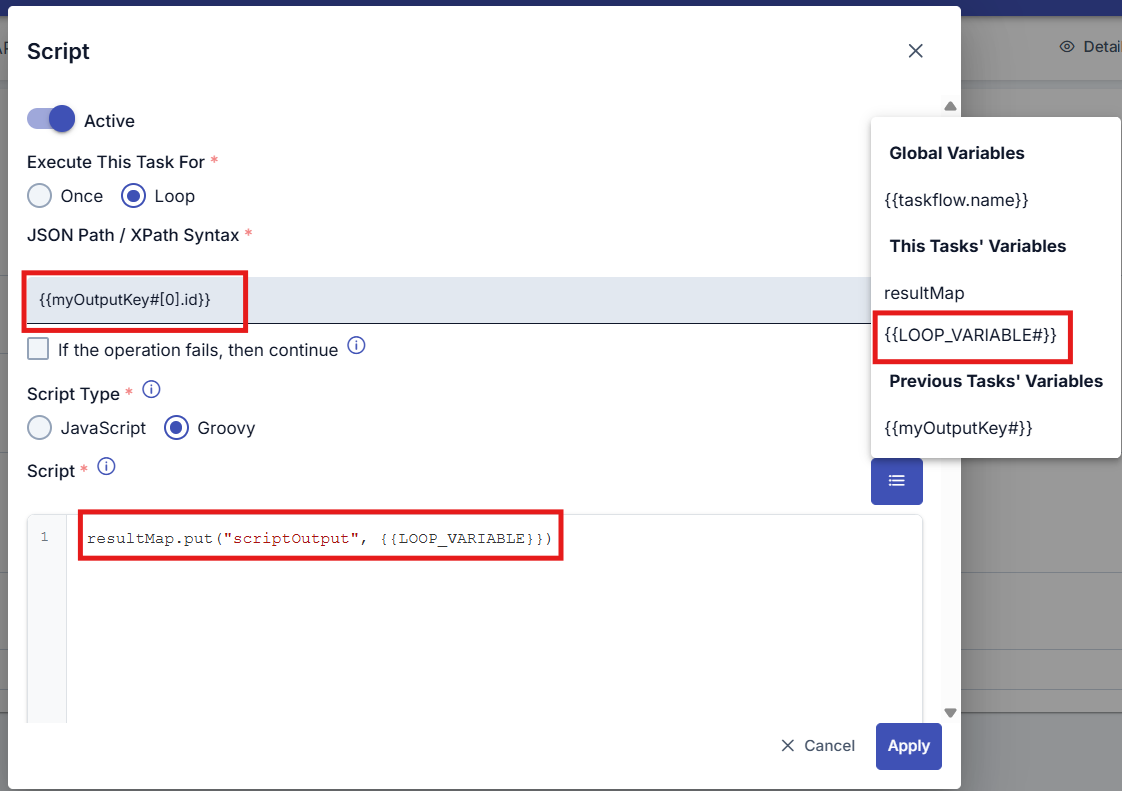
The # sign at the end of variables represents JsonPath/XPath. It corresponds to the $ operator in JsonPath. This is a Syntax specific to Apinizer. You can review the Common Fields in Tasks table below for detailed usage of this Syntax.
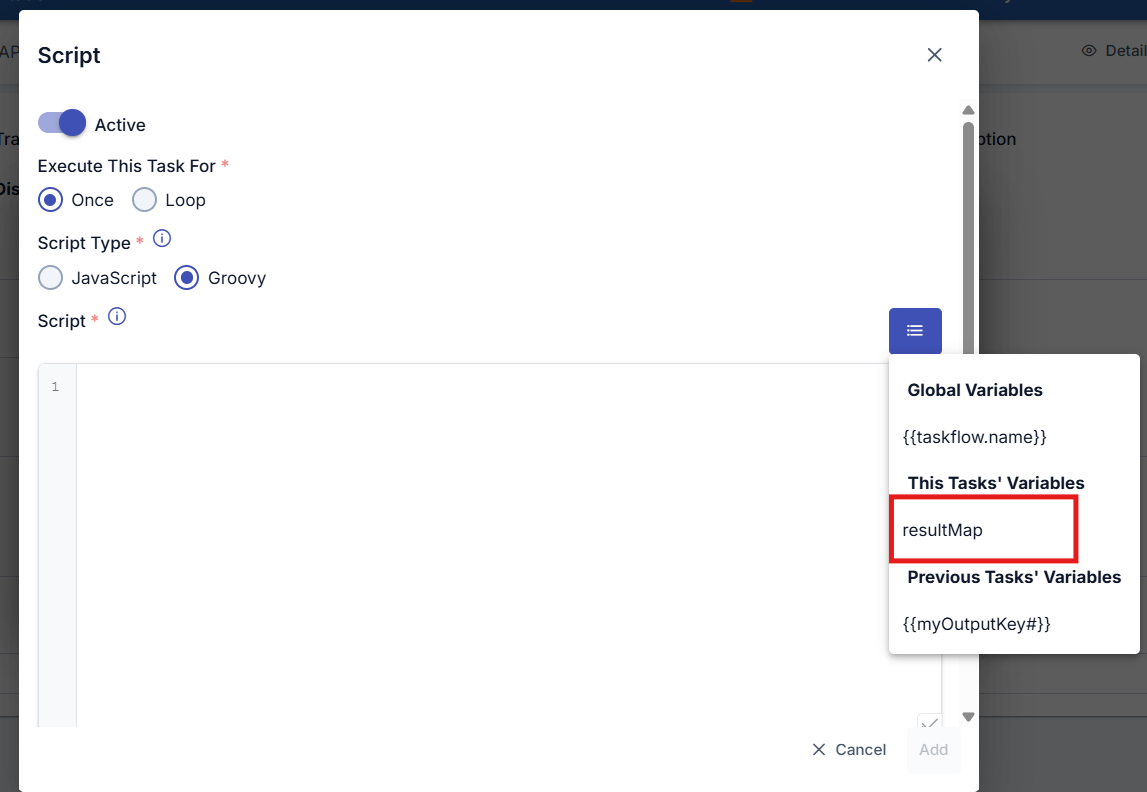
The Script task's ability to transfer data to the task to be defined in the next step is performed through the resultMap object and the variable value in the form interface where the Script task is defined.
After the tasks that the task flow will perform are defined, the task is manually triggered once from the Execute button. To access the executed state and outputs of the task, click the Details button to access the execution log records of the task flow.
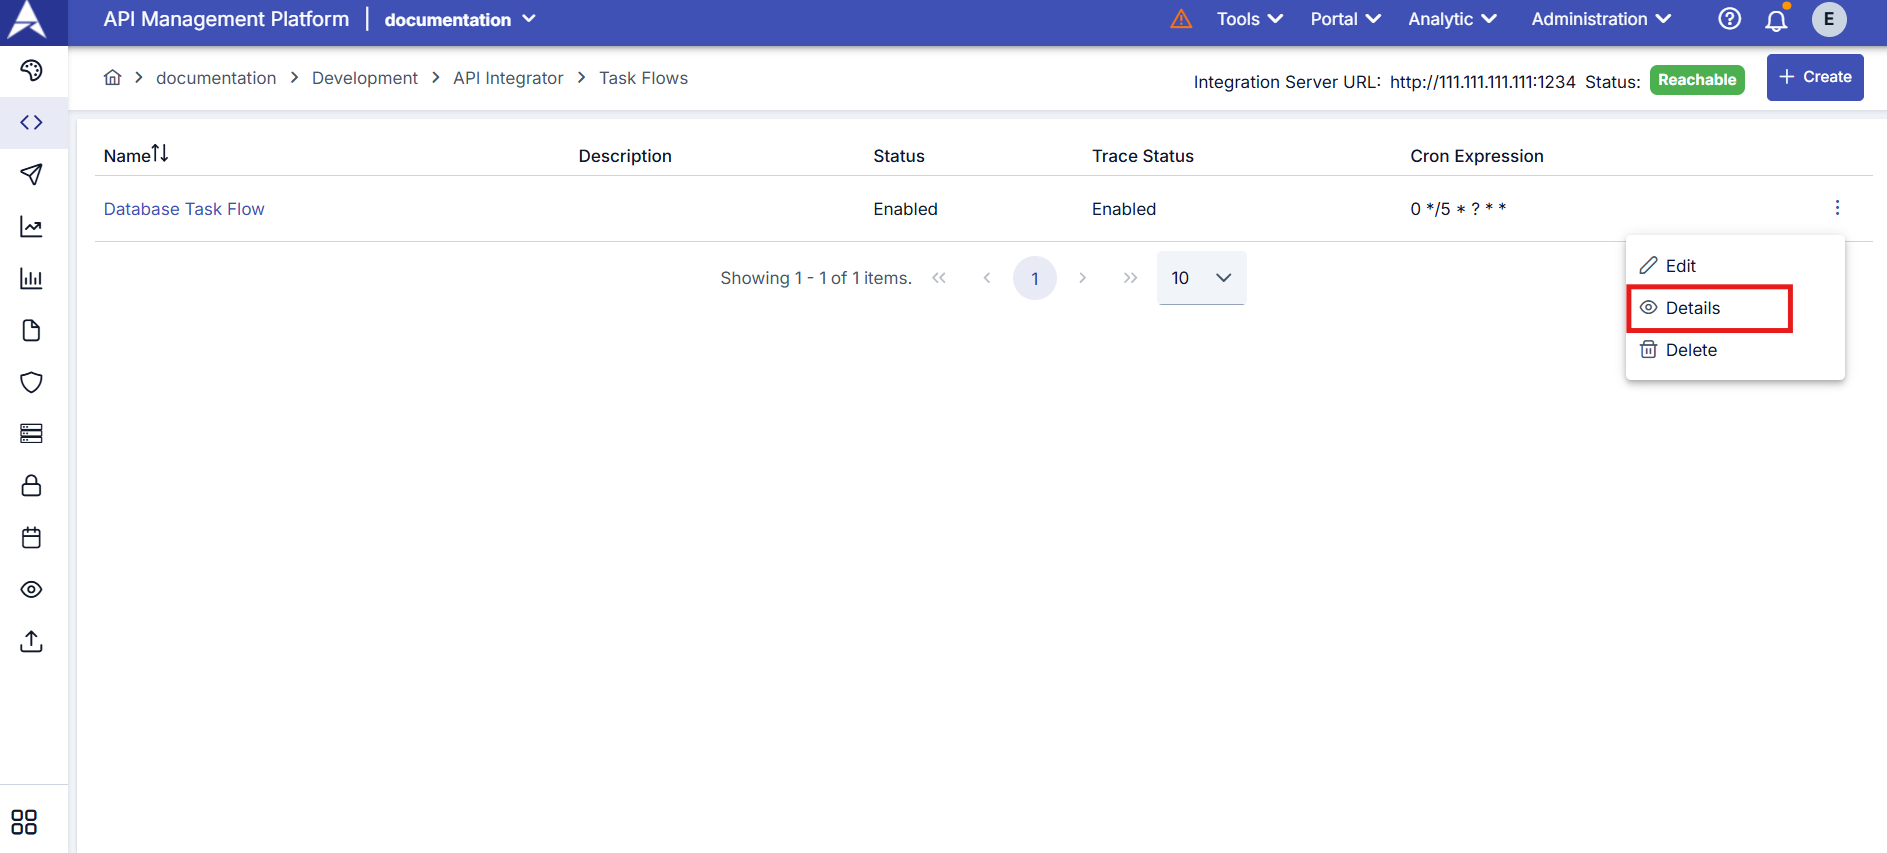
Viewing Task Flow Details
Logs can be viewed by clicking the menu button in the rightmost column of the record whose details are desired to be viewed from the task flow list and selecting Details.
The screen containing the log details of the Task Flow is reached.
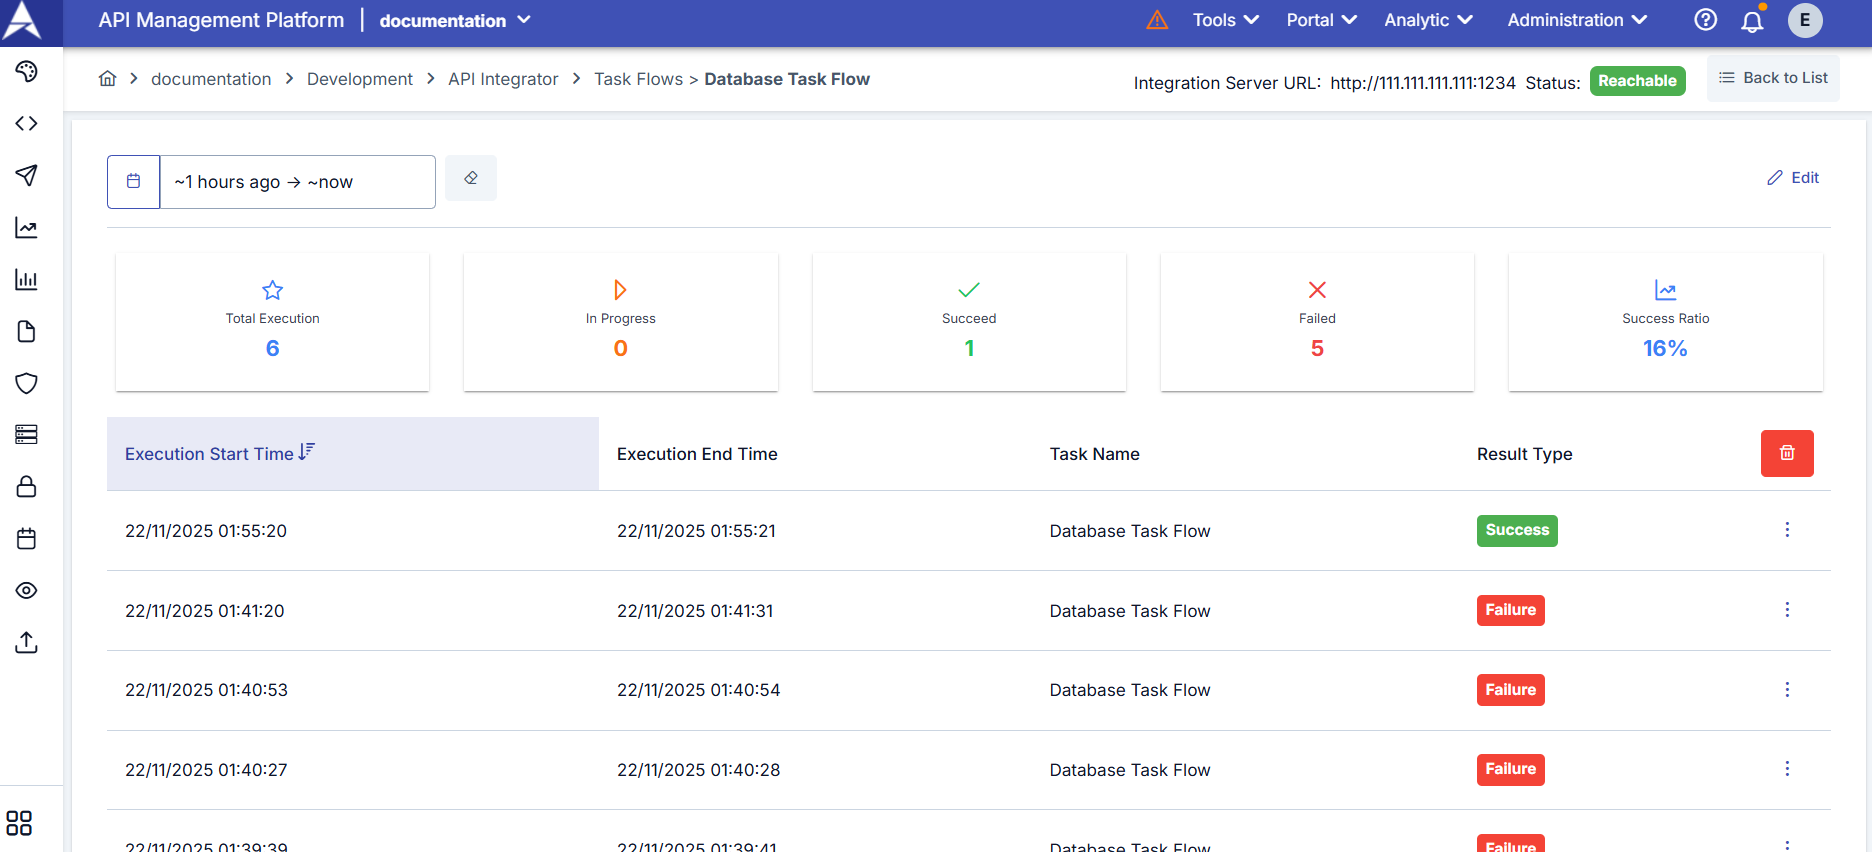
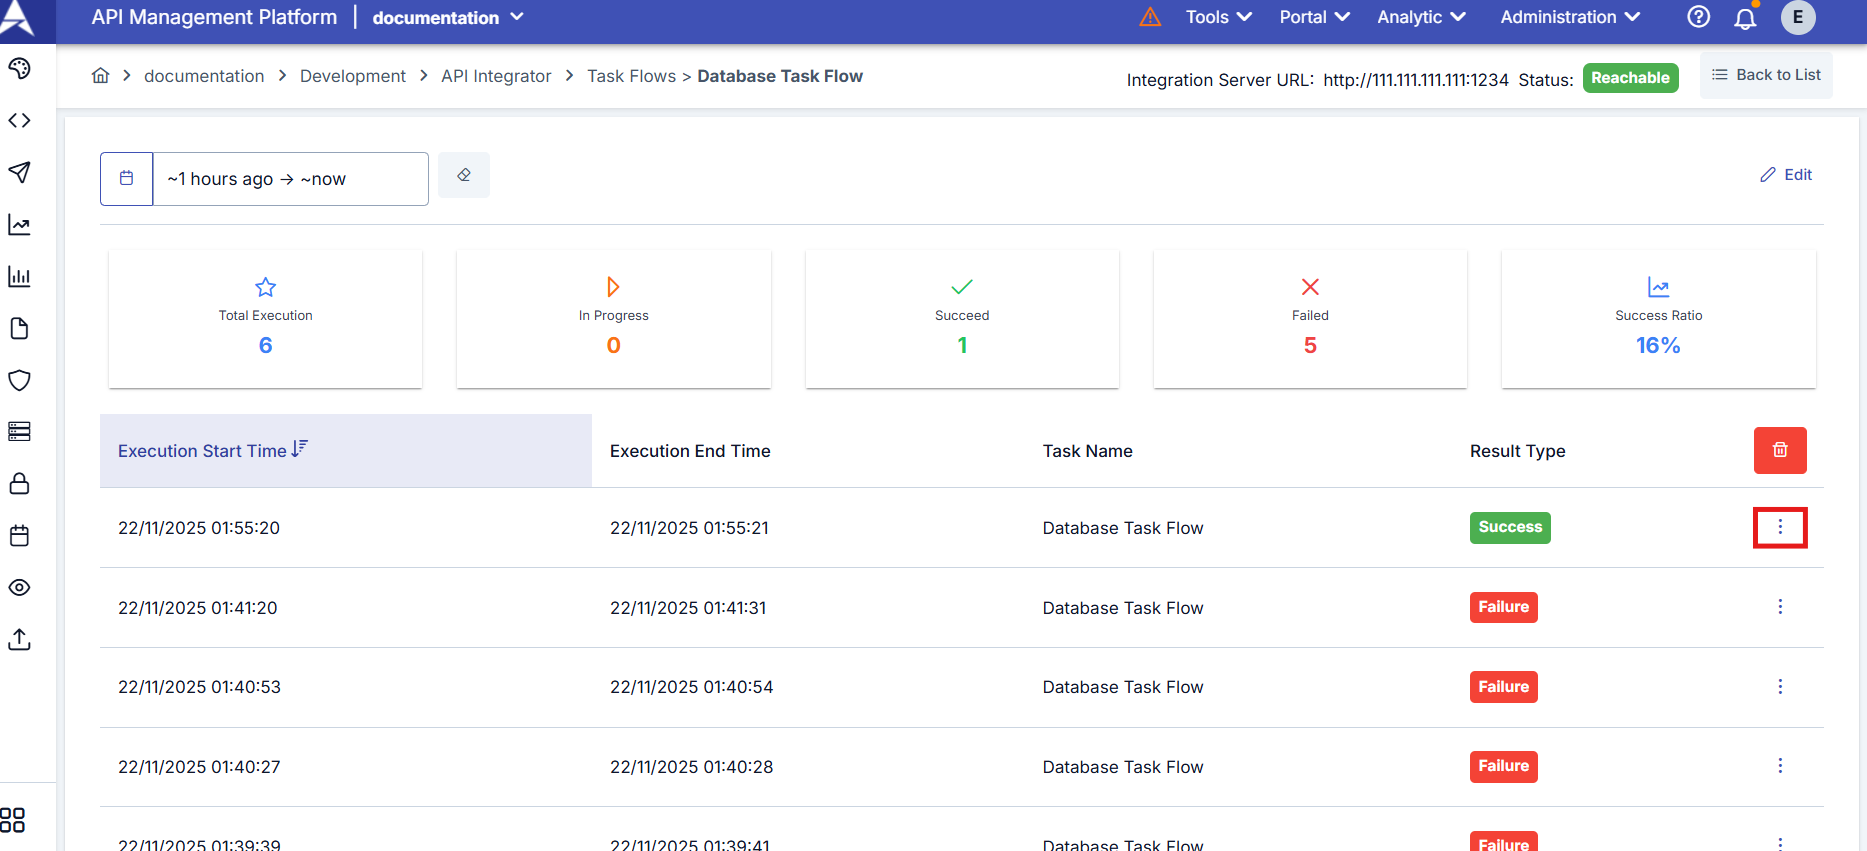
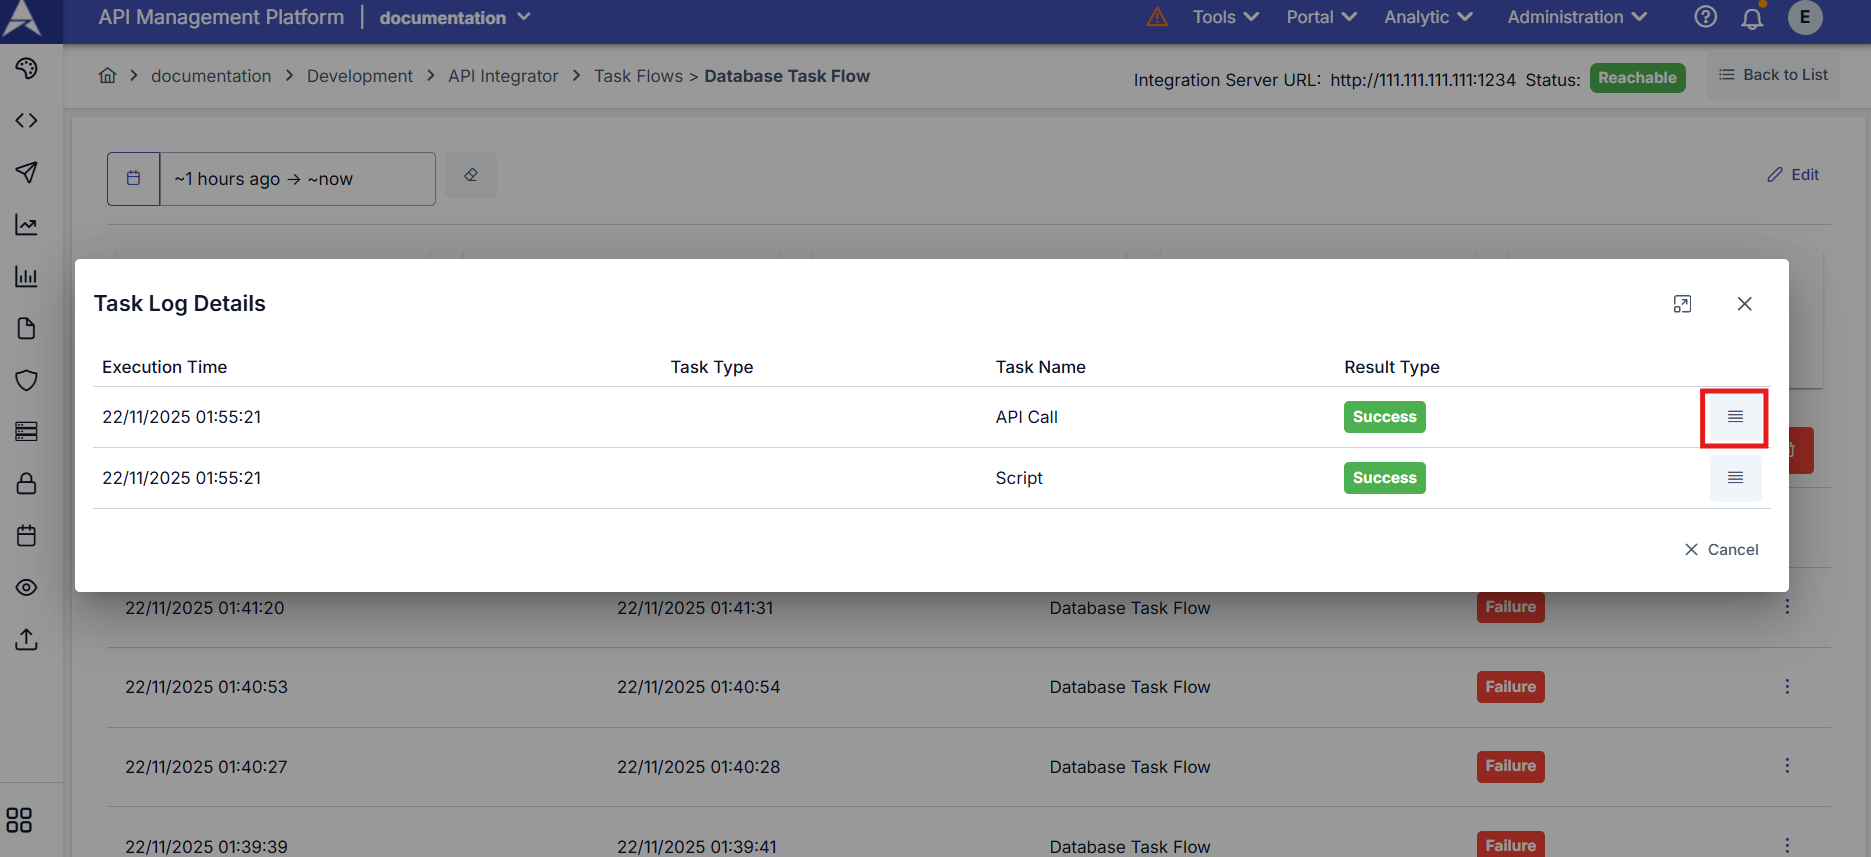
Press the three-dot button next to the relevant execution moment log record to examine the execution details of the task flow.

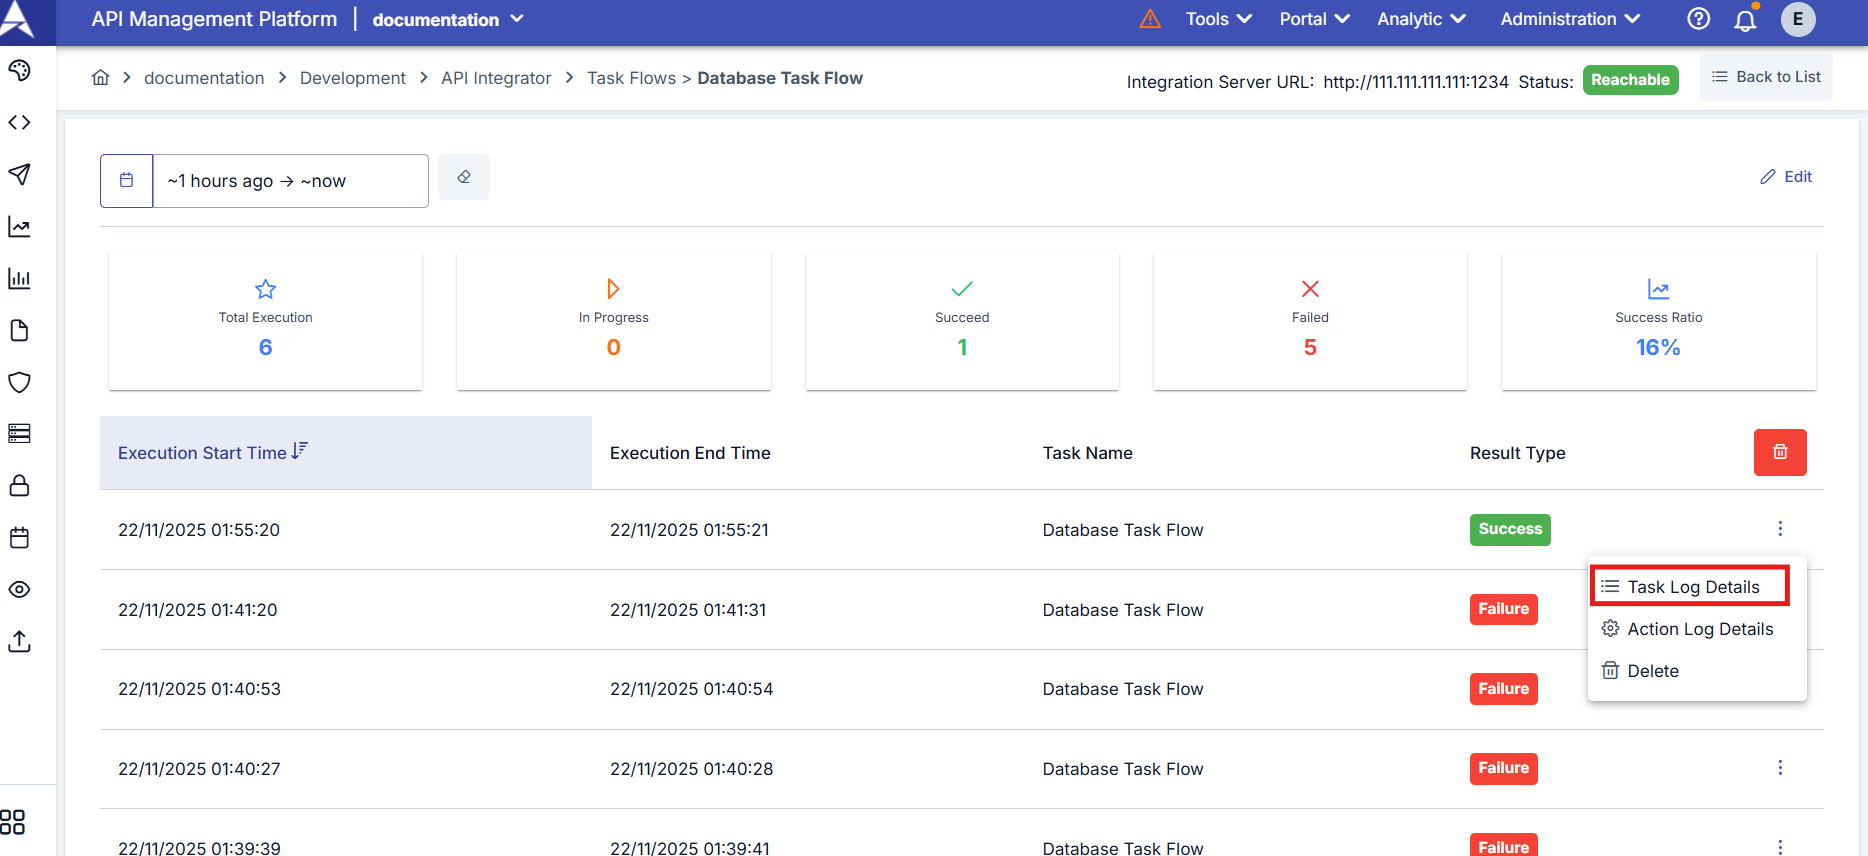
Select Task Log Details to access the detailed execution log and outputs of each task within the task flow.
Execution logs of each task defined within the task flow are displayed through the opened window. Log details and task outputs can be viewed by pressing the three-dot button next to the relevant log record.
Output of API Call task:
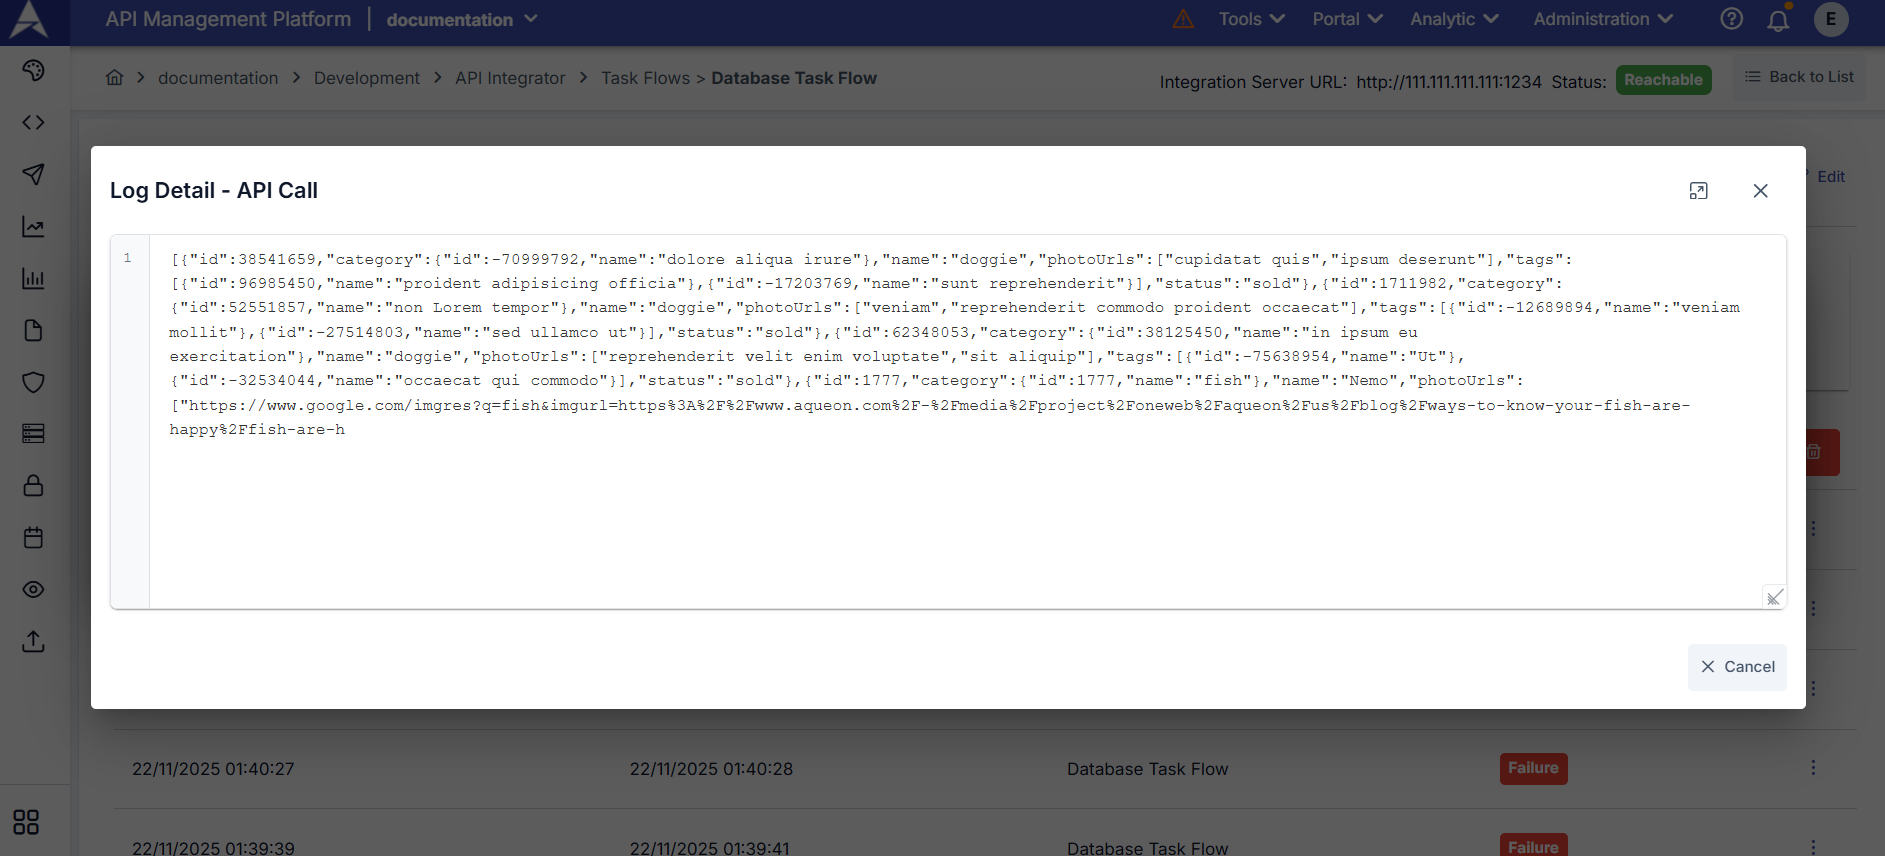
The Trace option in Task Flow Definition Settings must be active to see the output data of tasks. Otherwise, results produced by tasks are not displayed on the log detail screen.
Common Fields in Tasks
Some input and output fields that are the same for each type are found when creating a task. Fields used for configuring common information in tasks are shown in the table below.
Common Field Descriptions
| Field | Description |
|---|---|
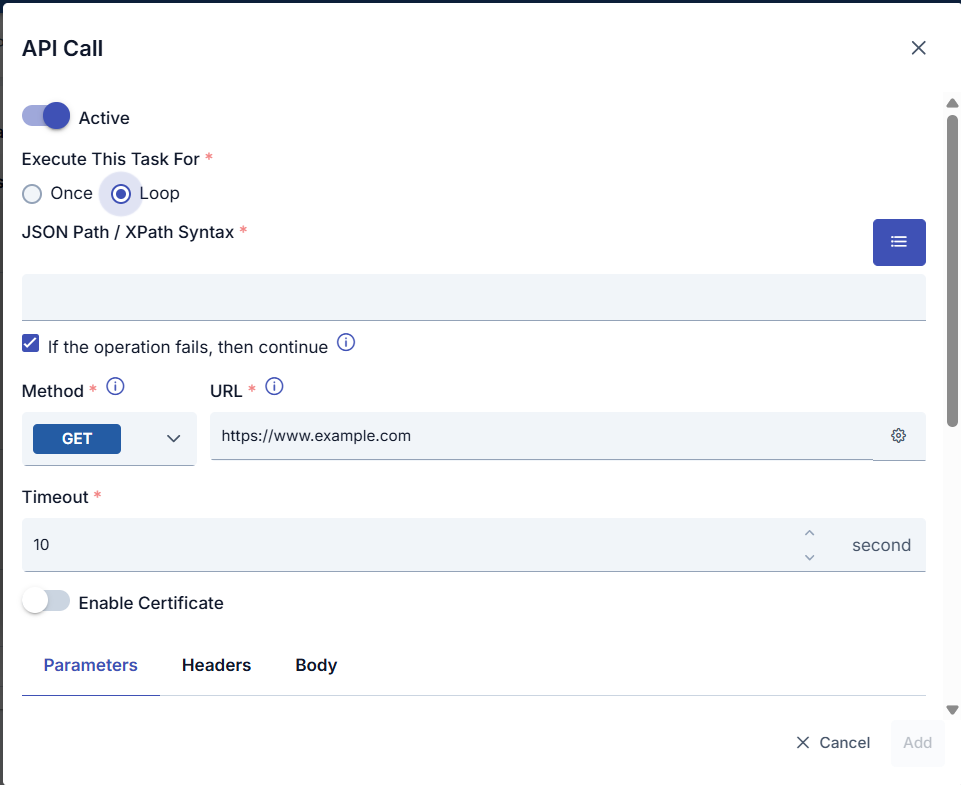
| Execute This Task For | The type of how the result produced from the previous task will be executed within the current task is selected. Once: The current task is executed once. Loop: The current task runs in loop form with the definition to be specified on the result it receives from the previous task. |
| JSON Path/XPath Syntax | This option becomes active if the task execution type is selected as Loop. The result of the value given with JSON Path/XPath is executed as a loop. |
| Continue if operation fails | This option becomes active if the task execution type is selected as Loop. When actions in the loop are executed, if an error occurs, it manages whether the task should continue running or be stopped immediately. |
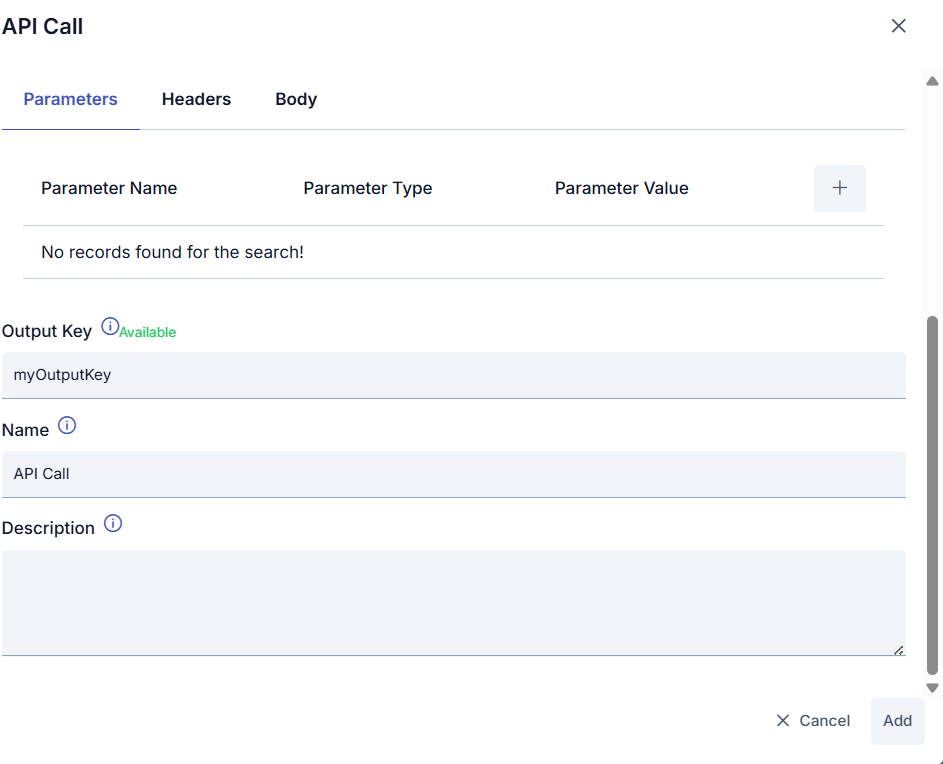
| Output Keys List button | The list of output keys created in previous tasks is viewed. Thus, this output key can be used in task definition inputs. |
| Output Key | The variable name to which the value that will be created when the task is executed will be assigned is entered. Subsequent tasks after this task will use the output key entered in this field if they want to process with this task's output. |
| **Name ** | The name of the task is written. This information is assigned as the value of the {{taskflow.name}} variable. |
| **Description ** | The description of the task is written. |
- No space should be left in the output key.
- Output key names in the defined flow must be unique.
Apinizer Syntax
The critical point in this field is that the value is written in accordance with Apinizer's syntax. There are 2 elements to pay attention to in this rule.
- Syntax 1: Querying Data
- Syntax 2: Using Data in Loop
Syntax rules:
- Must open and close with 2 curly braces
- In the first part of the syntax, the output key name of the previous task is given. A
#sign is placed at the end - In the second part of the syntax, the value to be retrieved from within the output value is written in the query language (JSONPath, XPath) belonging to the data type
Formula:
{{previous-task-output-name#<this-part-is-written-in-either-JSONPath-or-XPath-format>}}
Example:
A result named centralRates is produced in one of the previous tasks. The values of the result contain exchange rate information belonging to the Central Bank. An XPath query /Date/Currency has been written to get the elements in the array contained in this result one by one.
{{centralRates#/Date/Currency}}
Elements retrieved from data with syntax can be used within the task (when sending mail, when working with database, when writing script, etc.). To use, it must be referenced with the variable key named LOOP_VARIABLE.
Formula:
{{LOOP_VARIABLE#<this-part-is-written-in-either-JSONPath-or-XPath-format>}}
Example:
{{LOOP_VARIABLE#/Currency/Name/text()}}
Triggering Task Flow
Task flow can be triggered in three different ways:
- Manual Triggering
- Automatic Triggering
- Triggering via Endpoint
The task flow is triggered every time the marked Execute button in the top right corner is clicked.
The task flow is automatically triggered by Apinizer Integrator at the specified frequency based on the task flow's trigger frequency (Trigger Every) value.
If the Endpoint option is activated, the task flow is triggered on every request made via the specially created access URL for the task flow.
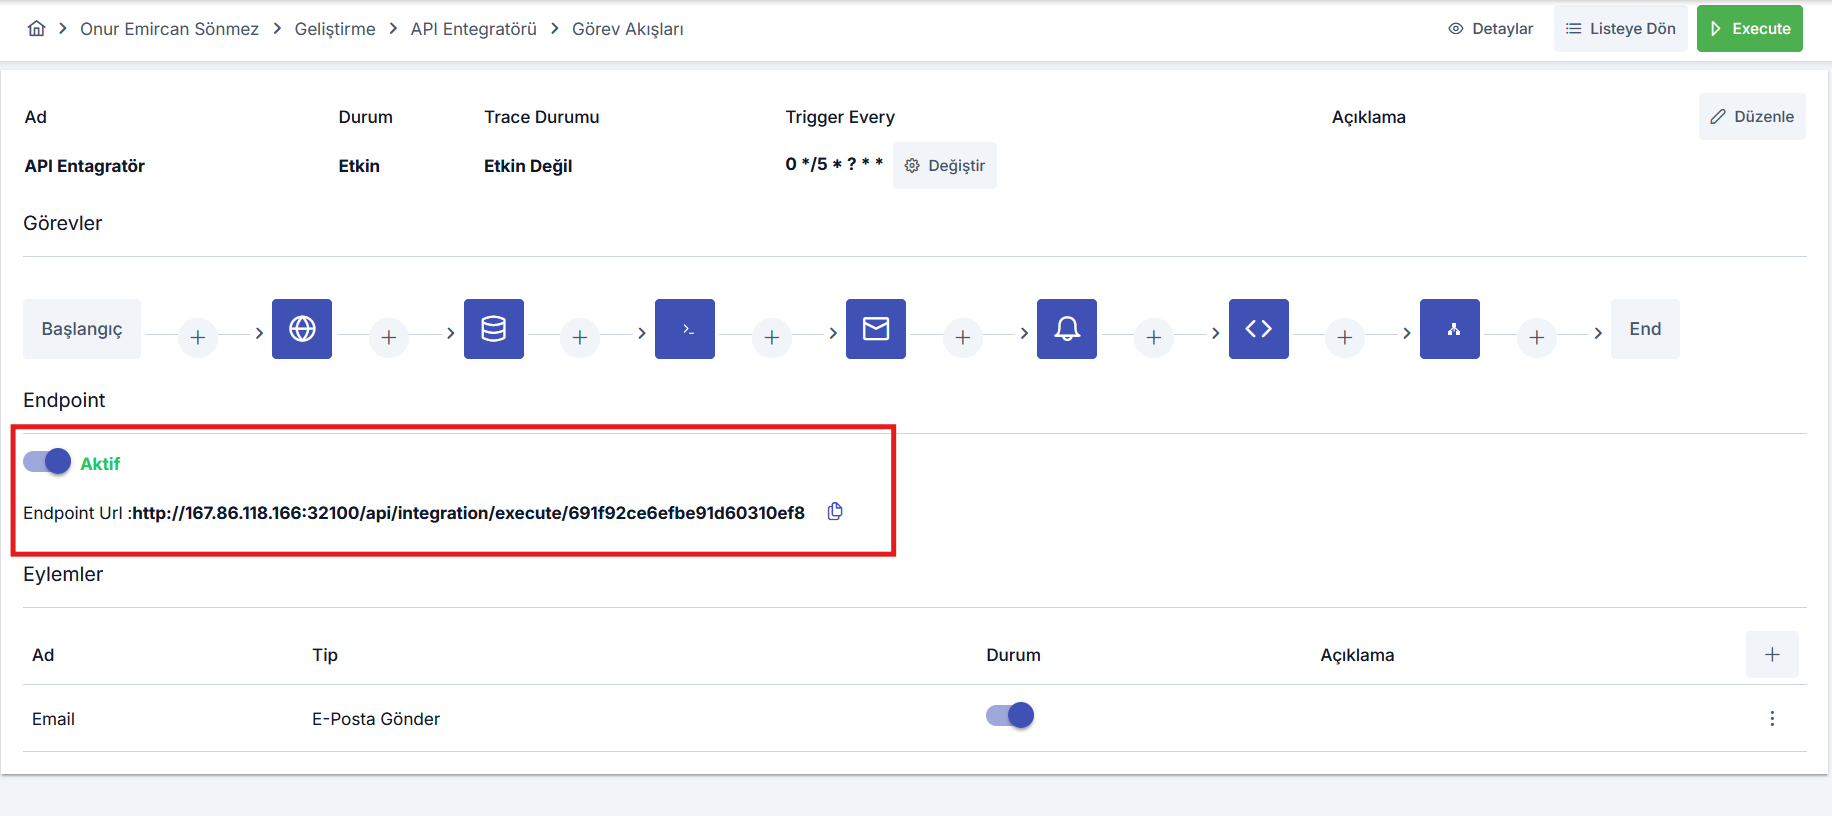
To trigger the task flow via its access URL, it is necessary to send a request by adding the user token to the Authorization header.
To create a token: Token can be created with the logged-in user from Profile menu from top right > My Profile.
For the task flow to be triggerable via Endpoint, the Endpoint option must be active and your integrator server status must be reachable.
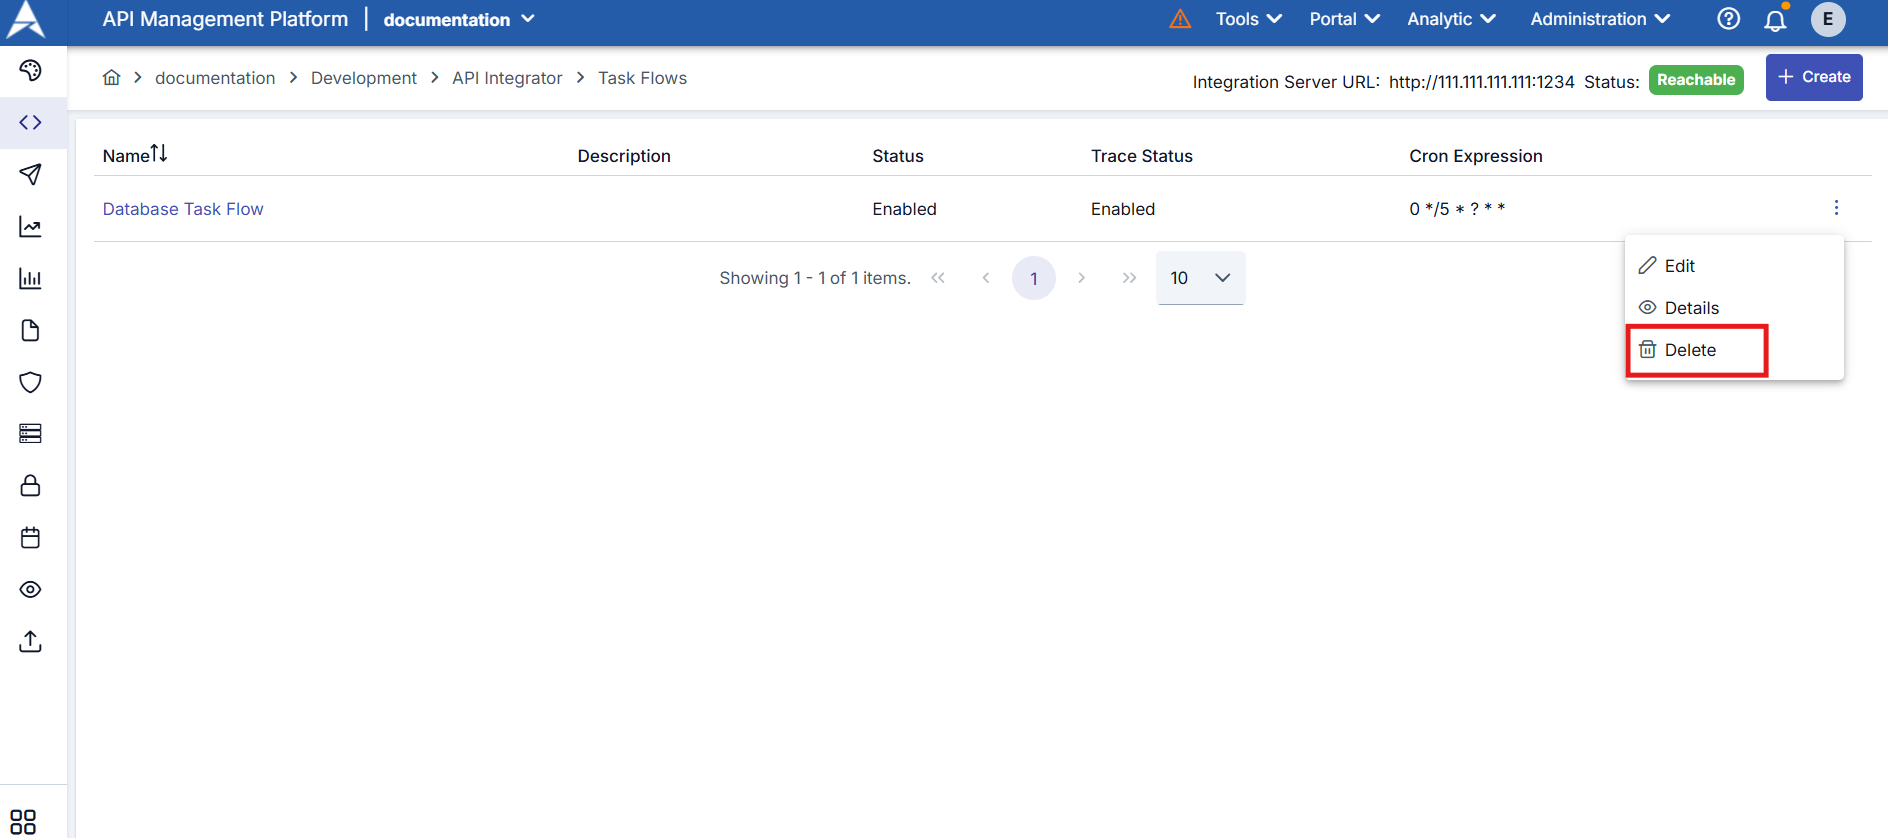
Deleting Task Flow
The record is deleted by clicking the menu button in the rightmost column of the record desired to be deleted in the task flow list and selecting Delete.
Endpoint Configuration
In addition to being triggered with a scheduler or manually with the execute button, task flows can also be triggered via HTTP requests through the special and unique endpoint created for the task flow at the moment the task flow is created.
The endpoint option must be activated from the task flow editing interface.
After the endpoint option is activated, the task flow can be triggered by sending a request to the displayed URL.
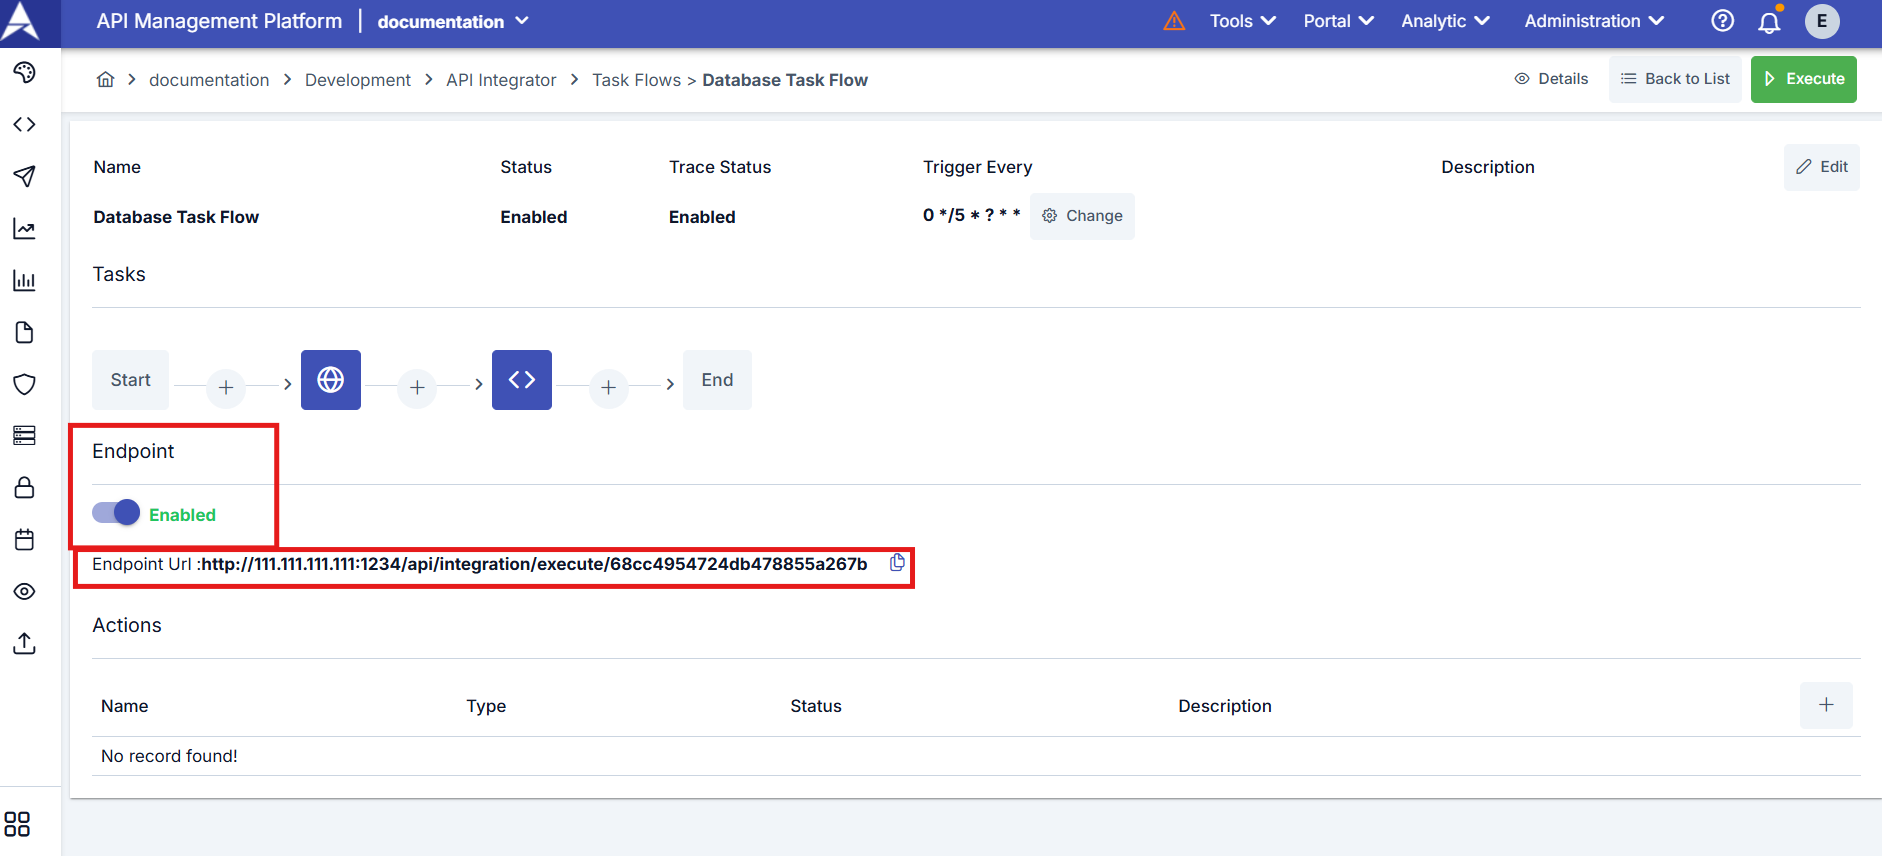
To trigger the task flow via its access URL, it is necessary to send a request by adding the user token to the Authorization header.
To create a token: Token can be created with the logged-in user from Profile menu from top right > My Profile.
Actions Configuration
What is an Action?
Action refers to operations to be performed when an error occurs during the execution of a task flow.
You can define tasks desired to be performed in case of a possible error by pressing the + button from the Actions section.
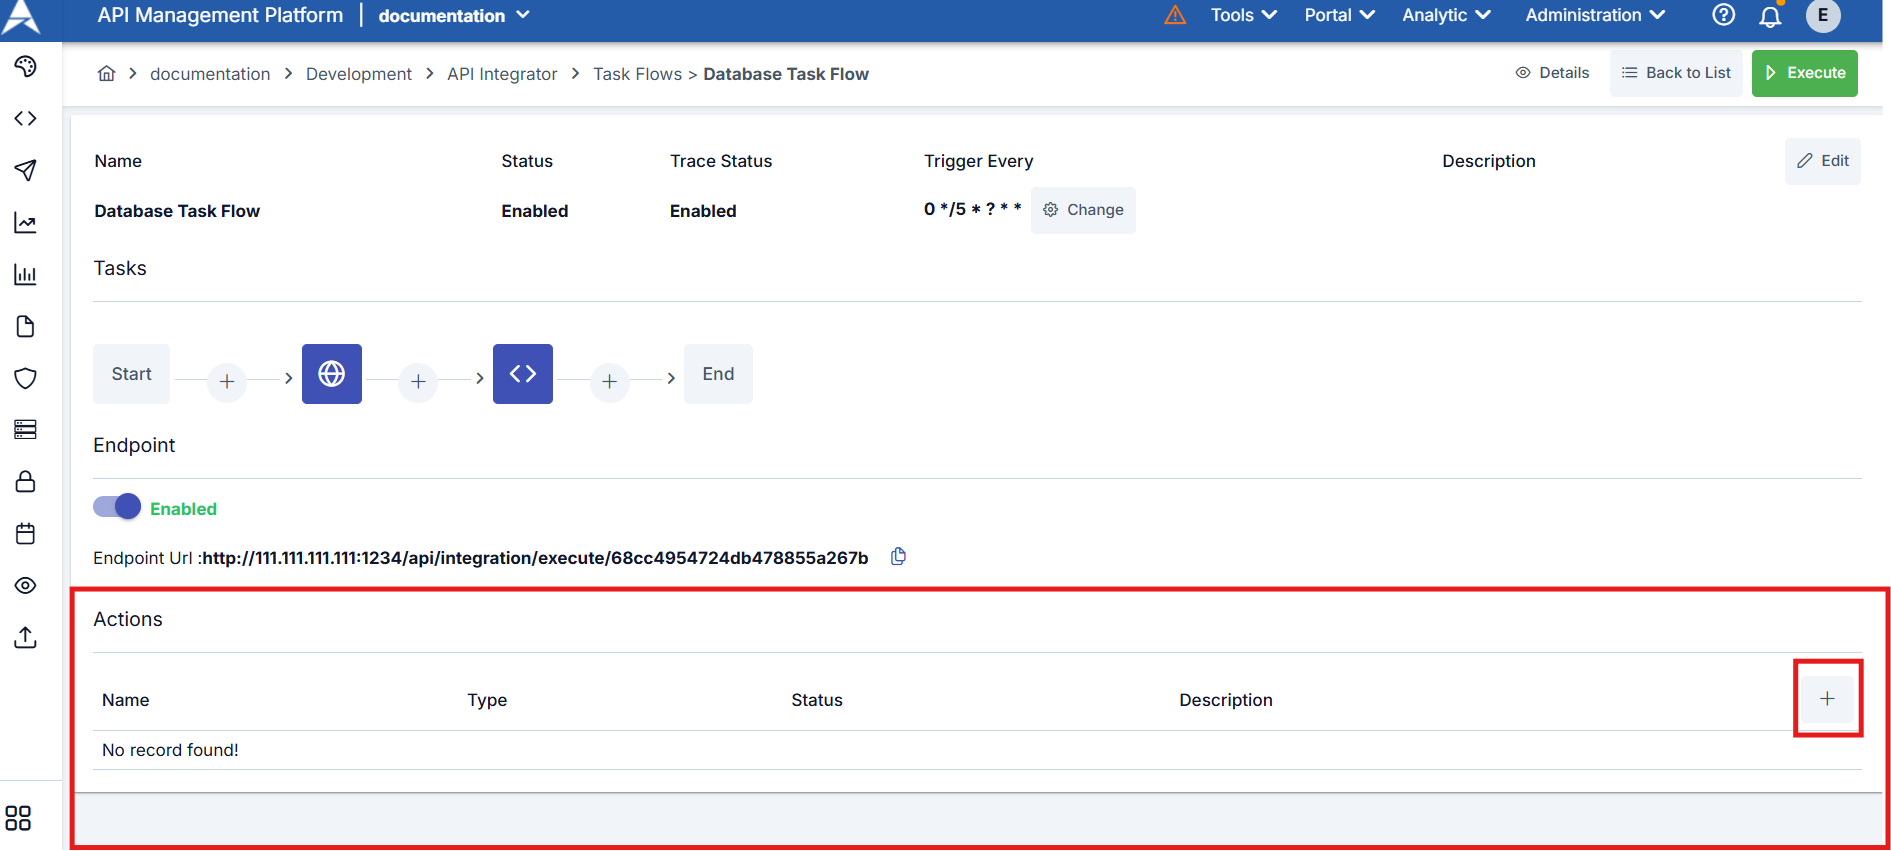
You can be notified of error situations or perform special operations for error situations by defining a task through the opened window when a possible error is encountered in the task flow.
For example, you can define an action to send an email or make an API call when the task flow fails.