API Developer Operations on API Portal
You can view, test, and start using API Products published through the API Portal according to the settings made. For this, an API Portal Developer account is needed.
This document explains how an API Developer account is opened and how a published API Product
- How is it viewed?
- How is it tested?
- How is it started to be used?
topics will be covered.
To create and start using an API Developer account, you need to go to the relevant API Portal address via browser. In this section, explanations and examples will be made through Apinizer API Portal.
Creating API Developer Account
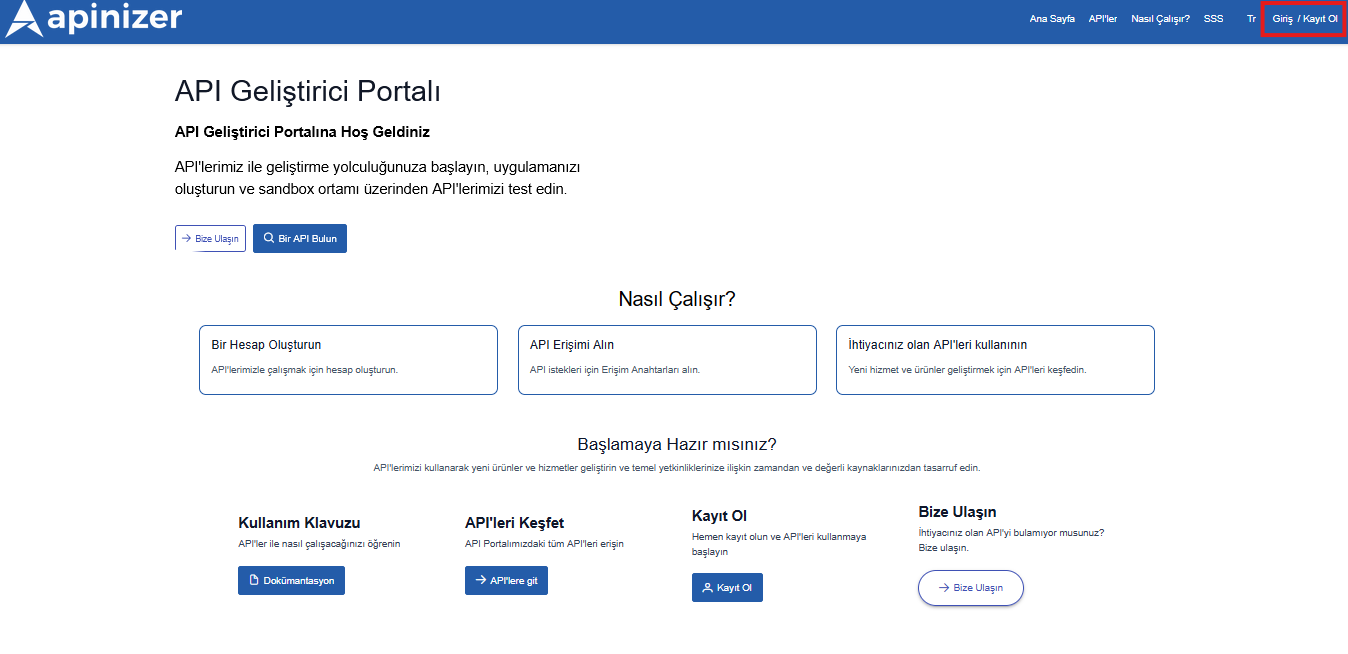
To create a new API Developer account, you can click the sign up button in the top right, or if you have an account, you can log in by clicking the login button.
After filling in the relevant fields, you can complete your registration by pressing the sign up button.

If the automatic user registration request approval option is not activated by the API Portal owner in the API Portal configuration, the API Portal owner must approve the registration request to be able to log in.
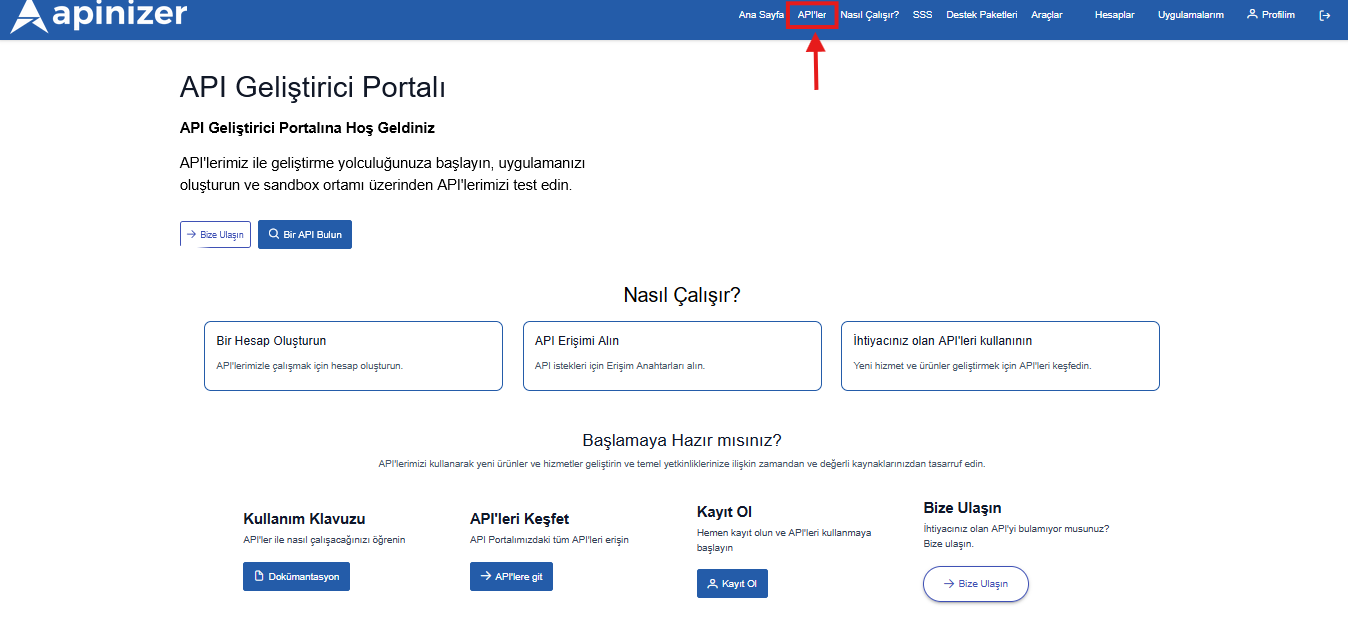
After logging in, you can view published APIs from the "APIs" page on the navbar on the API Portal Homepage.
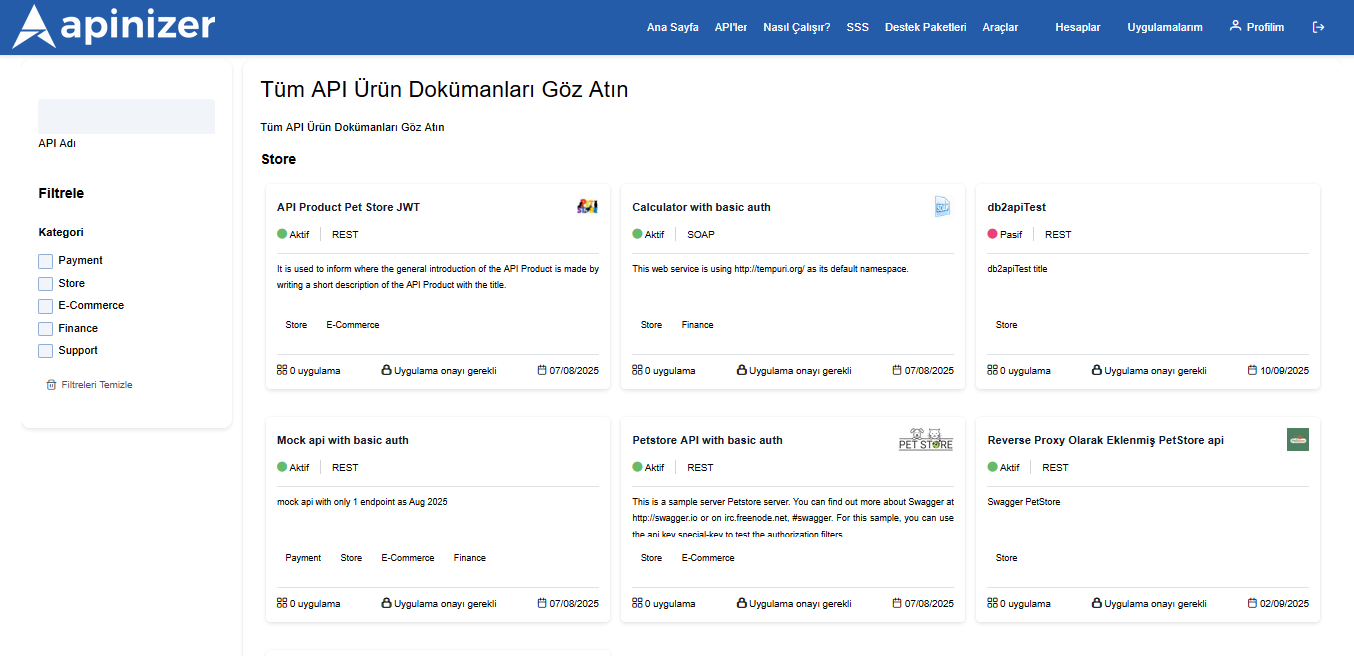
From this page, you can filter APIs by their names and categories to access the APIs you want more easily, go to the details of the relevant API to access its details, test if test requests are allowed in the API Product definition, and learn about their usage and accepted requests.
When you go to the detail page of the API you want to review, the overview page will welcome you. If we examine the fields on this page;
My Applications, applications registered to the API, are the defined clients of the API. They are an important building block in terms of defining and authorizing the client by the API.
Documents, is the area where the API's documents and data related to the API, and documents that are desired to be shared are listed. You can download and review uploaded documents.
Contact information, contains the contact information of the organization, unit, person or persons responsible for the relevant API.
Plan, shows the plan option you registered to the application.
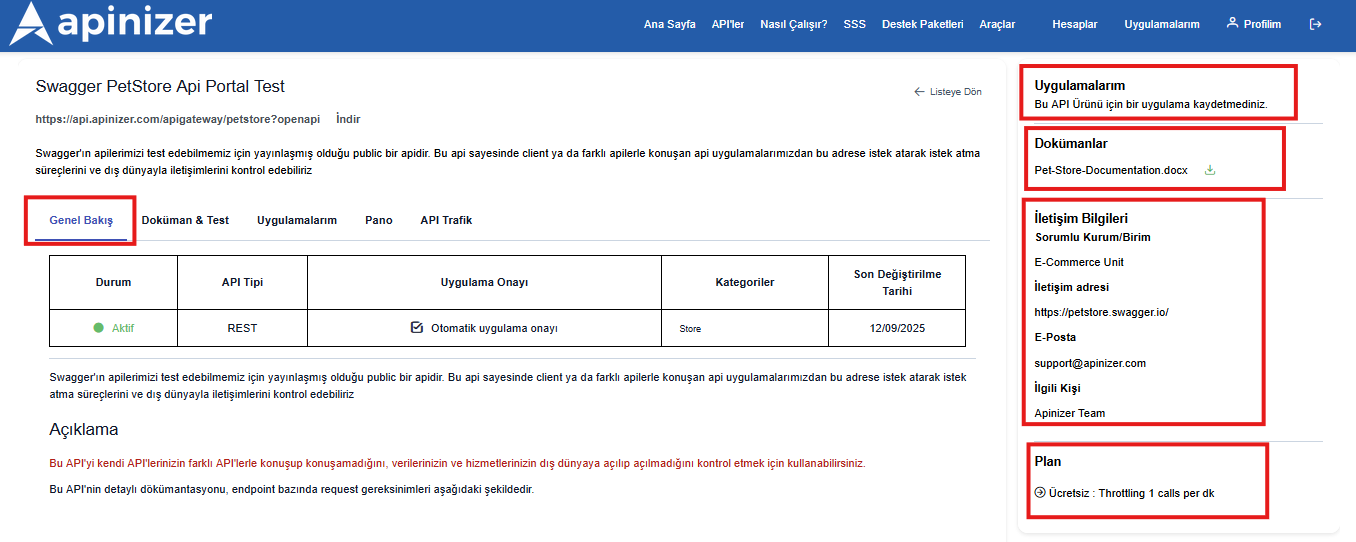
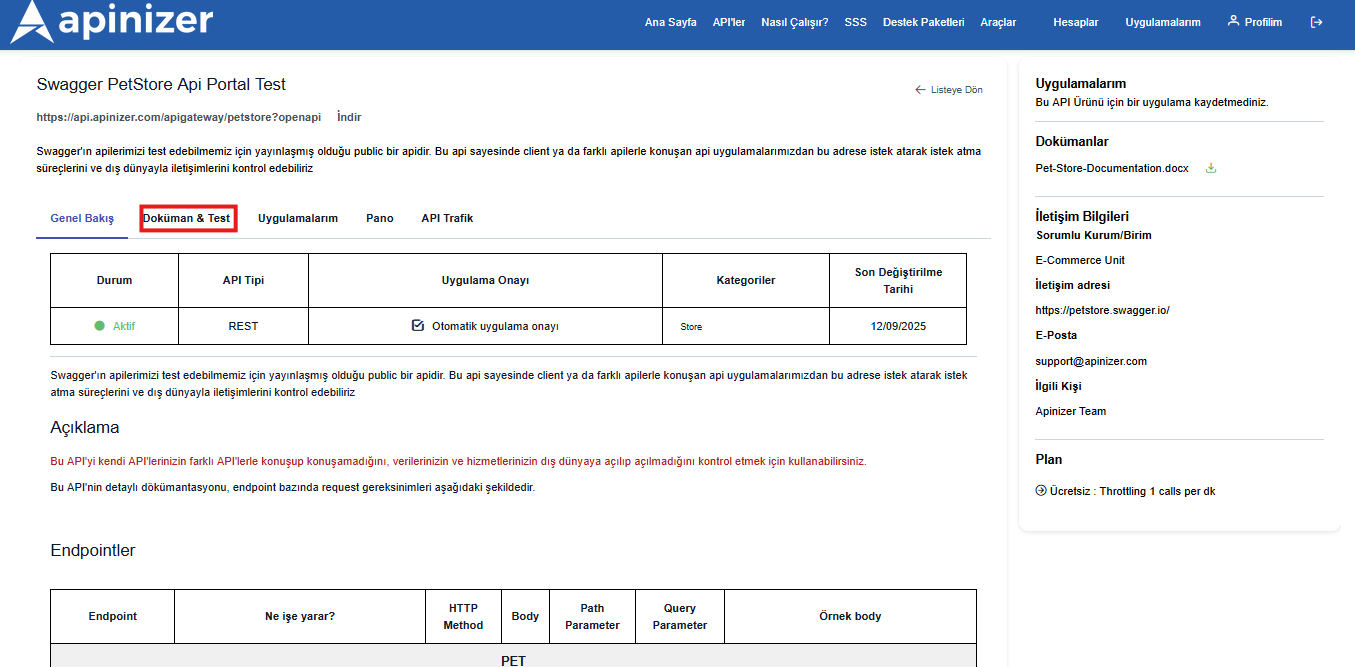
From the Overview page, you can get an idea about the relevant API, learn about the purposes of using the API, and learn the request structure of endpoints on the documentation & test page.
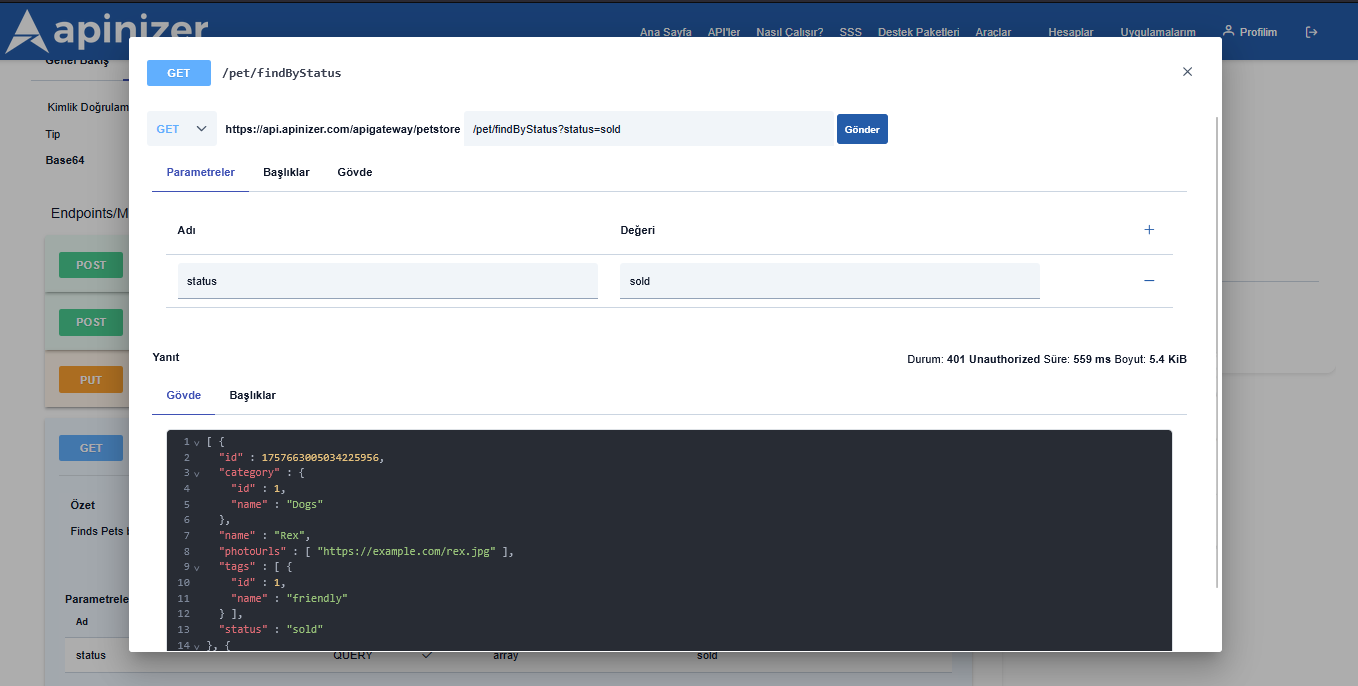
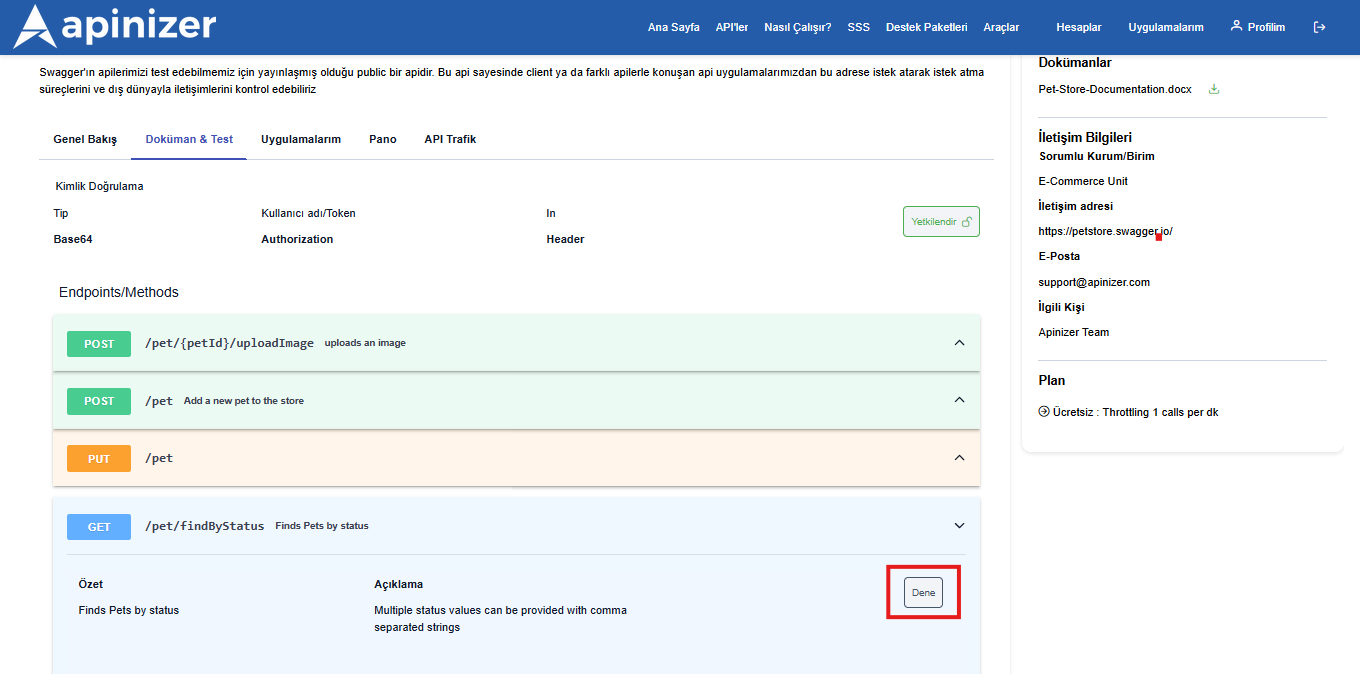
If the relevant API has Open API documentation or a Spec file is defined on the Apinizer side, you can see its methods/endpoints in the Documentation & Test tab, and if the API Product has test permission, you can test the relevant endpoint by pressing the try button.
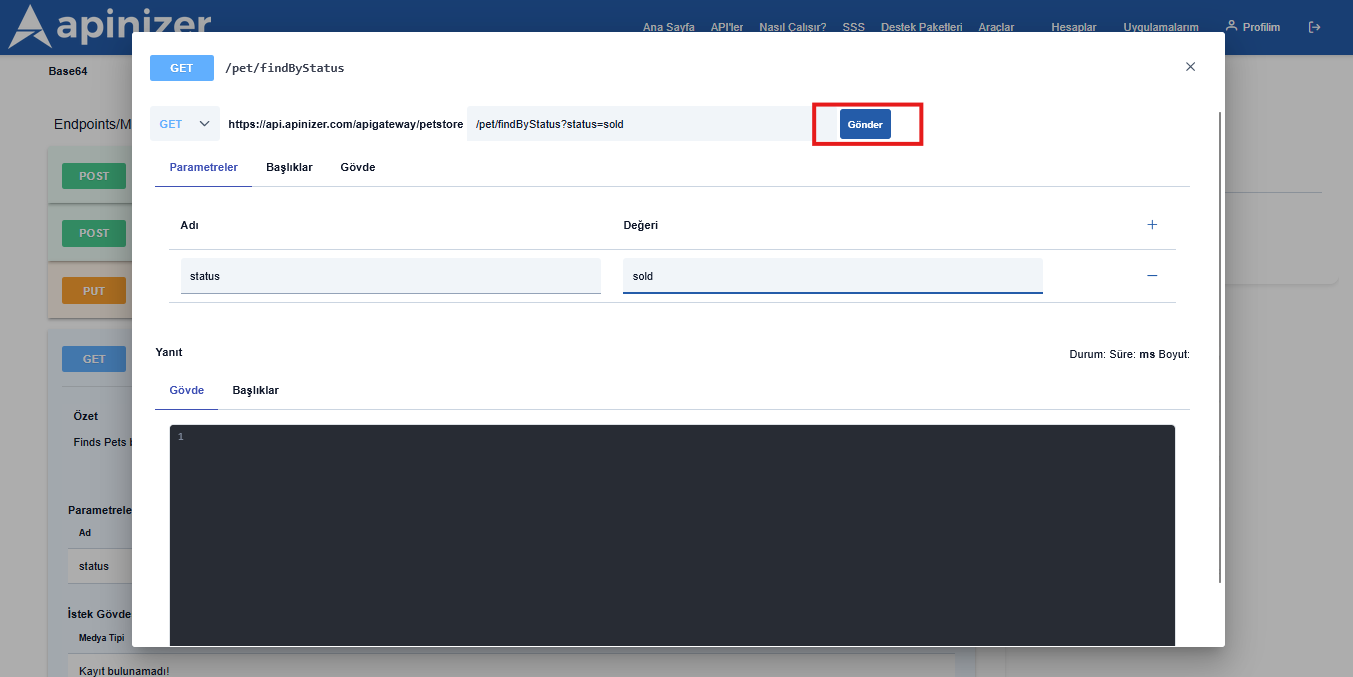
After pressing the Try button, you can send your request to the API by entering the necessary parameters and body on the opened page and pressing the send button.
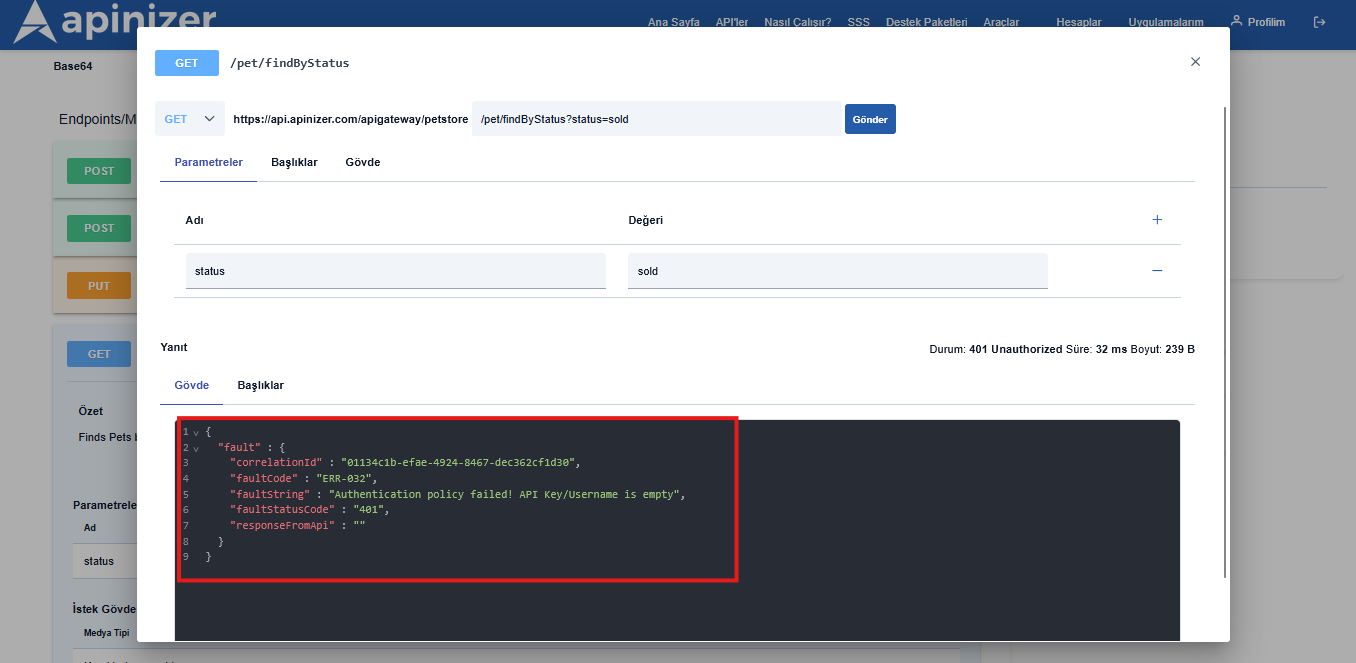
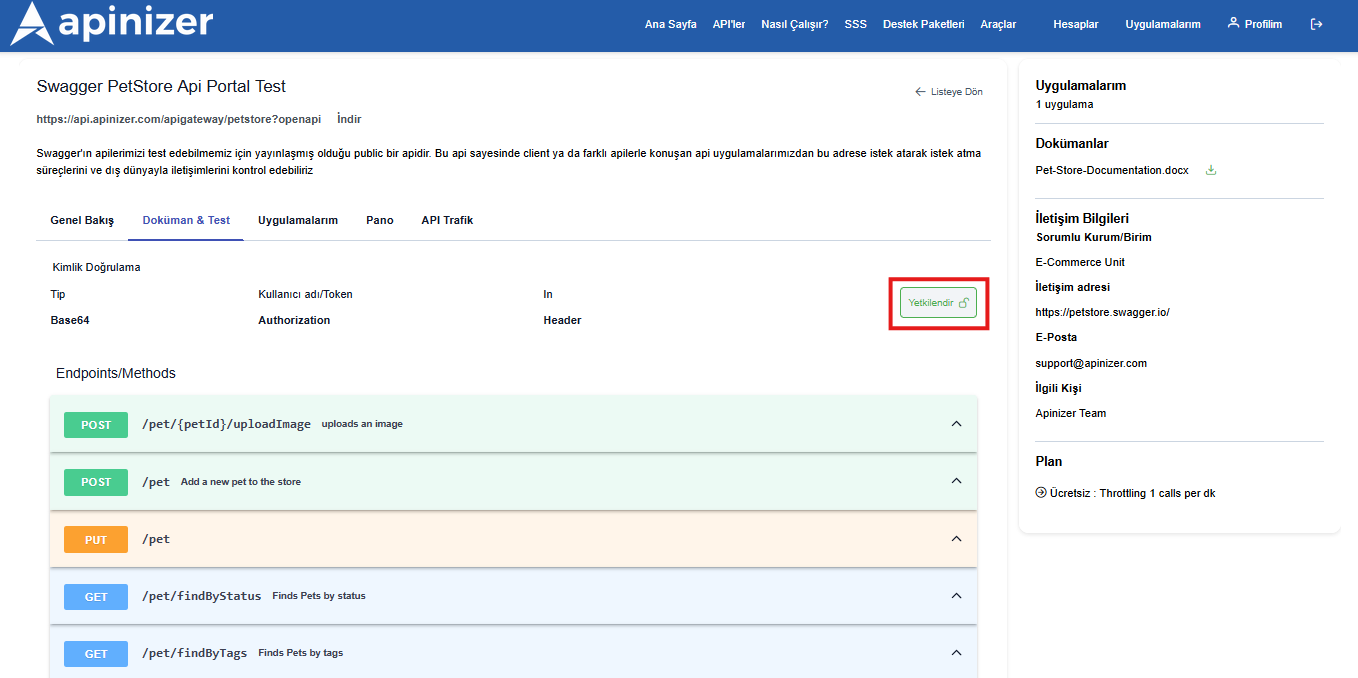
If you are making a request to an API protected by a security policy, you must first create an application, register the application to the API for API usage and testing, and authorize the application in the testing phase to test the API Endpoints. Otherwise, we will encounter the following error.
Creating Application and Registering Application to API
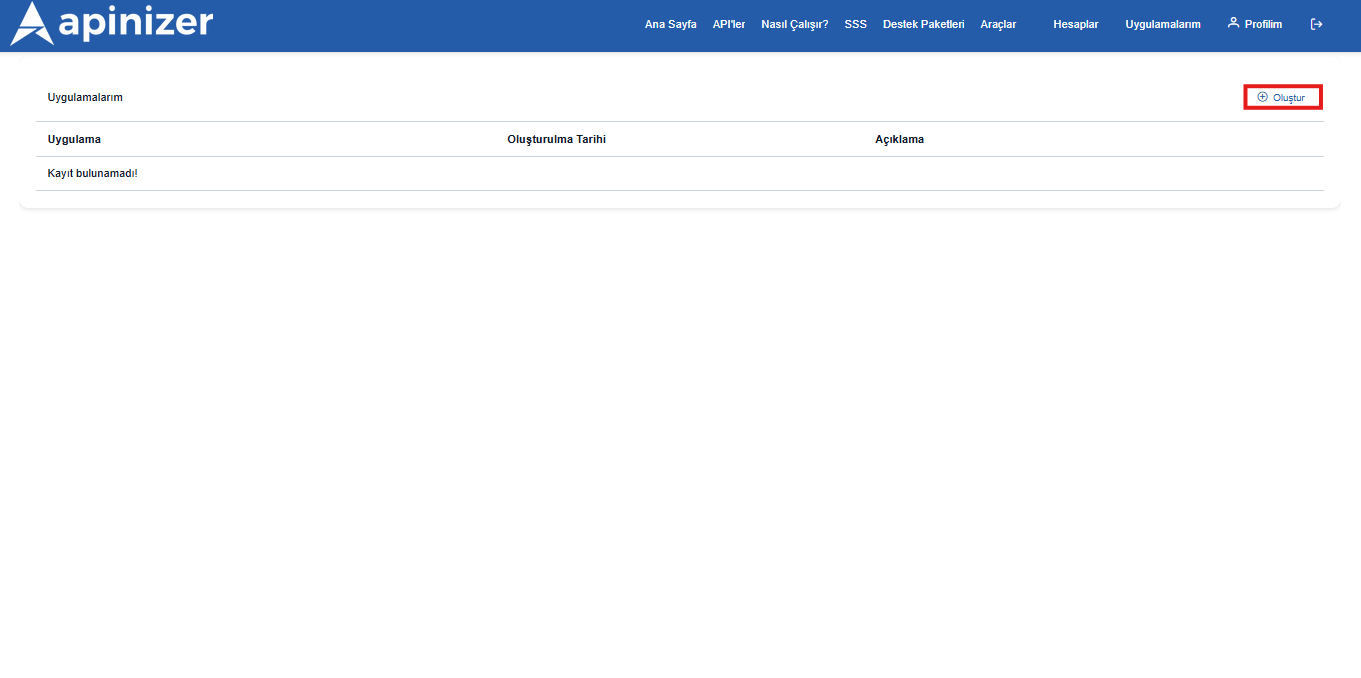
To create an application, we need to go to the application creation page by clicking the My Applications menu in the top right corner. From this page, you can view, edit, delete your registered applications, or add a new one.

After going to the My Applications page, a new application registration can be created by triggering the create button in the top right corner in the opened popup.
After pressing the save button here, the application registration will be made.
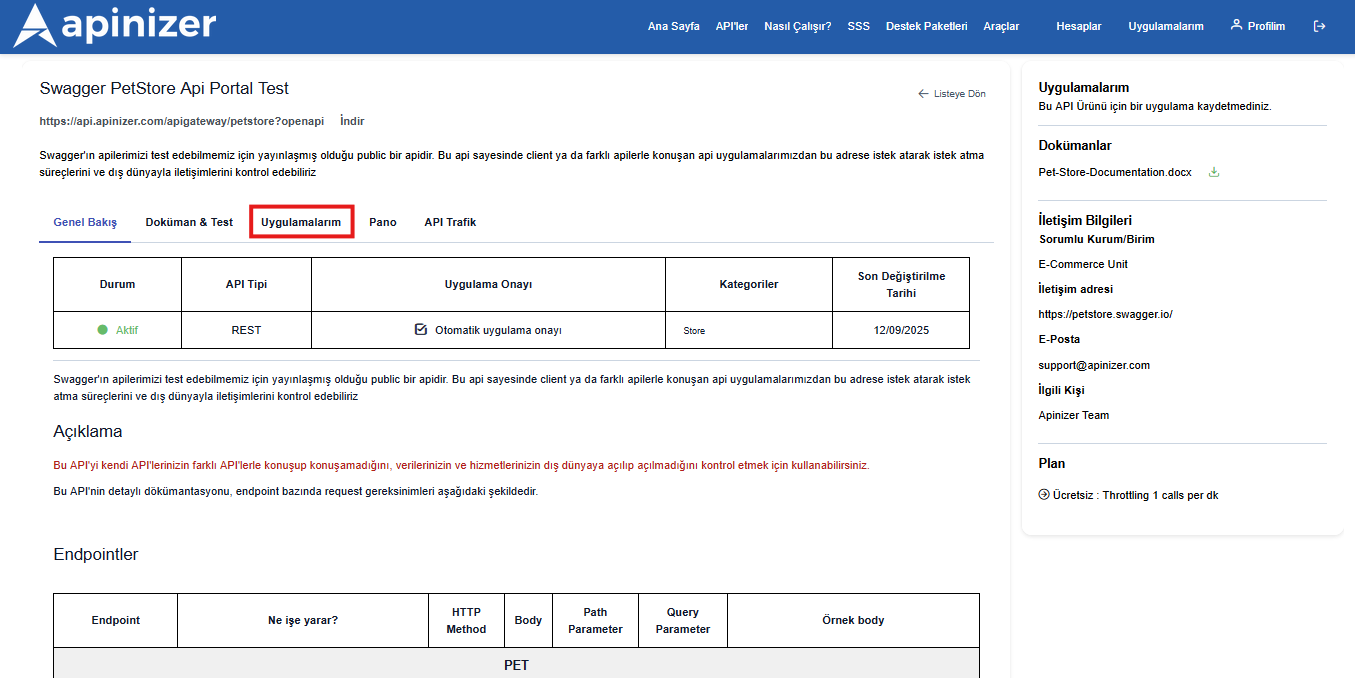
After creating the application, it is necessary to make a registration application from the APIs where this application is desired to be used. For this, you need to go to the details of the API Product you want to test and open the My Applications tab within the detail page.
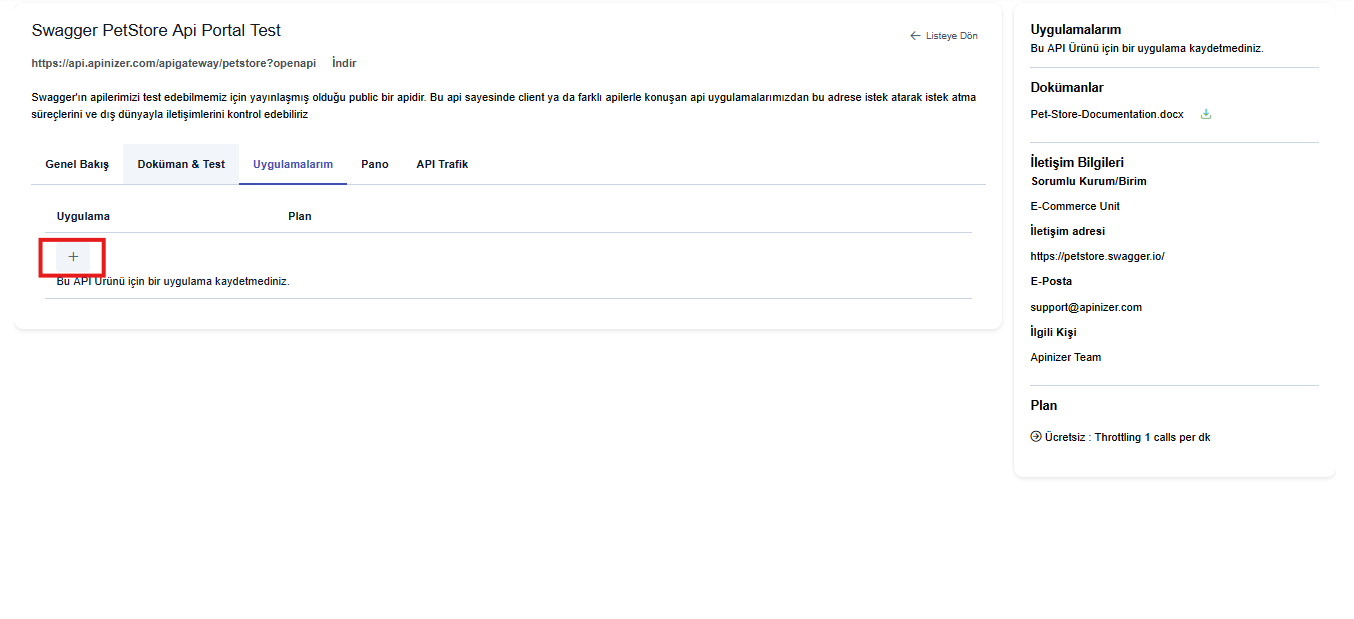
To register a new application to an API Product, you can send an addition request by selecting your application from one of the relevant API's plans by pressing the "+" button under the My Applications page.
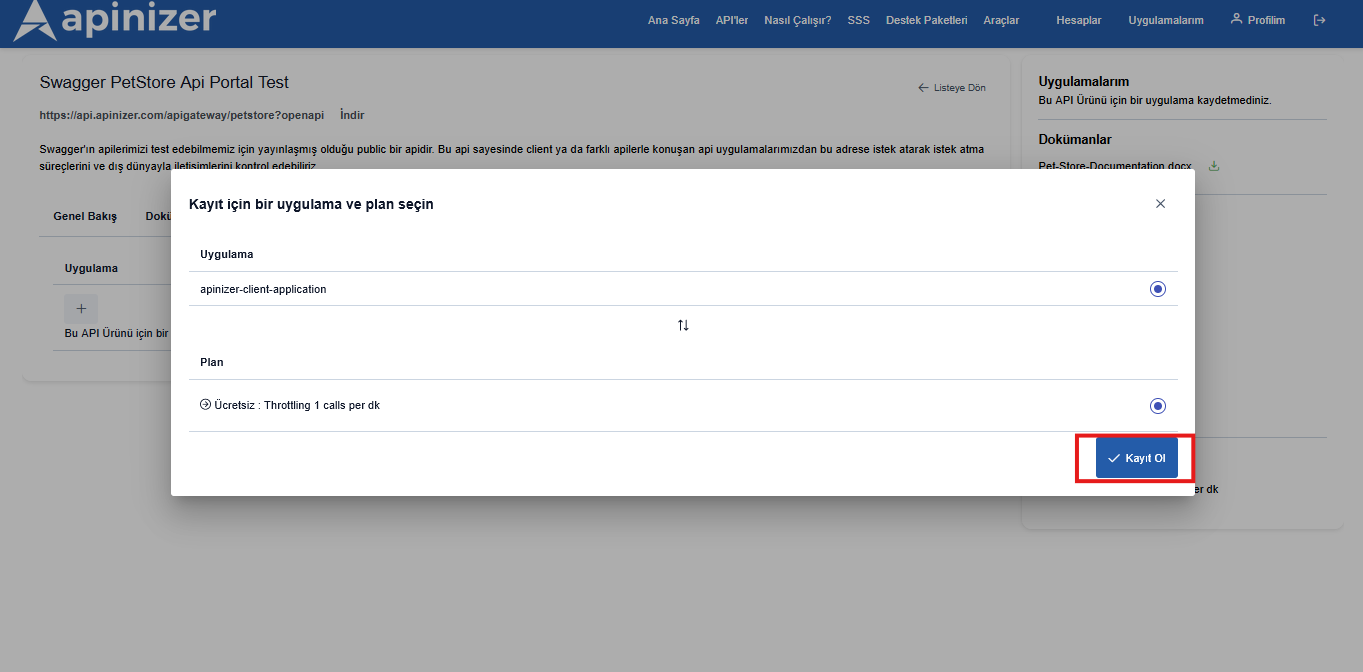
In the opened popup, after selecting the application you created and the one suitable for your request from the plans created by the API Product owner and pressing the save button, we send an application registration request for the API Product.
API Product application registration requests may be automatically accepted or manually approved by API owners according to the API Product publication setting. Therefore, you may need to wait for your application registration request to be approved to be able to make requests.
Application Authorization and Sending Test Request After Application Registration
After the application registration is successfully completed, the registered application will now be authorized to use the relevant API Product within the scope of the plan it has.
After the application registration is made, to try the API Product by sending a test request, go to the relevant API detail and switch to the Documentation & Test tab.
To be able to make a successful request and pass Authentication policies successfully, click the authorize button.
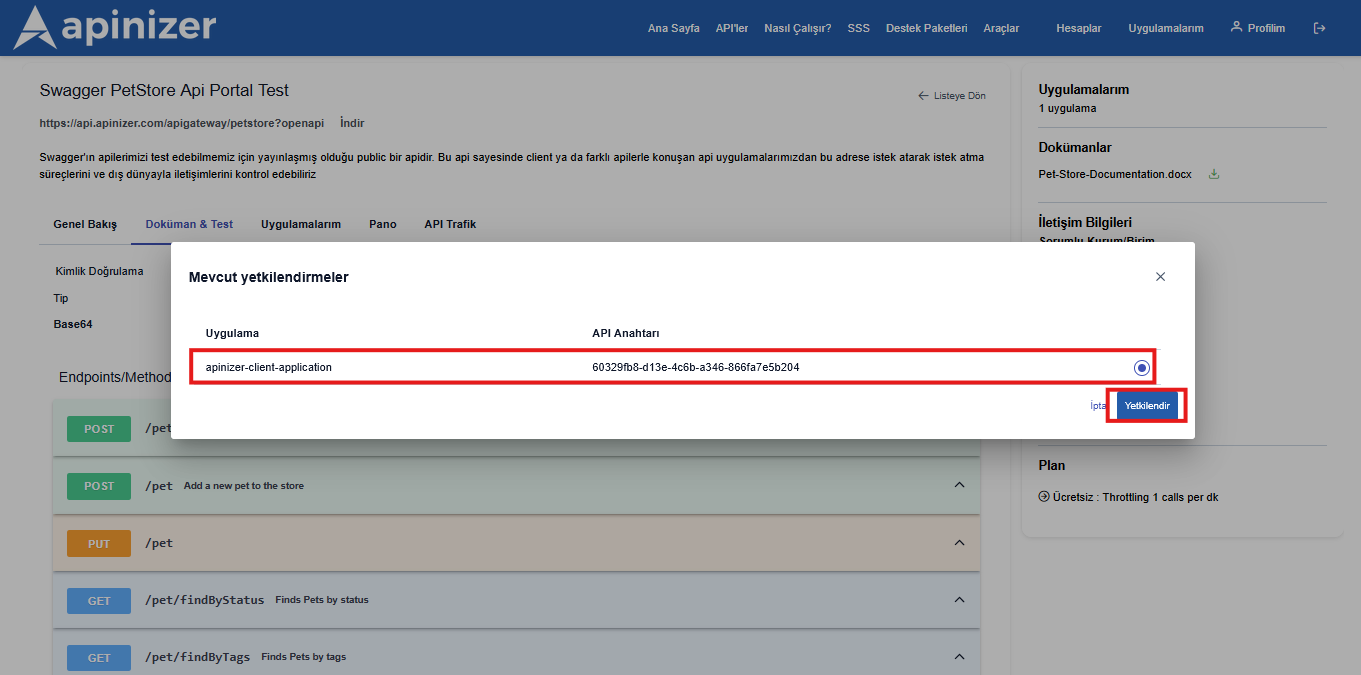
After selecting the application to be authorized in the opened popup, the authorization process is performed by clicking the authorize button. This way, the Authentication information expected by the API Product is automatically added to the request in the background for the application registration, ensuring authorization.
Then we can test by making a request to the endpoint we want to try.