Task Flow
What Is Task Flow?
Task Flow is a process that integrates multiple tasks to perform a job, operating as a flow. In the flow, tasks are integrated sequentially through their own APIs. Each task in the flow can use the output of the preceding task and can be executed once or multiple times.
Creating a Task Flow
To create a new task flow;
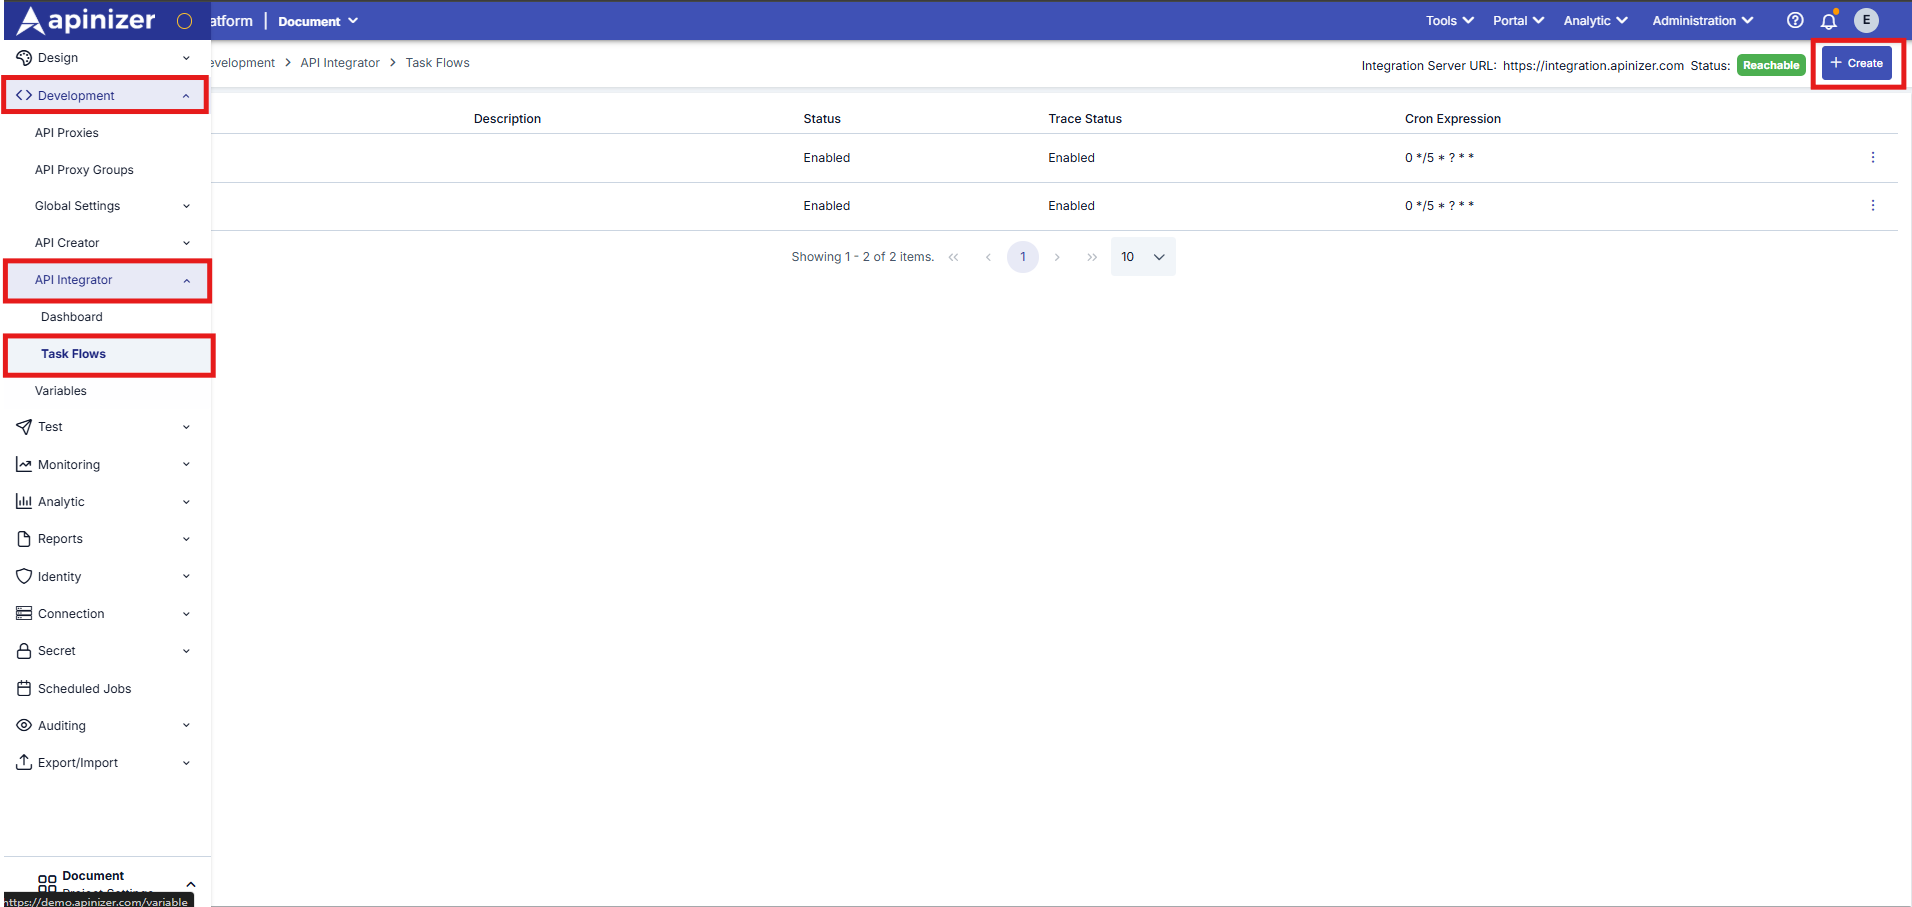
First, navigate to the Task Flows page within API Integrator under the Development tab on the left side of your screen, and click the Create button in the upper right corner to create a new Task Flow.
Name the task flow and create it using the Save and Next button. (You can access explanations about the fields in the table below the screenshot.)
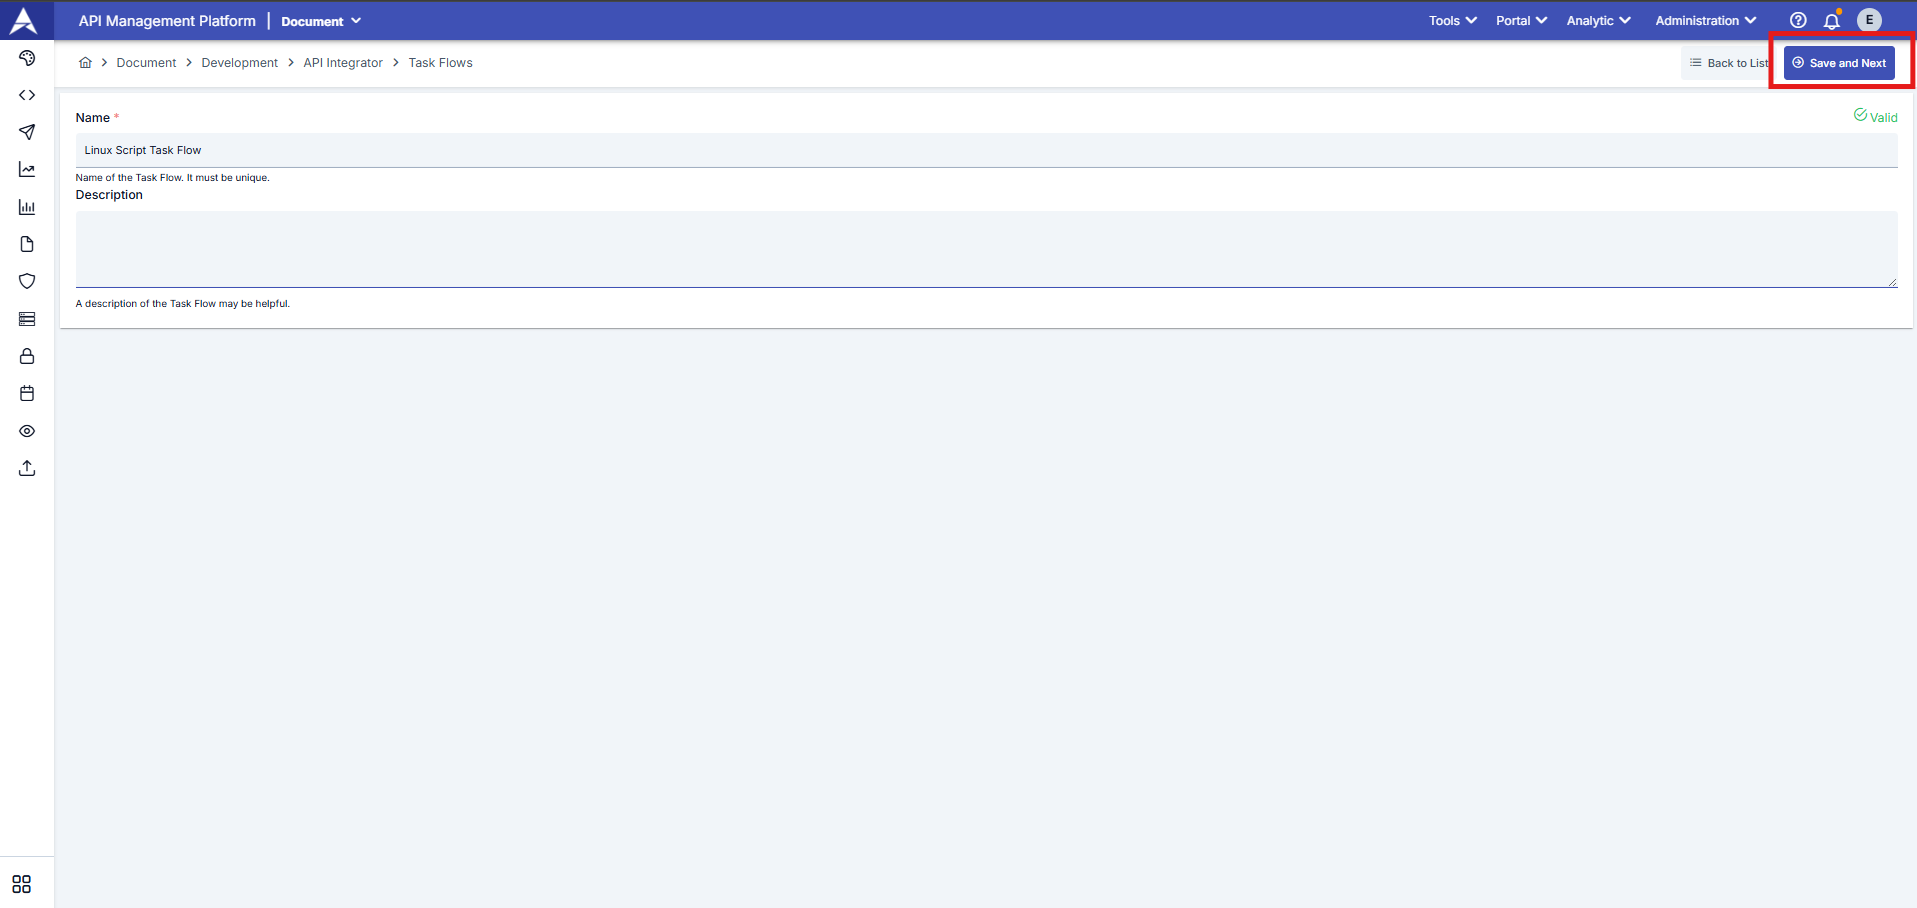
The description of the areas shared in the image above is available in the table below.
| Field | Description |
|---|---|
| Name (Required) | Unique name defining the task flow |
| Description (Optional) | Information text regarding the content of the task flow |
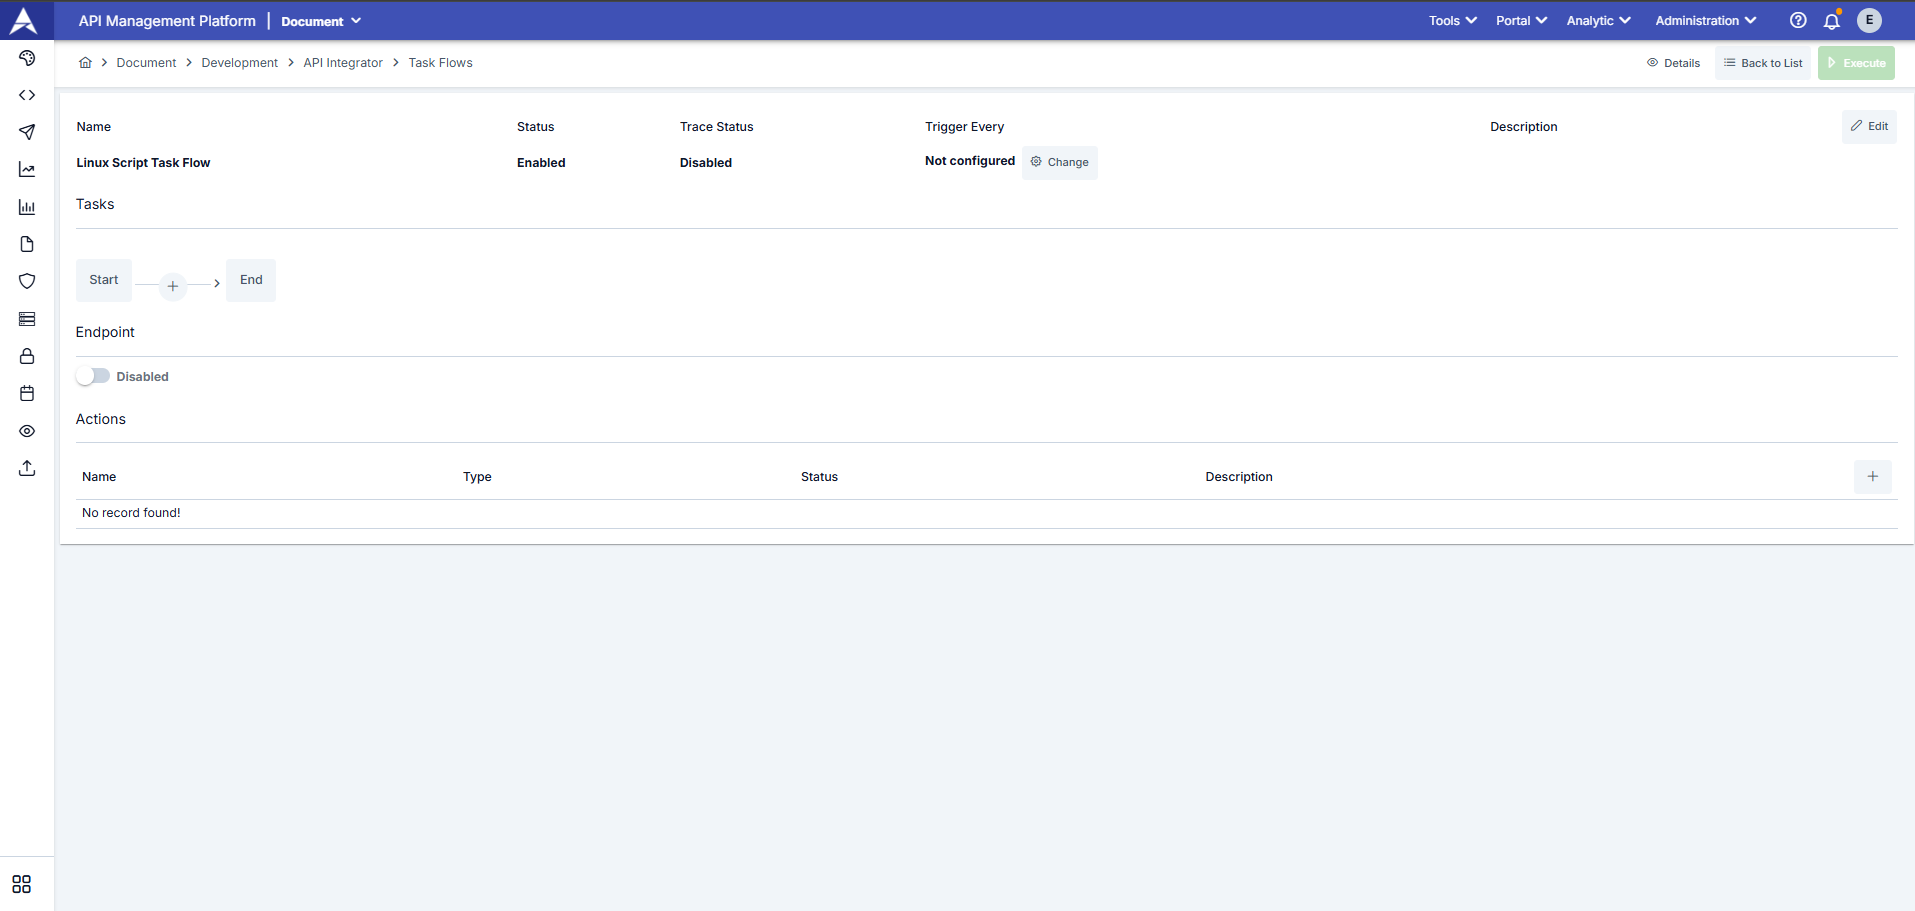
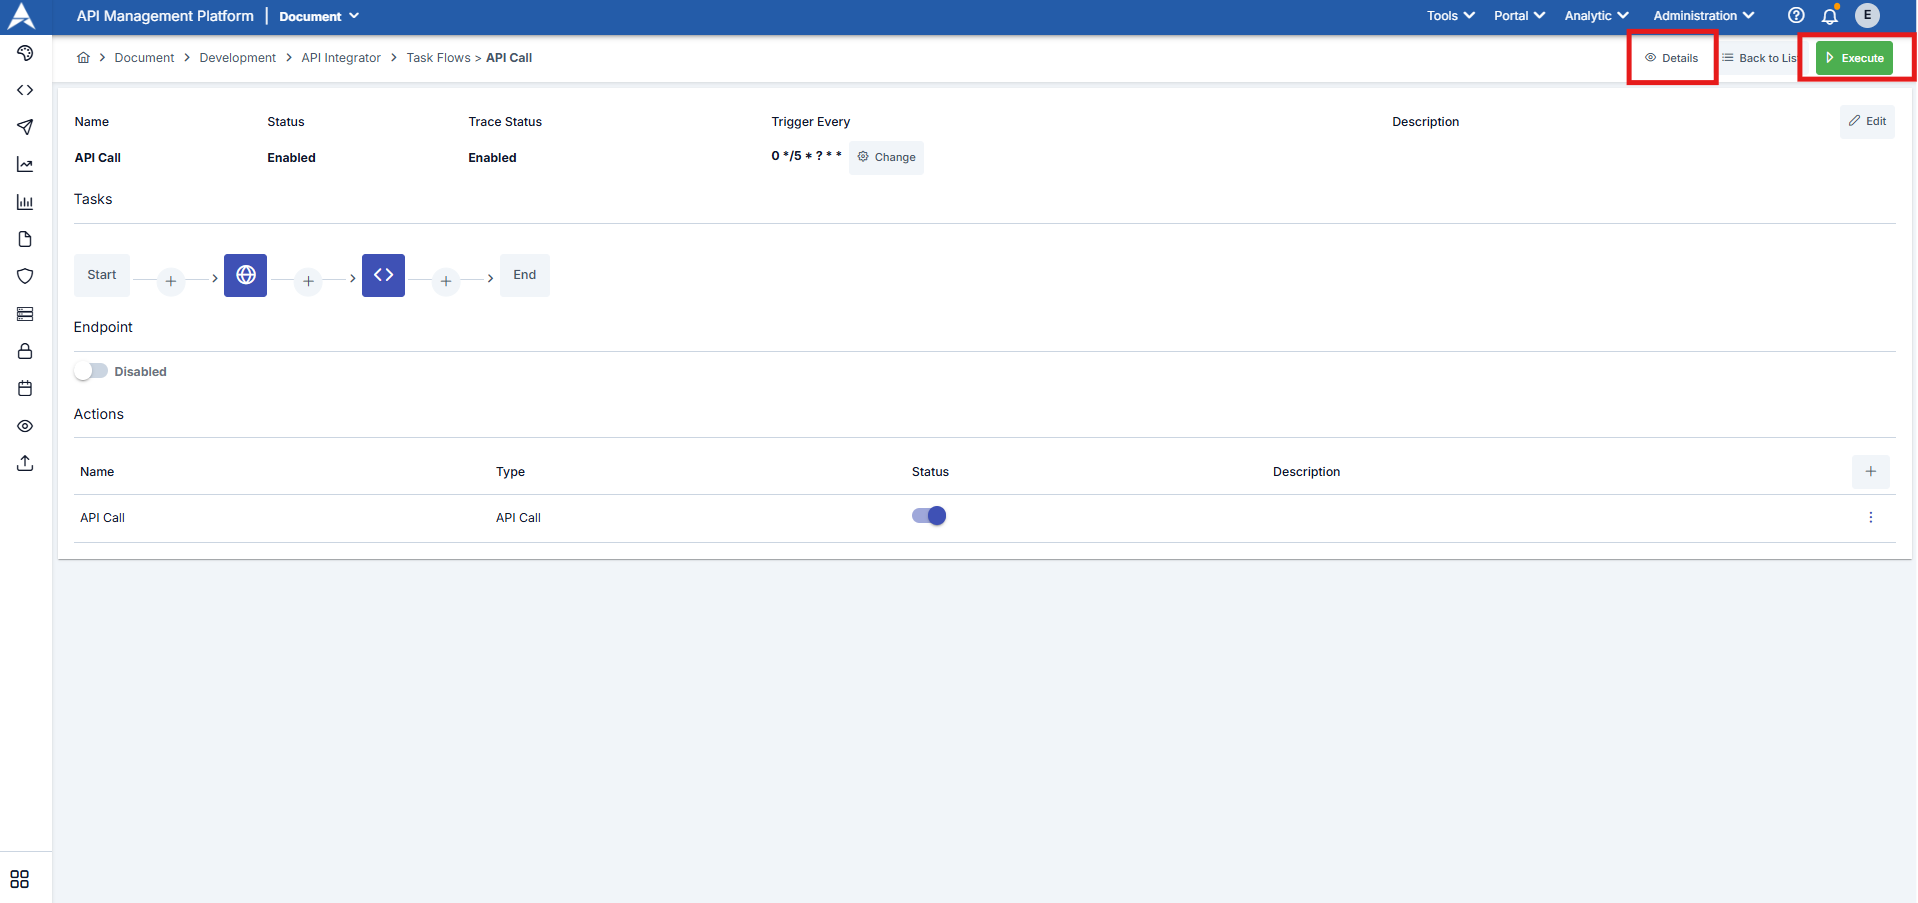
The definitions of the fields used for task flow configuration, as seen in the screenshot above, are available in the table below.
| Field | Description |
|---|---|
| Name | This is the name of the task flow as it appears in the list. It is required and must be unique on a per-project basis. |
| Status | Indicates whether the task flow is active or inactive. |
| Trace Status | Indicates whether the Trace (Debugging) feature is enabled or disabled. |
| Trigger Every | Indicates how often the task flow will be automatically triggered. |
| Description | This is an explanation of the task flow. |
| Tasks | The tasks defined in the task flow content are displayed on this graph, and from here, you can add, delete, and configure tasks. |
| Endpoint | In the screenshot below, you can see the window screen where the task's workflow steps are defined. One of the options for triggering the task workflow is to send a request to the endpoint of the task workflow's REST API.
|
| Actions | It describes the actions to be taken in the event of an error during the execution of the defined task flow. |
Task Flow Configurations
All configurations of settings on the Task Flow screen, the creation of workflows, and the definition of error tasks are detailed separately under this main heading.
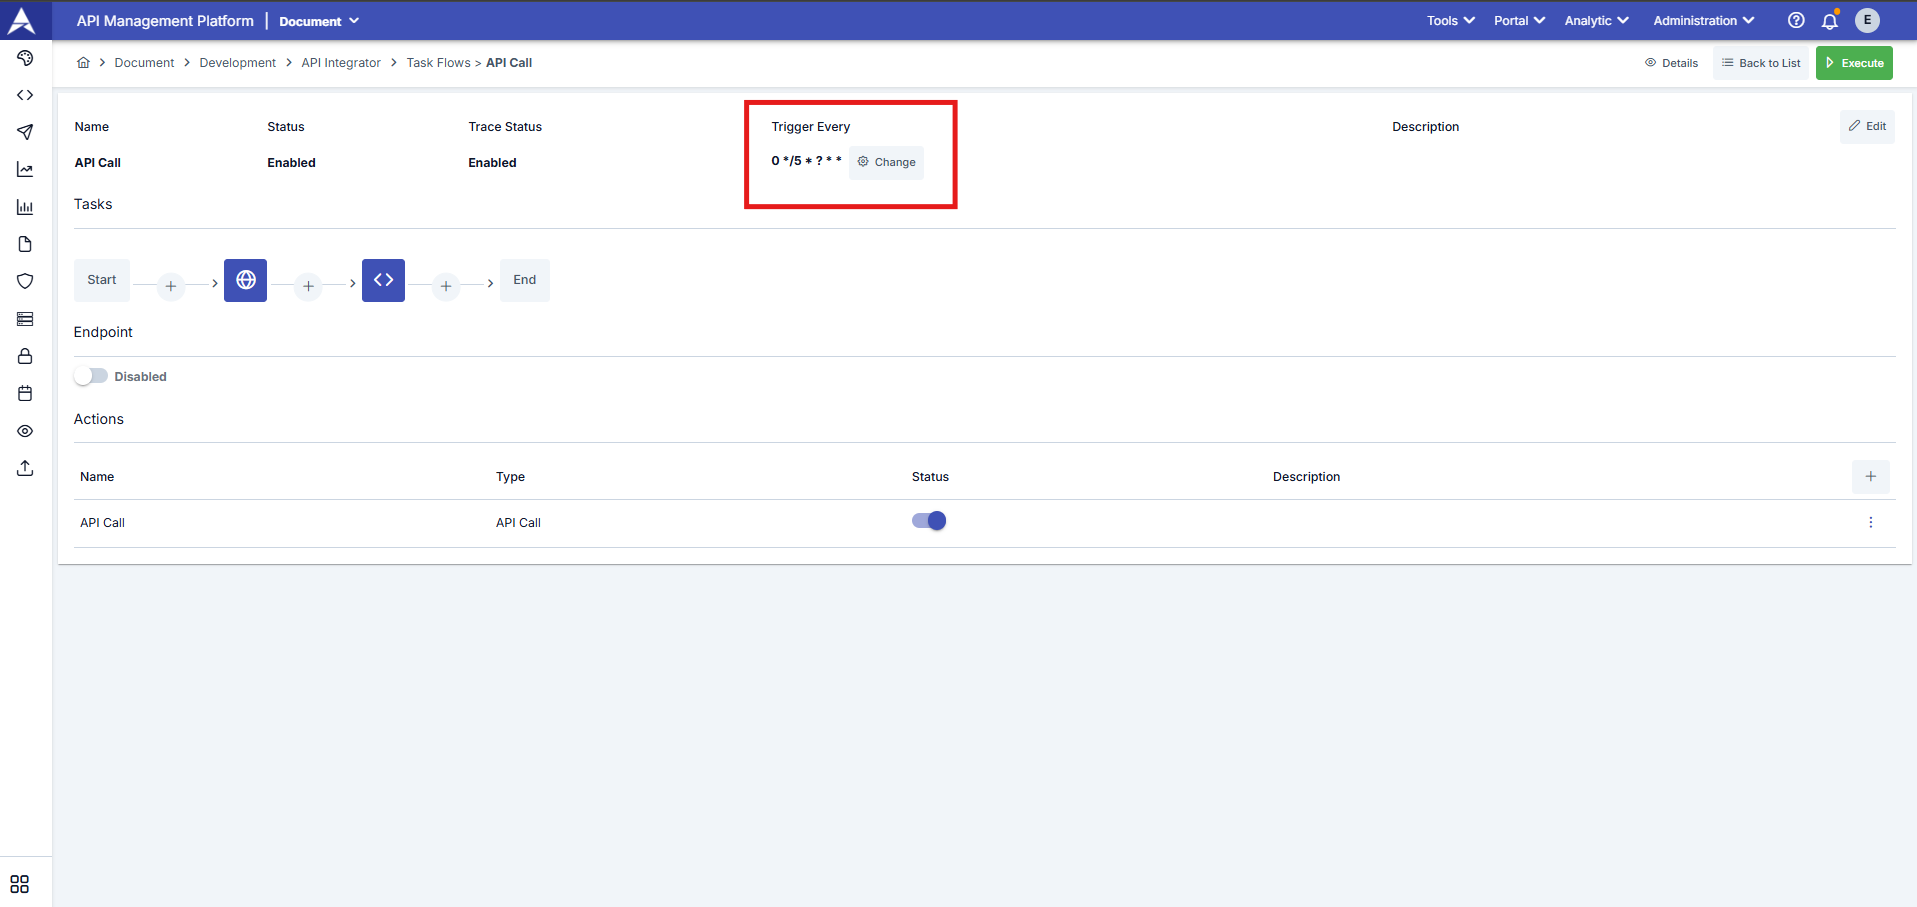
Task Flow Trigger Frequency Configuration (Trigger Every)
You can define a scheduler to automatically run the task flow at specific times.
The configuration regarding how often the created task flow should be triggered is performed through the window that opens when you click the Change button under Trigger Every.
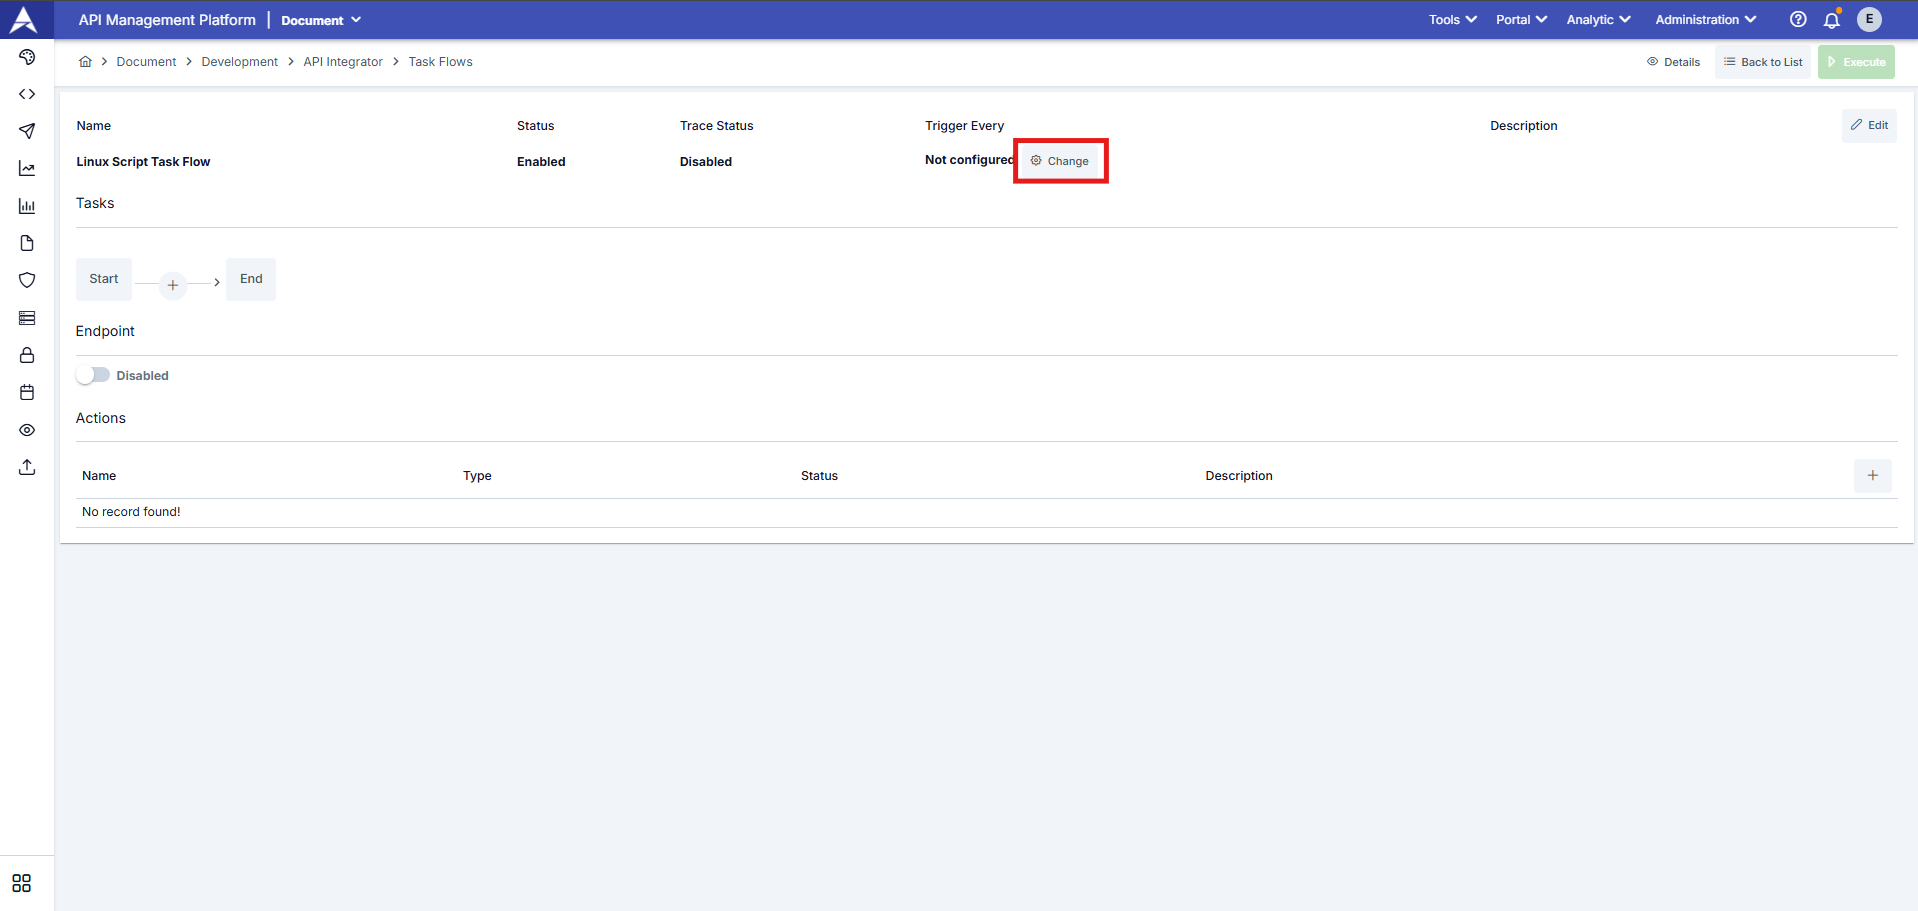
We need to fill in the Value and Unit fields to define the timer configuration.

By selecting the Custom option in the timer definition, scheduling can be performed using the desired Quartz Cron Expression.
Task Flow Definition Settings
We can configure task flow settings through the window opened via the Edit button located in the top right corner.
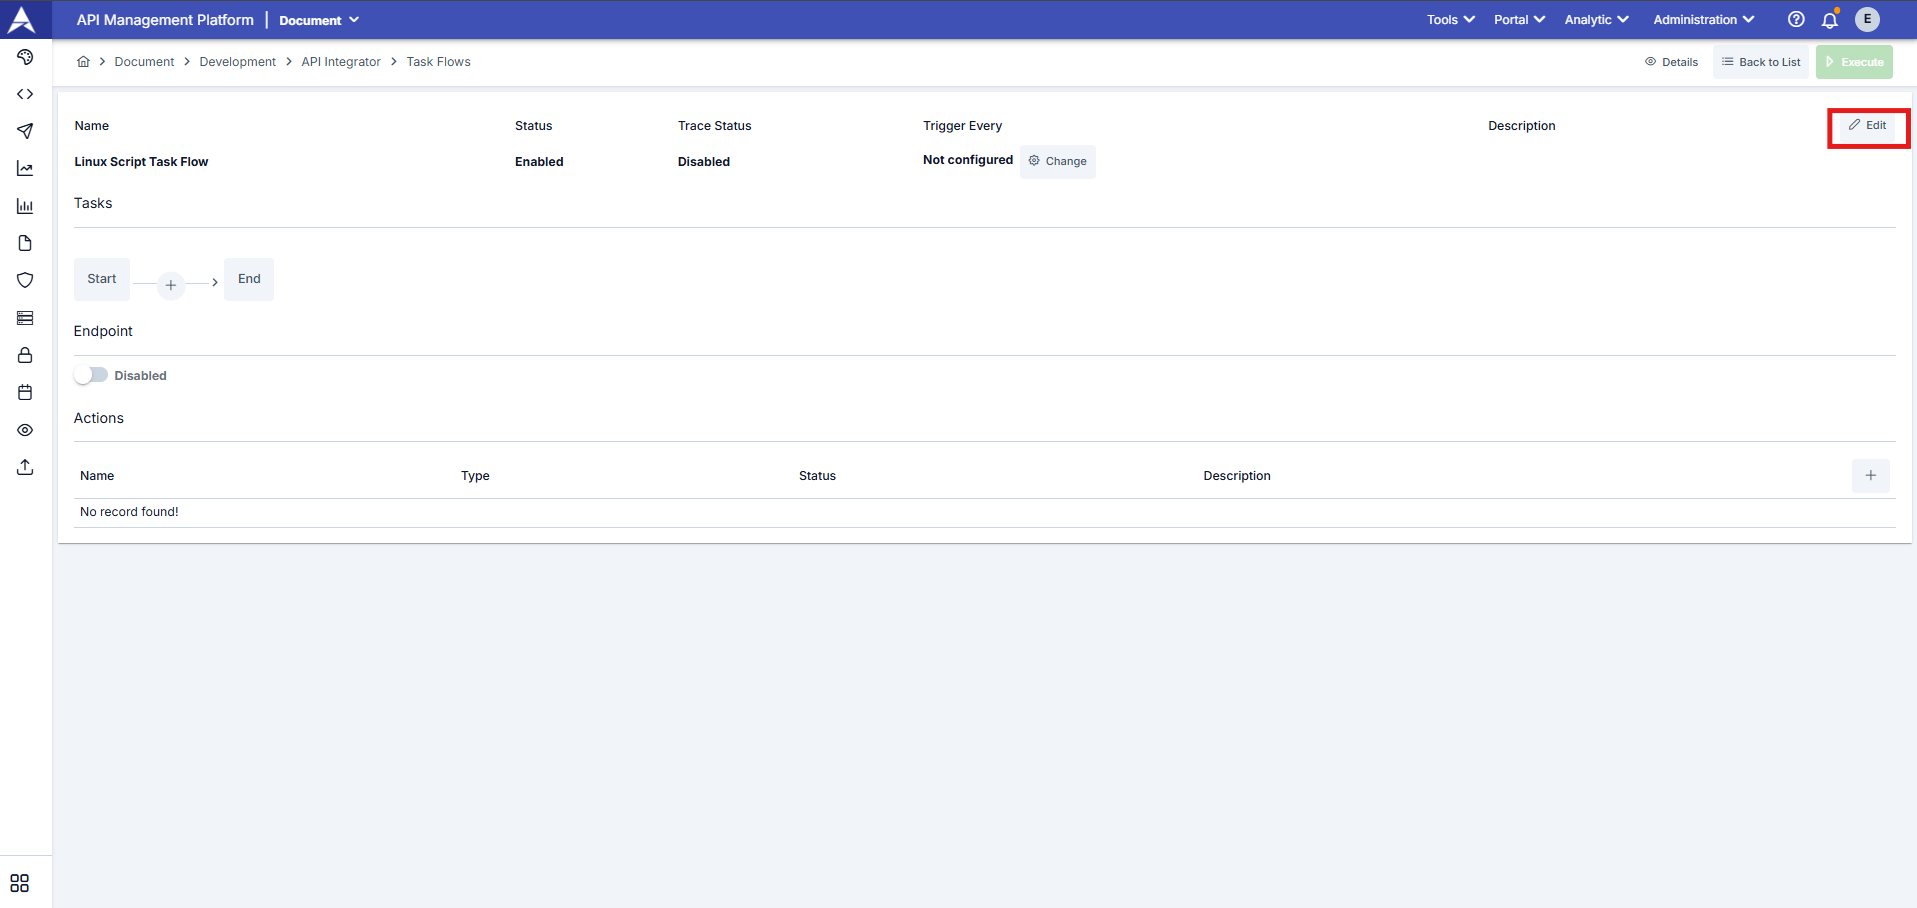
The task flow definition settings are as follows.

Detailed information about task flow definition settings is provided in the table below.
| Field | Description |
|---|---|
| Name | Task flow name |
| Description | Description of task flow definition |
| Status | Active/inactive status of the task flow |
| Trace Status | When the task flow step monitoring status is active (enabled), data belonging to running steps is displayed in the logs, while detailed logging is not performed when it is inactive (suspended). |
Task Settings
What is Task ?
In the API Integration module, each integration process performed with a system or application is referred to as a task.
Since Apinizer adopts the approach of performing integrations with API calls as much as possible, it has adopted the approach of defining a task/connection type for each endpoint that can be called with the API.
Therefore, there are 7 different tasks on Apinizer:
- Sending Emails
- API Call
- Database Connector
- Running Linux Scripts
- Script (Javascript or Groovy)
- Notification
- SNMP
Task Definition
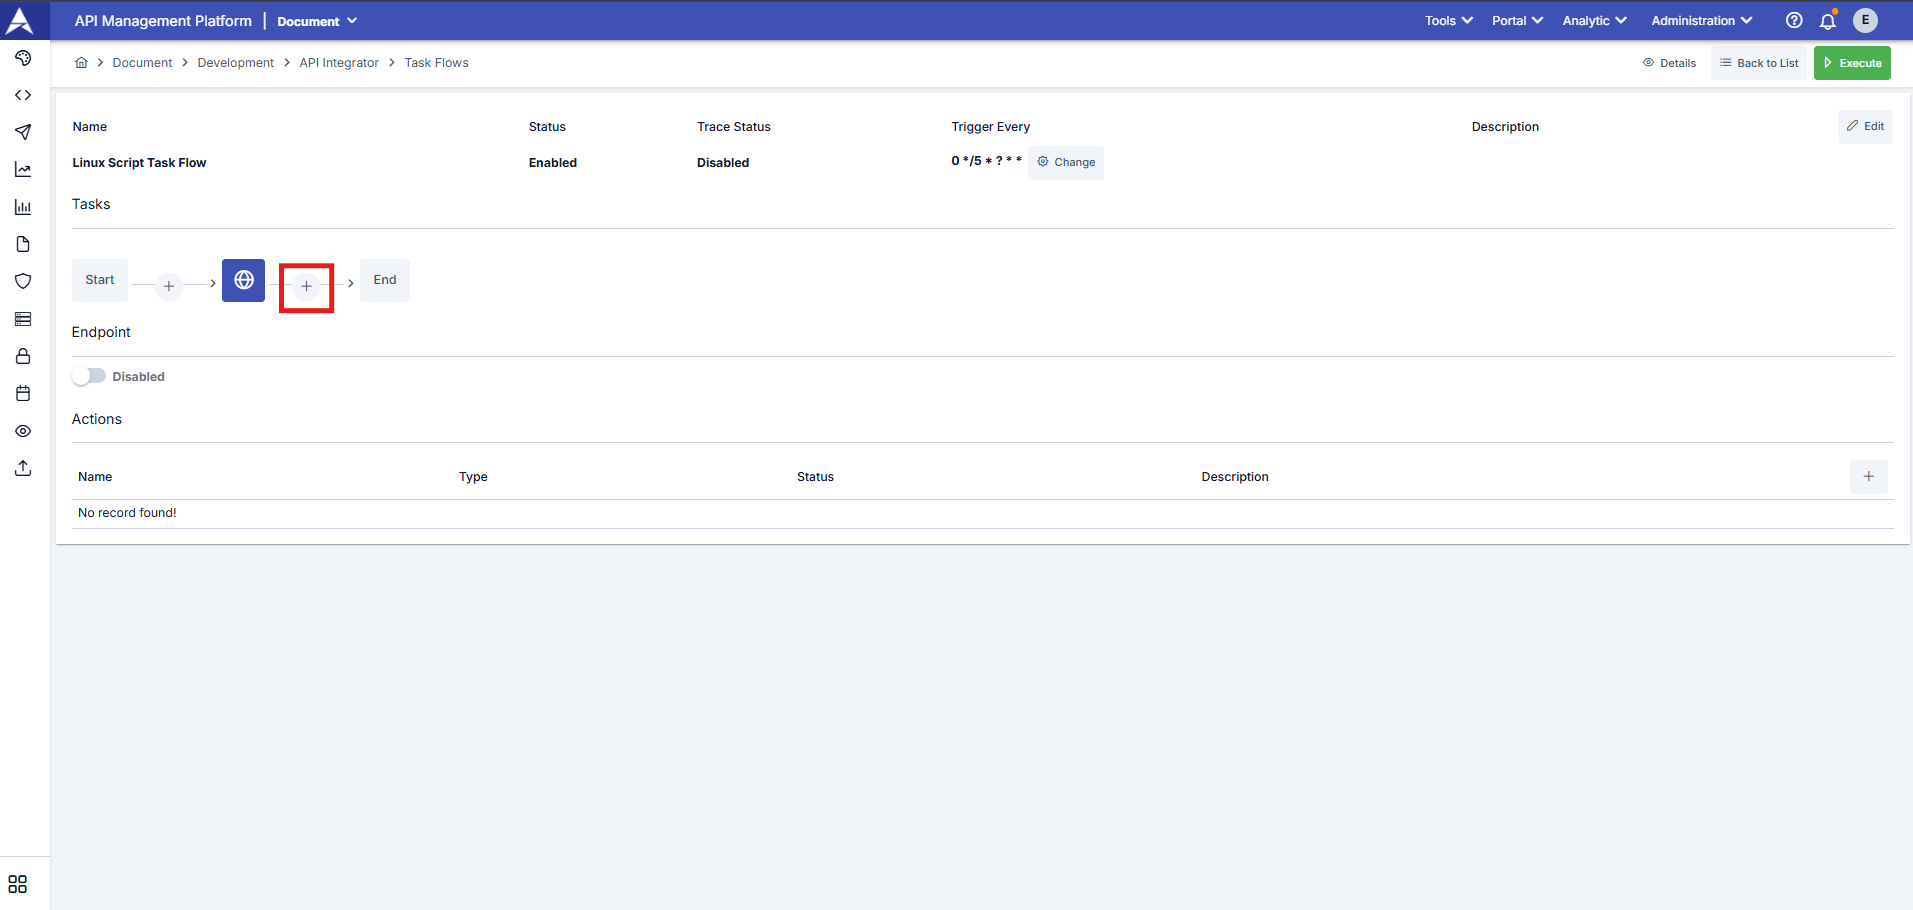
Defining sequential transactions is managed through the following interface. To define a new task, click the “+” button on the schema under Tasks.
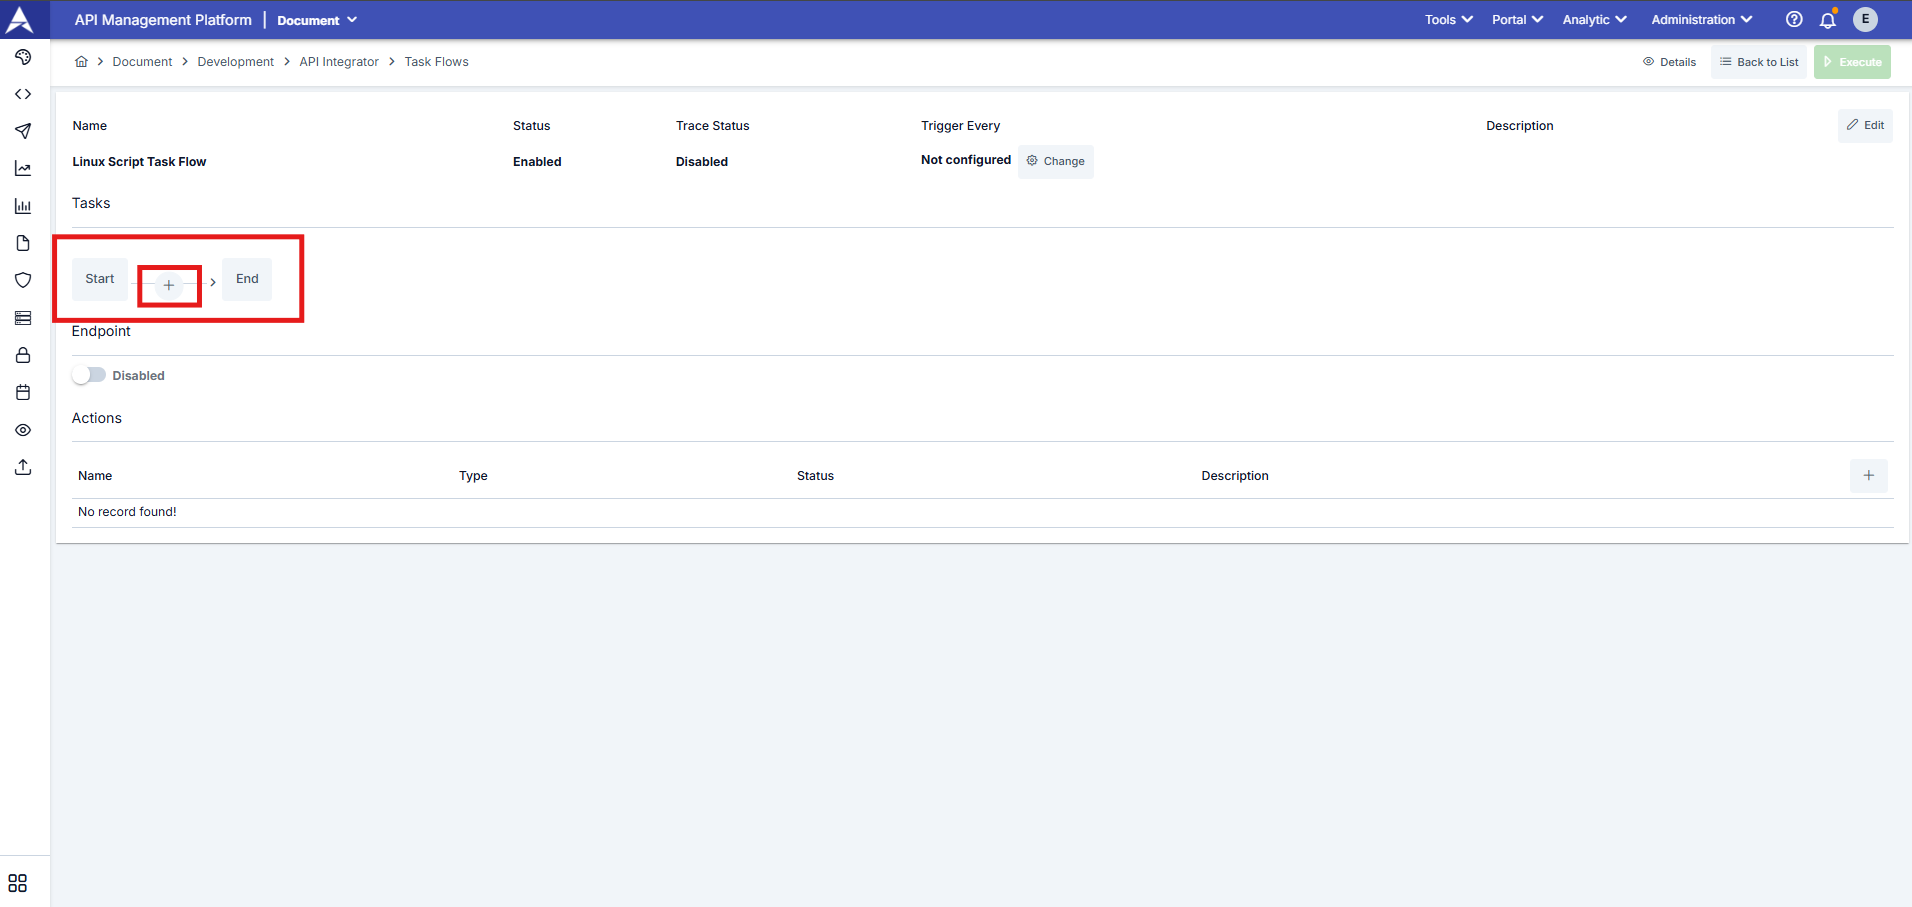
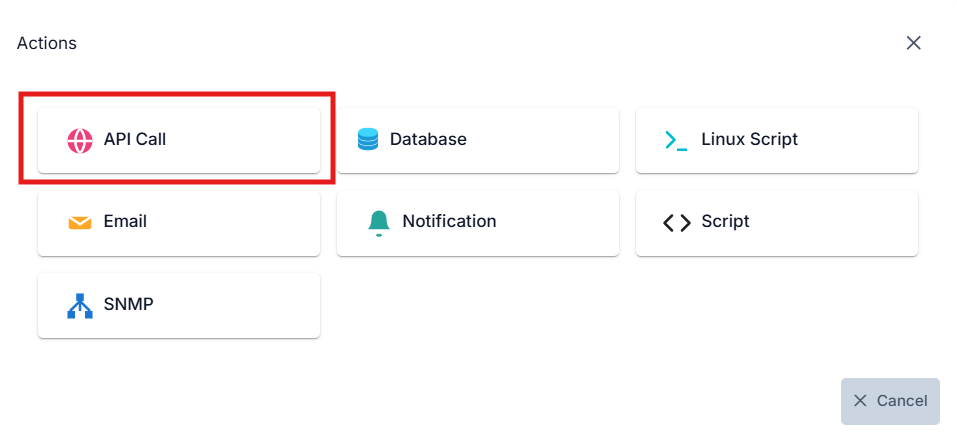
The screen where the task selection is made is shown below:
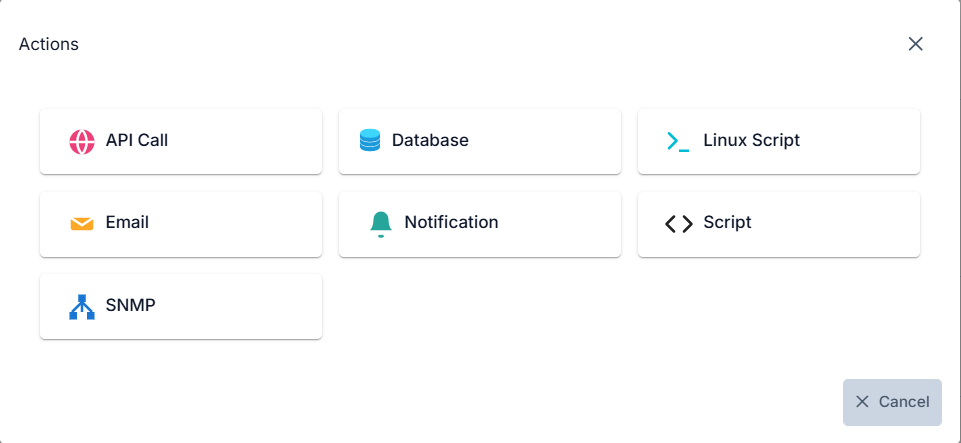
For illustrative purposes, this document will explain the concept using an API Call example.
Continue the task definition process by selecting the task you want to add.
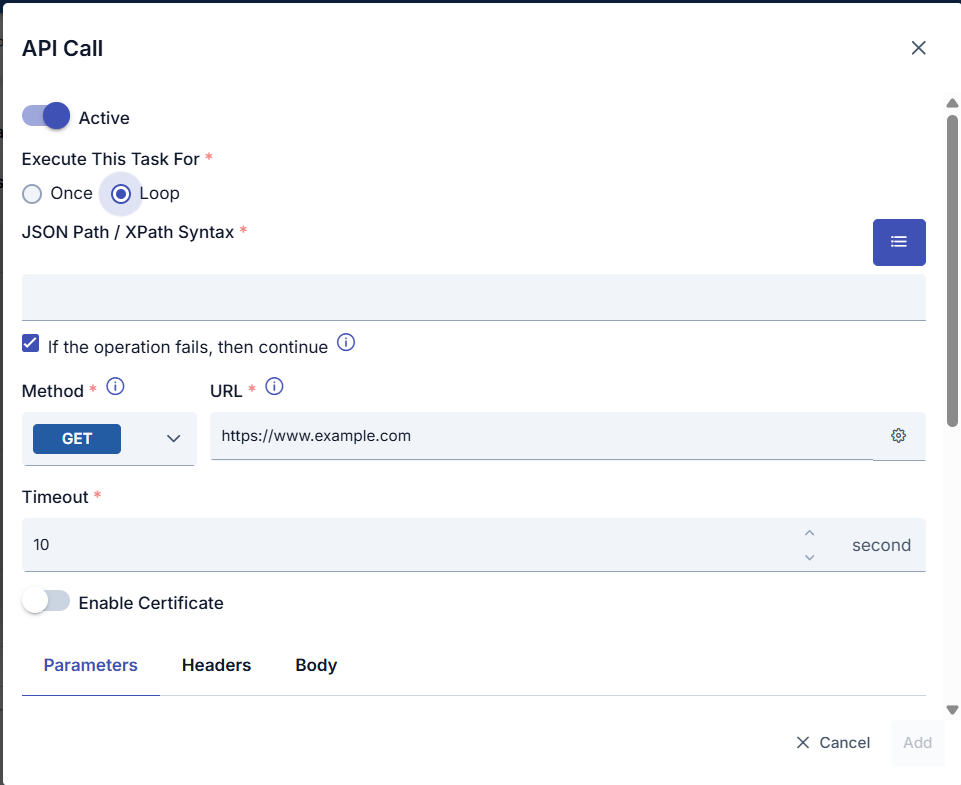
In the screenshot below, you can see the window screen where the task's working steps are defined.
Within the task flow, the output of the previous task can be used as the input for subsequent tasks. The following screenshots show how the output of an API call can be used as the input for the script policy added after it.

You can access the output of a previous API Call task within the Script task via the menu button using the variable specified when defining the API Call task.
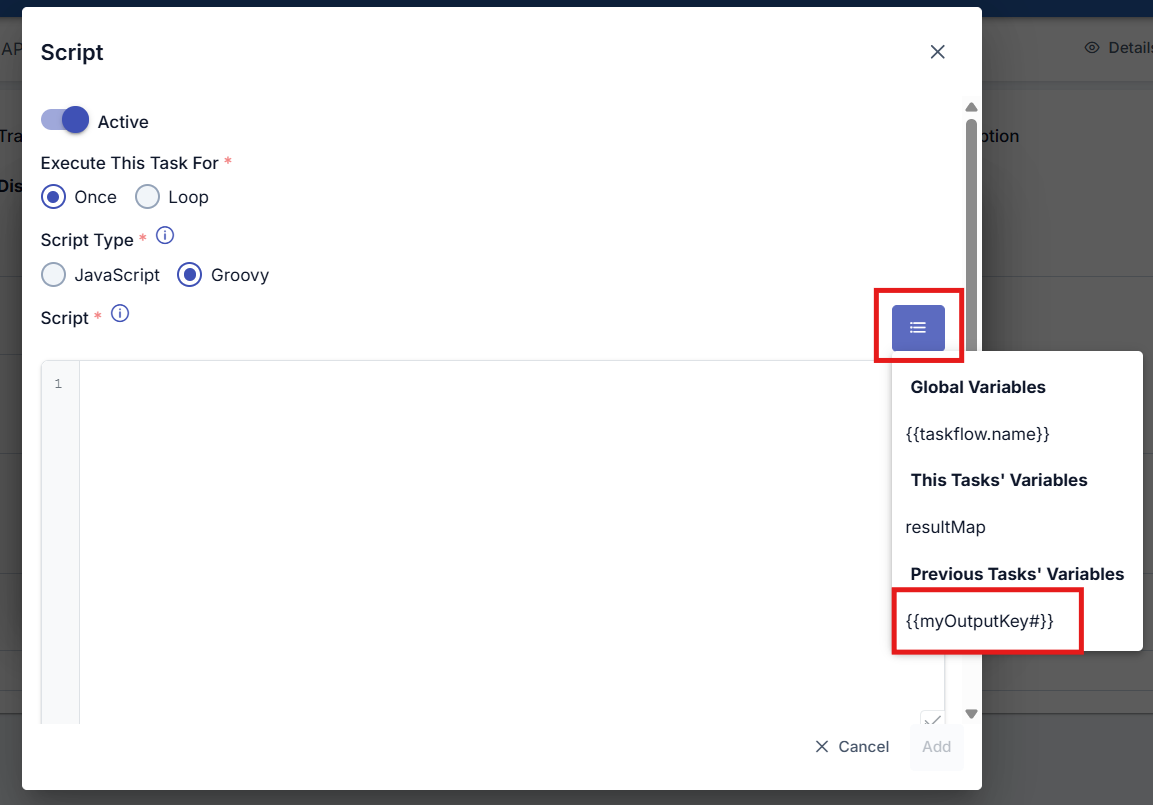
To use the output of the previous task within the current task, the variable must be enclosed in double curly braces with a hash (#) symbol at the end. Example: {{myOutputkey#}}
As shown in the screenshot below, the required data was retrieved by filtering the output variable of the Api Call task using JsonPath/XPath Syntax. This retrieved data can be used as the LOOP_VARIABLE variable within the Script task.
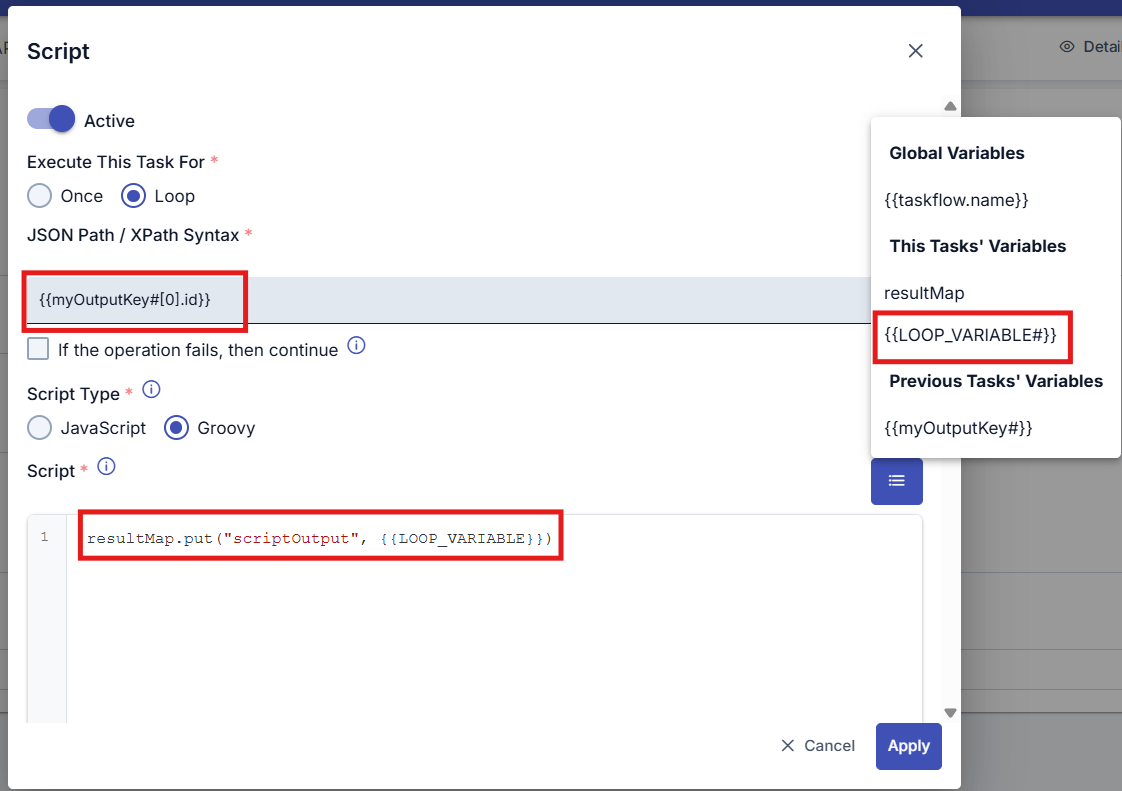
The # symbol at the end of variables represents JsonPath/XPath. It corresponds to the $ operator in JsonPath. This syntax is specific to Apinizer. For detailed usage of this syntax, please refer to the Common Fields table in the Tasks below.
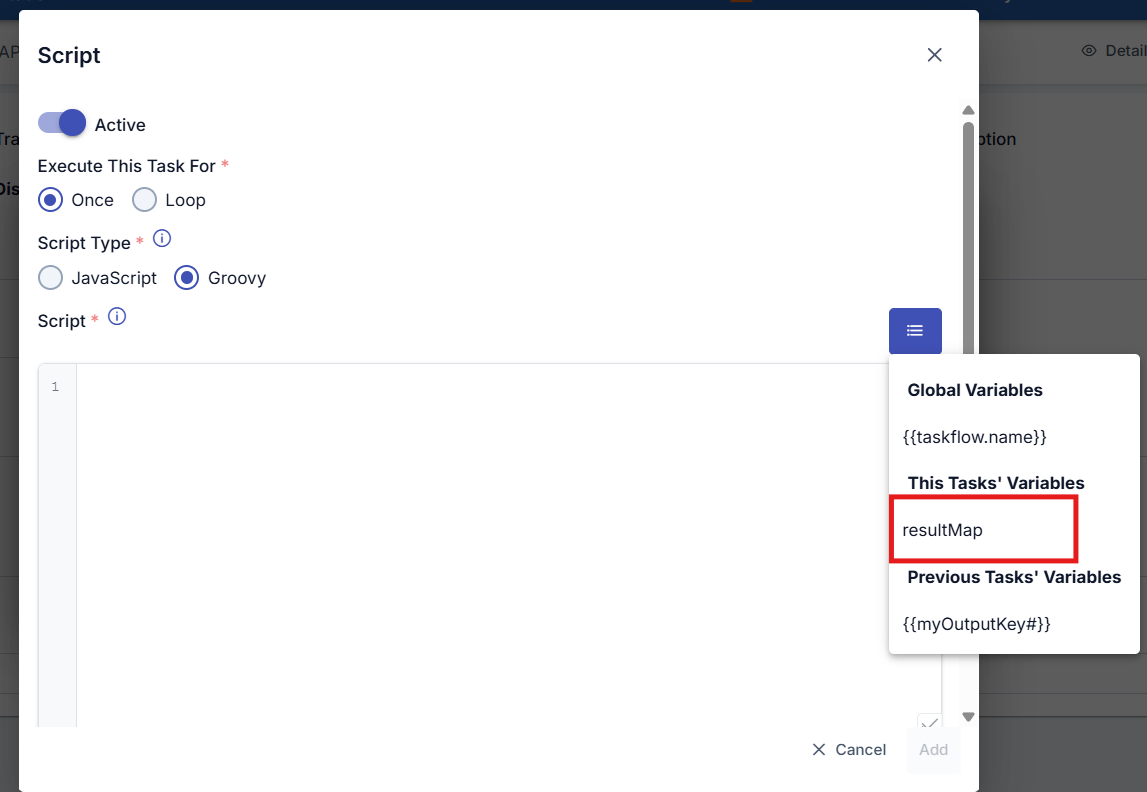
The ability of the script task to transfer data to the task defined in the next step is achieved through the resultMap object and the variable value in the form interface where the script task is defined.
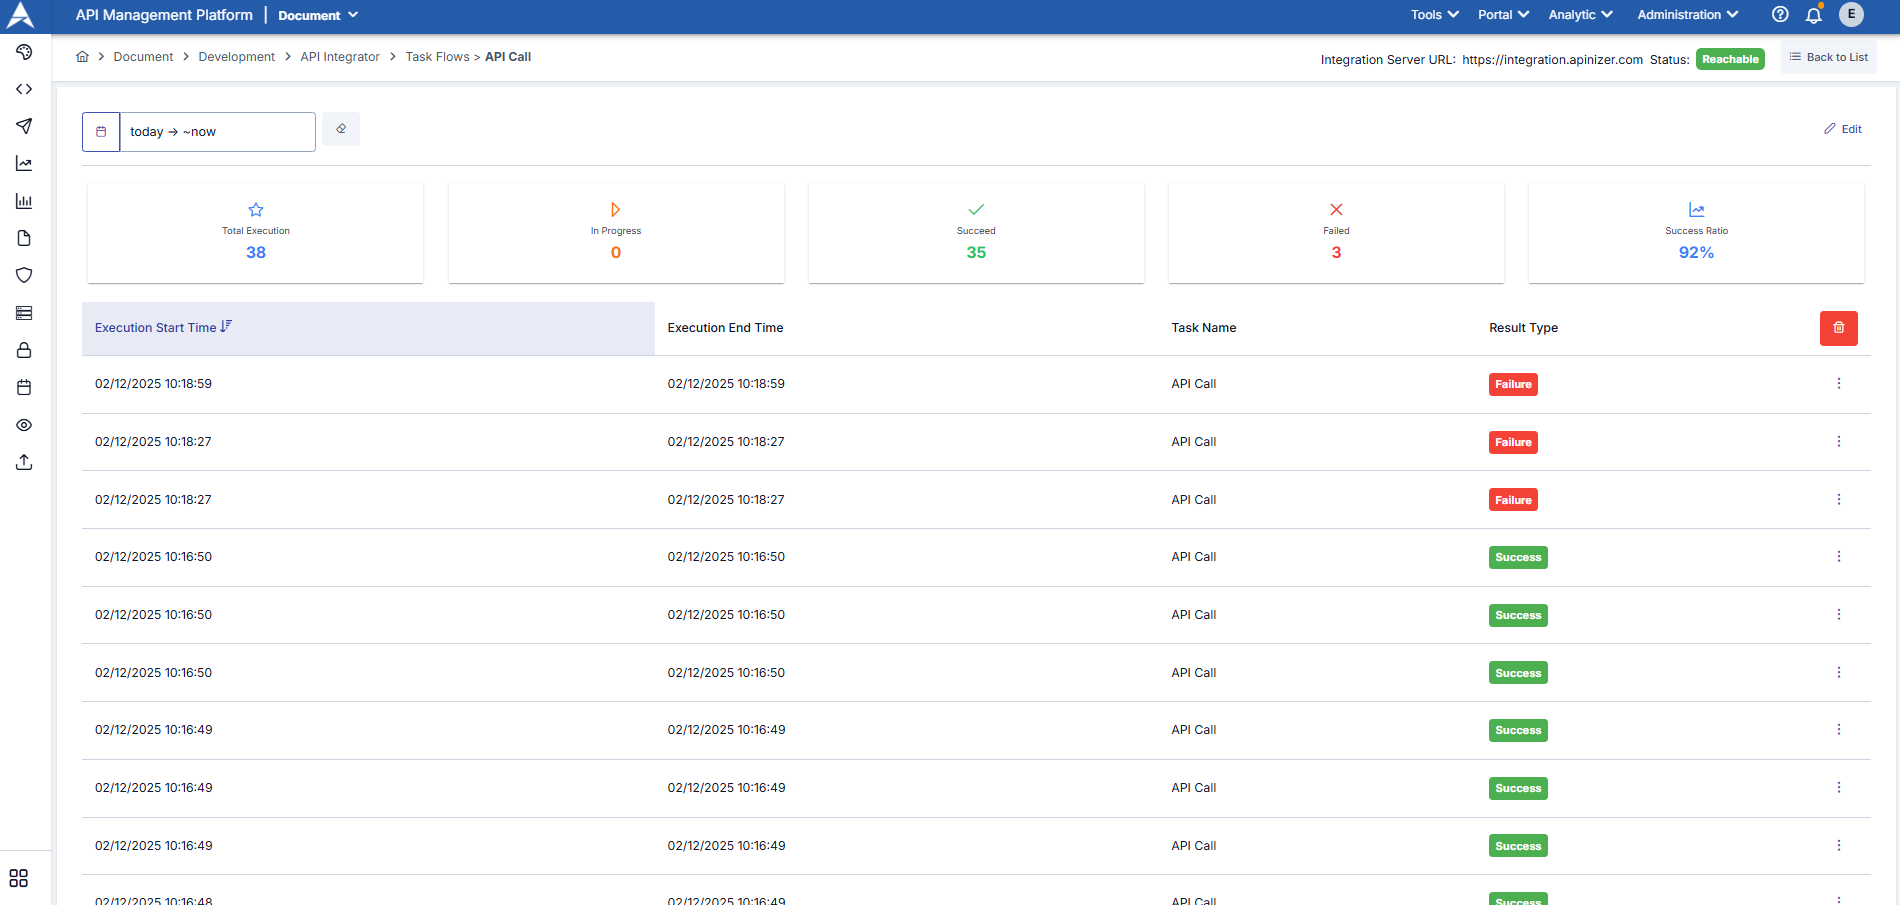
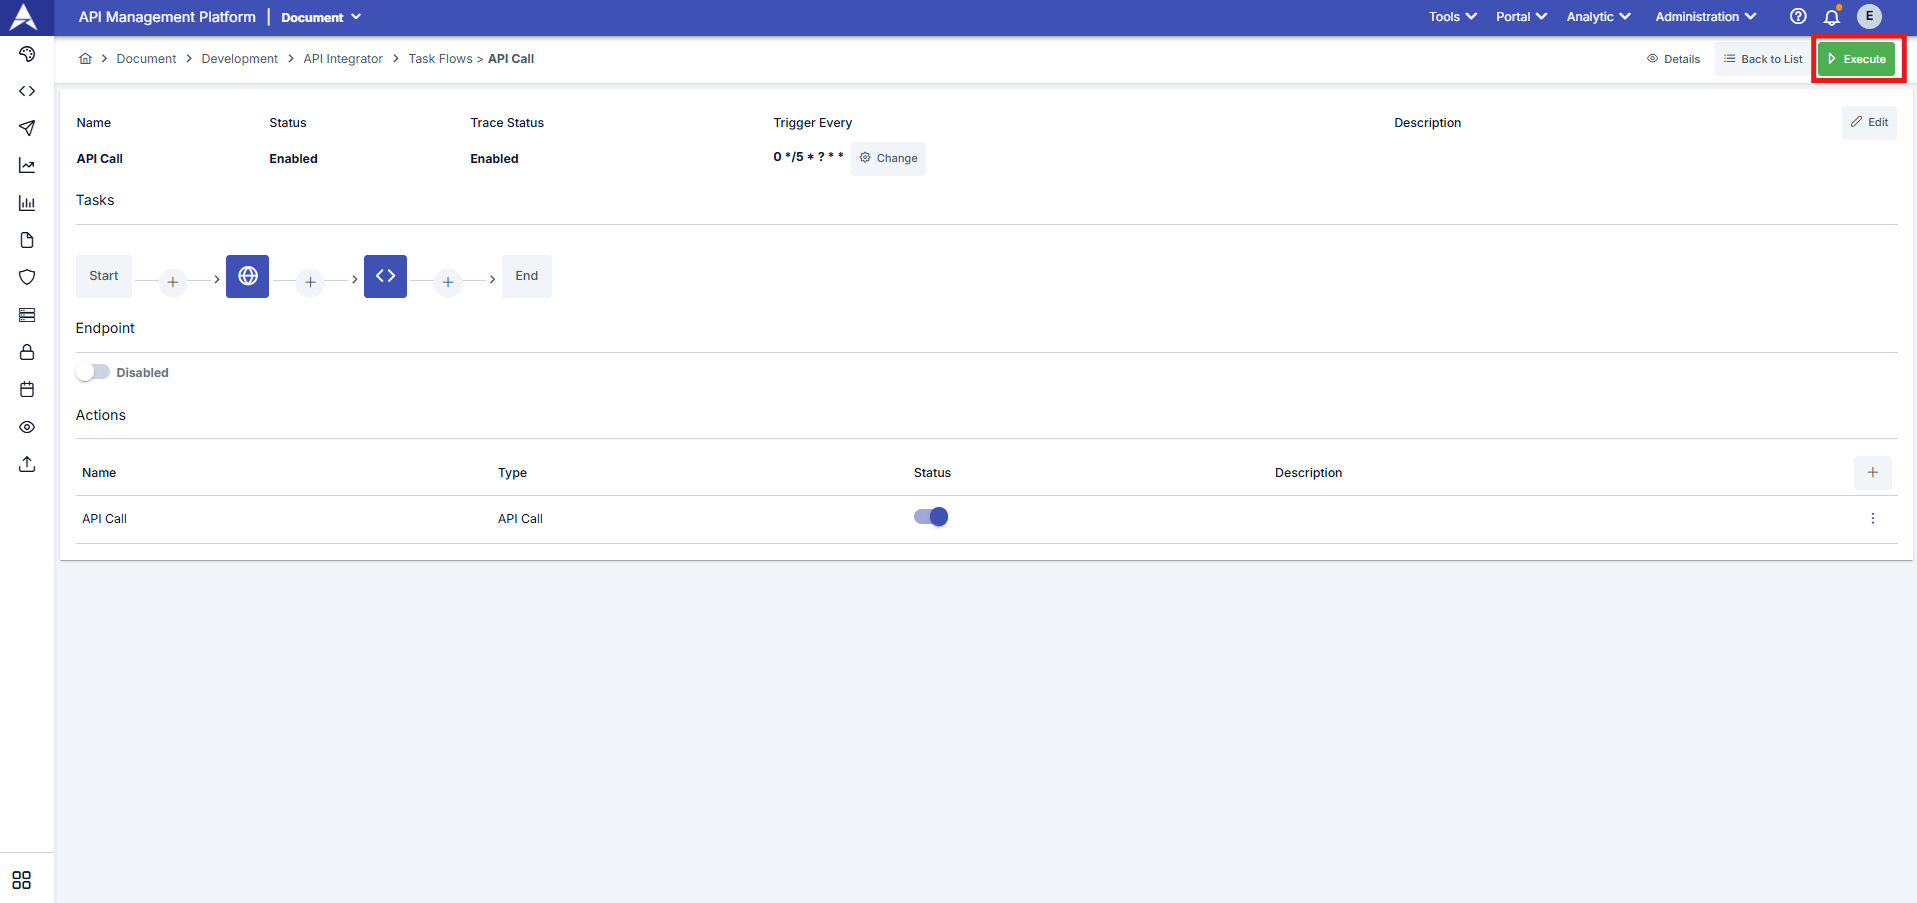
After the tasks to be performed by the task flow are defined, the task is manually triggered once by clicking the Execute button. To view the executed state of the task and its outputs, click the Details button to access the task flow's execution log records.
To view the output data of tasks, the Trace option within Task Flow Definition Settings must be enabled. Otherwise, the results produced by the tasks will not be displayed in the log details screen.
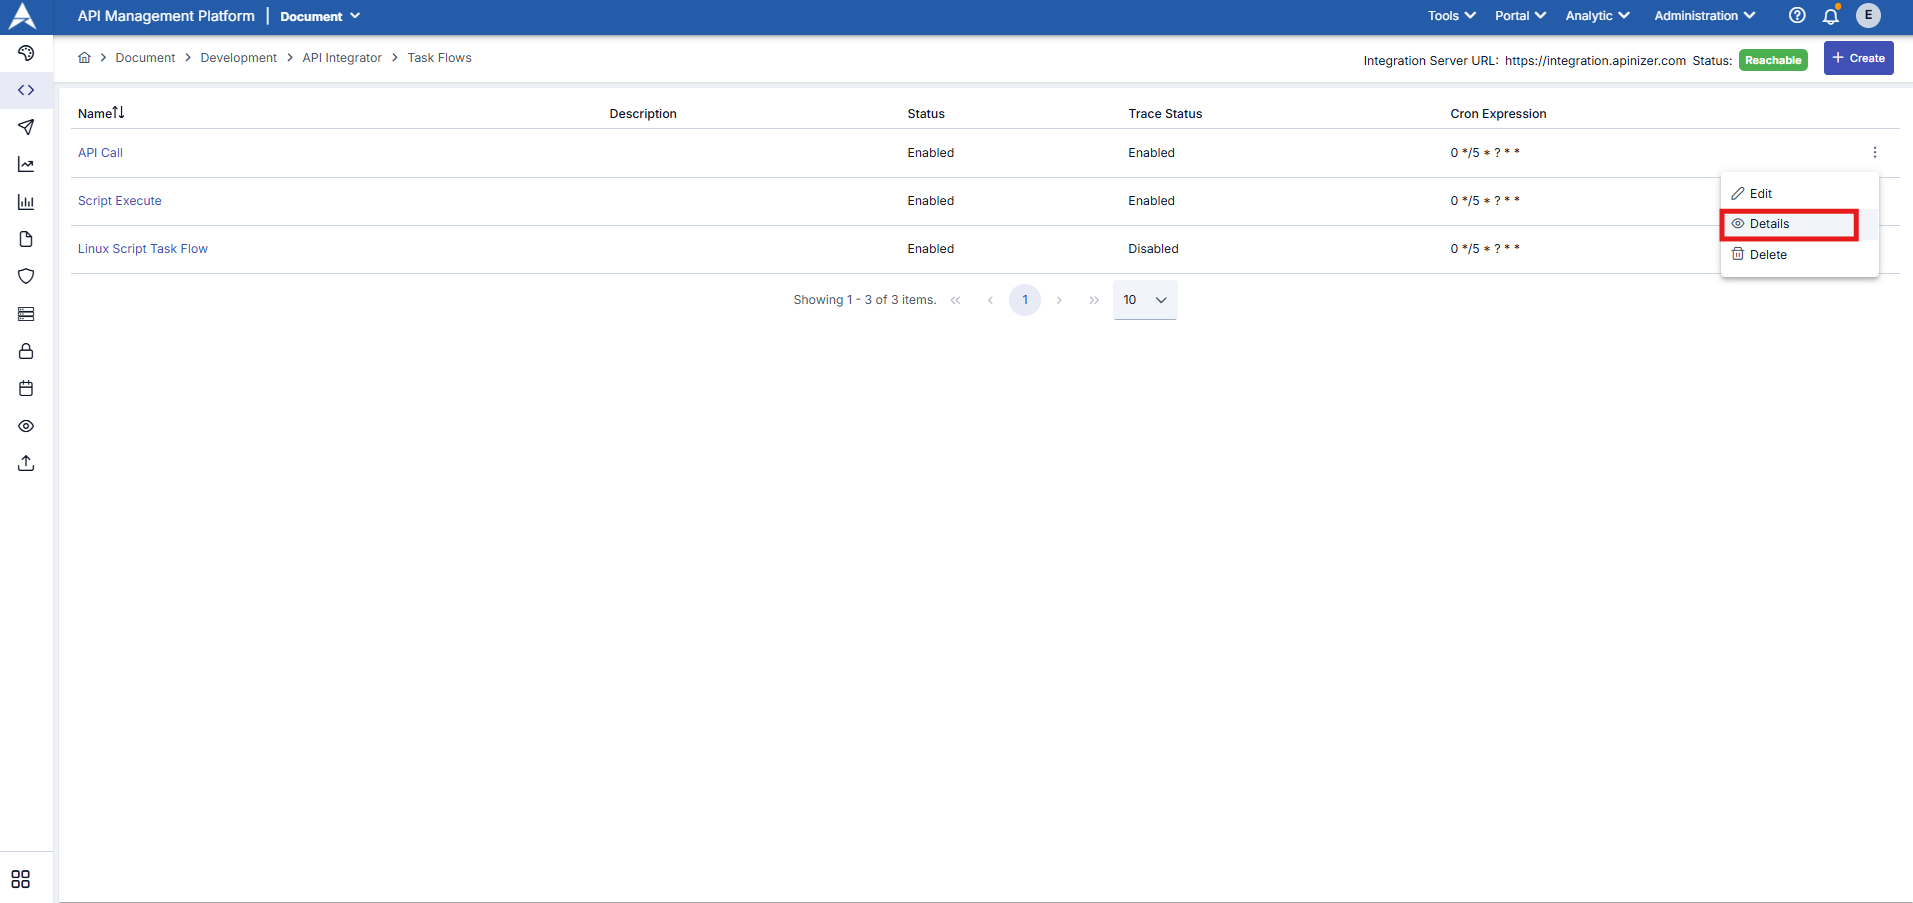
View Task Flow Details
To view the logs, click the menu button in the far-right column of the record you want to view details for in the task flow list and select Details.
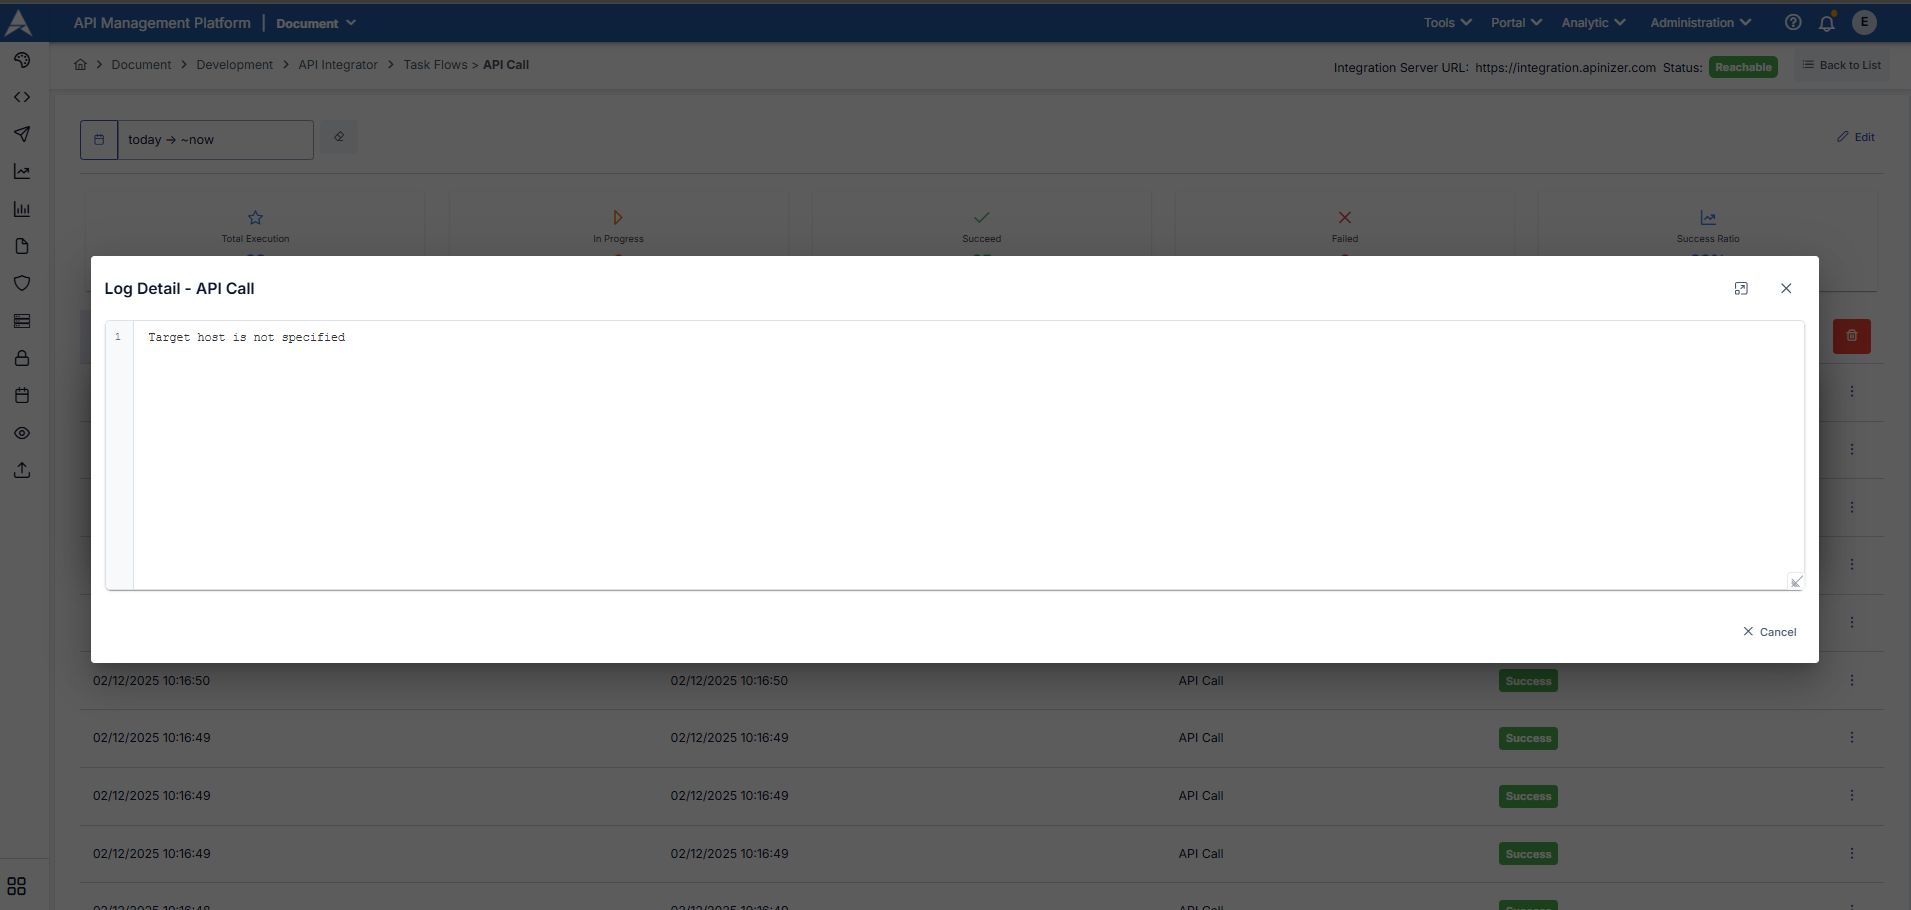
The visual containing the log details of the Task Flow is provided below:
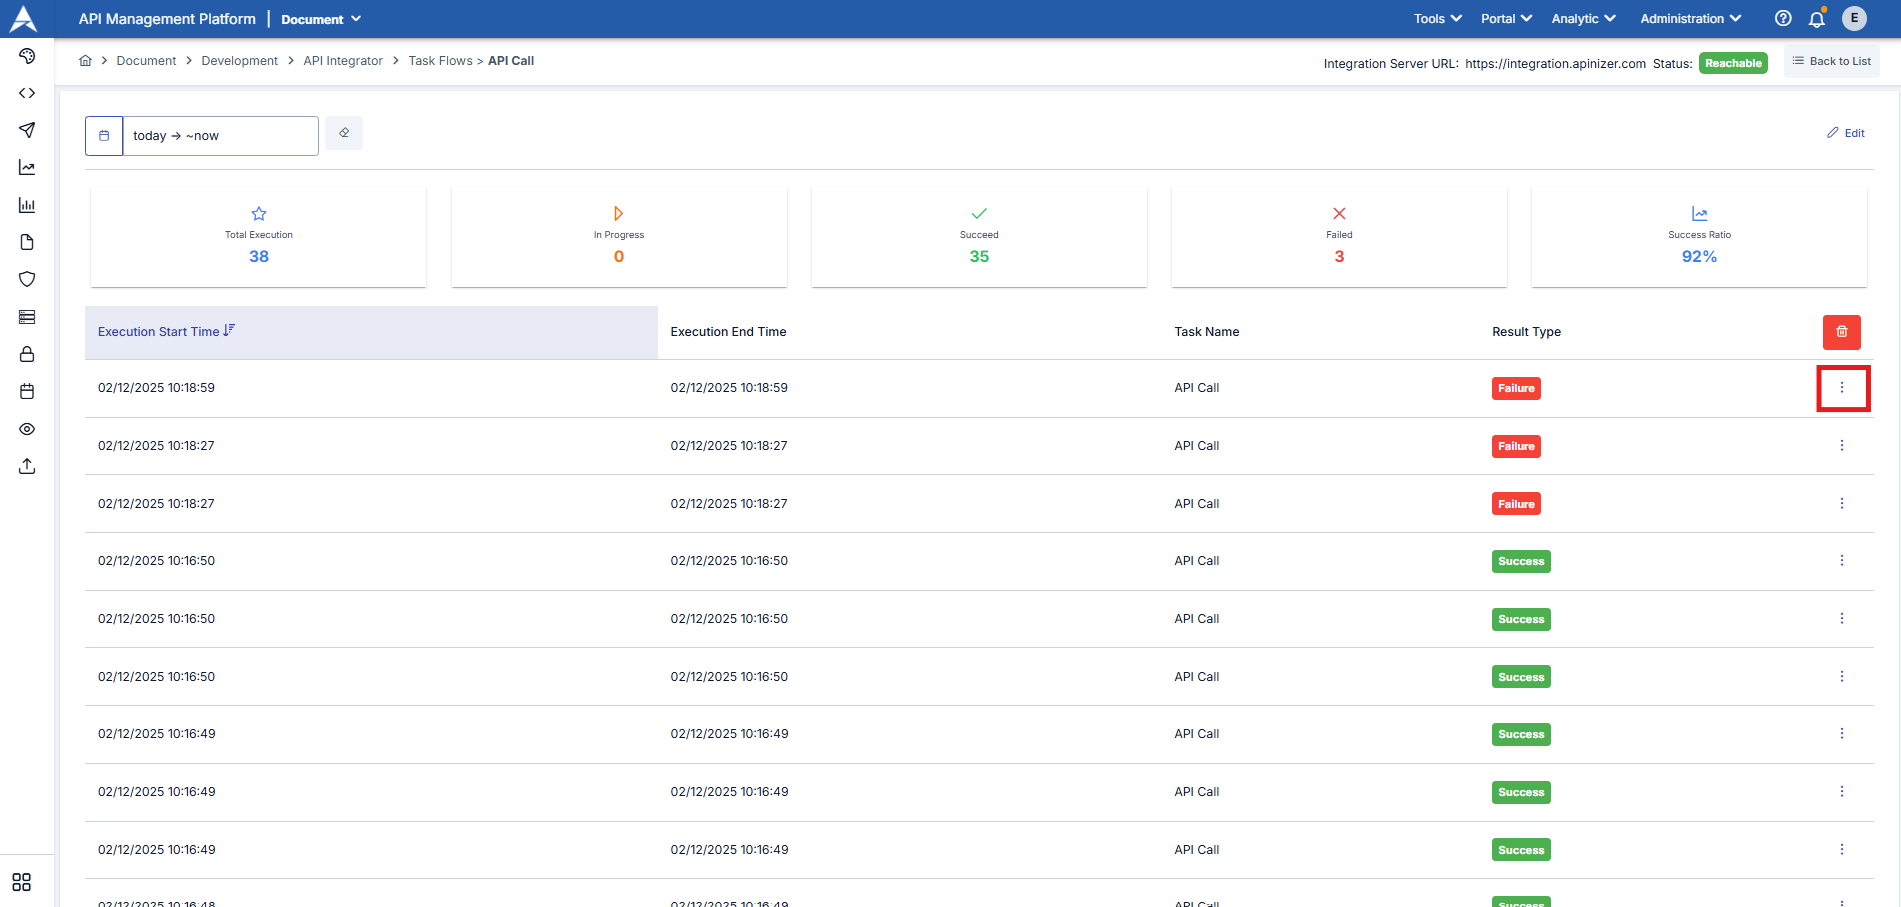
To review the details of the task flow, click the three-dot button next to the relevant work log entry.
To access the detailed work log and outputs for each task within the task flow, select Task Log Details.
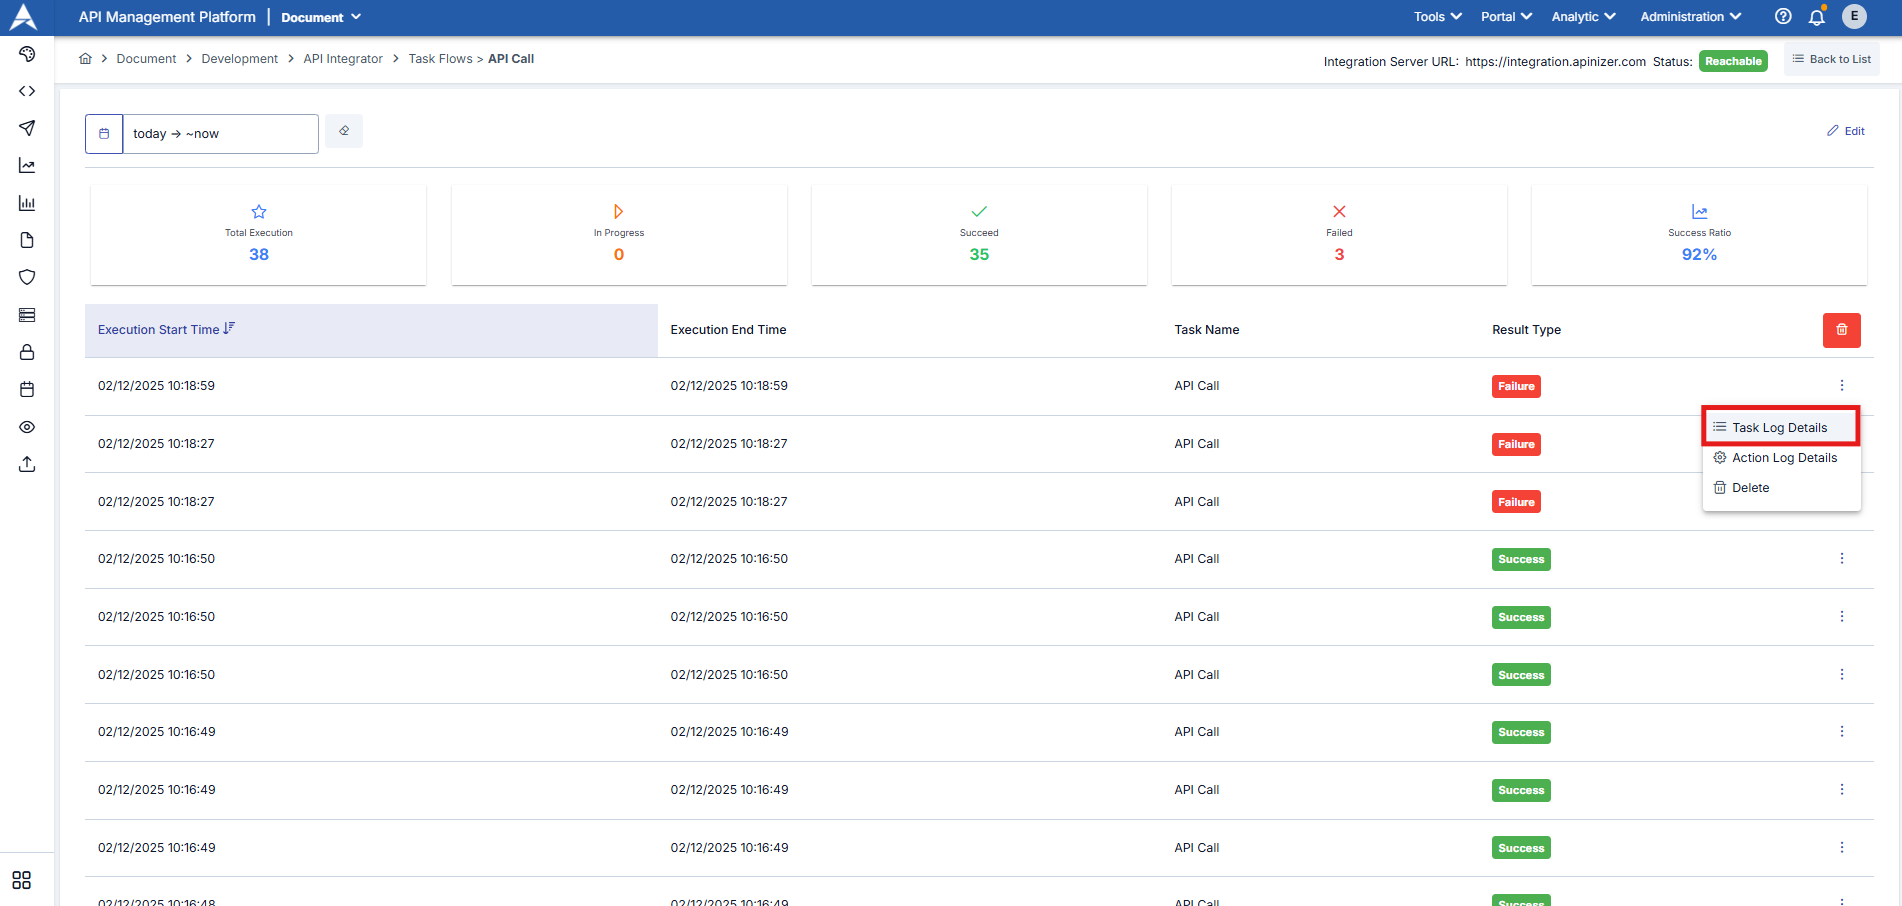
The work logs for each task defined within the task flow are displayed in the opened window. By clicking the three-dot button next to the relevant log entry, you can view the log details and the task's outputs.

In the screenshot below, we can see the output of the API Call task.
Görevlerdeki Ortak Alanlar
When creating a task, there are some input and output fields that are the same for each type. This information is highlighted in the images below.
The fields used to configure common information in tasks are shown in the table below.
| Alan | Açıklama |
|---|---|
Execute This Task For | The type of how the result generated from the previous task will be executed within the current task is selected. The executed result is used in the relevant field within the task to generate a process.
|
This option becomes active if the task type is set to Loop. The result of the value provided via JSON Path/XPath is executed as a loop. Apinizer Syntax The critical point in this area is that the value must be written in accordance with Apinizer's syntax. There are two elements to pay attention to in this rule. Syntax 1: Querying data Word order rules;
Let's look at the formula for the word order; {{previous-task-output-name#<This section is written in either JSONPath or XPath format>}} Let's look at an example of a word sequence;
{{centralRates#/Date/Currency}} Syntax 2: Using data from a loop within a task Elements extracted from data using syntax can be used within tasks (when sending emails, working with databases, writing scripts, etc.). To use them, they must be referenced using the variable key named LOOP_VARIABLE. Let's look at the syntax formula: {{LOOP_VARIABLE#<This section is written in either JSONPath or XPath format>}} Let's examine an example sentence structure: {{LOOP_VARIABLE#/Currency/Name/text()}} Detailed usage examples are described on the API Integrator Scenarios pages. | |
If the operation fails, then continue | This option becomes active if the task execution type is set to Loop. If an error occurs while executing actions in the loop, the process of whether to continue the task or stop it immediately is managed. |
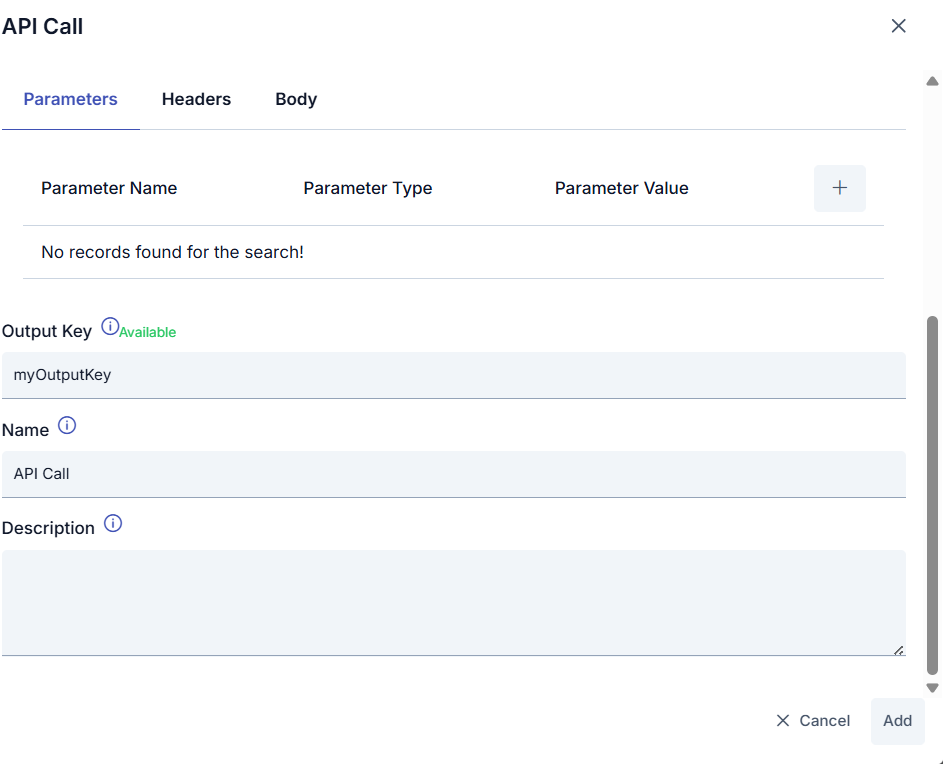
Output Keys | The list of output keys created in previous tasks is displayed. This allows the output key here to be used in task definition inputs. |
Output Key | The variable name is entered to which the value generated when the task is run will be assigned. Subsequent tasks will use the output key entered in this field if they wish to process the output of this task.
|
Name | The task name is entered. This information is assigned as the value of the {{taskflow.name}} variable. Therefore, when this variable is entered into the other input field and executed, the value of the variable will appear in the relevant output. |
Description | The job description is written. |
Triggering the Task Flow
For the task flow to be triggered via the Endpoint, the Endpoint option must be active and your integrator server must be accessible.
The task flow can be triggered in three different ways.
- Manual triggering: Each time the marked run button in the upper right corner is clicked, the task flow is triggered.
- Automatic triggering: Based on the task flow's trigger frequency (Trigger Every) value, Apinizer Integrator automatically triggers the task flow at the specified frequency.
- Triggering via endpoint: When the endpoint option is enabled, the workflow is triggered for every request made via the specially created access URL for the workflow. To trigger the workflow via its access URL, you must send a request with the user token added to the Authorization header.
To create a token: From the top right, select the Profile menu > A token can be created using the user who logged in from within My Profile.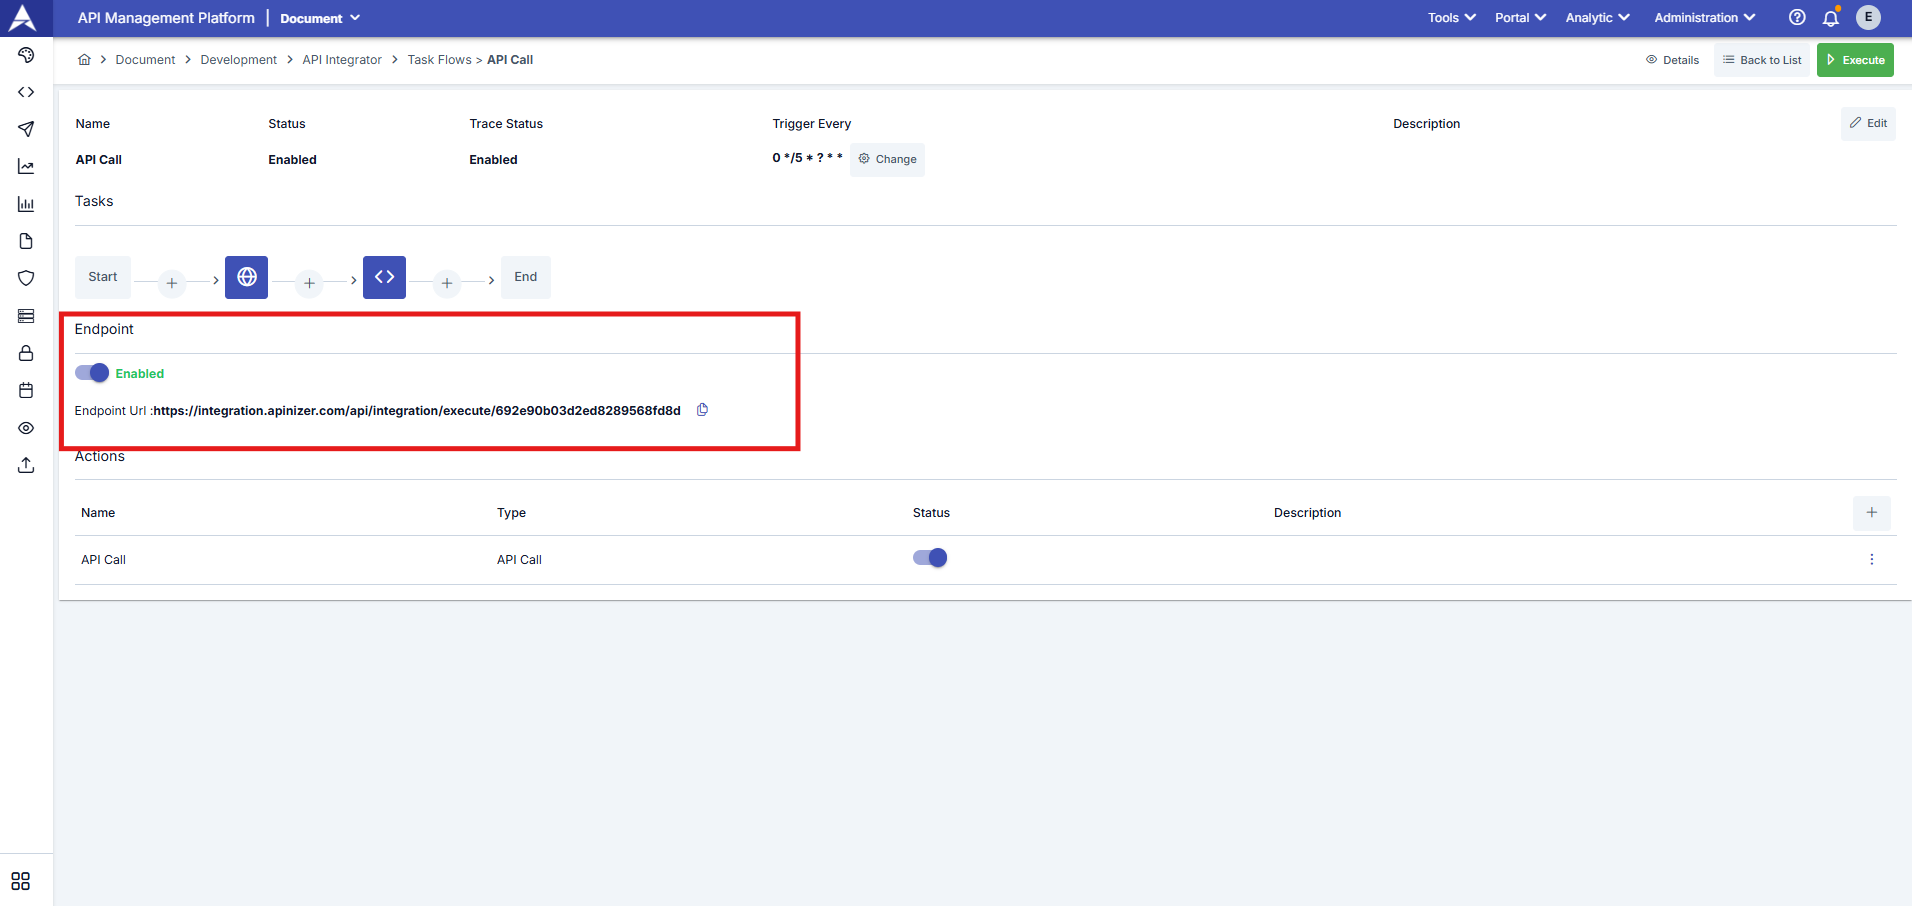
Deleting the Task Flow
To delete a record from the task flow list, click the menu button in the far-right column of the record you wish to delete and select Delete.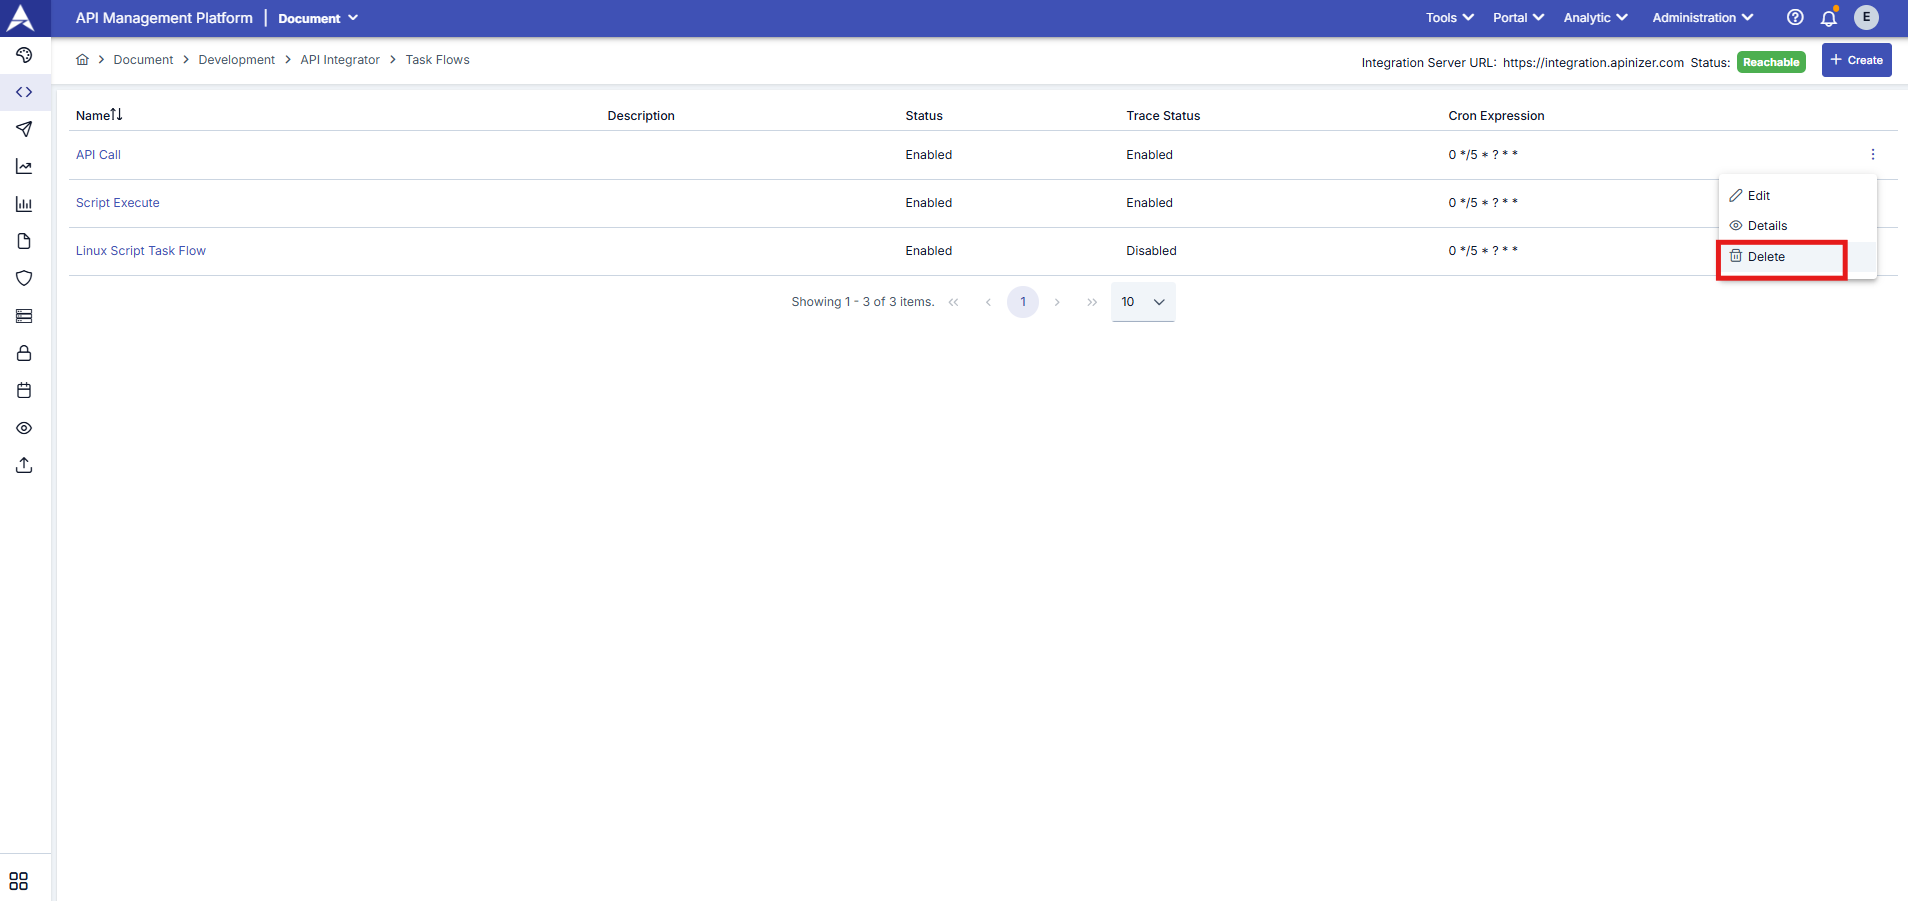
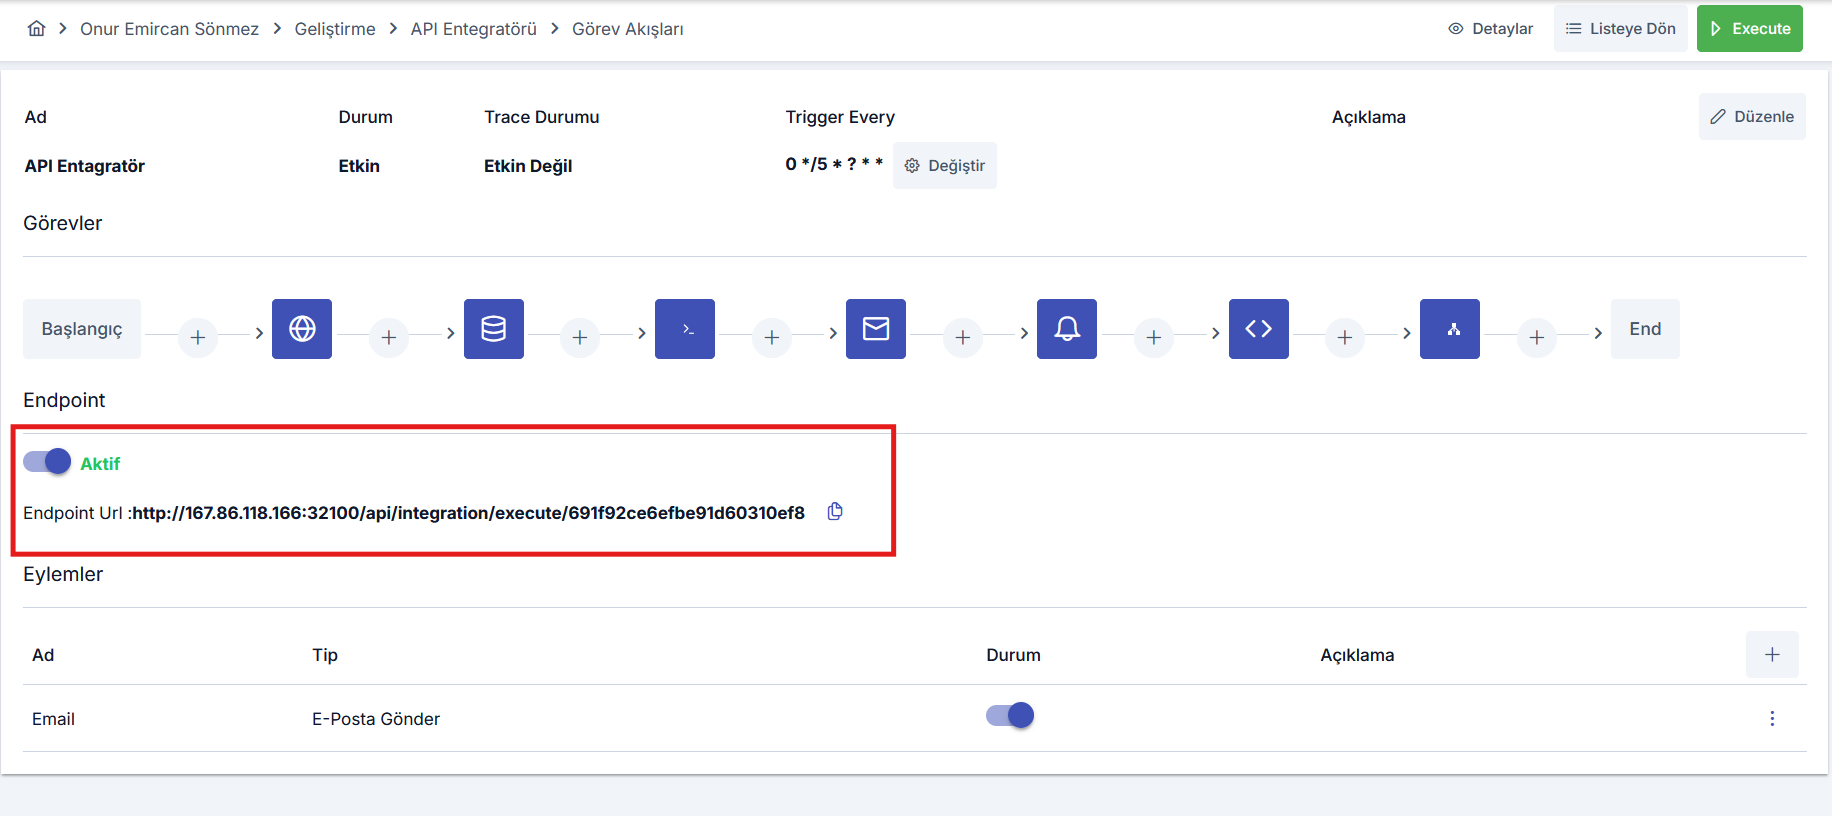
Endpoint Configuration
Task flows can be triggered manually using a scheduler or the execute button, but they can also be triggered via HTTP requests using the endpoint created specifically and uniquely for the task flow when it is created. To do this, the endpoint option must be enabled in the task flow editing interface. After enabling the endpoint option, the workflow can be triggered by sending a request to the displayed URL. To trigger the workflow via its access URL, the request must include the user token in the Authorization header.
To generate a token: From the top right, select the Profile menu > Within My Profile, a token can be generated for the logged-in user.
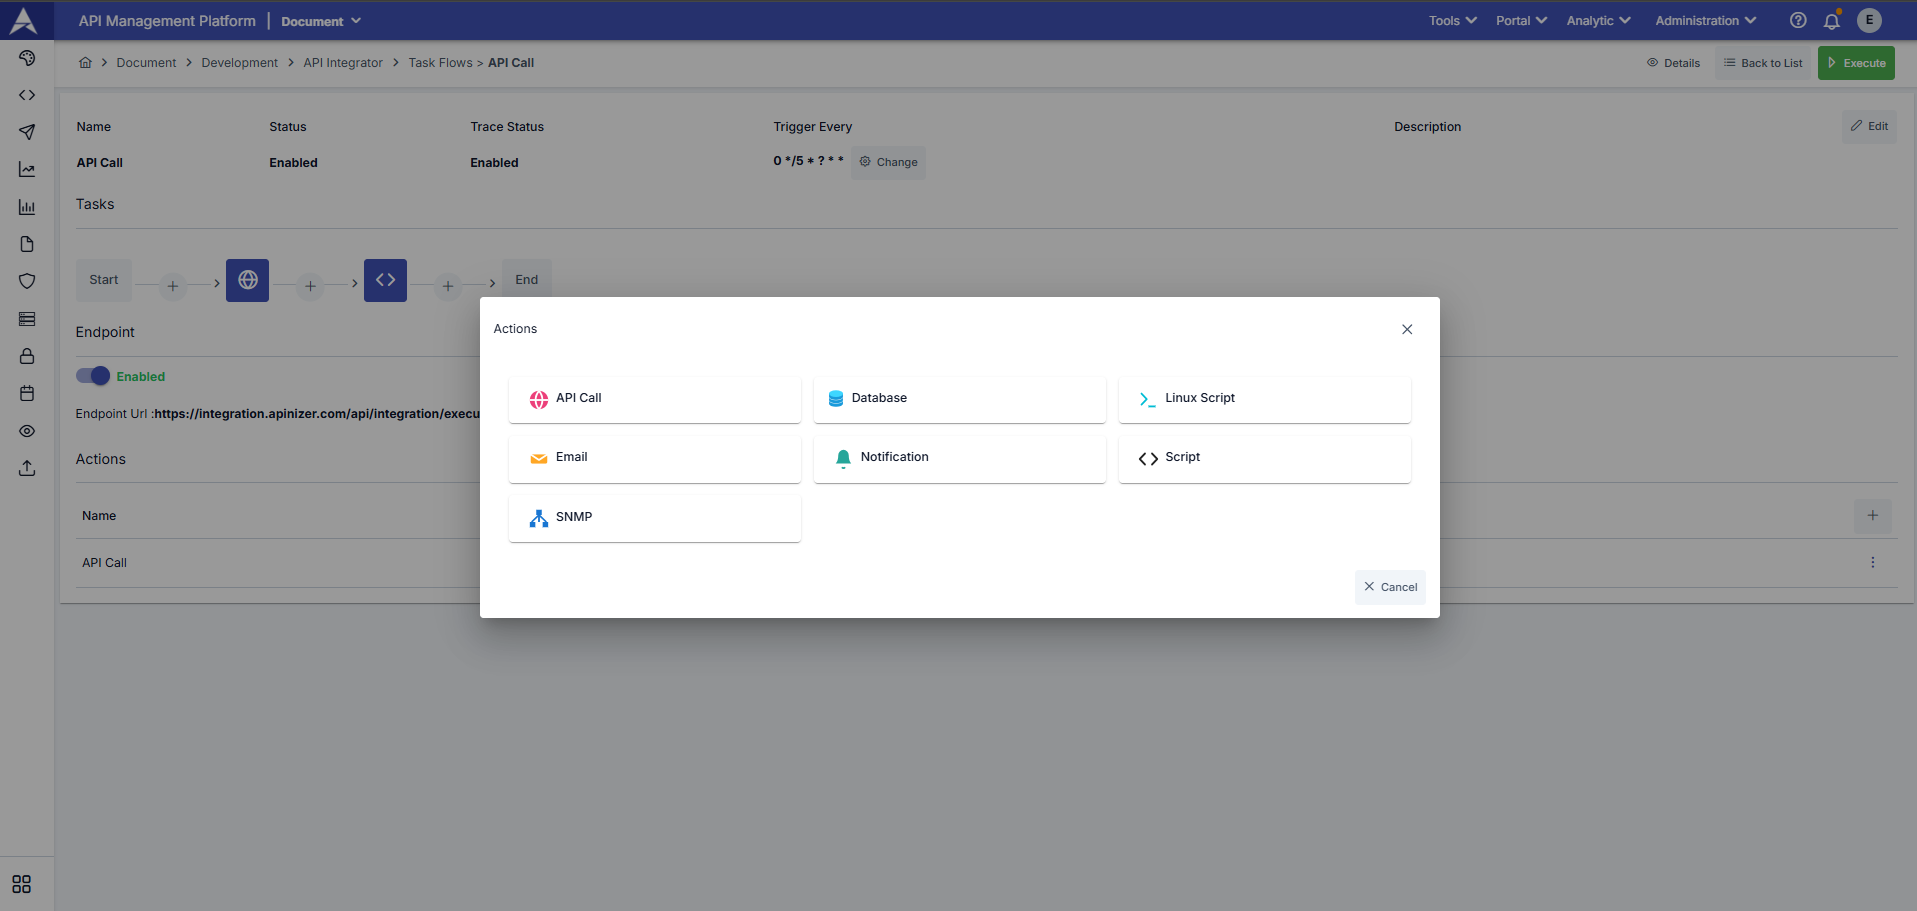
Actions Configuration
What Is Action?
Action refers to the steps to be taken if an error occurs during task flow execution.
You can define the tasks you want to be performed in case of a potential error by clicking the + button in the Actions section.
If you encounter a potential error in the task flow through the opened window, you can define a task to be notified of error conditions or perform specific actions for error conditions.