API Proxy Groups
API Proxy Groups allow multiple API Proxies to be managed as a group.
Policies and settings added to an API Proxy Group are executed when a request comes to the API Proxy Group and are then forwarded to the API Proxies within the group.
With the 2024.05.1 Patch Version;
An API Proxy can belong to multiple API Proxy Groups.
- The feature that allowed API Proxies requiring common policies to be managed by an API Proxy Group has been removed.
- If you need to use common policies, you can use global policies or policy groups.
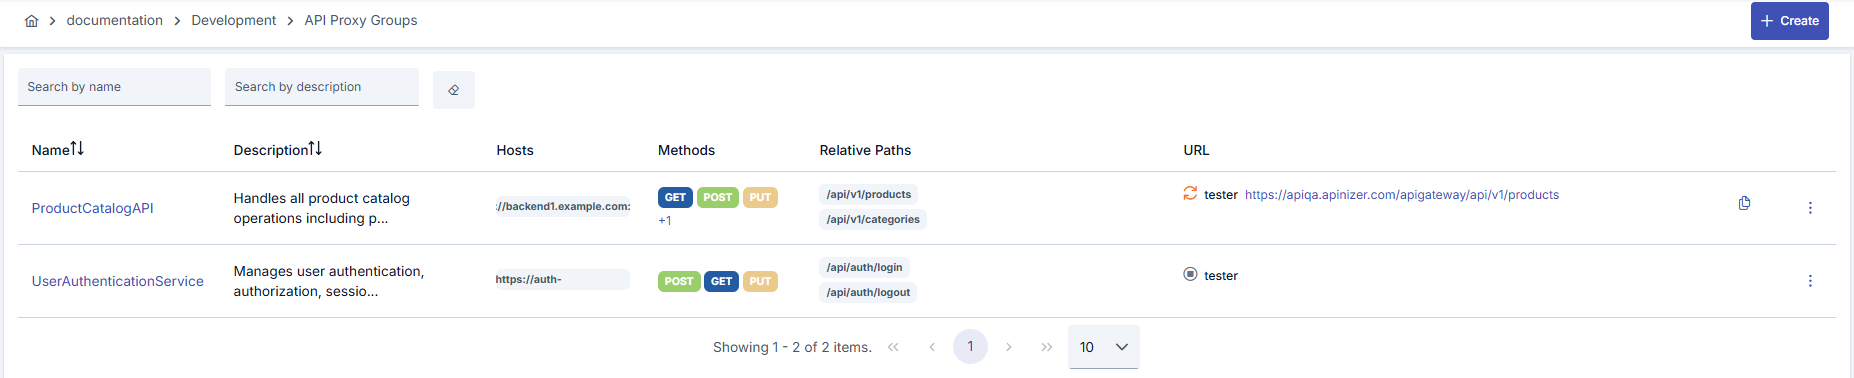
API Proxy Group List
When the API Proxy Group list is first opened, the existing API Proxy Groups are displayed as shown in the image below.
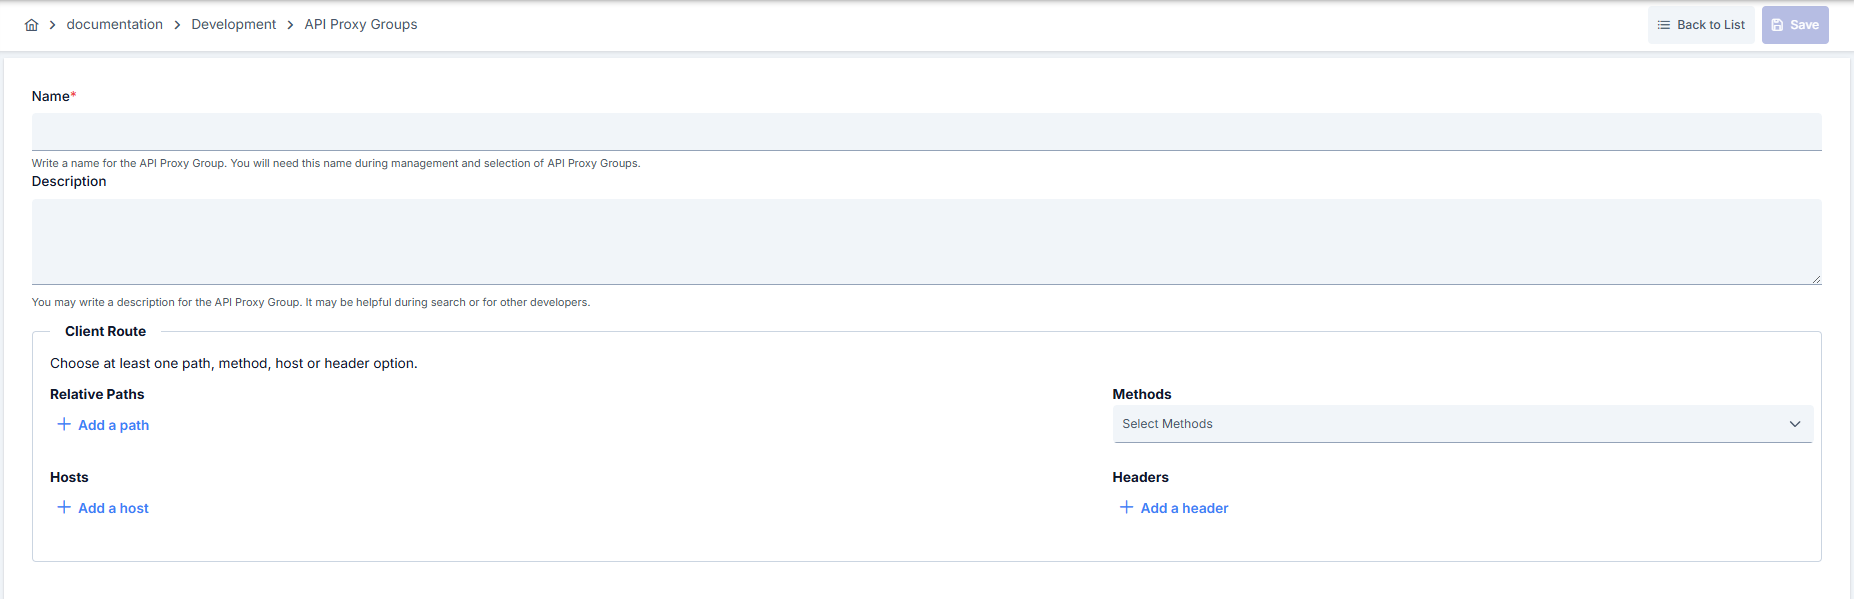
Creating a new API Proxy Group
To create a new API Proxy Group, click the ![]() Create button in the upper right corner of the API Proxy Group List interface.
Create button in the upper right corner of the API Proxy Group List interface.
In the opened form, enter at least the Name in the Name and Description fields for the new API Proxy Group, then click the Save button.
| Field | Description |
|---|---|
| Name | A unique name for the API Proxy Group. Spaces and special characters should not be used. A meaningful naming convention should be applied for group identification. |
| Description | A text area explaining the purpose and usage scenario of the API Proxy Group. Used to understand the function of the group during management and maintenance processes. |
| Client Route | Routing information used by clients to access this API Proxy Group. At least one of the routing options based on path, method, or header must be selected. • Relative Paths URL path(s) relative to the API Proxy Group where requests will be directed. Multiple paths can be defined, each must start with “/”. • Methods HTTP methods allowed for this group (GET, POST, PUT, DELETE, PATCH, OPTIONS, HEAD). By default, all methods can be selected. • Hosts Host addresses of backend services. Multiple hosts can be added. • Headers HTTP headers to be added or modified at the API Proxy Group level. Defined as key-value pairs and applied to all requests belonging to this group. For detailed information, please see API Proxy Client Route User Guide |
After saving, the formatting interface of the API Proxy Group opens.
Configuring an API Proxy Group
The formatting of the Overview, Settings, and Development tabs is almost identical to that of the API Proxy, with only a few minor differences.
Overview Tab
The picture below shows the Overview Tab:
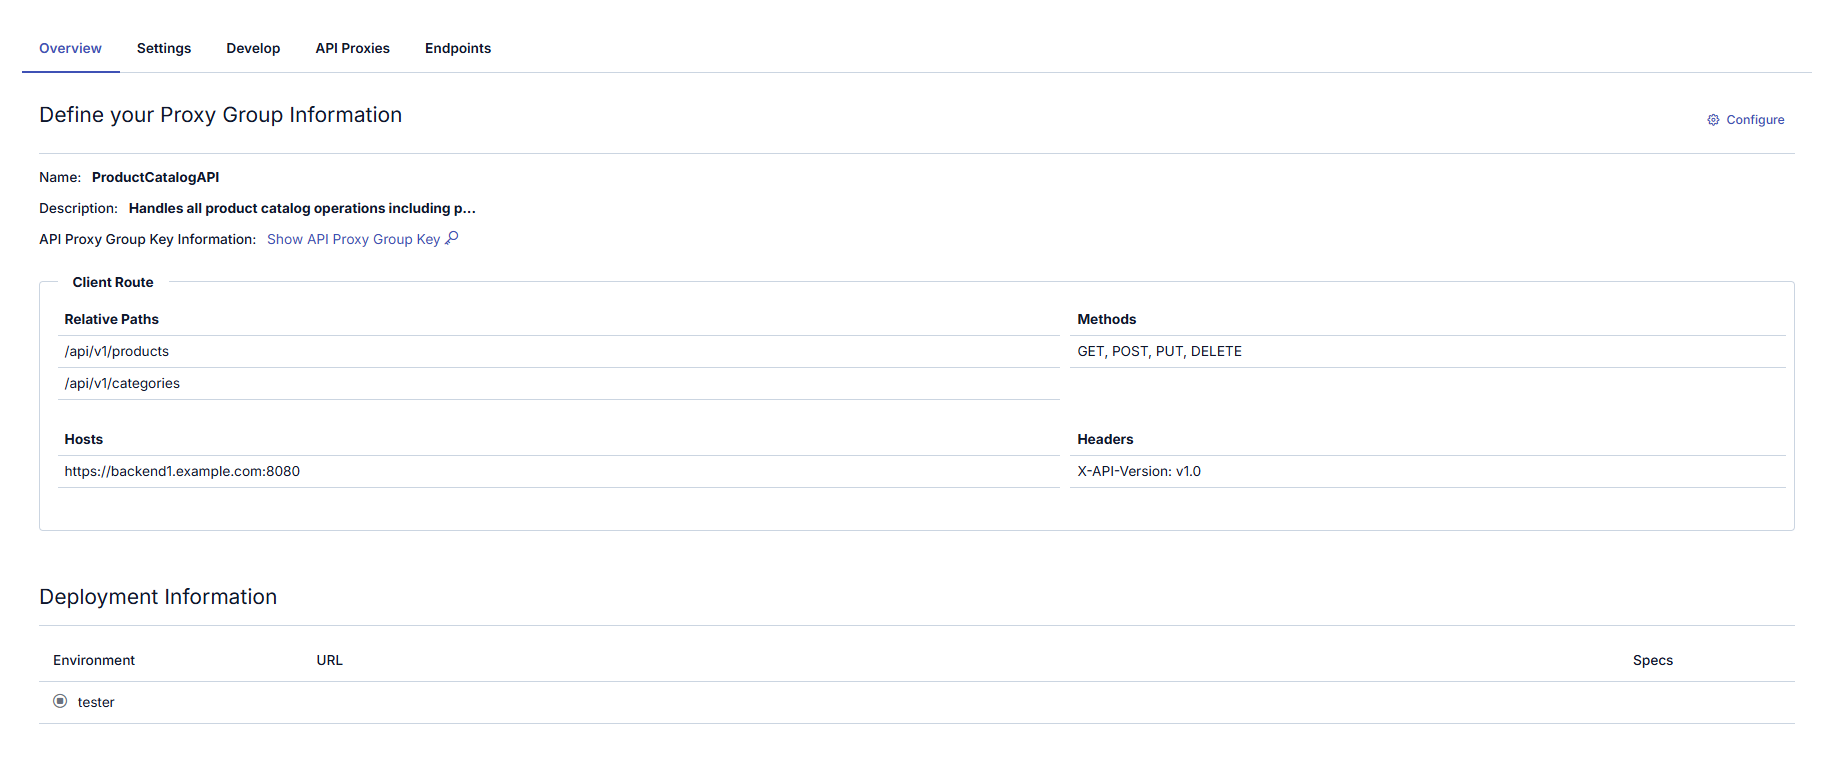
The fields used for Overview Tab are shown in the table below.
| Field | Description |
|---|---|
| Name | The name of the API Proxy Group. This is a required field. |
| Description | The explanation/definition of the API Proxy Group. Optional field based on preference. |
| Client Route | The routing information that clients will use to access the API Proxy Group. For more details, see: API Proxy Client Route Usage Guide |
| API Proxy Group Key | The section where Public and Secret Keys required for JWT or OAuth2 authorization over the API Proxy Group are managed. For detailed information on how these keys are managed for API Proxy, see the relevant documentation. |
| Deployment Information | Information about the deployment status and environment of the API Proxy Group. Environment: The environment where the API Proxy Group is deployed (Development, Test, Production). URL: The full URL to be used by clients to access the API Proxy Group. Specs: |
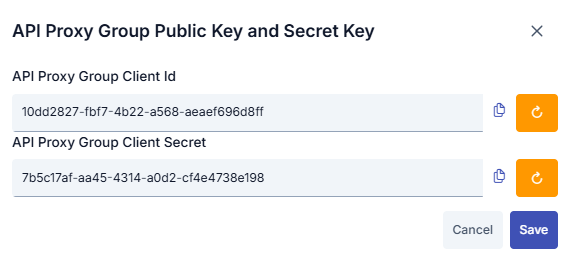
API Proxy Group Key Section
This is the section where the access keys of the API Proxy Group are managed. Access keys are used for the OAuth2 Authentication Policy.
Client Id and Client Secret values are created automatically and the user can request new ones to be created. If any of the keys are regenerated for an installed API Proxy Group, the API Proxy Group must be reinstalled for the keys to be valid.
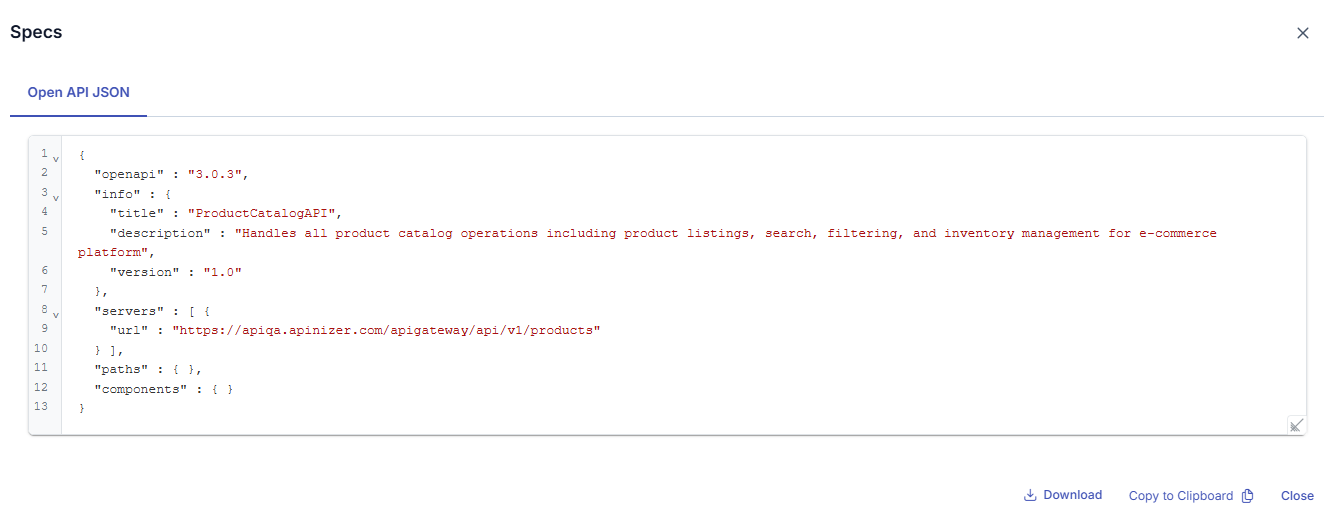
API Proxy Group Display in Swagger Interface
After the API Proxy Group is deployed, a Show button appears in the Deployment section for the relevant access address. Clicking this button provides access to the JSON format Open API specification information of the API Proxy Group.

The picture below shows the Spec Info settings:
Accessing API Proxy Group Definition Files
The content of definition files opens as seen above when clicking the Show link, and it can be copied from there. However, this method is intended for users with roles like API Developers and API Testers who work within the Apinizer platform. Clients cannot access these interfaces.
Clients can access the definition files by using the access address of the deployed API Proxy Group in the environment where it is installed, as shown below:
Let the access URL of an API Proxy Group on Production Environment is https://api.apinizer.com/apigateway/apiProxyGroup.
Then, URLs below can be used to access the definition files:
Swagger 2.x (JSON)
- https://api.apinizer.com/apigateway/apiProxyGroup?swagger
- https://api.apinizer.com/apigateway/apiProxyGroup?swagger&format=json
- https://api.apinizer.com/apigateway/apiProxyGroup?swagger.json
Swagger 2.x (YAML)
- https://api.apinizer.com/apigateway/apiProxyGroup?swagger&format=yaml
- https://api.apinizer.com/apigateway/apiProxyGroup?swagger.yaml
OpenAPI 3.x (JSON)
- https://api.apinizer.com/apigateway/apiProxyGroup?openapi
- https://api.apinizer.com/apigateway/apiProxyGroup?openapi&format=json
- https://api.apinizer.com/apigateway/apiProxyGroup?openapi.json
OpenAPI 3.x (YAML)
- https://api.apinizer.com/apigateway/apiProxyGroup?openapi&format=yaml
- https://api.apinizer.com/apigateway/apiProxyGroup?openapi.yaml
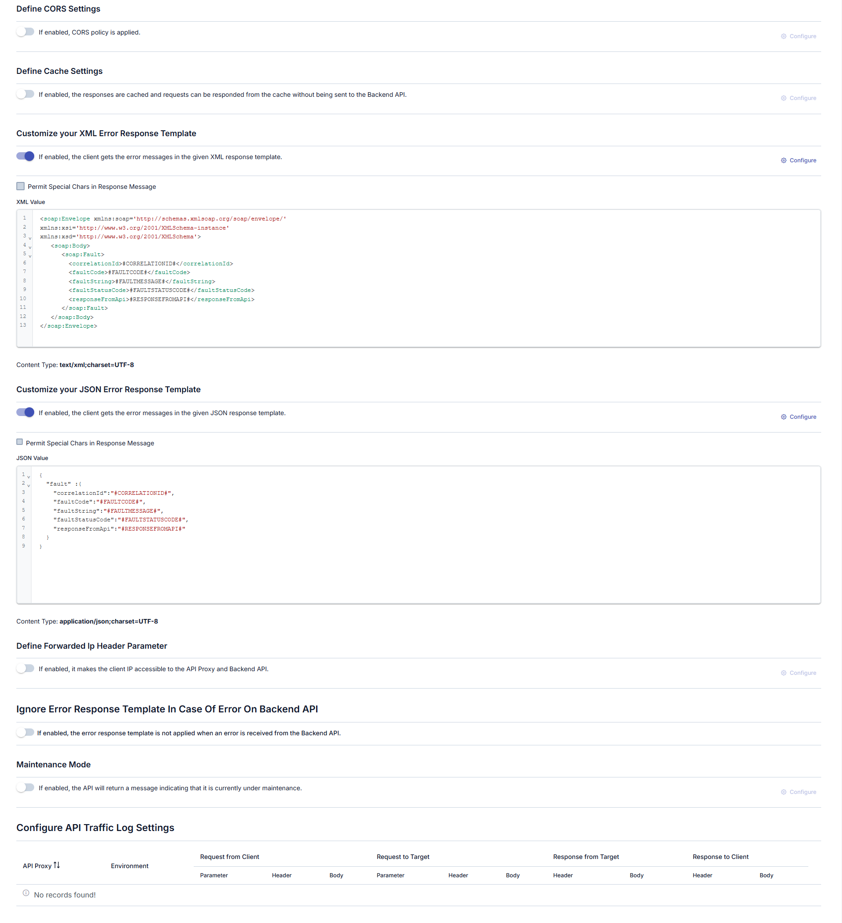
Settings Tab
The following settings can be managed for the API Proxy Group via the Settings tab. For details of these settings, see the Settings Tab page.
- CORS
- Cache
Customizing the XML Error Response Template
- Customizing the JSON Error Response Template
- Forwarded IP Header Parameters
- Ignore Error Response Template: The setting to ignore the Error response template can be set on the basis of API Proxy Group.
- API Proxy Traffic Log Settings
The picture below shows the Settings Tab:
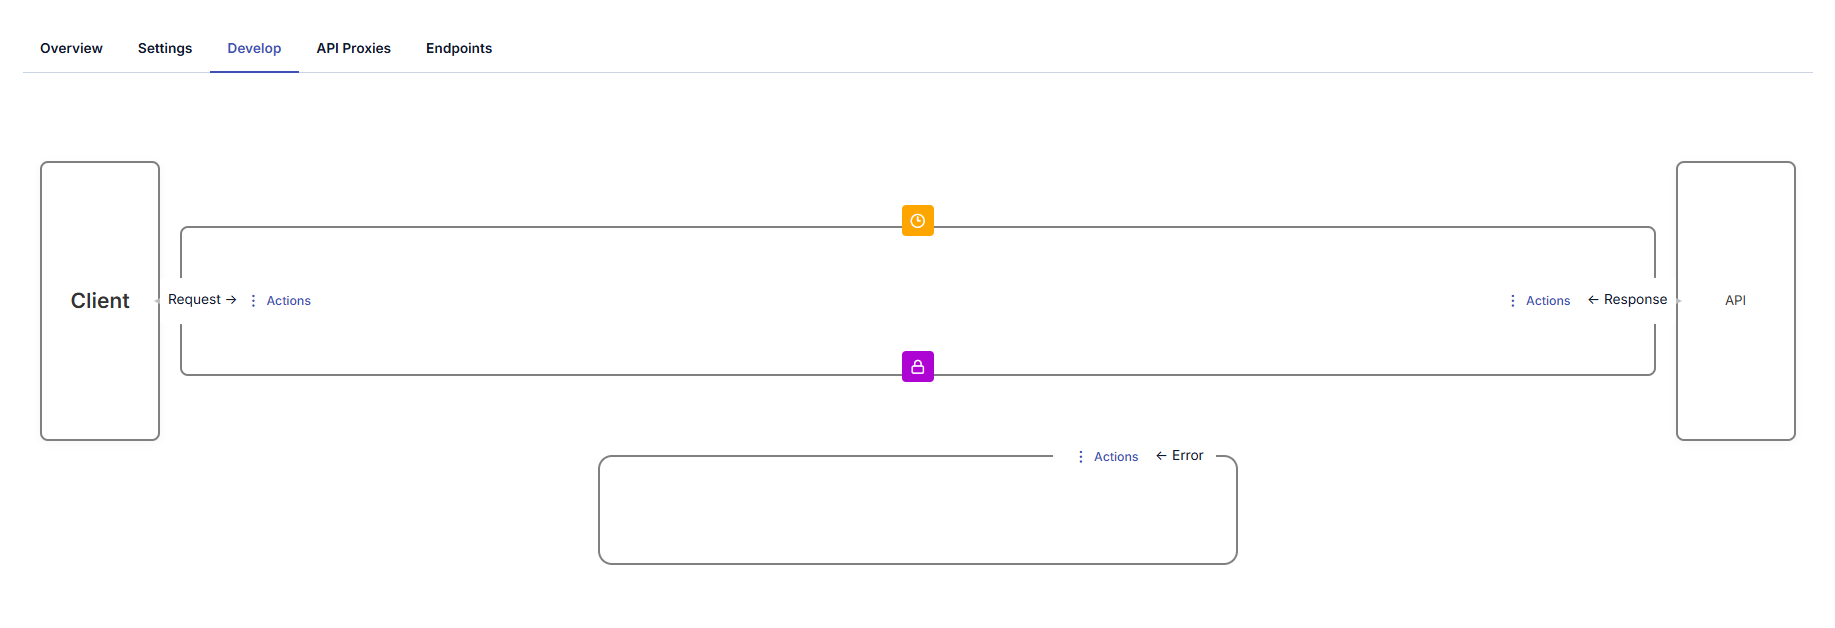
Development Tab
In the Development tab, policies for the API Proxy Group are managed. For detailed information, refer to the API Proxy's Development Tab page, which explains how policies are managed for API Proxies.
The picture below shows the Development Tab:
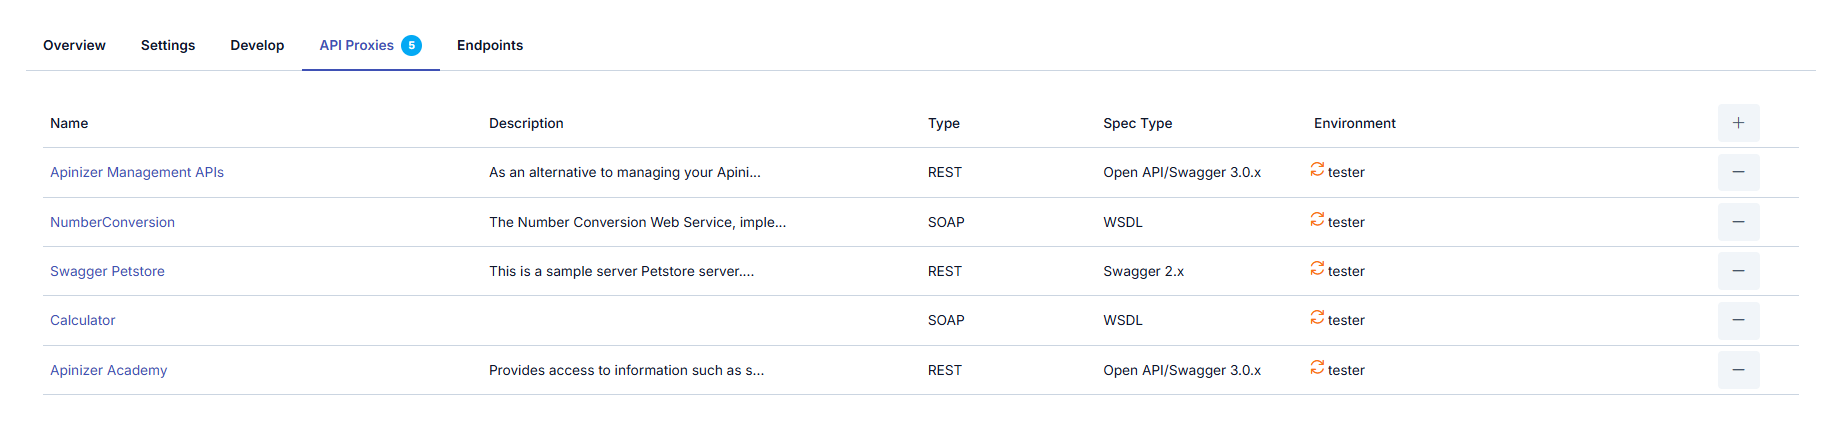
API Proxies Tab
The API Proxies within the API Proxy Group and their deployment information are managed from this section.
If the API Proxy Group has not been deployed, the URL field will appear empty.
The picture below shows the API Proxies Tab:
Endpoints Tab
The picture below shows the Endpoints Tab:
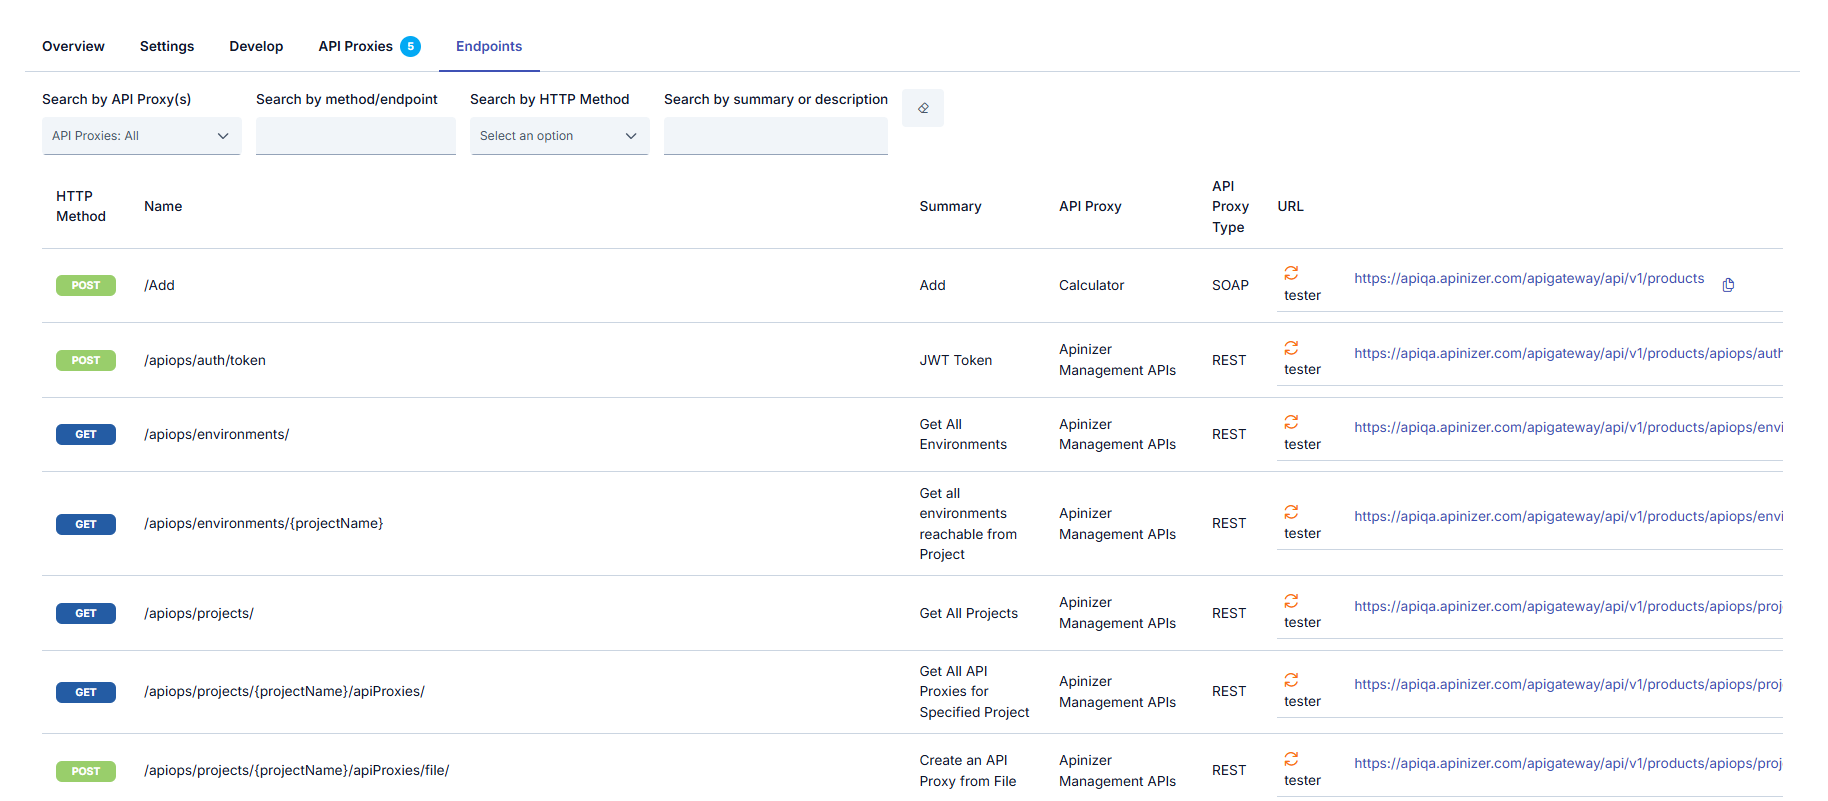
Endpoint Test
Click the test button to test the endpoints.

Viewing Endpoint Detail
Click the button at the end of the line to view the details of the endpoints.

The picture below shows the endpoint detail:
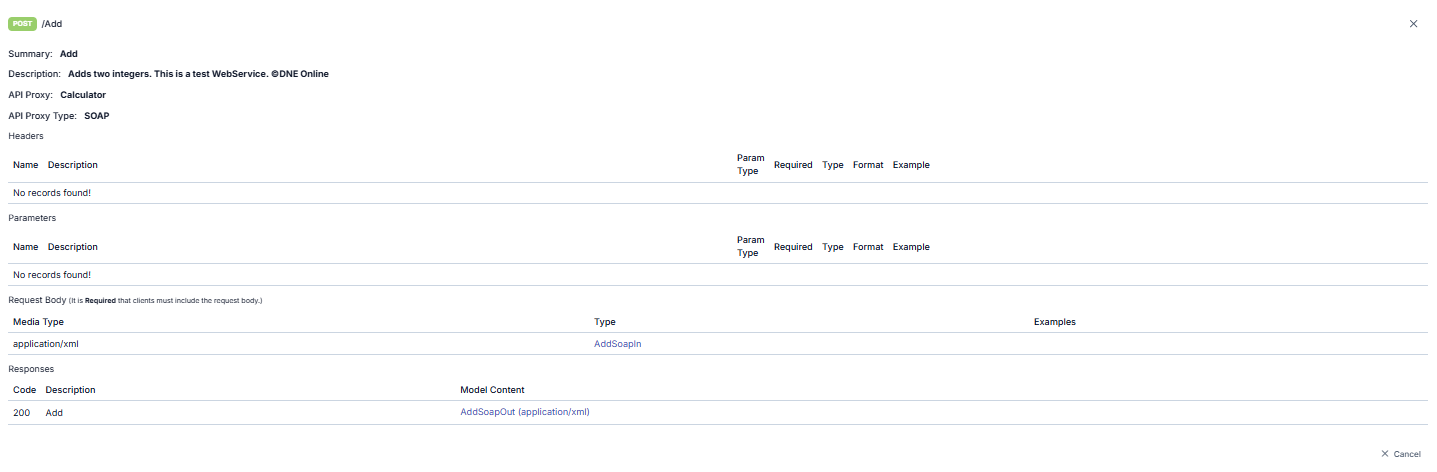
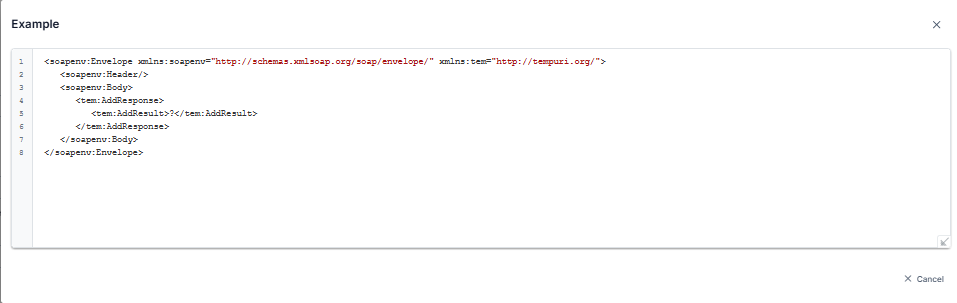
On this screen, if the Type information of the request or the Model Content of the response is found, the detail can be viewed by clicking it.
Let the addresses to be used in the examples below be:
- URL of the Environment: https://demo.apinizer.com/apigateway
- API Proxy Group's Relative Path: /apiProxyGroup1
- API Proxy Group's URL on the Environment it is deployed to: https://demo.apinizer.com/apigateway/apiProxyGroup1
- API Proxy's Relartive Path: /petstore
- API Proxy's URL on the Environment it is deployed to: https://demo.apinizer.com/apigateway/petstore
- Methot/endpoint: /pet/findByStatus
- HTTP method value of the endpoint to be accessed: GET
Proxy Group only works on HTTP(S) protocol.
Direct Access to API Proxy
There is no change in direct access to API Proxies added to the API Proxy Group. Clients continue to access API Proxies through the addresses created based on the environments they are deployed in.
The URL to send the GET request is:
https://demo.apinizer.com/apigateway/petstore/pet/findByStatus?status=pending
Access to API Proxy Group
API Proxies' methods/endpoints can be accessed through the API Proxy Group's address.
Accessing an endpoint of a REST-type API Proxy
The access address is determined by appending the endpoint's address to the gateway address specified for the API Proxy Group. During this process, the API Proxy's own address is not taken into account.
The URL to send the GET request is:
https://demo.apinizer.com/apigateway/apiProxyGroup1/pet/findByStatus?status=pending
If a method/endpoint is accessed through the API Proxy Group, the API Proxy's address is not considered. The method/endpoint behaves as if it belongs directly to the API Proxy Group, and the URL for the method/endpoint is constructed with the API Proxy Group's address.
If there are multiple methods/endpoints with the same address and HTTP method within the REST-type API Proxies in the API Proxy Group, the request will be routed to the first found method/endpoint.
Due to a method/endpoint in any API Proxy within the API Proxy Group using a path parameter, access to some method/endpoints of other API Proxies within the group may become inaccessible.
Accessing a method/endpoint of API Proxy of SOAP type
Sending the request with the SOAPAction header and the corresponding SOAP message to the access address of the API Proxy Group is sufficient.
If there are multiple methods with the same SOAP Action within SOAP-type API Proxies in the API Proxy Group, the request will be directed to the first method encountered.