In this tab, policies, protocol conversion settings and method/endpoint management operations can be done for the selected API Proxy.


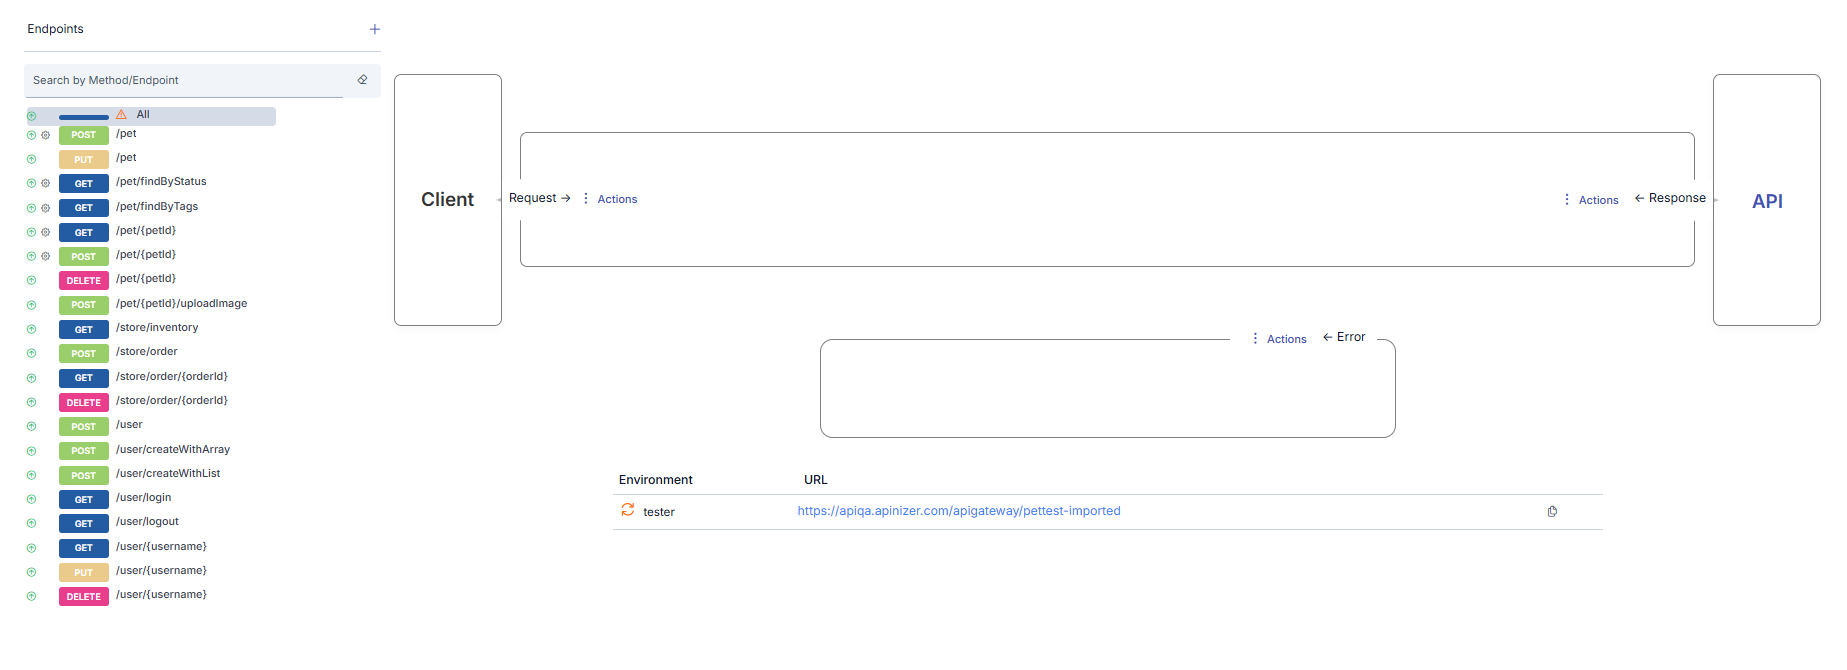
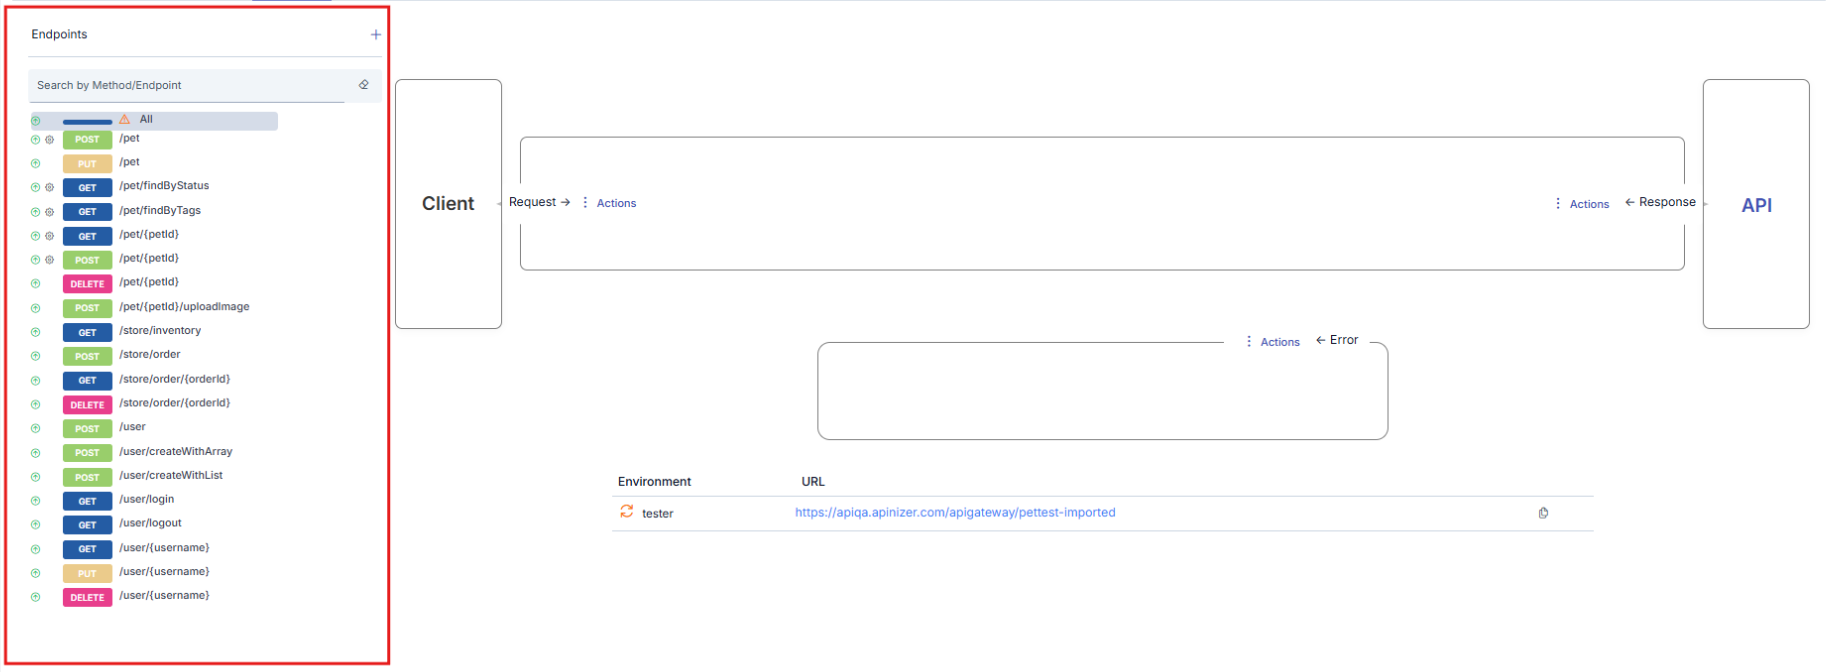
Method/Endpoint Operations

Each API Proxy has its own methods/endpoints that act as a proxy for the methods/endpoints of the Backend API it is created for.

If the API Proxy is created

  • using an API Definition File created with the Spec Designer,
  • by giving the URL address of the WSDL, Swagger or OpenAPI file, or
  • by uploading specification file (WSDL, Swagger or OpenAPI file),

then for each of the existing methods/endpoints in this file, a method/endpoint with the same name is created in the API Proxy automatically.


Users may want to add new methods/endpoints, update existing ones, delete them or disable them for a certain or indefinite period for the following possible reasons:

  • One or more new methods/endpoints are added to the Backend API.
  • One or more new methods/endpoints are deleted from the Backend API.
  • The HTTP method or the name of one or more methods/endpoints in the Backend API are desired to be hidden from the clients.
  • One or more methods/endpoints in the backend API are intended to be completely or temporarily closed to clients.

Adding a REST Method/Endpoint

Add button is clicked to add a new method/endpoint.


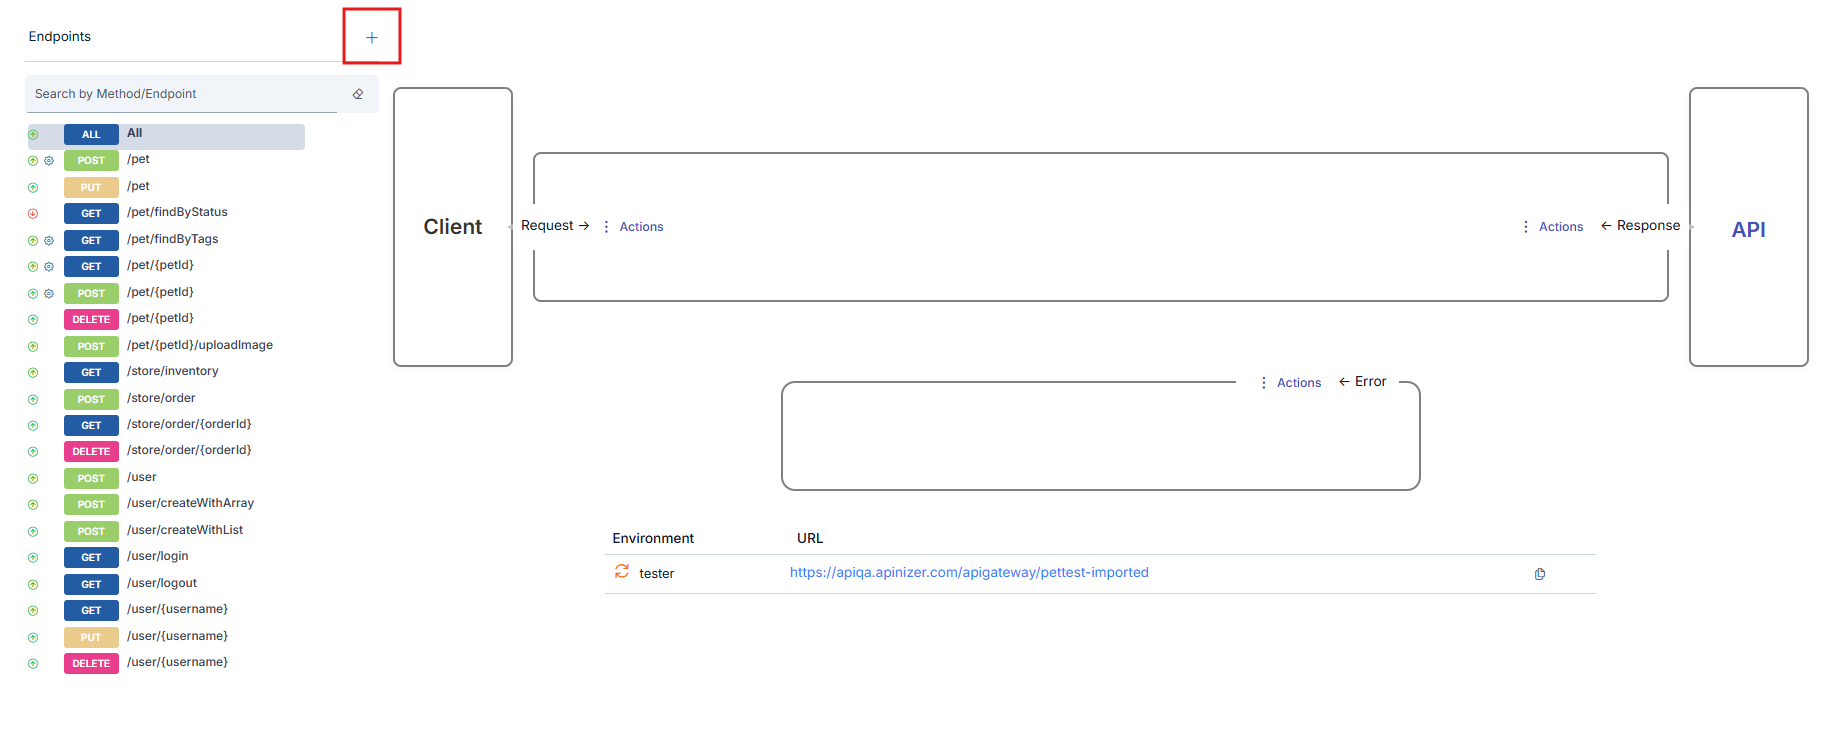
When the button is clicked, a popup appears where the information of the new method/endpoint to be added can be entered.


REST Endpoint Settings

The picture below shows the endpoint settings of the REST type API Proxy:


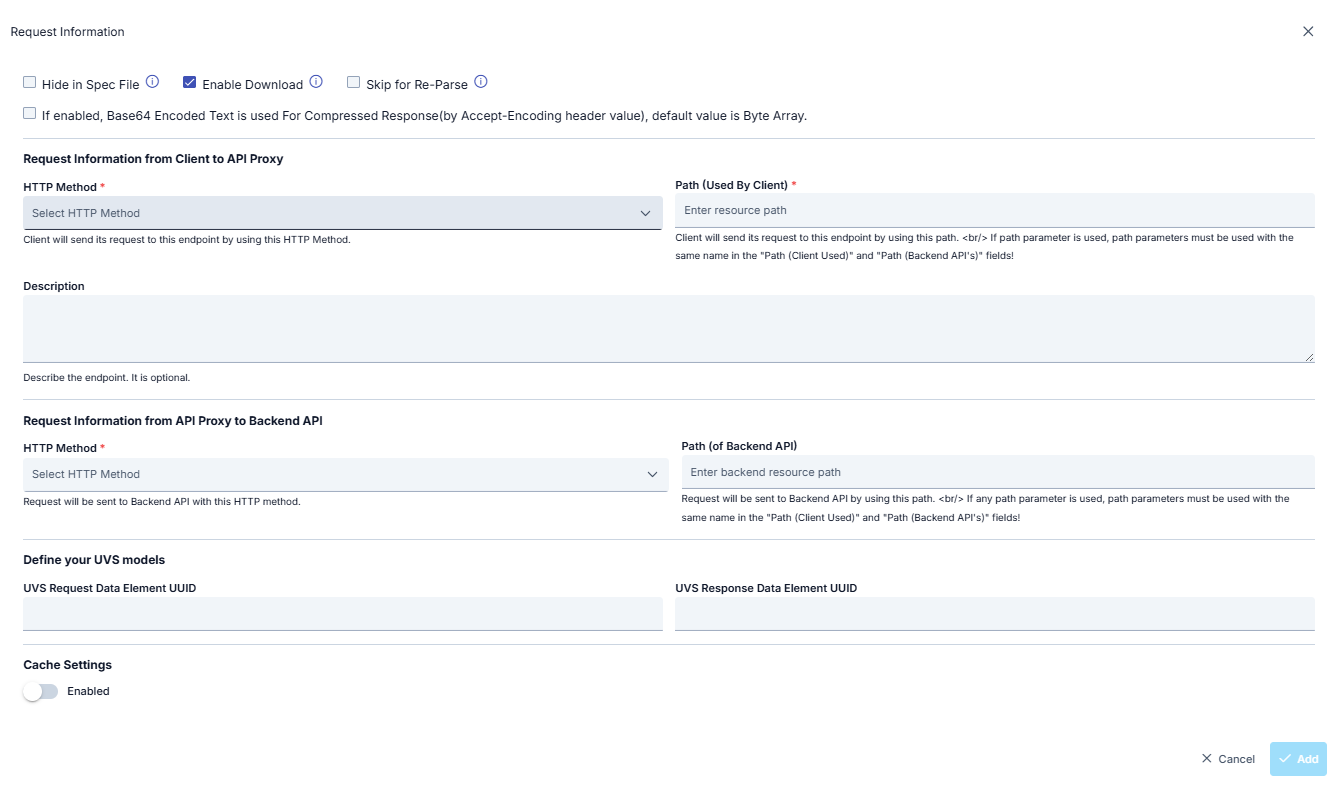
A new method/endpoint is added to the API Proxy when the following information is filled and the Add button is clicked.

FieldDescription
Hide in Spec FileIf this option is selected, this method will not be shown in Spec File.
Enable Download

If the result returned from API Method/Endpoint is of Byte Array type, this option is selected to treat the result as a file. Otherwise, the content is returned to the client as encoded text.

In order to decide whether the result is a Byte Array or not, it is checked whether the Content Type Header value is included in the "Byte Array Types" list in the system settings. If it is in this list, it is decided that the result is of Byte Array type.

If enabled, Base64 Encoded Text is used For Compressed Response(by Accept-Encoding header value), default value is Byte Array

It is decided whether the response message that will be returned from this method is compressed, by checking whether there are gzip, deflate or br values in the Accept-Encoding value. If one of these values is present, the status of the message is compressed.

If the returned message is compressed and the response is of Byte Array type and;

  • If this option of the method is active, the returned message is compressed as a Byte Array and returned to the client.
  • If this option of the method is disabled, the returned message is encoded with Base64 and converted to text, then the text is compressed and returned to the client.

HTTP Method

(From Client to API Proxy section)

The HTTP method of the method/endpoint. It is mandatory.

Path

(From Client to API Proxy section)

The relative address of the method/endpoint that can be accessed over the URL of the API Proxy. It is mandatory.

Description

(From Client to API Proxy section)

An optional description of the method/endpoint.

Backend HTTP Method

(From API Proxy to Backend API section)

The HTTP method that the method/endpoint of the Backend API expects. It is mandatory. 

Backend Path

(From API Proxy to Backend API section)

The relative address of the method/endpoint of the Backend API. It is mandatory.

Cache Settings 

If this option is selected, only HTTP Get requests' responses will be cached. 

Cache Key Type

  • There are two options for Cache Key Type:

    • Use Query Params: This value is used to determine the key (to be created for caching) based on the HTTP Query parameters in the request.

    For example, when the query parameter is /methodName?param1=value1&param2=value2, the key to be kept in the cache consists of the value "param1=value1&param2=value2"

    • Create Custom Key: This value is used to create the key (to be created for caching) with the fields to be selected from the request.

    When this value is selected, a key is created with the fields to be specified in the "Variable List" table.

Variable List

If Create Custom Key is selected as the Cache Key Type, this field becomes active.

This list specifies where to retrieve the relevant values in the header, parameter, or body sections of the request message that will be used to generate the cache key.

For example; An expression can be written as "Create key based on the APIKEY value in the header of the request message and the XPath value "//identity_no" in the body".

Capacity

Maximum number of the responses to be cached.

Invalidation Requires Authn

Selected if authorization is required to invalidate the cache.

Handling Action

If authorization is required to invalidate the cache, the action to take for unauthorized requests is selected:

  • Continue
  • Stop

TTL (seconds)

The length of time the cached response will remain in the cache. It is given in seconds.

Cache Null Value

Checked if null values are also to be cached.


SOAP Method Settings

The settings that can be made for the SOAP type API Proxy methods are different from the REST type settings.

It is not possible to add new methods to a SOAP Type API Proxy, only existing methods can be updated.


The picture below shows the method settings of the SOAP type API Proxy:


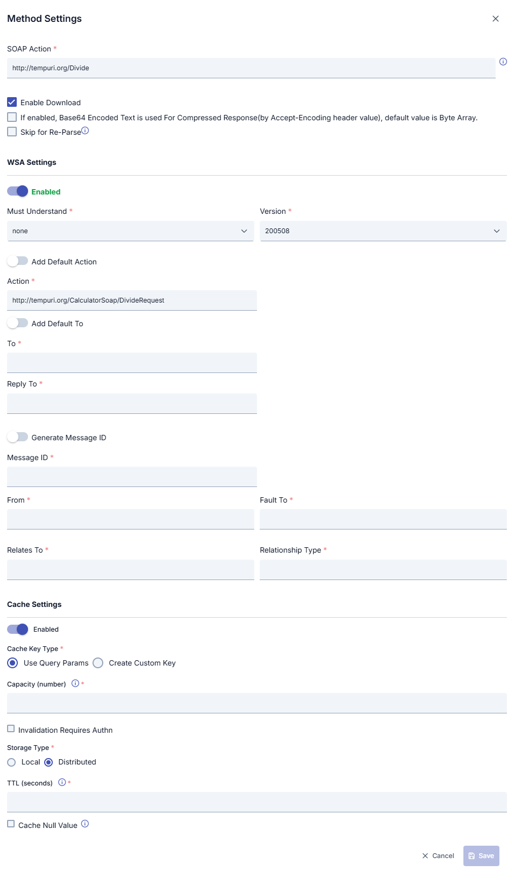
The fields used for the method settings of the SOAP type API Proxy are shown in the table below.

FieldDescription

SOAP Action

When the WSDL file is parsed, the SOAPAction value specified for the method is automatically obtained. However, the value in this field can be changed to use a different value for any reason.

Enable Download

If the result returned from API Method/Endpoint is of Byte Array type, this option is selected to treat the result as a file. Otherwise, the content is returned to the client as encoded text.

In order to decide whether the result is a Byte Array or not, it is checked whether the Content Type Header value is included in the "Byte Array Types" list in the system settings. If it is in this list, it is decided that the result is of Byte Array type.

If enabled, Base64 Encoded Text is used For Compressed Response(by Accept-Encoding header value), default value is Byte Array

It is decided whether the response message that will be returned from this method is compressed, by checking whether there are gzip, deflate or br values in the Accept-Encoding value. If one of these values is present, the status of the message is compressed.

If the returned message is compressed and the response is of Byte Array type and;

  • If this option of the method is active, the returned message is compressed as a Byte Array and returned to the client.
  • If this option of the method is disabled, the returned message is encoded with Base64 and converted to text, then the text is compressed and returned to the client.

WSA Settings

Thanks to this section, WS-Security Addressing settings can be activated separately for each method. When activated, the corresponding WSA values are added to the SOAP message.

Must Understand

The "Must Understand" value is set.

Version

WSA version to be used is selected.

Add Default Action

It allows the predefined action to be added to the SOAP message when parsing the WSDL file. When activated, the following action statement disappears.

Action

This field is used to add customized action to the SOAP message.

Add Default To

It provides the predefined who information to be added to the SOAP message when parsing the WSDL file. When activated, the following to whom statement disappears.
ToThis field is used to add customized who information to the SOAP message.

Reply To

This field is used to add customized response to the SOAP message.

Generate Message ID

This field is activated to add a different generated Message ID for each message to the SOAP message.

Message ID

This field is activated to add a fixed Message ID for each message to the SOAP message.

From

This field is used to add customized from information to the SOAP message.

Fault To

This field is used to add customized error to the SOAP message.

Relates To

This field is used to add customized error association information to the SOAP message.

RelationShip Type

This field is used to add customized error relationship type information to the SOAP message.

Cache Settings

If this setting is activated, method/endpoint based cache settings will be activated.

Cache Key Type

There are two options for Cache Key Type:

  • Use Query Params: This value is used to determine the key (to be created for caching) based on the HTTP Query parameters in the request.

For example, when the query parameter is /methodName?param1=value1&param2=value2, the key to be kept in the cache consists of the value "param1=value1&param2=value2"

  • Create Custom Key: This value is used to create the key (to be created for caching) with the fields to be selected from the request.

When this value is selected, a key is created with the fields to be specified in the "Variable List" table

Variable List

If Create Custom Key is selected as the Cache Key Type, this field becomes active.

This list specifies where to retrieve the relevant values in the header, parameter, or body sections of the request message that will be used to generate the cache key.

For example; An expression can be written as "Create key based on the APIKEY value in the header of the request message and the XPath value "//identity_no" in the body".

Capacity

Maximum number of the responses to be cached.

Invalidation Requires Authn

Selected if authorization is required to invalidate the cache.

Handling Action

If authorization is required to invalidate the cache, the action to take for unauthorized requests is selected:

  • Continue
  • Stop

TTL (seconds)

The length of time the cached response will remain in the cache. It is given in seconds.

Cache Null Value

Checked if null values are also to be cached.


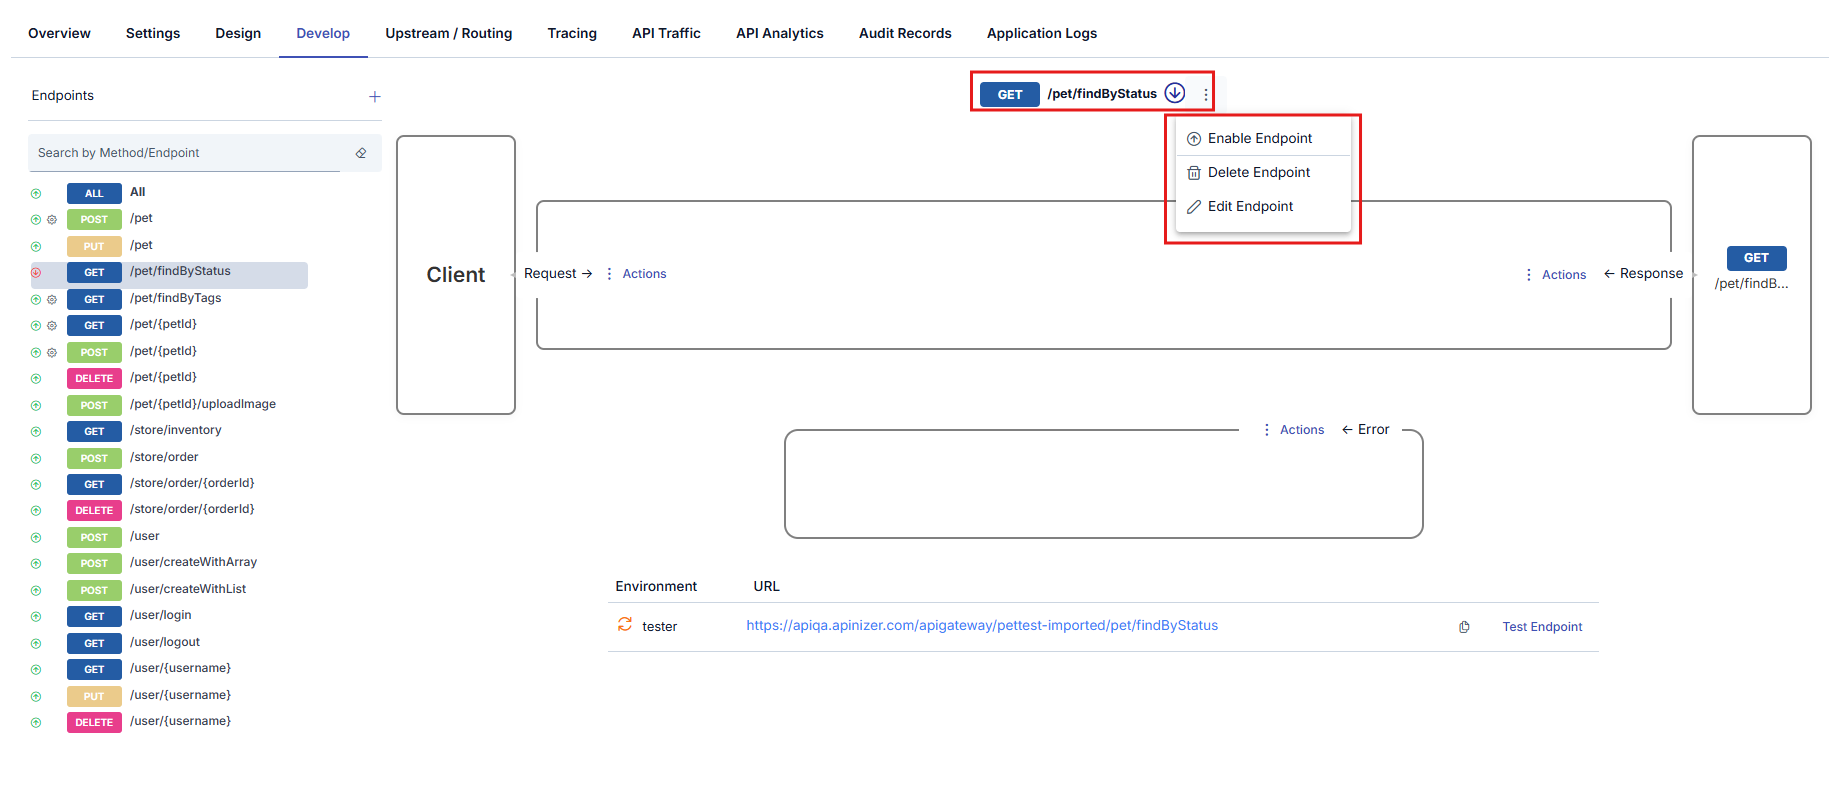
Selecting a Method/Endpoint

Clicking the name of any method in the method/endpoint list will select that method and the interface will be updated accordingly.

  1. The color changes in the list to indicate the selected method/endpoint.
  2. The selected method/endpoint is displayed in the upper middle section.
  3. In the lower middle section, the links of the actions that can be taken for this method/endpoint are displayed.
  4. On the right side, the method/endpoint of the Backend API that the selected method/enpoint is associated with is displayed.


Updating a Method/Endpoint

Edit Endpoint link opens the popup to update the method/endpoint. After entering information, clicking the Save button updates the method/endpoint. 

Deleting a Method/Endpoint

Delete Endpoint link is clicked, and the confirmation is given to complete the operation.

Disabling a Method/Endpoint

It is possible to disable a method/endpoint without deleting it. 

To do this, click on the Disable Endpoint link. When the link is clicked, the method/endpoint is closed to access and with it, the following changes occur in the interface.

  1. The icon next to method/endpoint changes to indicate that the method/endpoint is disabled.
  2. Disable Endpoint link changes to Enable Endpoint.


Testing a Method/Endpoint

If an API Proxy is deployed to at least one environment, methods/endpoints can be easily tested within this tab. Clicking the Test Endpoint link for the selected method/endpoint opens the Test Console for this method/endpoint. For detailed information about testing, you can refer to the Test Console interface.

Message Flow

The Development tab is where the policies to be applied to request and response messages during message flow are configured. The interface is designed to show this flow. Thus, the user can visually see which policies will be applied to the request message in which order before sending it to the Backend API, and which policies will be applied in which order to the response message before it is returned transmitted to the client.

The flow from the Client to the Backend API is visualized by

  • An arrow symbolizing the request message leaving the client to the Backend API,
  • An arrow symbolizing the response message leaving the Backend API to the Client,
  • Icons on the request or response message showing the policies applied and the order in which they are applied.

This section will not go into the details of the policies. For detailed information about the policies, please refer to the Policies page.

Client (API Consumer)

It is displayed in the left-hand frame in the interface. It is the stakeholder that sends the request to the API Proxy, and starts the stream. The message from the client reaches the Backend API after the policies are applied.


Backend API

It is the original API that is closed to the Client's direct access and hidden from the Client, and that receives requests from the API Proxy and returns the responses to the API Proxy. It is indicated by the frame on the right on the interface. The response of the Backend API is sent to the Client after the policies are applied.


When the API link in the Backend API box is clicked, the API Description Document of the Backend API is displayed.


Policies

Policies are the configurations on request and response messages to describe the requirements of security, filtering, validating, transforming or enriching messages, applying partial business logic, error management, etc. API Gateway operates the policies defined by these configurations during the message flow between the Client and the Backend API.

This section describes the actions that can be taken on policies in general. For detailed information about any policy, you can refer to the relevant policy documentation in the Policies section.

Location and Order of the Policies

Policies can be located in three different points:

  • API Proxy Group 
  • API Proxy 
  • Method/Endpoint 

A policy added to an API Proxy Group is executed by all API Proxies in that group if the request comes directly to the API Proxy Group or if the "Apply Settings to Related API Proxies" option is selected on the API Proxy Group.

A policy added to an API Proxy is executed for all methods/endpoints of that API Proxy.

A policy attached to a method/endpoint will only be executed for that method/endpoint.

In the image below, there is an example of the policies added to these points.

In the image, it can be seen that the API Proxy, whose method/endoint named GET - findByStatus has been selected, has been added to an API Proxy Group named Proxy Group - 1.

The marked fields are where the policies are displayed, depending on where they were added.

  • In the field marked with frame 1, if this API Proxy is added to any API Proxy Group, the policies defined for that API Proxy Group and which will be executed on the request messages are seen. It is decided whether or not to execute the policy as follows:
    1. If the request came through the API Proxy Group, the Policy will be executed.
    2. If the request comes through API Proxy and the "Apply Settings to Related API Proxies" option in the API Proxy Group is active, the Policy will be executed.
    3. In cases other than a and b, the Policies in this area will not be executed. In this case, the display is for informational purposes only.
  • In the area marked with frame 2, without selecting any method/endpoint for this API Proxy, the policies added to be valid for all methods/endpoints and that will be applied to the request messages are seen. All indicates this.
  • In the area marked with frame 3, the policies added to the selected method/endpoint and to be applied to the request messages are displayed.
  • In the area marked with frame 4, the policies applicable to the selected method/endpoint and to be applied to the response messages are displayed.
  • In the area marked with frame 5, without selecting any method/endpoint for this API Proxy, the added policies that apply to all methods/endpoints and that will be applied to response messages are displayed. All indicates this.
  • In the area marked with frame 6, if this API Proxy is added to any API Proxy Group, the policies defined for that API Proxy Group and which will be applied to the response messages are displayed. It is decided whether or not to execute the policy as follows:
    1. If the request came through the API Proxy Group, the Policy will be executed.
    2. If the request comes through API Proxy and the "Apply Settings to Related API Proxies" option in the API Proxy Group is active, the Policy will be executed.
    3. In cases other than a and b, the Policies in this area will not be executed. In this case, the display is for informational purposes only.

Sections 1 and 6 are visible only when the Apply Settings to Related API Proxies option is activated on the API Proxy Group.


If a specific method/endpoint of API Proxy is not selected or All is selected, four zones will appear as shown in the image below.


  • In the field marked with frame 1, if this API Proxy is added to any API Proxy Group, the policies defined for that API Proxy Group and which will be applied to the request messages are seen. It is decided whether or not to execute the policy as follows:
    1. If the request came through the API Proxy Group, the Policy will be executed.
    2. If the request comes through API Proxy and the "Apply Settings to Related API Proxies" option in the API Proxy Group is active, the Policy will be executed.
    3. In cases other than a and b, the Policies in this area will not be executed. In this case, the display is for informational purposes only.
  • In the field marked with frame 2, the policies that will be applied to the request messages and applied to all methods/endpoints of this API Proxy are displayed.
  • In the area marked with frame 3, the policies that will be applied to the response messages and applied to all methods/endpoints of this API Proxy are displayed.
  • In the area marked with frame 4, if this API Proxy is added to any API Proxy Group, the policies defined for that API Proxy Group and which will be applied to the response messages are displayed. It is decided whether or not to execute the policy as follows:
    1. If the request came through the API Proxy Group, the Policy will be executed.
    2. If the request comes through API Proxy and the "Apply Settings to Related API Proxies" option in the API Proxy Group is active, the Policy will be executed.
    3. In cases other than a and b, the Policies in this area will not be executed. In this case, the display is for informational purposes only.

The Execution Order of the Policies

Policies are executed 

  • for the request message, by API Proxy Group → API Proxy → method/endpoint order,
  • for the response message, method/endpoint → API Proxy → API Proxy Group order

during the message flow.

At each level, policies at that level are processed in order of the flow direction of the message.

In the image below, this situation is summarized and the order in which the policies are processed is shown by numbering.


Types of Policies

Policies can be local or global.

A local policy can only be used by an API Proxy or method/endpoint for which it is defined. If the API Proxy or the method/endpoint is deleted, the policy is also deleted with it.

On the other hand, global policies are created independently of API Proxies or methods/endpoints, and can be used by zero or more API Proxies or methods/endpoints. When an API Proxy or a method/endpoint is deleted, the global policies used by that API Proxy or method/endpoint are not affected. However, any update to the global policy affects all API Proxies or methods/endpoints that use that policy.

Adding a Policy

  • Select the entity that the policy will be added to. For example, for a policy to be applied for all methods/endpoints of API Proxy, All is selected in the method/endpoint field of that API Proxy.
  • Click on the (plus) Add Policy icon in the appropriate field depending on whether the policy will be added to the request message or the response message. 


  • Select the type of the policy to be added within the popup. The types of policies that appear in this window depend on the type of active API Proxy and which zone the policy is to be added.


  • When the type of the policy to be added is selected, a form appears where configuration information for that policy can be entered. Within this form, policies can be added in various ways.
Adding an Existing Global Policy 

This action does not create a new policy. Allows one of the existing global policies to be "attached" to the selected API Proxy or method/endpoint.

To do this, click the Select From Global Policies  link next to the policy type at the top of the policy window. The process is completed by selecting the appropriate policy from the window that opens.


Creating a New Global Policy and Adding It  

With this process, both a new global policy is created and this policy is added to the selected API Proxy or method/endpoint.

For this, the Add The Policy As A Global Policy box is checked before saving the configuration made in the policy window.


Creating a Local Policy

The policy window provides local policy creation by default. In other words, the saved policies are added as local policies without any action to select from global policies or save the policy globally.

Updating a Policy

Clicking the icon of an existing policy opens a popup where the information of that policy can be updated.


After the updates are made in the popup, Save button is clicked to complete the operation.

If the type of policy updated from the Development tab of an API Proxy is global, the update is not performed on this global policy. Instead, a local policy with the same configuration as that global policy is created for the API Proxy that is being updated, and the update is performed on this local policy. This eliminates the possibility of accidentally affecting all API Proxies using the global policy.

If the goal is indeed to update the global policy and ensure that all API Proxies that use it now work according to this update, the update should be done from the Global Policies interfaces.

Disabling a Policy

A policy can be temporarily disabled without deleting it from the method/endpoint or API Proxy to which it was added. For this, the policy is opened for updating and the status is set to Not Active by clicking the Active button at the top of the window that opens. This policy will not be executed until the status is updated again.


Disabling All Policies 

In the Method/Endpoint section, at the bottom of the middle section, there is a link named Disable All Policies. When this link is clicked, if the All option is selected, all policies added to the API Proxy are temporarily disabled. If it is within any specific method, only the policies added to that method are temporarily disabled. Disabled policies can later be reactivated individually from the policy update window or collectively by clicking the Activate All Policies link.


When policies are disabled, the colors of the icons change to gray.


If API Proxy has been added to an API Proxy Group and policies have been applied through that API Proxy Group, turning off all policies will not affect policies from the API Proxy Group, these policies will remain active.

Deleting a Policy

When the mouse is hovered over a policy, an icon appears and the policy can be "deleted" by clicking this icon.

"Deleting" a policy on the Development tab;

  • actually deletes the policy if it is a local policy,
  • only deletes the attachment of the policy with the method/endpoint or the API Proxy, if the policy is global. The policy itself is not deleted and can be added again. To delete a global policy, deletion must be performed from within the Global Policies interfaces.

Deleting All Policies

Click on the Delete All Policies link in order to delete the policies all together. After confirmation, all policies on API Proxy and method/endpoints are deleted.


Importing a Policy

Another way to add a policy is to import a previously exported local policy. The imported policy is added to the selected method/endpoint or to the API Proxy if All is selected.

For this operation, the Import Local Policy link is clicked. The process is completed by uploading the file containing the policy.


Exporting a Policy

A policy can be exported for reuse elsewhere. To do this, click the Export Policy link in the policy update window. Doing this will download a file and the downloaded file can then be imported as a local policy. 


During the export from the Development tab, the selected policy is exported globally if it is global, and locally if it is local. The imported policy is also global or local, accordingly.