Test Console
Through the Test Console, SOAP and REST APIs can be tested and test records can be managed without using any other tool such as Postman or SOAP UI.
The image containing the Test Console is given below:
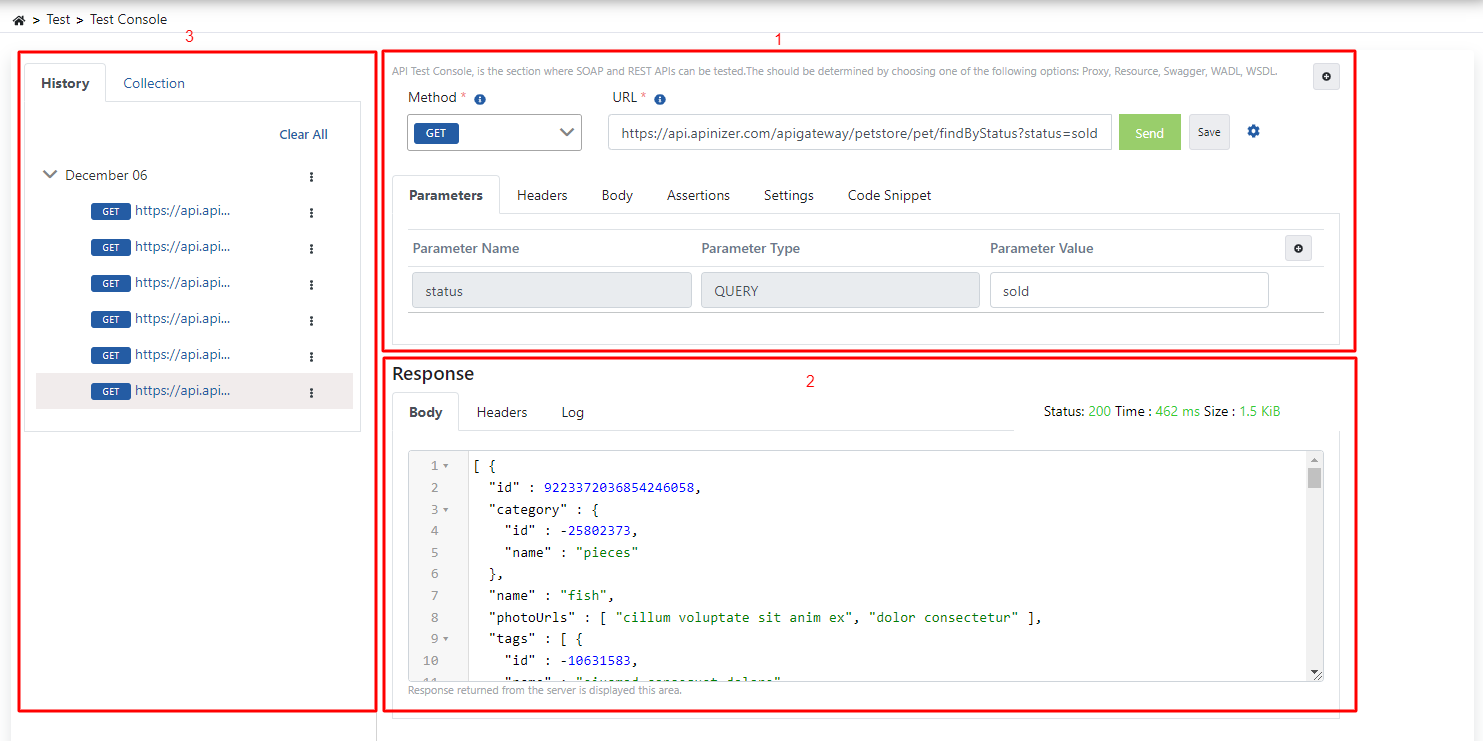
Test Console consists of 3 parts;
- Request: In this section, request preparation processes are managed.
- Response: In this section, the results of the response are managed.
- Test Records: In this section, you can see the test history and the tests saved as a group.
Request
Creating the Request Address
There are 2 ways to create a request address;
- The endpoint you want to test can be written manually.
- An API Proxy on Apinizer can be tested from the Test Helper interface or a request address can be created via the API definition file.
Generating the Request Address with Test Helper
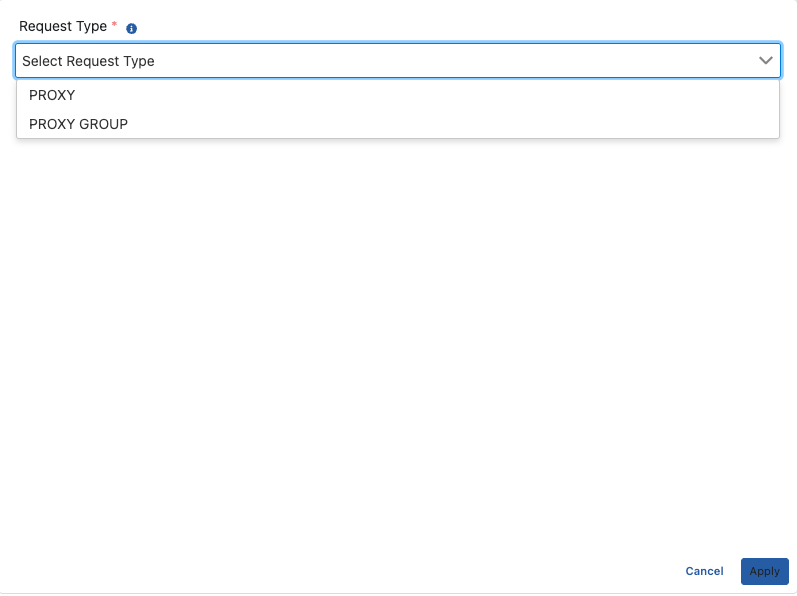
When the selected button in the image below is clicked, the Test Helper dialog opens.

The image containing the Test Helper settings is given below:
The fields used for the Test Helper configuration are shown in the table below.
| Field | Description | |
|---|---|---|
Request Type | The API type to be tested is determined by choosing one of the Proxy, Proxy Group, Swagger, OpenApi, WADL, WSDL options. These types:
These types are selected when you want to test API Proxies in your selected project on Apinizer. Also, the selected API is tested from the environments where the proxy is deployed. The parameter list and sample request body of the created endpoint, if any, are also created by Apinizer. | |
Proxy Group List | API Proxy groups that can be tested within the same project are listed. | |
Proxy List | API Proxies that can be tested within the same project are listed. The proxy must be deployed to be tested. | |
Service URL | The service URL of the API to be tested. The URL is parsed and the endpoints of the API are created. | |
Endpoints | The endpoint to be tested is selected from among the endpoints available in the API. | |
Environment List | The environment where the proxy will be tested is selected. | |
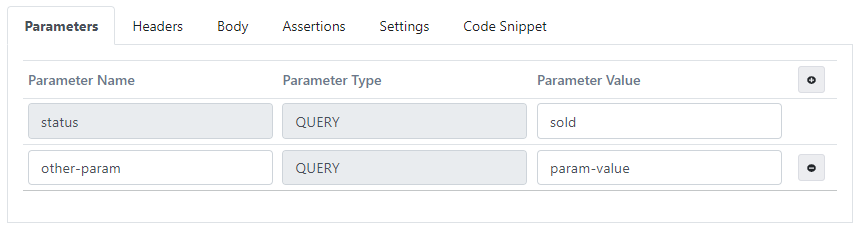
Adding a Query Parameter
The query parameters of the request are managed from the Parameters tab.
Each edited value is automatically updated on the URL information.
Adding a Header
Request headers are managed from the Headers tab.

Adding a Body
The data to be added to the body of the request can be created in 2 different ways; raw, x-www-form-urlencoded

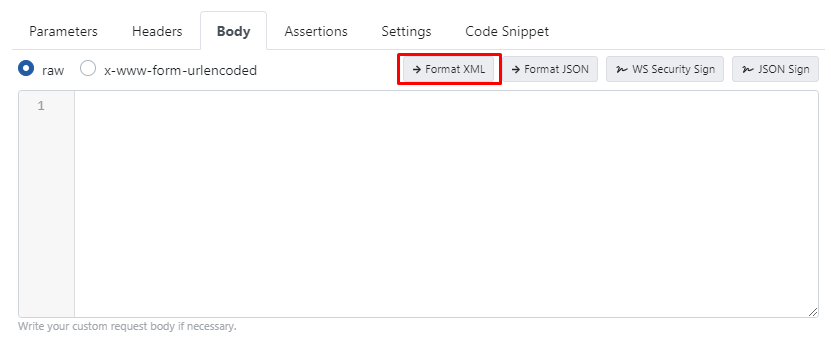
Format XML
Formatting as XML can be performed with data added to the request body.
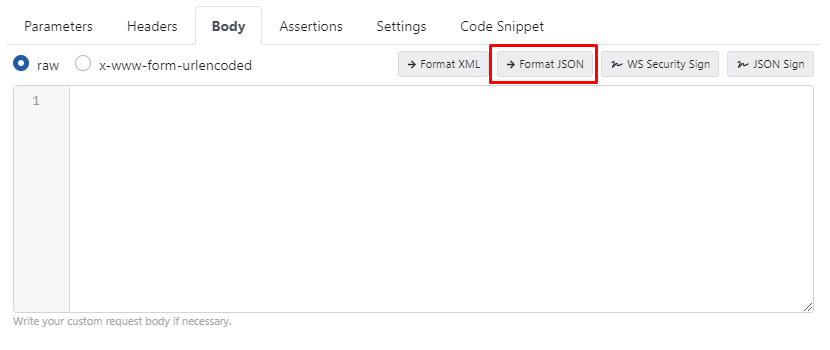
Format JSON
Formatting as JSON can be performed with data added to the request body.
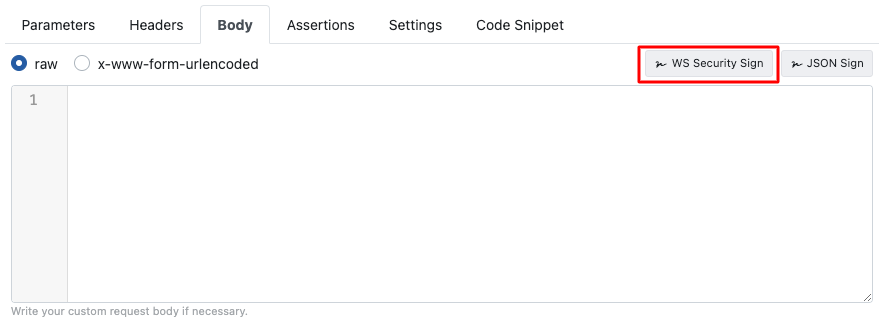
WS Security Sign
WS Security Sign operation can be performed when the data to be added to the body of the request is selected as raw.
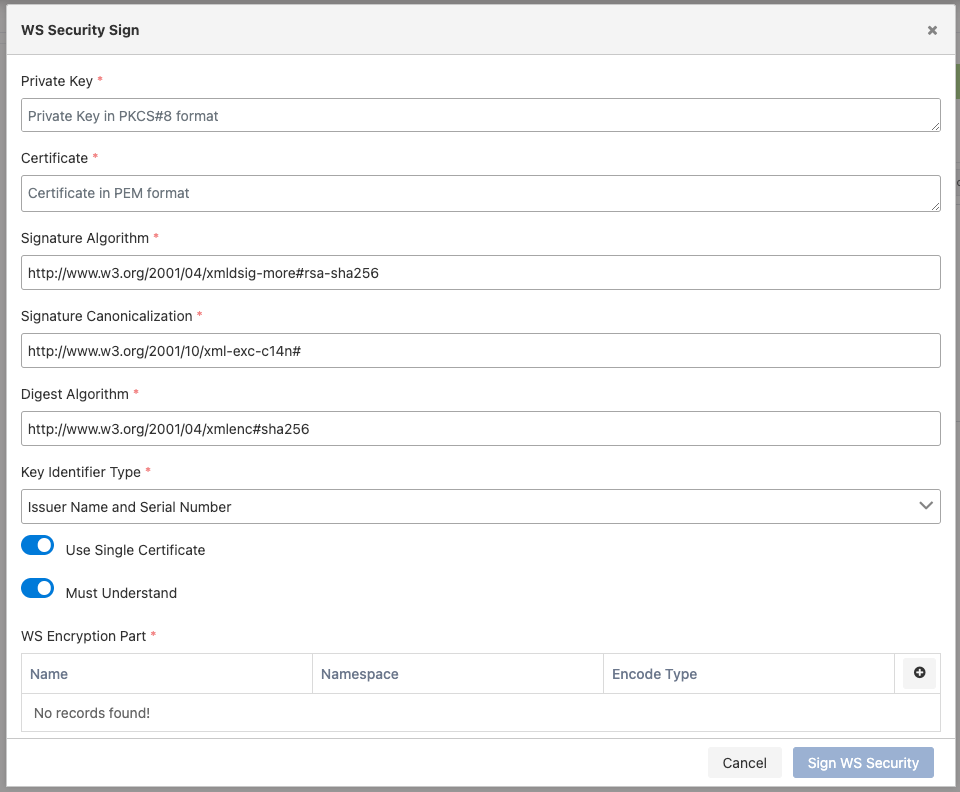
The picture below shows the WS Security Sign settings:
The fields used for the WS Security Sign configuration are shown in the table below.
Field | Description |
|---|---|
| The textual representation of the Private Key to be used for signing is in PKCS#8 PEM format. | |
Certificate | The textual representation of the certificate to be used for signing is in PKCS#8 PEM format. |
Signature Algorithm | This is the information about the signing algorithm. |
Signature Canonicalization | This is the information about the signature canonicalization. |
Digest Algorithm | This is the digest algorithm to be used in the signature. |
Key Identifier Type | This is the information about how the signature key will be placed within the message. |
Use Single Certificate | This is the information about whether the signing will be done with a single certificate. |
Must Understand | WS-Security başlığında "Must Understand" değerinin ne olması gerektiğini belirtir. |
WS Encryption Part | This is the information about where the data will be signed. Multiple values can be entered. This is the information about the name of the XML element to be signed, the namespace information of the XML element, and whether it will be signed as an element or as content. |
JSON Sign
JSON Sign operation can be performed when the data to be added to the body of the request is selected as raw.
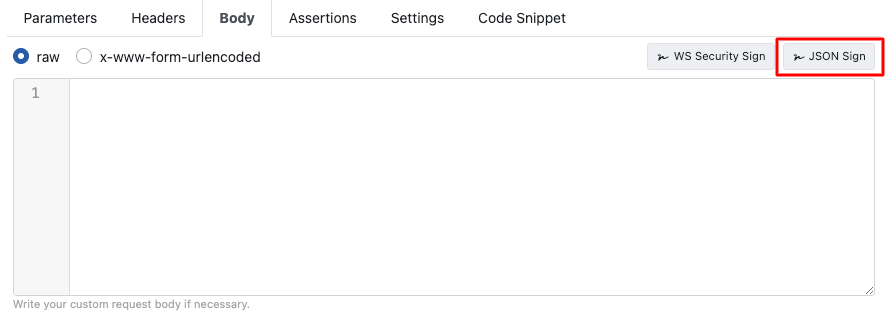
The picture below shows the JSON Sign settings:
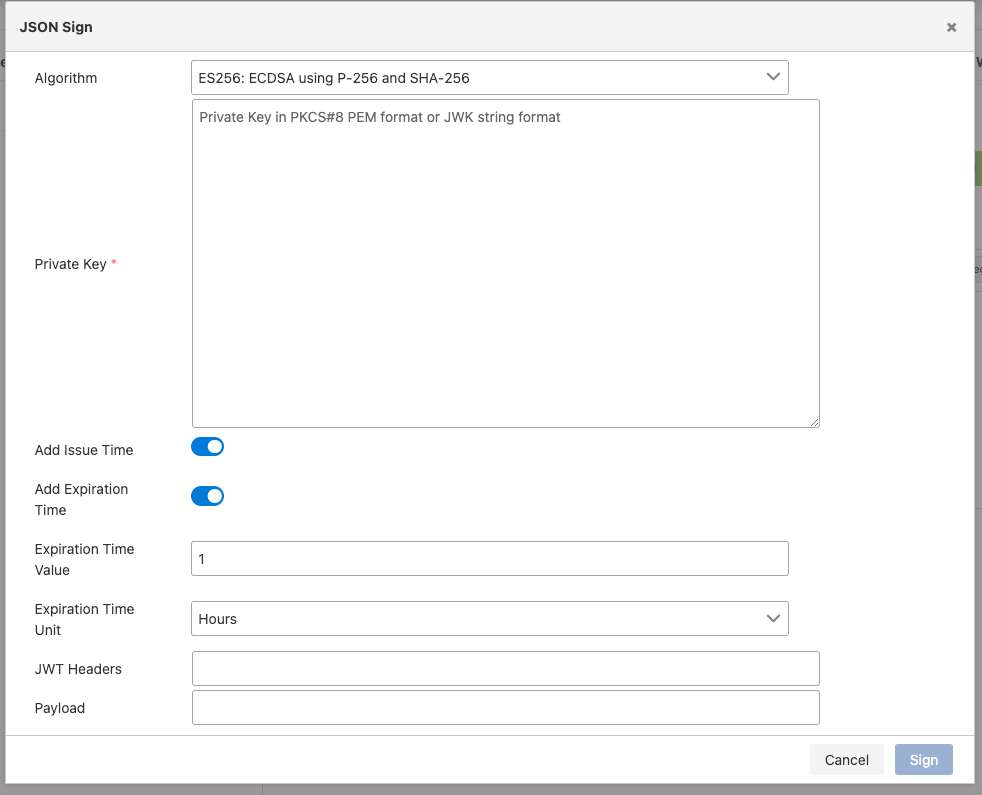
The fields used for the JSON Sign configuration are shown in the table below.
Field | Description |
|---|---|
Algorithm | It is information about the algorithm to be signed. |
| The textual representation of the Private Key value to be used for signing is in PKCS#8 PEM or JWK format. | |
| If the creation time is to be added to the generated signature, this option should be enabled. | |
| If the expiration time is to be included in the signature, this option must be enabled. | |
| This is the information on how long the signature will be valid. | |
| This is the time unit for the validity period of the signature. | |
| If additional header information is to be added to the header section of the data to be signed, it can be included in this field in JSON format. | |
| If additional information is to be added to the body section of the data to be signed, it can be included in this field in JSON format. |
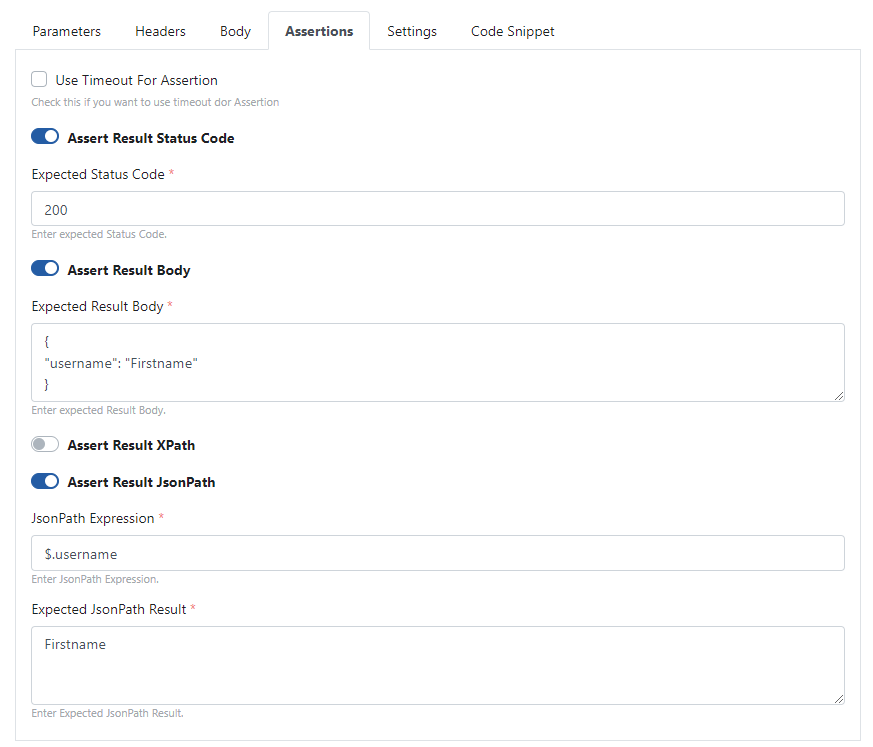
Creating Assertions
The assertions tab allows validation with expected values by querying the value in the body with timeout, HTTP status code, body, JsonPath/Xpath regarding the response to be returned when sending the request.
The fields used for the assertions configuration are shown in the table below.
Field | Description |
|---|---|
Use Timeout For Assertion | If enabled, the request is authenticated using the timeout value. |
Assert Result Status Code | Activated to verify based on status code. |
Expected Status Code | The expected satus code value is written. |
Assert Result Body | Activated to validate the body of the response. |
| The value of the expected response body is written. | |
Assert Result XPath | Activated to validate a value inside the body of the response. The data type of the body value of the response must be in XML format. |
XPath Expression | An XPath query is written for the key information that holds the value to be verified in the response body. |
Expected Xml Result | The expected result is written in the XPath information to be verified in the response body. |
Assert Result JsonPath | Activated to validate a value inside the body of the response. The data type of the body value of the response must be in JSON format. |
JsonPath Expression | A JsonPath query is written for the key information that holds the value to be verified in the response body. |
Expected JsonPath Result | The expected result is written in the JsonPath information that is wanted to be verified in the response body. |
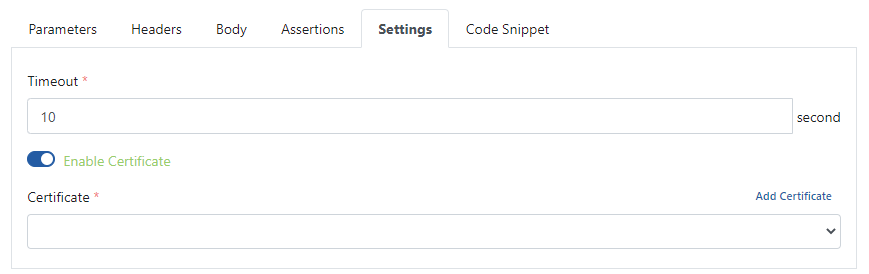
Settings
Timeout and certificate information are managed in the settings tab.
The fields used for the settings configuration are shown in the table below.
Field | Description |
|---|---|
Certificate | The certificate to be sent in the request is selected or a new one can be added. |
Enable Certificate | If a certificate is to be sent in the request, it is activated. |
Timeout | After the request is sent, it specifies how long it will take to receive a response from where the request is waiting for a response. |
Please click to go to the details of creating a new certificate.
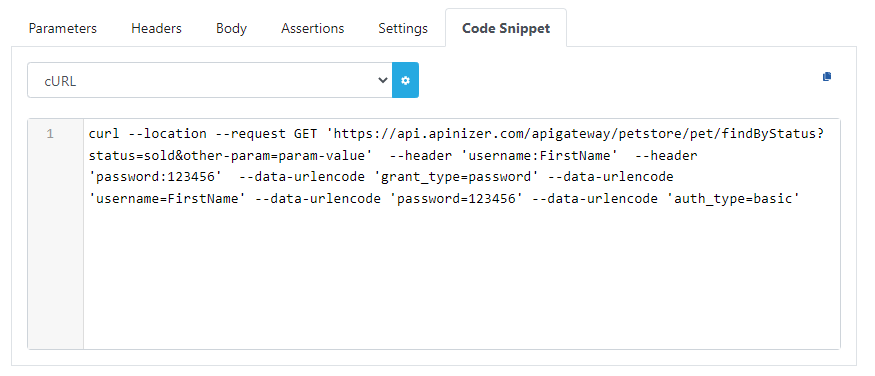
Code Snippet (Code Snippet)
In the Code Snippet tab, the necessary code is generated to send the request via cURL.
The picture below shows the Code Snippet tab:
Creating a New Test
If a new test is to be performed after the test process is completed, the information of the test areas can be refreshed by clicking the button marked in the image below.

Response
Response Body
The body of the response is shown in this section.
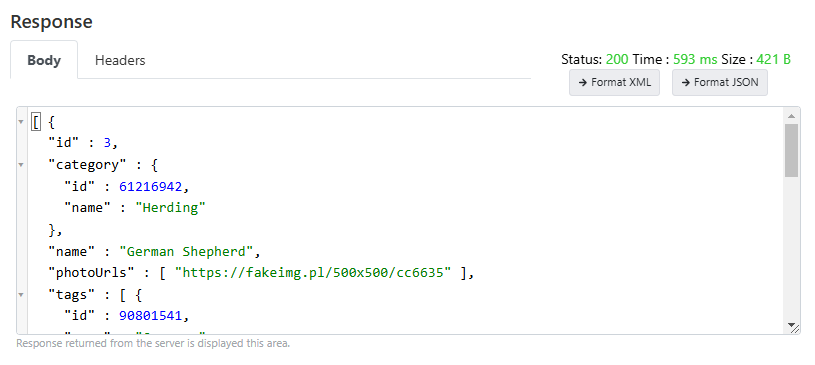
The response body data can be formatted as XML or JSON.
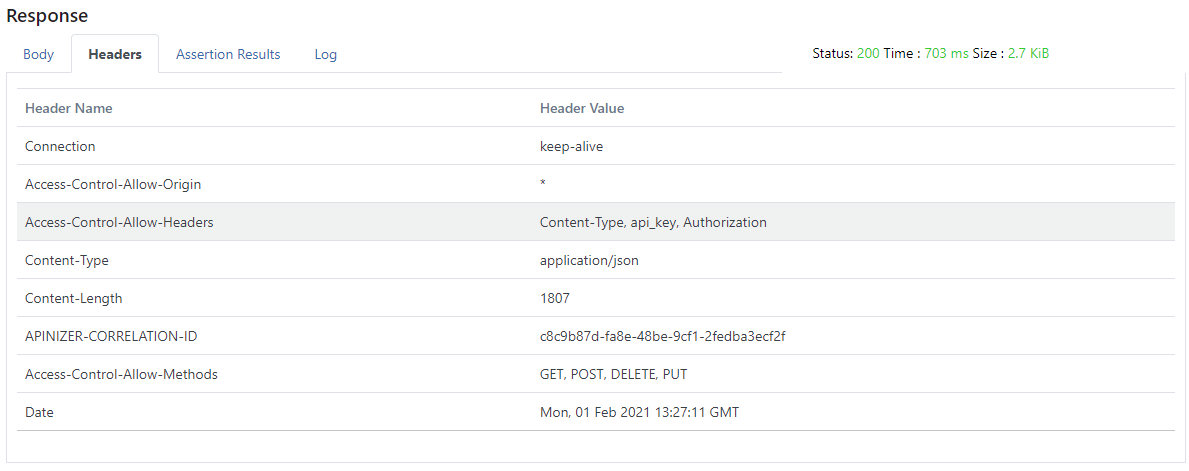
Response Headers
The headings of the response are shown in this section.
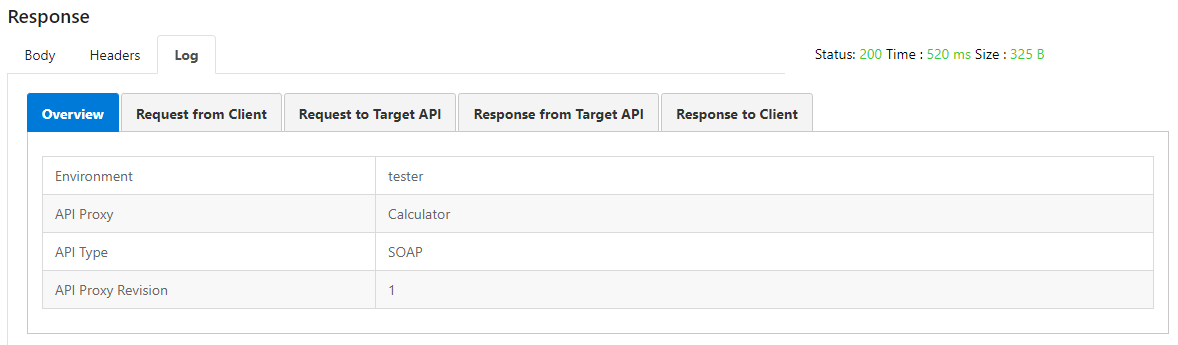
Response Logs
The log of the response information is seen in this section.
History
The history of each tested request is stored in the Test Console. The history of the test is categorized by the days they were tested.
When the link of the test log is clicked, the request can be retested.
The image containing the test history is given below:
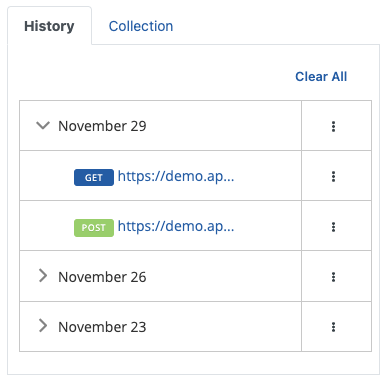
Test History Deletion Procedures
- Click on the Clear All link to delete all history information.
- To delete the day-based history, the relevant day is deleted from the detail menu of the information.
- Deleting only the history is deleted from the detail menu of the relevant history information.
Collection
Collection is the creation of test records by structuring them under a group roof so that the tests can be reused.
Each collection can contain more than one collection.
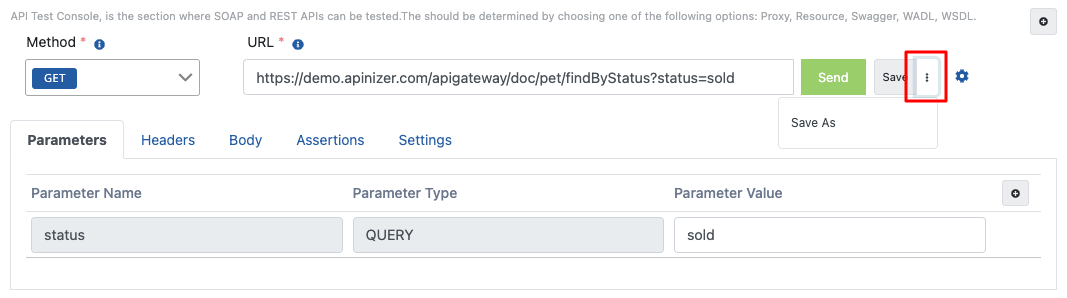
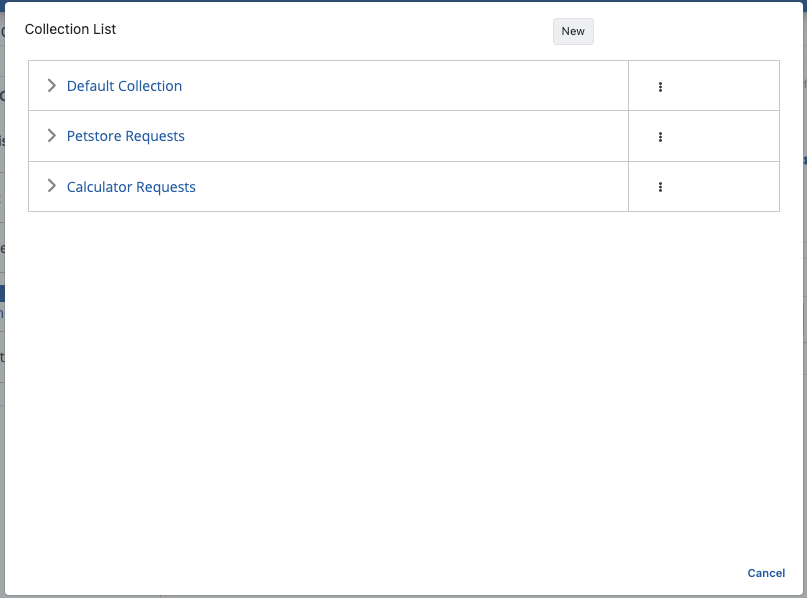
Saving the Test to a Collection
After completing your test, click the marked Save button in the image to save it.

Then, in the dialog named Collection List, click on the link of the collection to which the test will be assigned.
Apinizer creates a collection called 'Default Collection' to start.
After selecting its collection, the test is saved by giving it a name. The default test record is named as the endpoint URL you are testing.
Collection Based Transactions
The operations that can be done on the collection are done through the detail menu of the collection in the image below.

Rename: It is used to change the name of the related collection. The screen that appears when clicked is given a new name and saved.
Add Collection: It is used to add a new collection into the related collection.
Delete Collection: Used to delete the related collection. If a collection is deleted, all records linked to that collection will be deleted.
Registration Based Transactions
Many operations that can be done on the record can be accessed via the detail menu in the image below.
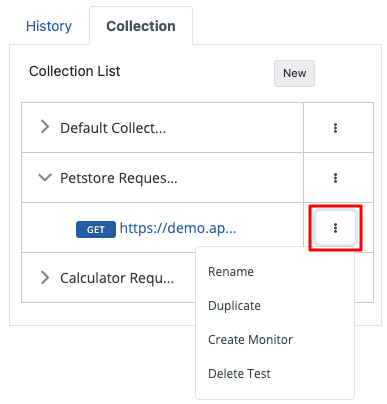
Rename: It is used to change the name of the relevant test. The screen that appears when clicked is given a new name and saved.
Duplicate: It is used to create a copy of the relevant test.
Create Monitor: It is used to create an Uptime Monitor using the related test. Please click to get detailed information.
Delete Test: It is used to delete the related test.
Save As: In order to save a saved test to another collection, the button marked in the image is clicked.