DB-2-API
Apinizer allows you to create and install a REST API that performs database operations with DB-2-API in minutes, even without the need for technical knowledge. It supports the following operations:
- Native SQL statements (SELECT, INSERT, UPDATE, DELETE, PROCEDURE, BATCH INSERT, TRUNCATE)
- NoSQL operation types (FIND)
- Calling Stored Procedure
- Return the cursor result
- Batch processing
- CRUD operations
Creating a DB-2-API
The Development → API Creator → DB-2-API path is followed through the main menu.
Click the Create button at the top right of the interface that opens.

The API creation work begins by filling in the fields below for the newly created API and clicking the Save and Next button at the top right.

Creating a Endpoint
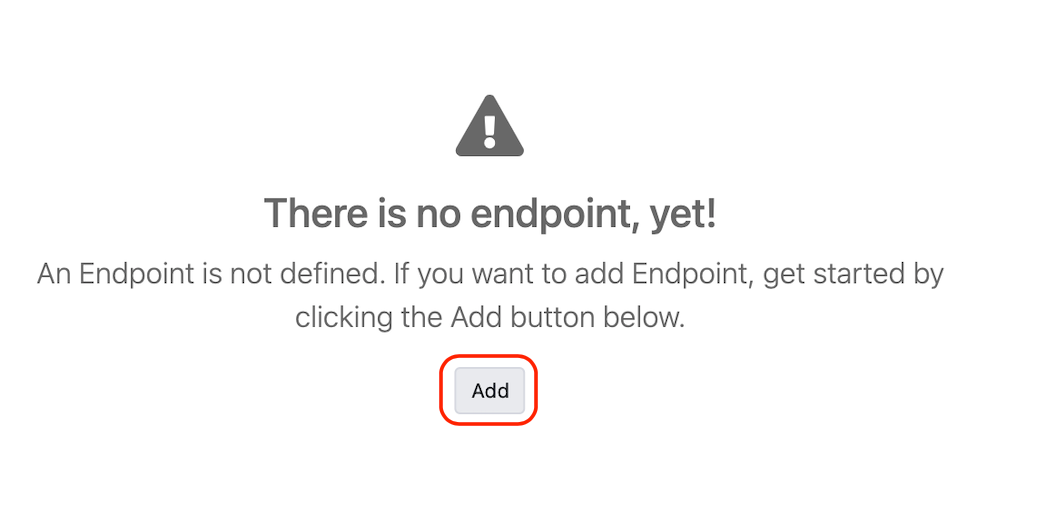
By clicking the Add button on the screen, the Method/Endpoint is added to the API.
Filling the fields on the Method/Endpoint definition screen, click the Save button.
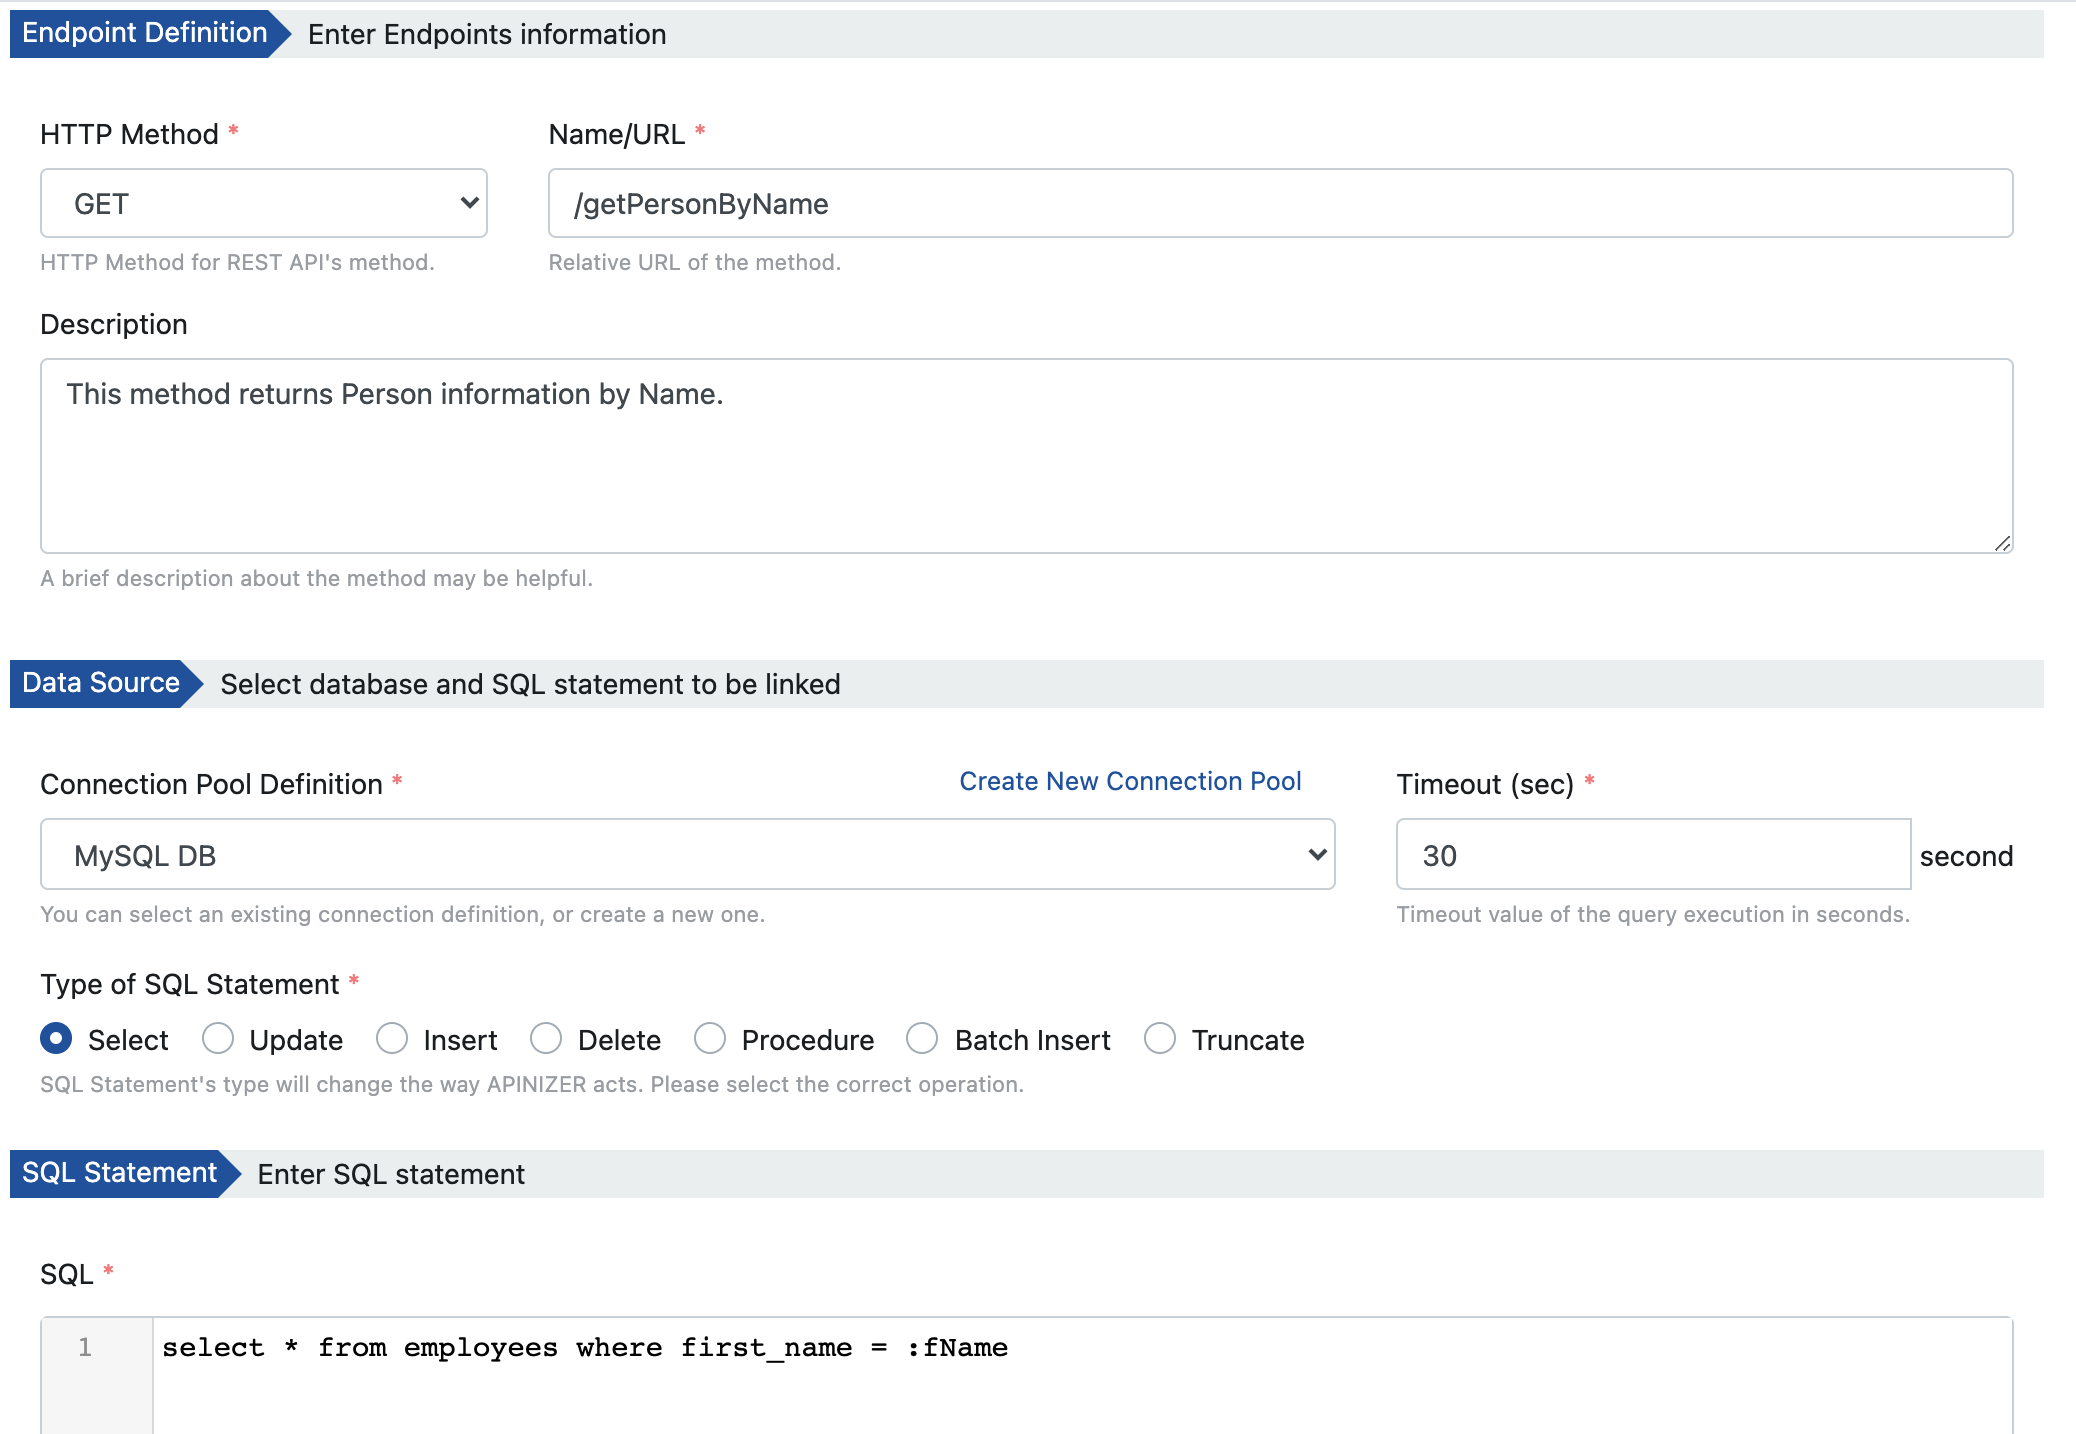
The fields used to create the endpoint are shown in the table below.
Field | Description |
|---|---|
HTTP Method | HTTP Method is selected for REST APIs; GET, POST, PUT, HEAD, OPTIONS, DELETE, PATCH, TRACE, ALL |
Name/URL | The name given to the Method/Endpoint by the user. This name appears in interfaces. |
Description | An optional description of the method/endpoint that may be useful for usage and management activities. |
Connection Pool Description | It is the information of the database connection where the queries will be executed. |
Timeout | The timeout value in seconds of query execution. |
Type of SQL Statement | SQL Statement type information; SELECT, UPDATE, INSERT, DELETE, PROCEDURE, TRUNCATE, BATCH INSERT |
SQL | The SQL statement that will be executed. Parameters must be prefixed with a colon (:) without spaces so that they can be defined. Then you can check the correctness of your query by entering sample values for the parameter and clicking the Try It button. Example query: select * from employees where first_name =:fName. Here :fName is the parameter and it is sent by the user who will make the request to the API. |
Operation Type | NoSQL operation type information; FIND |
Query | This is the query that will be run. Parameters are enclosed in two curly braces so that they can be defined. Then you can check the accuracy of your query by entering sample values for the parameter and clicking the Try It button. Example query: { username: {{username}} }. Here {{username}} is the parameter and it is sent by the user who will make the request to the API. |
Parameters | If there is a parameter such as :fName in your SQL Query, the Parameters table opens. Here, Data Type, Format, Repetition Type, Parameter Type and Sample Value of the parameter are entered. |
Example Response | It is an example of the response returned when the Try It button is clicked. Only the single and first record is returned in response. It is an editable field. Thus, the user can change the sample response information or remove confidential information. This change affects the sample response information of the method in the API definition file where API Proxy is created. |
Testing SQL
It may be desired to see what kind of result will be obtained when a request is sent to the endpoint. If the query to be run for the endpoint has parameters, Test Values is entered and the Try It button is pressed.
The template returned by the test is the response object that is stable in Apinizer.
If there is more than one record that works with the query, only the first record is given in the sample response.
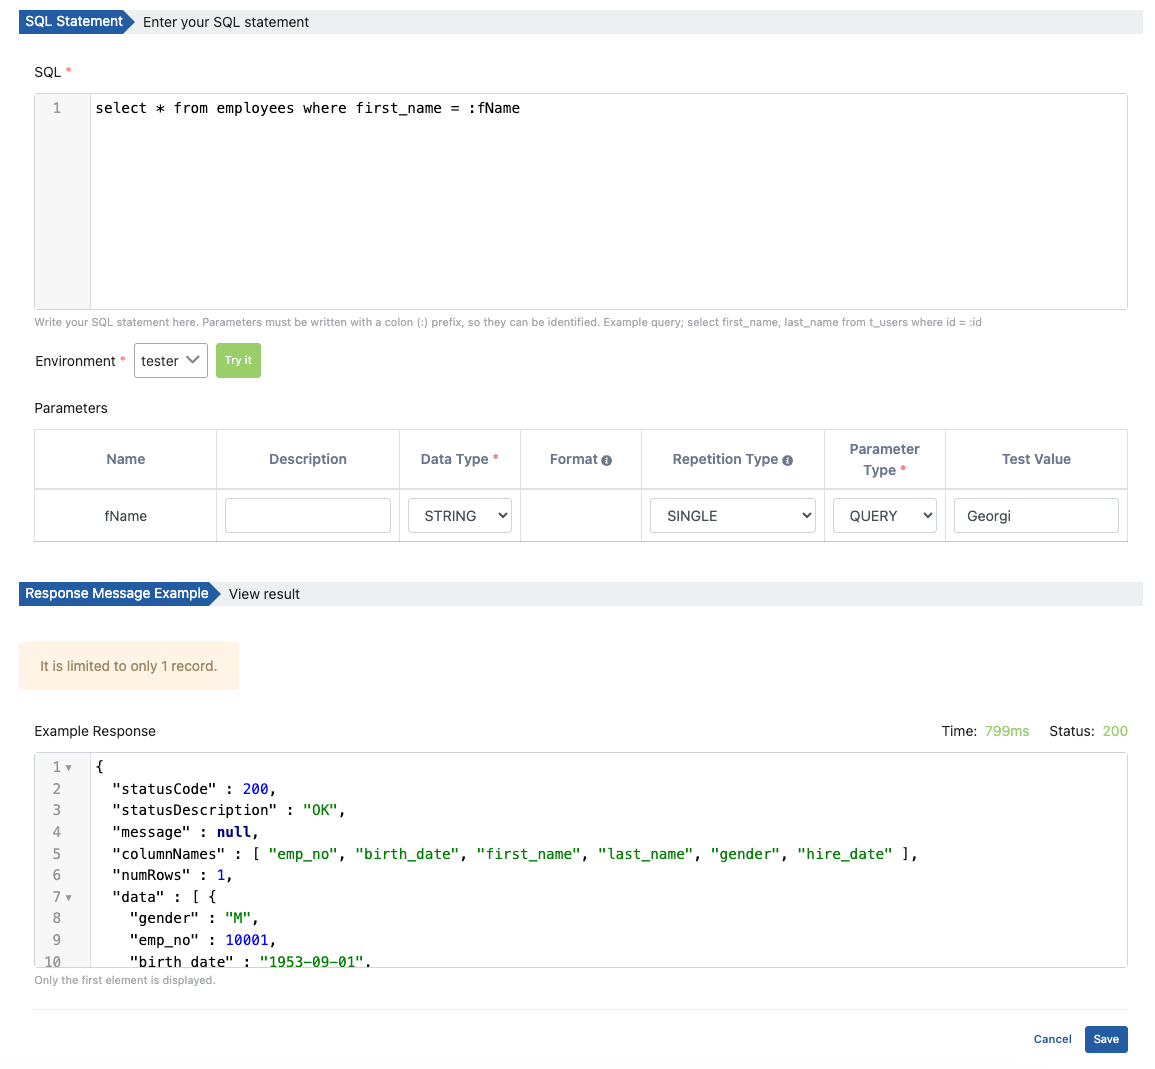
If it is desired to send a null value for the test, it is sufficient to write null as a parameter.
API Proxy Creation from DB-2-API
An API Proxy for DB-2-API is created by clicking the Create API Proxy button.
To create API Proxy from DB-2-API, there must be at least one endpoint.
API Proxy is created by entering the required fields for API Proxy and clicking the Save button.

What can be done after this step is exactly the same as the API Proxy document. Click to go to the details.
You can create multiple API Proxies from a DB-2-API.
Deploy/Redeploy
To view and manage API Proxies in DB-2-API, click the Manage API Proxies link, and they are viewed and managed from the window that opens.
In the window that opens, Deploy/Undeploy and Redeploy API Proxies created with DB-2-API are done in this section. Revisions, Deploying, Redeploying, Undeploying
To deploy the API Proxy, click on the Manage API Proxies link and click on the deploy icon.

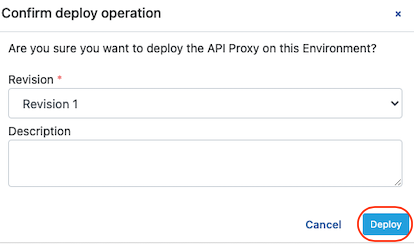
Confirmation is required after the above process. The information about the installation process is created and the Deploy button is clicked.
All API Proxies need to be Redeployed when a new Method/Endpoint is added to the DB-2-API or one of the existing Method/Endpoints is updated.
When you add a new Method/Endpoint or update an existing Method/Endpoint the following information will appear.

By saying Redeploy Required, the changes are applied to API Proxies.

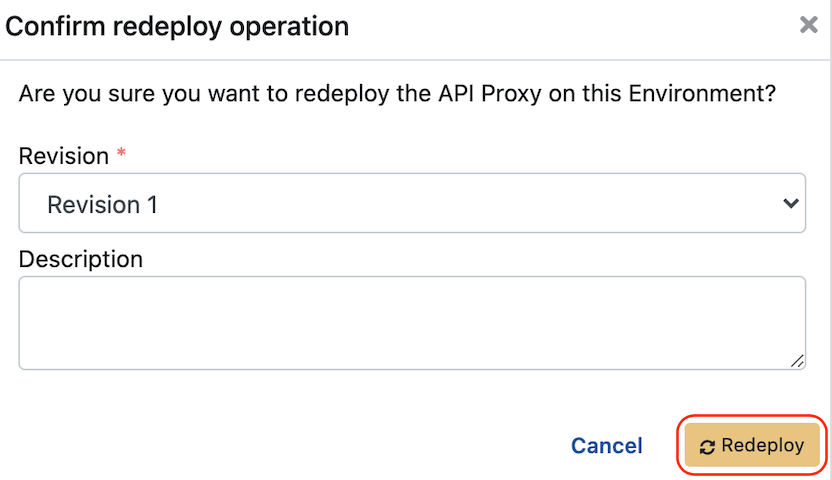
Confirmation is required after the above process. Click the Redeploy button after creating the information about the redeployment process.
From the DB-2-API page, click the link in the name of API Proxy to go to API Proxy.

Similarly, to go to the DB-2-API page from the API Proxy page, click on the DB-2-API name in the API Proxy as follows.

Deleting a DB-2-API
When a DB-2-API is deleted, all API Proxies that depend on it are deleted first by Undeploy and then deleted.