Script-2-API Kullanımı
Script-2-API, herhangi bir kod editörüne ihtiyaç olmadan JavaScript veya Groovy script dilleri ile metotlar oluşturarak REST API oluşturmanızı sağlar.
Özel tanımlı değişkenler ile mesaj bölümlerini kod içinde kullanabilme, güncelleyebilme ya da silebilme işlemleri gerçekleştirilebilir.
Bu içerikte, mail işlemlerinin yönetildiği bir REST API için Script-2-API tanımlama, sırasıyla mail göndermek için sendMail metodu oluşturma, REST API'yi API Proxy olarak oluşturma, yükleme ve test etme işlemleri anlatılacaktır.
1. Script-2-API Oluşturma
Script-2-API ekranında kolay bir şekilde API'nin genel bilgileri girilerek REST API tanımlaması yapılır.
1.1. /sendMail Metodunu Oluşturma
Aşağıdaki görselde, /sendMail metodu istek mesajının gövdesinden eposta bilgileri alınarak eposta gönderme işlemini Groovy diliyle oluşturulmaktadır.
Metot eklemek için Ekle (Add) butonuna tıklanıp metot bilgileri girilip Kaydet (Save) tuşuna basılır.
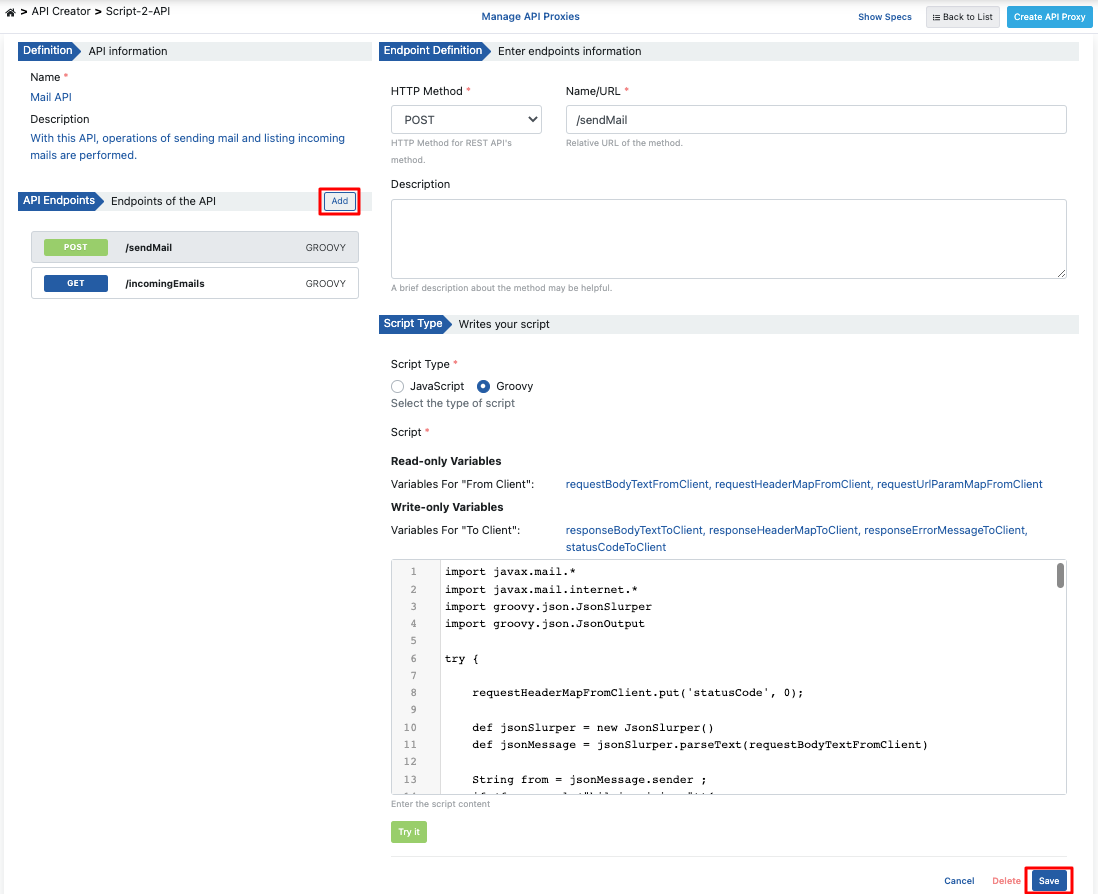
Dene (Try It) butonuna tıklanarak script kodu test edilebilir.
Groovy kodu;
import javax.mail.*
import javax.mail.internet.*
import groovy.json.JsonSlurper
import groovy.json.JsonOutput

try {
    requestHeaderMapFromClient.put('statusCode', 0);
    def jsonSlurper = new JsonSlurper()
    def jsonMessage = jsonSlurper.parseText(requestBodyTextFromClient)

    String from = jsonMessage.sender;
    if (from.equals("bilgi.apinizer")){
        from="info@apinizer.com";
    } else if(from.equals("apinizer.hata")){
        from="warning@apinizer.com";
    } else {
        statusCode=400;
        requestErrorMessageFromClient = JsonOutput.toJson([
            isTheOperationSuccessful: false,
            errorMessage: 'Hatalı gönderen bilgisi',
            errorCode:'01-ERR-02'
        ])
        return;
    }

    String to=jsonMessage.reciever;
    String cc=jsonMessage.recieverInformation;
    String bcc=jsonMessage.recieverInformation;

    if(!to?.trim() && !cc?.trim() && !bcc?.trim()){
        requestErrorMessageFromClient = JsonOutput.toJson([
            isTheOperationSuccessful: false,
            errorMessage: 'En az bir alıcı eklenmeli',
            errorCode:'01-ERR-03'
        ])
        statusCode=400;
        return;
    }

    String subject=jsonMessage.subject;
    if(subject?.trim()){
        subject=""
    }

    String content=jsonMessage.content;
    if(content?.trim()){
        content=""
    }

    String mimeType=jsonMessage.contentType;
    if(mimeType?.trim()){
        mimeType="text/html;charset=utf-8"
    }

    // Init constants of sender email account.
    String email = "apinizer.hata"
    String password = ""
    String host = "mail.apinizer.com"
    String port = "25" // "465" "587"

    // Set up properties.
    Properties props = System.getProperties()
    props.put("mail.smtp.user", email)
    props.put("mail.smtp.host", host)
    props.put("mail.smtp.port", port)
    props.put("mail.smtp.auth", "false")
    props.put("mail.smtp.starttls.enable", "false")
    props.put("mail.smtp.socketFactory.class", "javax.net.ssl.SSLSocketFactory")
    props.put("mail.smtp.ssl.trust", host) // Change host to "*" if you want to trust all host.

    Session session = Session.getInstance(props, new javax.mail.Authenticator() {
        protected PasswordAuthentication getPasswordAuthentication() {
            return new PasswordAuthentication(email, password);
        }
    });

    // Set up message.
    MimeMessage message = new MimeMessage(session)
    message.setFrom(new InternetAddress(from))
    if(to?.trim()){
        message.addRecipients(Message.RecipientType.TO, new InternetAddress(to))
    }
    if(cc?.trim()){
        message.addRecipients(Message.RecipientType.CC, new InternetAddress(cc))
    }
    if(bcc?.trim()){
        message.addRecipients(Message.RecipientType.BCC, new InternetAddress(bcc))
    }
    message.setSubject(subject)
    message.setContent(content, mimeType)

    try {
        // Send mail.
        Transport.send(message)
    } catch (MessagingException e) {
        e.printStackTrace();
        statusCode=500;
        responseErrorMessageToClient = JsonOutput.toJson([
            isTheOperationSuccessful: false,
            errorMessage: 'Error occurred while sending mail:' + e.getMessage(),
            errorCode:'01-ERR-04'
        ])
        return;
    }

    statusCode=200;
    responseBodyTextToClient = JsonOutput.toJson([
        isTheOperationSuccessful: true,
        errorMessage: '',
        errorCode:''
    ])
} catch (MessagingException e) {
    e.printStackTrace();
    statusCode=500;
    responseErrorMessageToClient = JsonOutput.toJson([
        isTheOperationSuccessful: false,
        errorMessage: 'Error occurred while sending mail:' + e.getMessage(),
        errorCode:'01-ERR-05'
    ])
    return;
}
Eposta gönderirken isteğin gövdesinde aşağı JSON gövdesi olmalıdır;
{
 "sender":"info@apinizer.com",
 "reciever":"user@apinizer.com",
 "recieverInformation":null,
 "secretReceivers":null,
 "subject":"test",
 "content":"test",
 "contentType":"text/html;charset=utf-8"
}
Başarılı yanıt döndüğünde aşağı şablondaki mesaj şablon örneğiyle karşılaşılır;
{
 "isTheOperationSuccessful":true,
 "errorMessage":"",
 "errorCode":""
}
Hatalı yanıt döndüğünde aşağı şablondaki mesaj şablon örneğiyle karşılaşılır;
Script Error: {
 "isTheOperationSuccessful":false,
 "errorMessage":"Error occurred while sending mail:Invalid Addresses",
 "errorCode":"01-ERR-04"
}
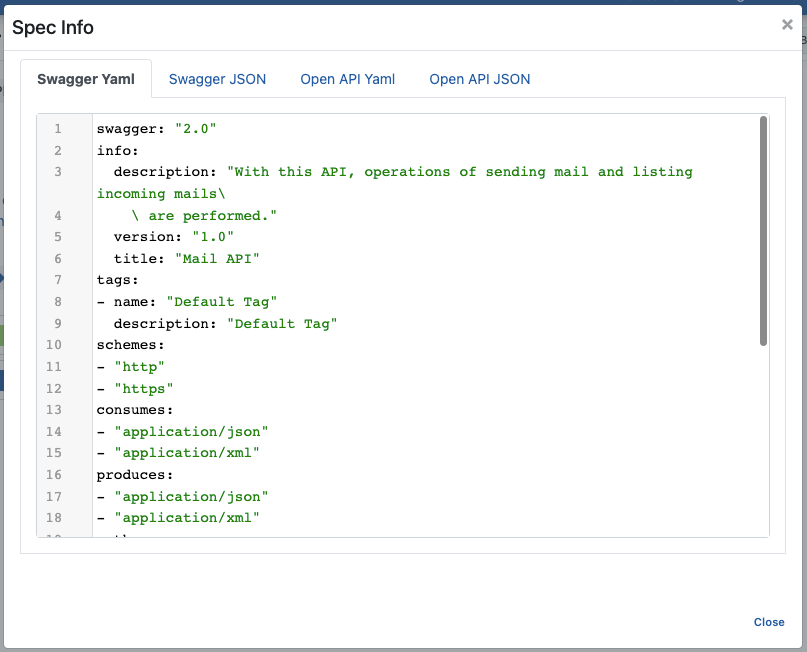
2. API Tanım Belgelerini Görüntüleme
Mail API'ye ait API tanım dosyalarına erişmek için Spec'leri Göster (Show Specs) linkine tıklanır.

Spec Bilgisi diyaloğunu içeren görsele aşağıda yer verilmiştir:
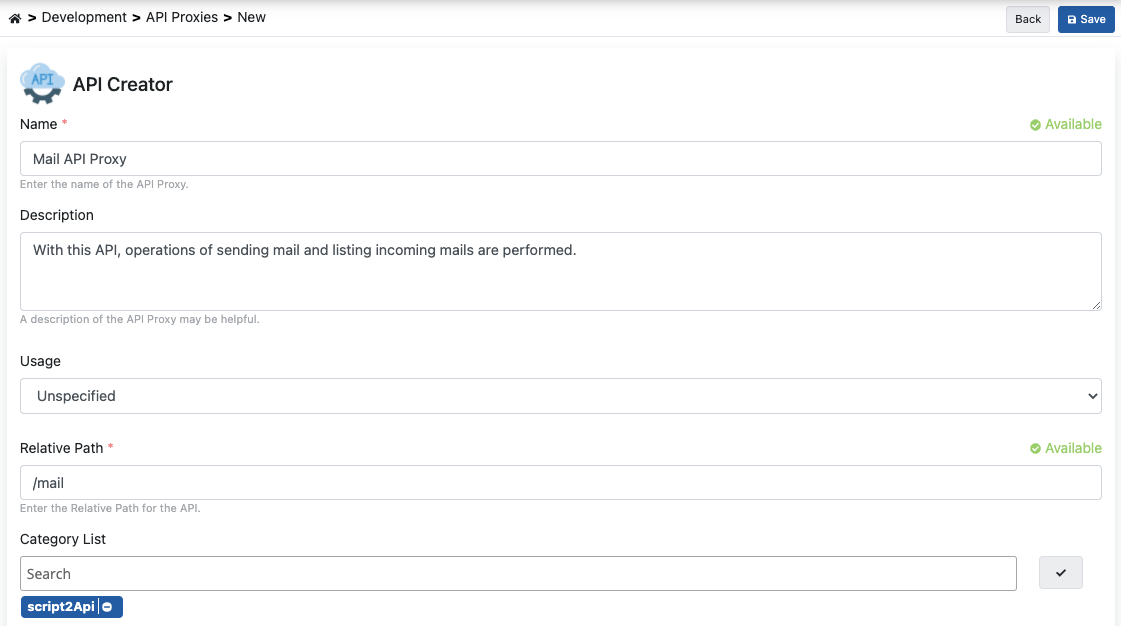
3. API Proxy Oluşturma
Script-2-API ekranından API Proxy Oluştur (Create API Proxy) butonuna tıklanarak anında API Proxy oluşturulabilir.

API Proxy'yi oluştururken aşağıdaki görselde bulunan girdi alanları doldurularak Kaydet (Save) butonuna tıklanır.
3.1 API Proxy'yi Canlıya Alma
Mail API Proxy, tanımı yapılmış ortam (environment) üzerine hızlı bir şekilde yüklenip (deploy), istemcilerin tüketimine açılabilir.
Bu işlemin yönetimi API Proxy ekranındaki Yükle (Deploy) butonuyla açılan diyalog üzerinden gerçekleştirilebilir.

Bu işlem, aynı şekilde Script-2-API ekranında API Proxy'leri Yönet (Manage API Proxies) linkinden yönetilebilir.

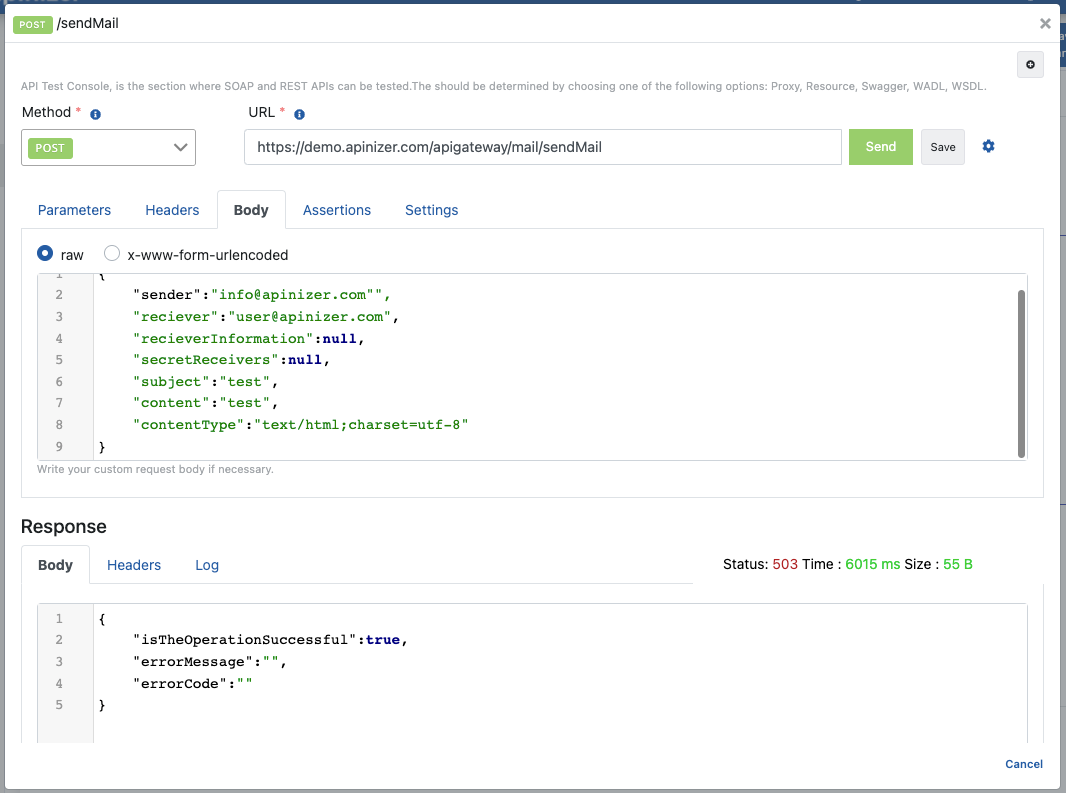
4. Test Etme
API Proxy sayfası üzerinden /sendMail metodunun test edilmesini içeren görsel aşağıdadır;