Getting a JWT Token from a Backend Application via API Call and Applying Cache
In this scenario, it will be explained how a JWT token expected by the backend is obtained from the backend application's token endpoint using the API Call policy on a REST API Proxy named Swagger PetStore, and how that token is configured to be reused through the cache mechanism.
Example Scenario:
- The backend API expects an
Authorization: Bearer <jwt>header on every request. - The token is obtained from a token (authentication) endpoint belonging to the backend application.
- Calling the token service on every client request is undesirable in terms of both latency and load on the token service.
- Therefore the token is obtained with the API Call policy; the response is cached and the same token is reused until it expires.
Solution:
An API Call policy added on the request pipeline in Apinizer makes a synchronous call to the token endpoint. The access_token value from the response is added to the Authorization header of the request that will go to the backend. On the Cache tab, Dynamic TTL is enabled so that TTL is calculated from the JWT exp claim (or from the expires_in field in the response); thus an expired token is not kept in cache.
The application steps of the scenario mentioned above are as follows;
- The API Client sends a request to Apinizer.
- Apinizer checks whether a valid token exists in cache.
- Cache miss: An API Call is made to the backend token endpoint and the returned JWT is written to cache.
- Cache hit: The token service is not called; the JWT in cache is used.
- The obtained JWT is added to the Authorization header of the request going to the backend.
- Apinizer sends the request to the Backend API.
- The Backend API responds to Apinizer.
- Apinizer responds to the API Client.
In this scenario, https://auth.example.com/oauth/token is used as the sample token endpoint. In your own environment you must use the real token URL, client credentials, and grant type of your backend application. For field-level details of the API Call policy, see the API Call page.
1) Creating the API Proxy
In this scenario, a REST API named Swagger Petstore (https://petstore.swagger.io) will be used.
First, this address must be defined as an API Proxy.
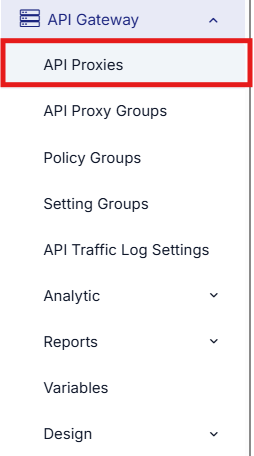
For this, click the API Proxies option under the API Gateway menu.
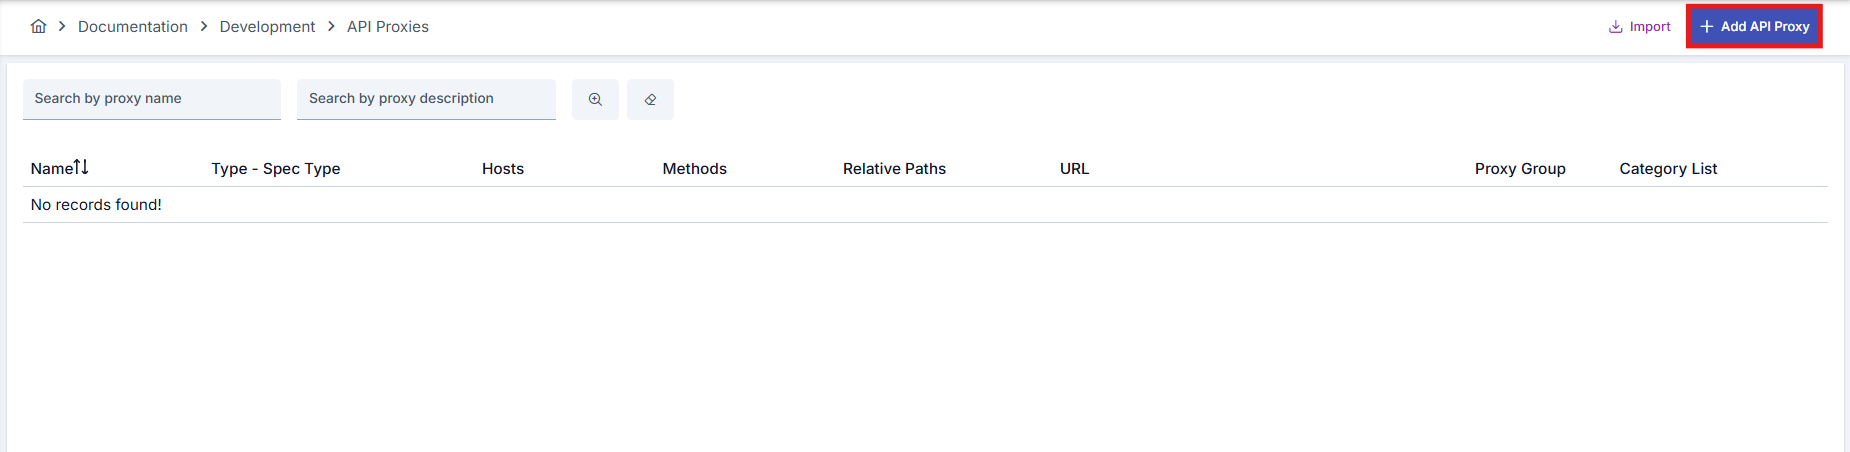
Since no proxy definition has been made yet on the opened page, the text No records found! appears.
Click the Add API Proxy button in the top right corner and start creating a new API Proxy.
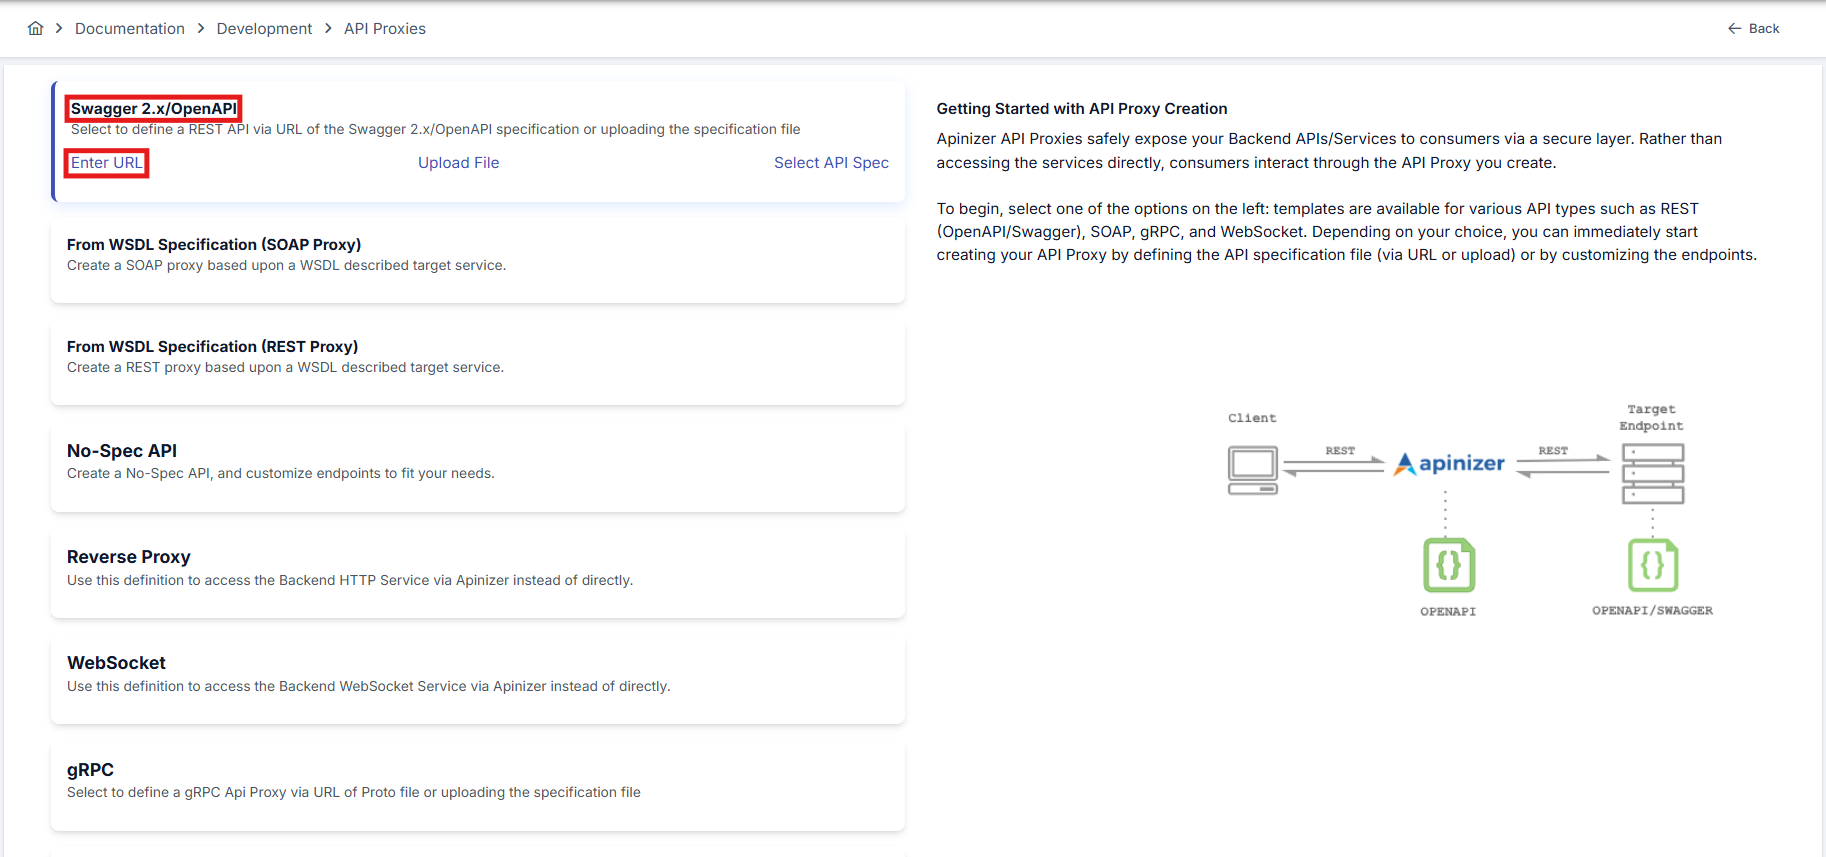
In this section, the type of the API Proxy to be created must be selected.
Since the type of API used in this scenario will be Swagger 2.X, this type is selected.
Click Enter URL to switch to the screen where the address of the API to be used will be entered.
As shown in the image below, enter the address to be accessed in the URL field and click the Parse button.

After the Parse operation, the screen shown below appears.
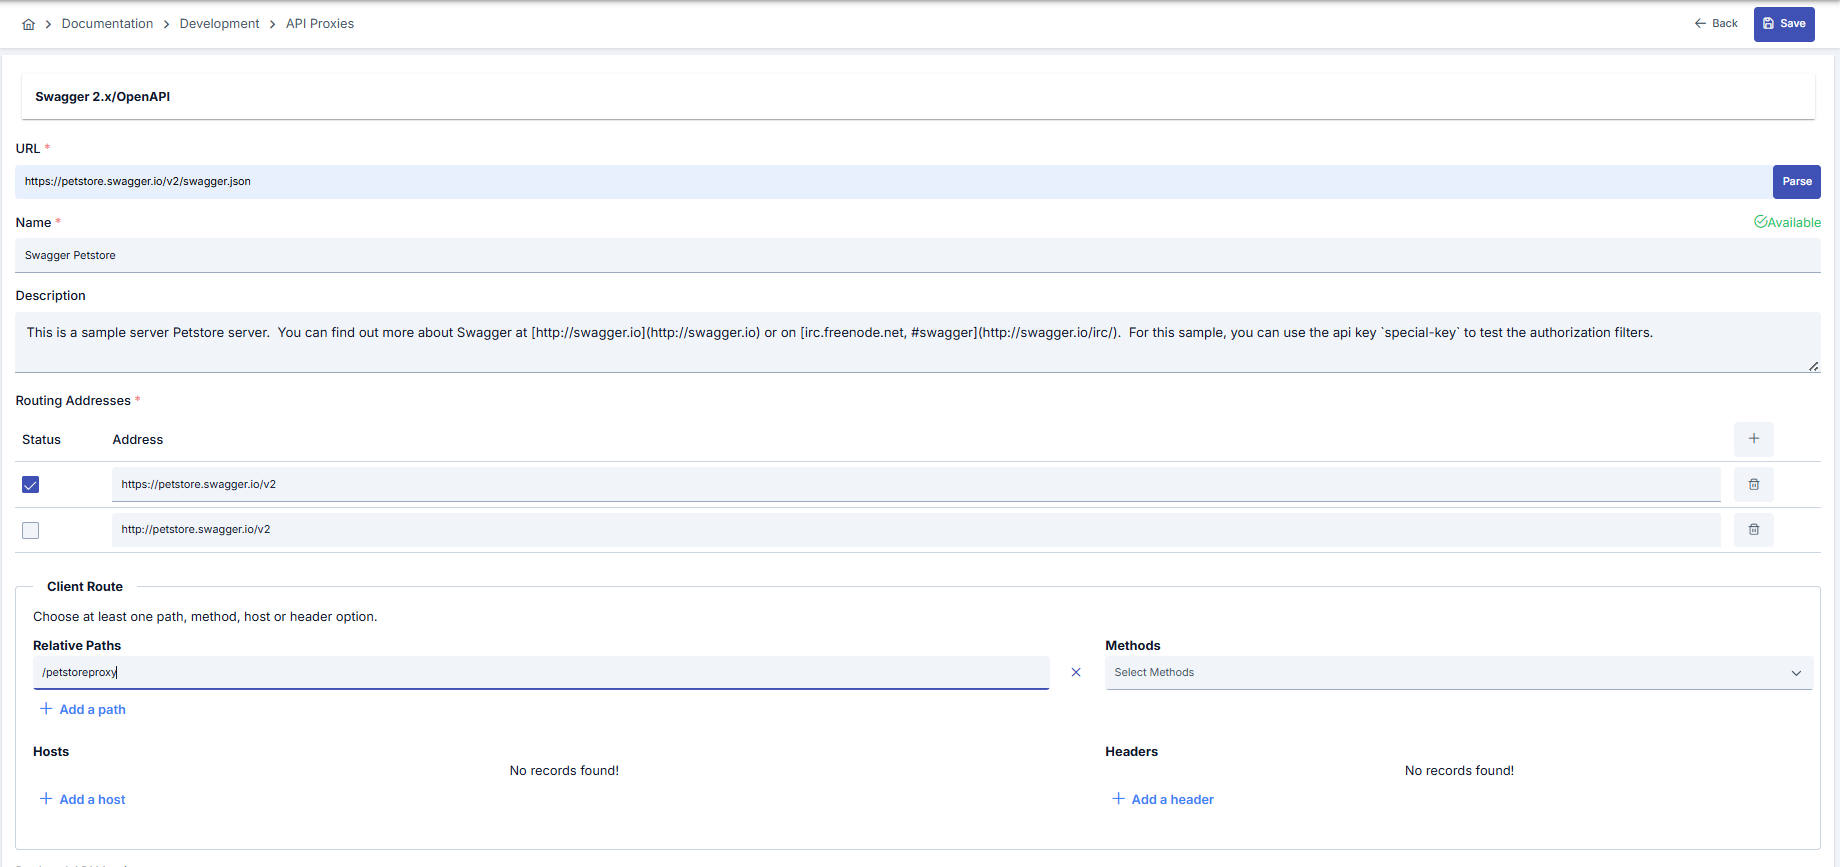
API Proxy settings can be configured on this screen. For detailed information about these settings, see the API Proxy Creation documentation.
The settings of the API Proxy to be used in this scenario are as shown below.
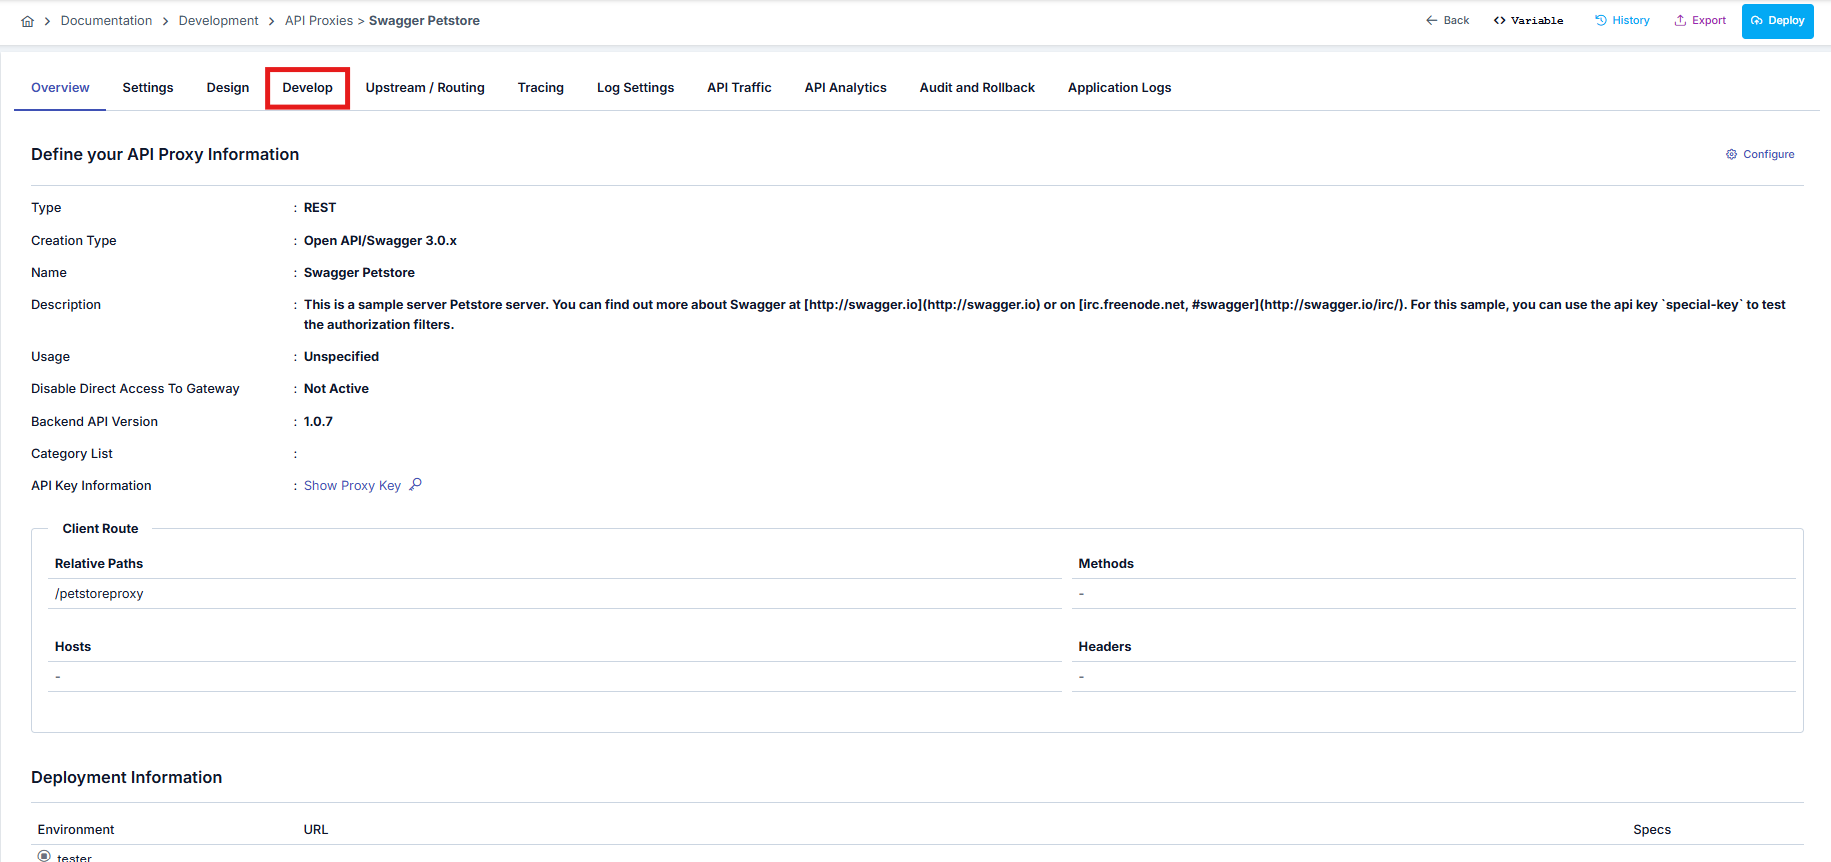
After saving, click the Develop tab on the opened page.
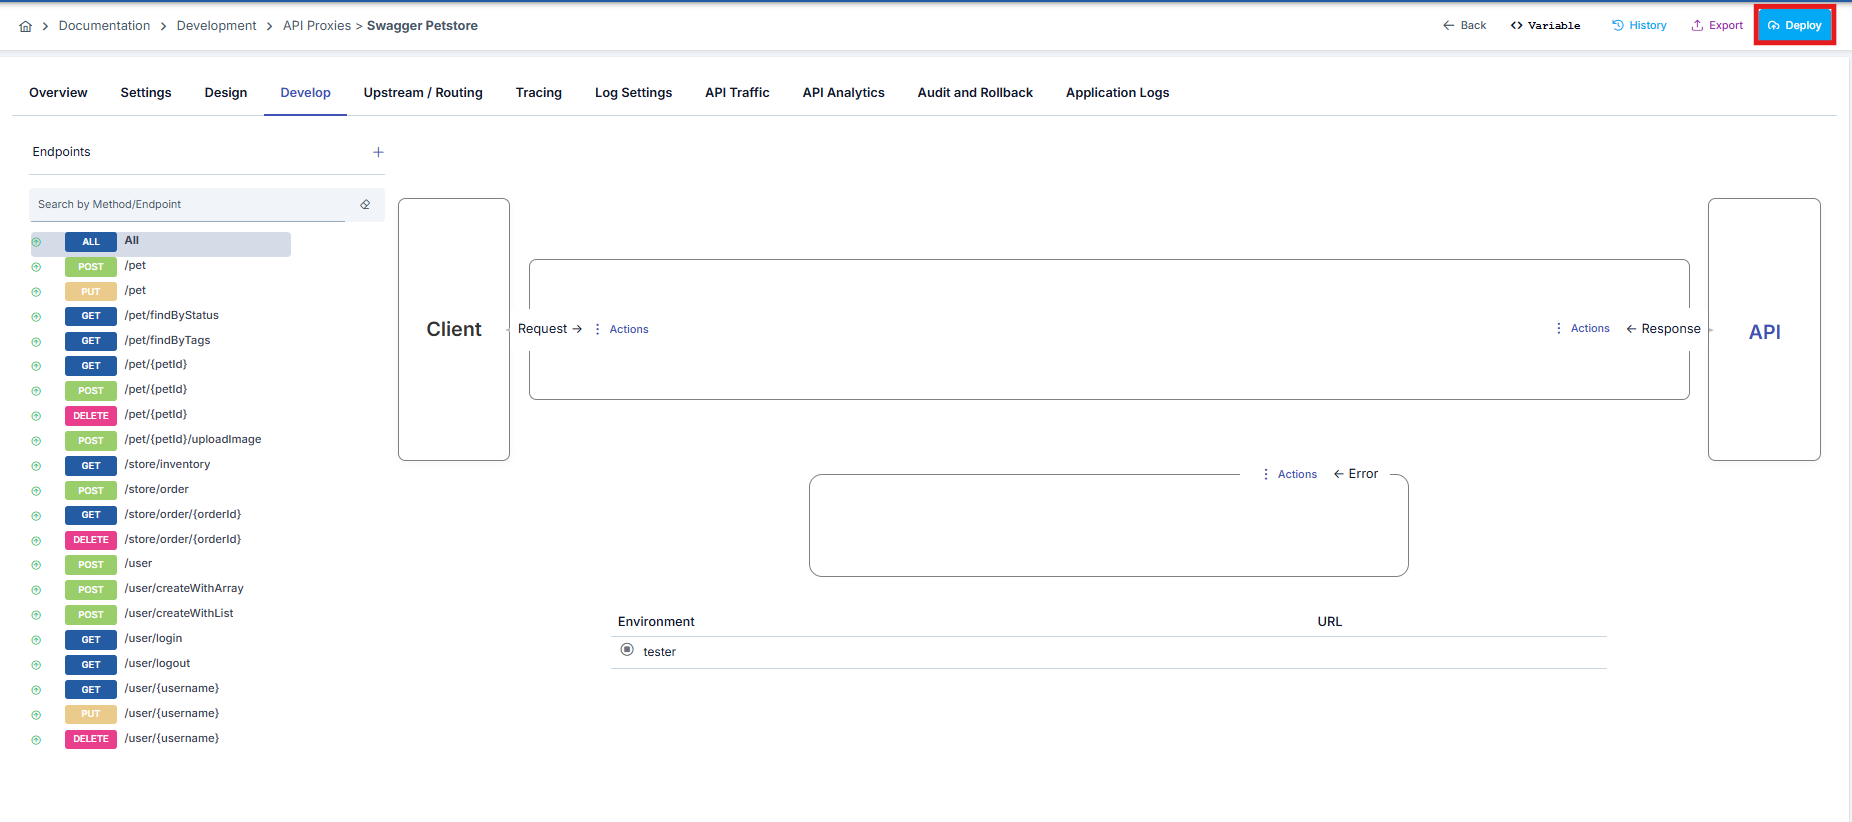
The endpoints of the REST API are listed here.
With the All expression above these endpoints, policies to be added can be applied to all endpoints. In this scenario the API Call policy will be added on the request pipeline via All.
Deploy the created API Proxy by clicking the Deploy button in the upper right area.
2) Creating Variables to Carry the Token Value
Variable definitions are required to read the access_token field from the token response and write this value to the backend request header.
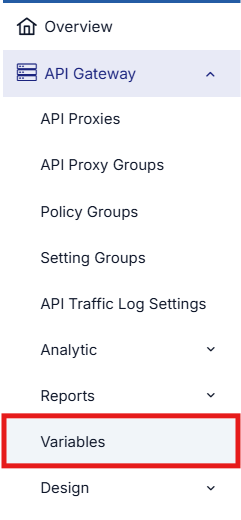
For this, click the Variables option under API Gateway in the navbar.
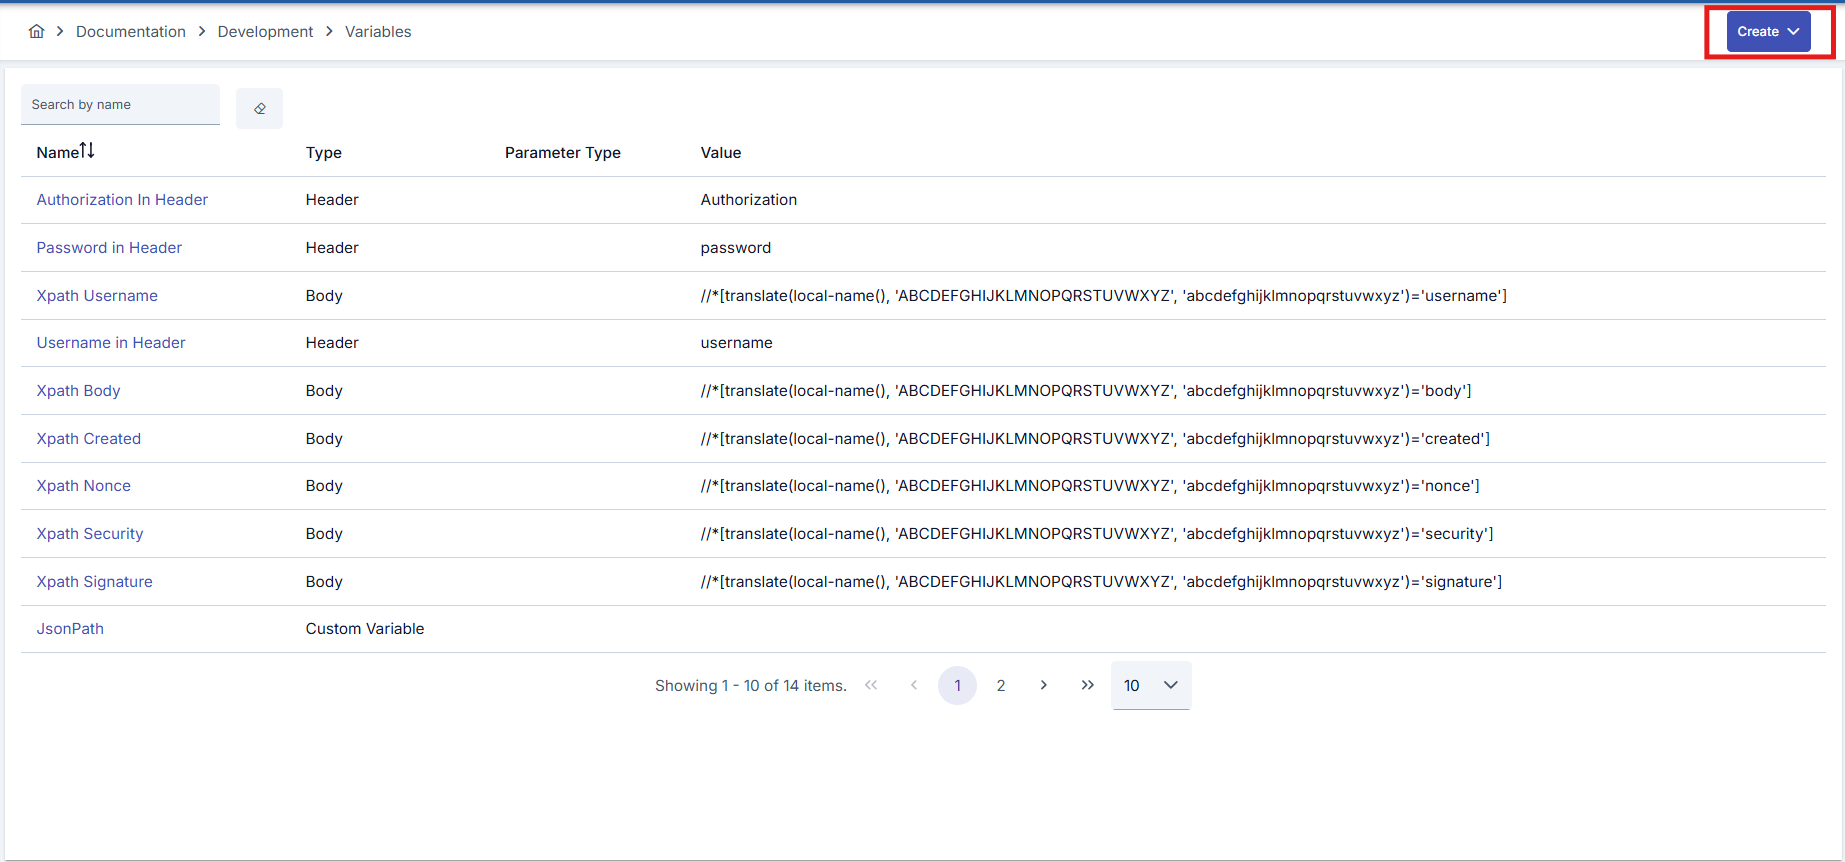
On the opened screen, click the Create button in the top right corner.
The following variables will be created in this scenario:
| Variable Name | Type | Usage |
|---|---|---|
| jwtAccessToken | Body | Reads the $.access_token value from the token response body |
| jwtExpiresIn | Body | (Optional) Reads the $.expires_in value from the token response body |
| backendAuthToken | Custom Variable | Used to carry the token value across the policy chain |
For the jwtAccessToken variable, select Body as the Type and enter the following value in the JSON Path field:
$.access_token
For the jwtExpiresIn variable, again select the Body type and enter the following value in the JSON Path field:
$.expires_in
For backendAuthToken, select the Custom Variable type. This variable is used when writing the token read from the API Call response to the Authorization header in the After Call stage.
After the related variable definitions are completed, the variables list appears as shown below.

For detailed information about variables and their types, see the Variables page.
3) Adding the API Call Policy
The API Call policy can now be added.
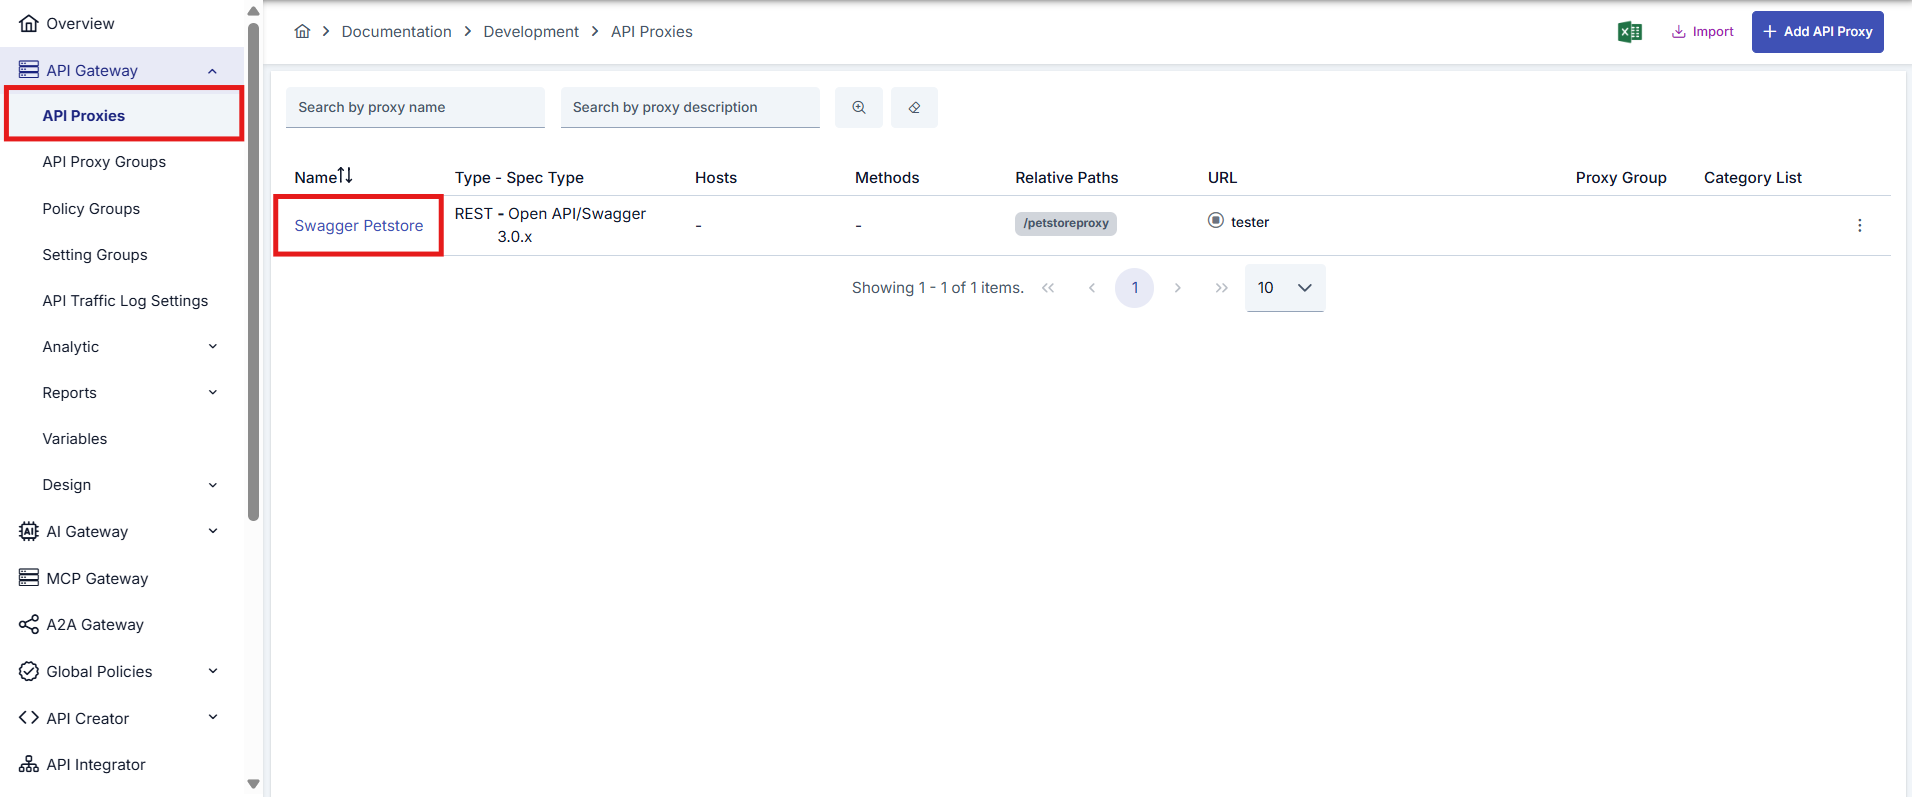
Go to the page where API Proxies are listed and select the Swagger Petstore proxy created in the previous steps.
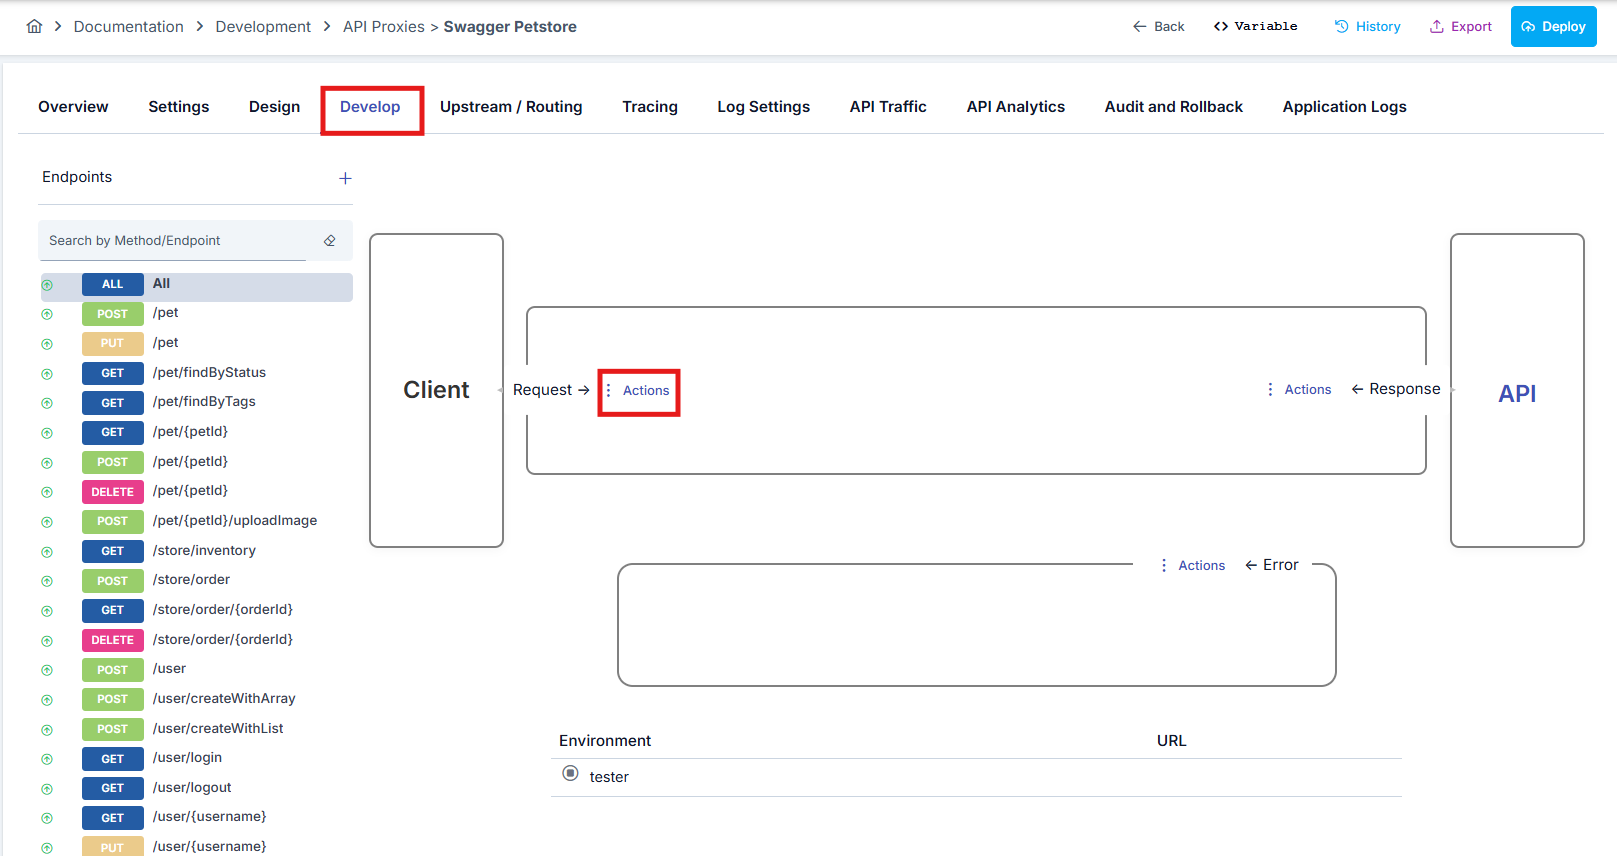
Then go to the Develop tab and click the Add Policy button on the All row in the request pipeline.
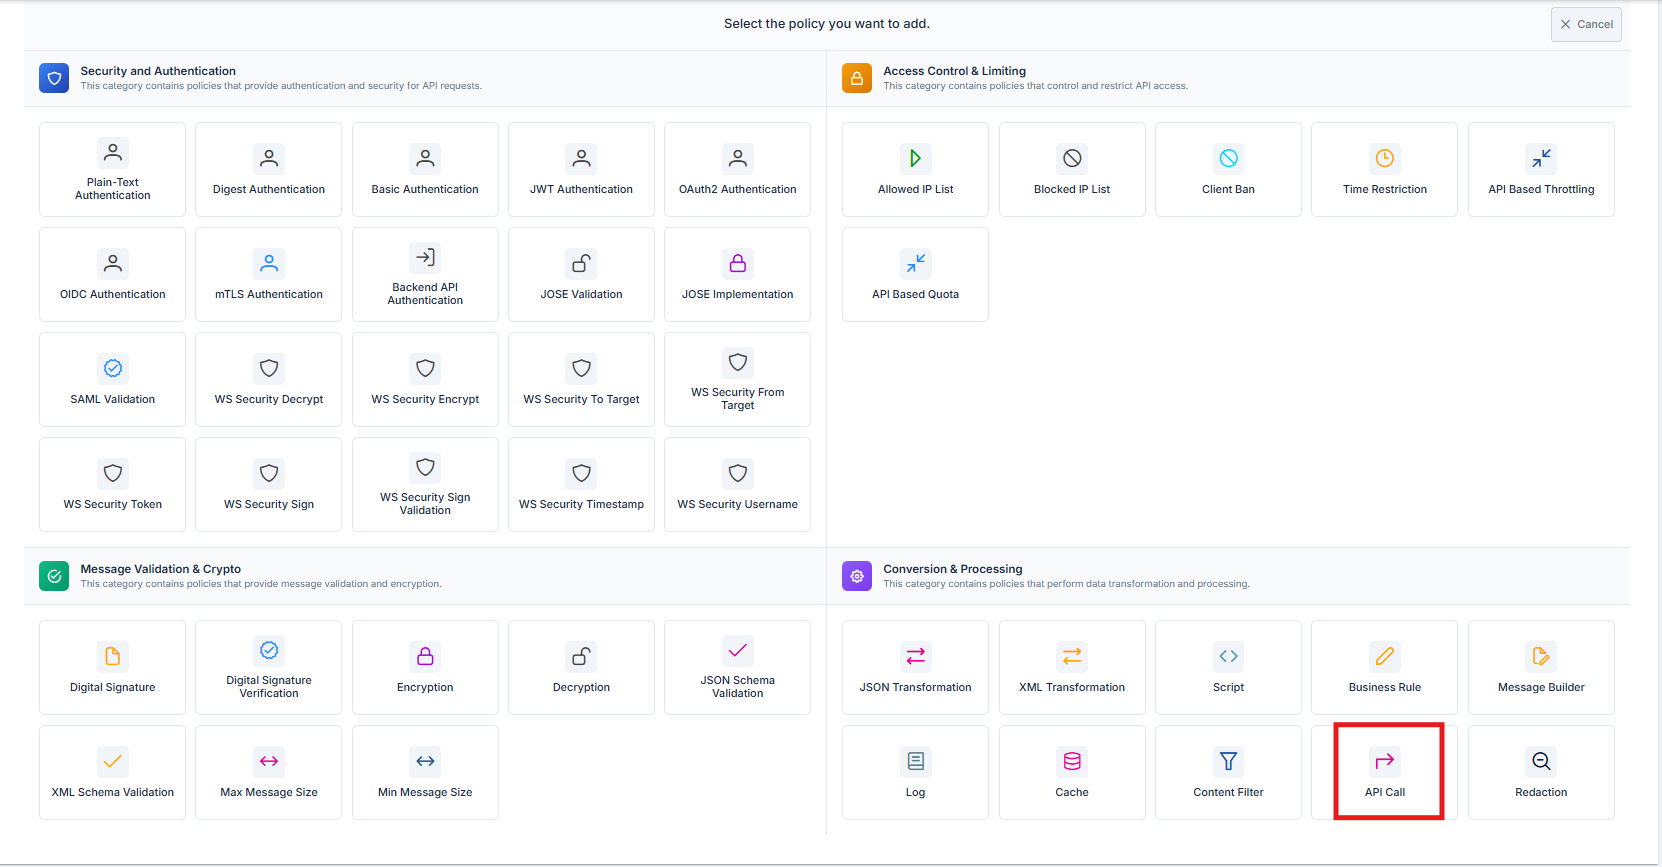
On the opened page, select the API Call (REST API Call) policy.
3.1) Basic Call Settings
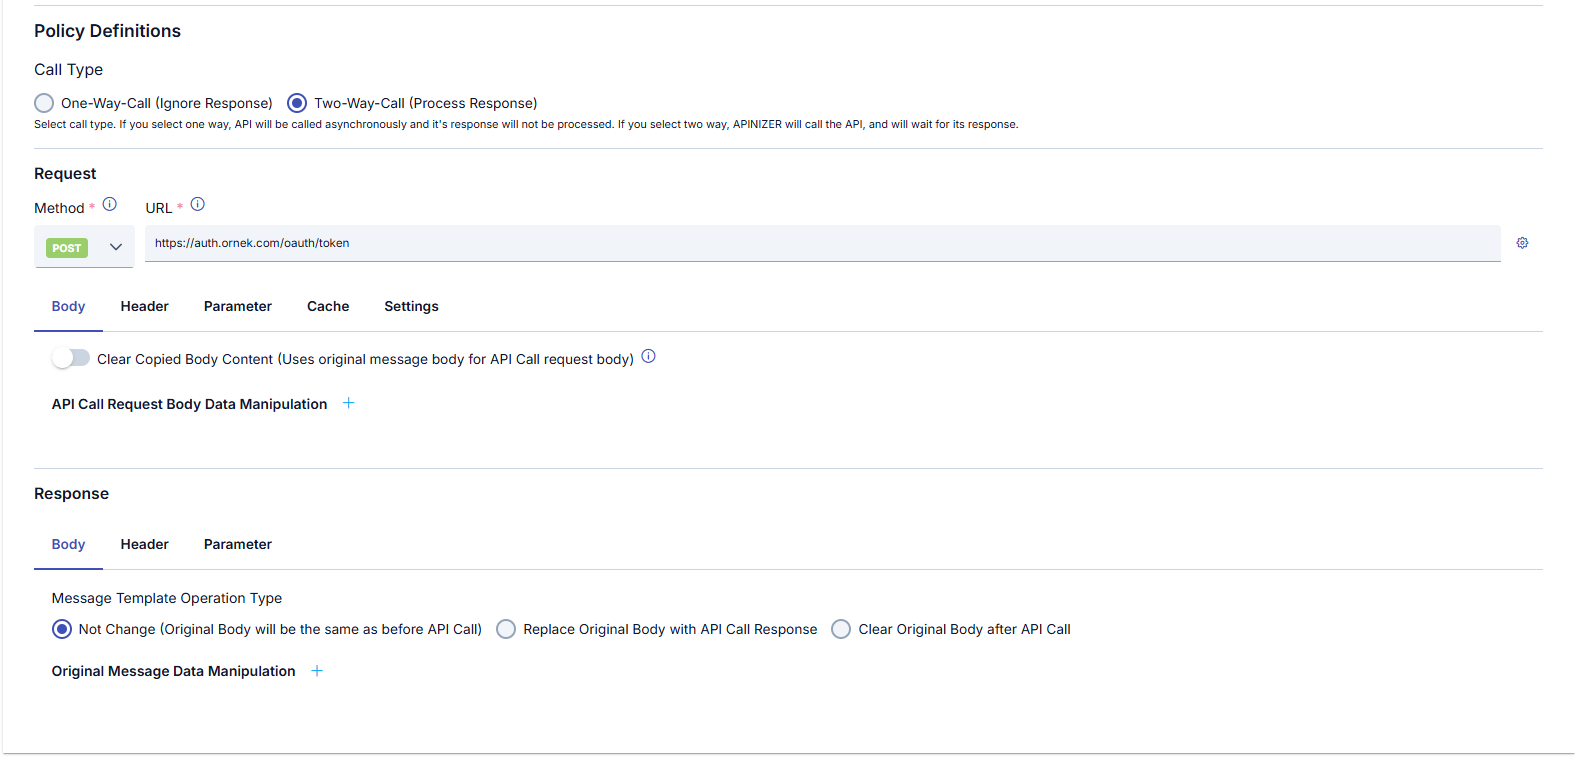
The fields on this screen can be examined one by one as follows:
- Set Call Type to Two-Way-Call (Process Response). Because the token returned in the response after the request must be obtained and processed, not only the outgoing request but also the returned response is important.
- Set HTTP Method to POST.
- Enter the token endpoint address in the Base URL field. The sample address in this scenario is:
https://auth.example.com/oauth/token
3.2) Request — Preparing the Token Request
The request going to the token endpoint can be made by forwarding the original body coming from the client, or by clearing the request body coming from the client and creating a request body for the API Call within the API Call policy.
- Enable Clear Body Before Call. (To define a custom request body for the API to be called instead of the request body coming from the client.)
- Enable Use Message Template.
- Select the type of request body expected by the API in the request body: XML, JSON, x-www-form-urlencoded
- Enter the fields required to obtain a token in the body content.
In our example, the token service expects the request body as x-www-form-urlencoded, so x-www-form-urlencoded will be used in the example.
| Key | Value |
|---|---|
grant_type | client_credentials |
client_id | <CLIENT_ID> |
client_secret | <CLIENT_SECRET> |
scope | api.read |
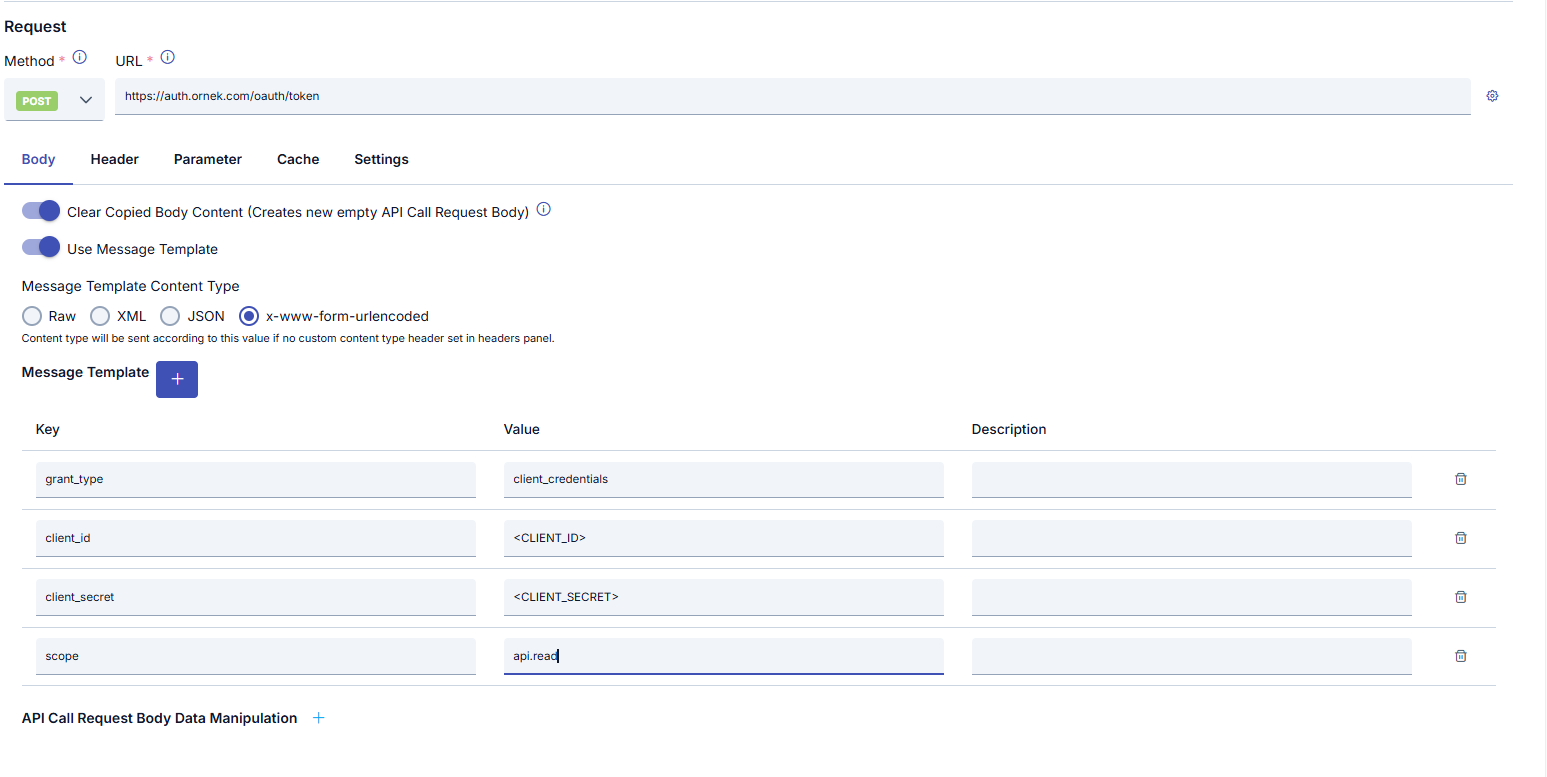
Instead of keeping sensitive information such as client_id and client_secret as plain text inside the policy, it is recommended to use a Variable / environment variable. In production environments, resolving credentials via a vault or encrypted variable is preferred.
Additionally, with a different script to be written, the parameters used during token acquisition can be made dynamic based on the values sent by the user. In this way, the token acquisition process can be customized per user, so that each user obtains a token that belongs to them and matches their own data.
HEADER tab:
- If the token service expects a
Content-Type, add the relevant header. - If not needed, Remove All Headers Before Call can be enabled so that unnecessary headers from the client do not go to the token service; then only the required headers are added via New Headers.
Sample new headers:
| Name | Value |
|---|---|
Content-Type | application/x-www-form-urlencoded |
Accept | application/json |
3.3) Cache — Caching the JWT
The CACHE tab is configured so that the token service is not called on every request.
Settings to be used in this scenario:
| Field | Value | Description |
|---|---|---|
| Enable Cache | On | Cache the token response |
| Apply By (Cache By) | A fixed variable or fixed key | For a client_credentials scenario, a fixed key is enough for the single token used by the gateway. Example: backend-jwt-token |
| Capacity | 100 | A low capacity is enough since only one/few keys will be stored in this scenario |
| Cache Storage Type | DISTRIBUTED | Distributed cache is preferred so that all Workers share the same token in a cluster |
| Cache Null Responses | Off | Do not cache empty/failed token responses |
With the Apply By feature, separate caching can be performed based on the value of the selected variable. In this way, when the value of the related variable differs in incoming requests, the system does not use the data in the cache; instead it uses the up-to-date data returned from the backend and creates a new cache entry. Thus each request is cached uniquely according to the value it belongs to, and requests can be distinguished from one another.
If there is no need for a token-based distinction and Apinizer is the sole authorized user of the related backend, it is recommended to set the cache capacity to 1.
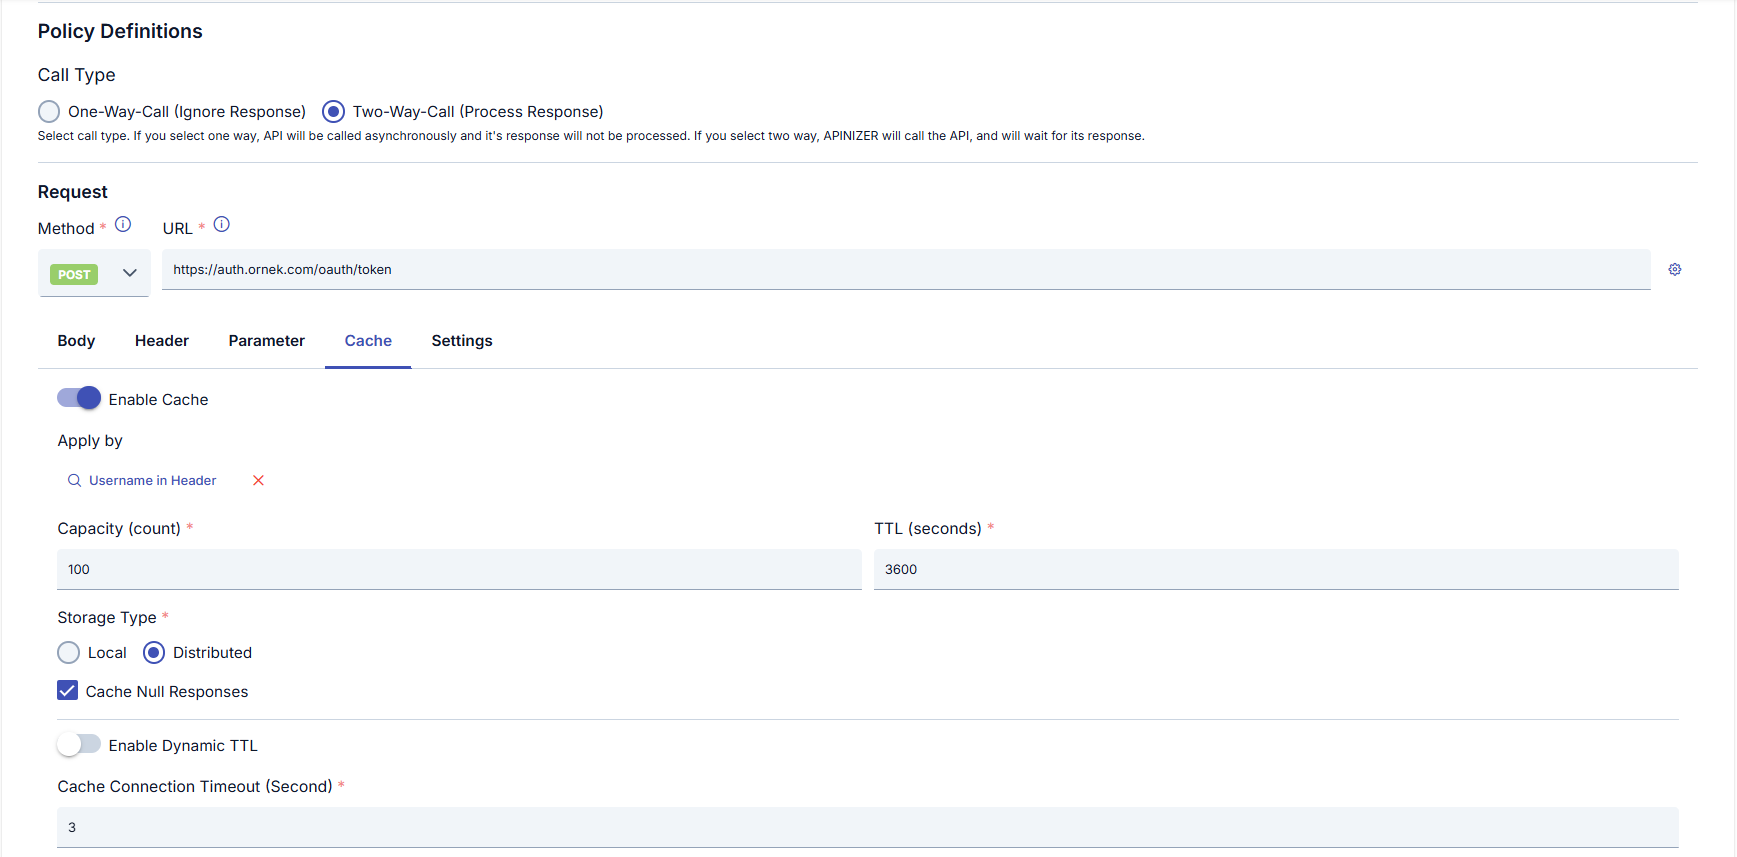
** By default, cache configuration within API Call is quite simple, as seen in the screenshot above. However, in some cases we may want to cache our token with dynamic TTL instead of a fixed TTL.
For this, the Enable Dynamic TTL option provided within the API Call policy must be enabled.
Dynamic TTL based on JWT lifetime
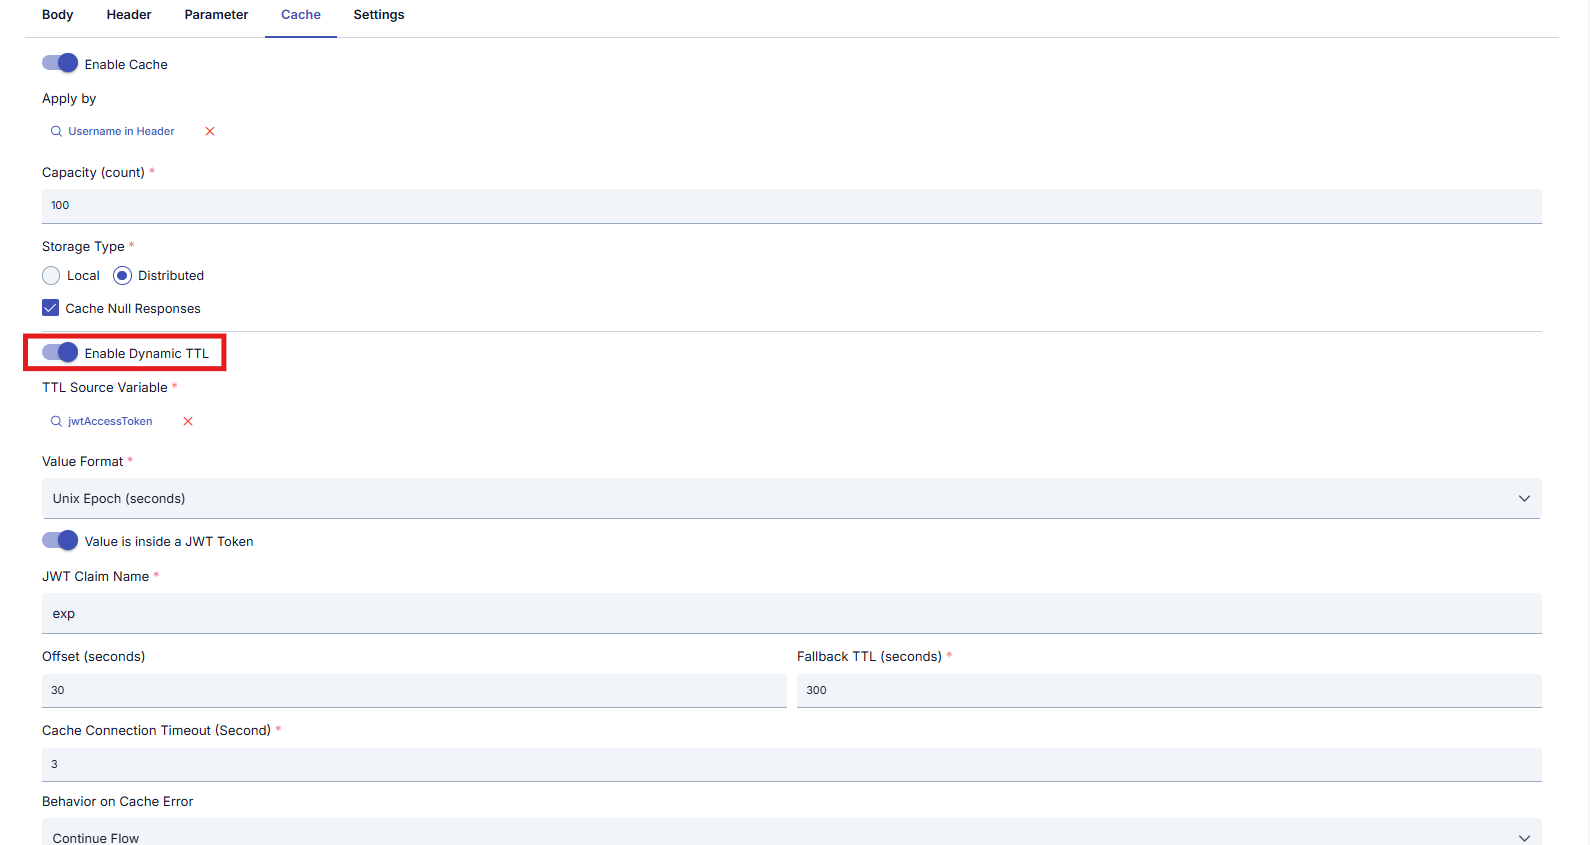
Instead of a fixed TTL, it is recommended to keep the cache according to the token's real validity period.
There are two common methods for Dynamic TTL configuration:
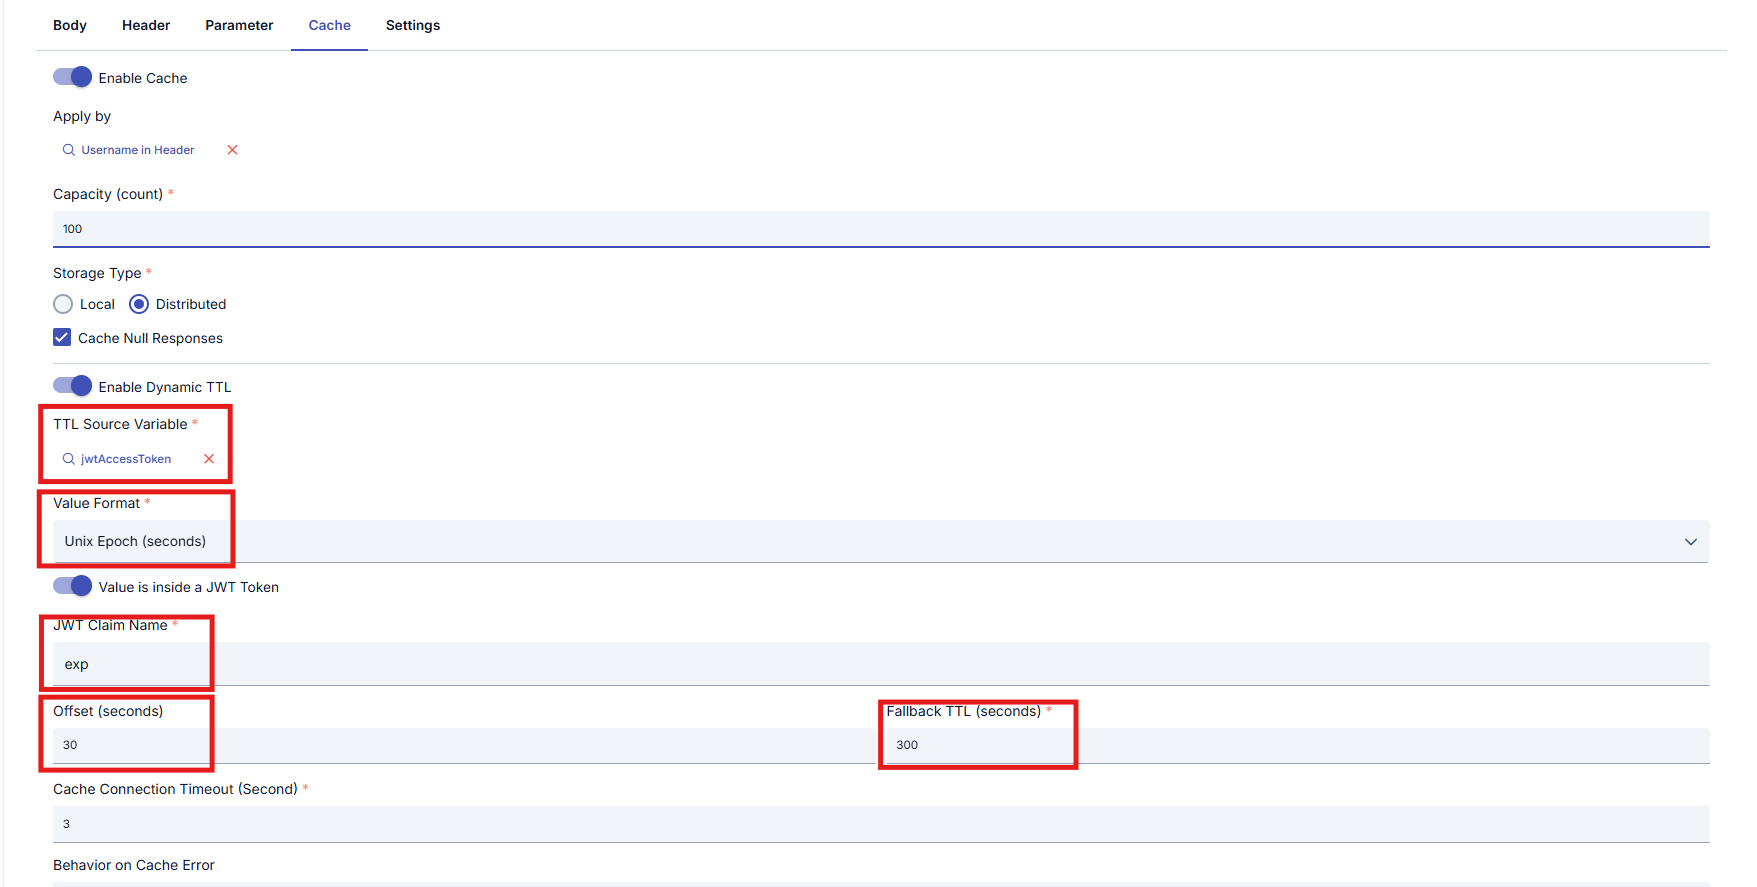
Method A — JWT exp claim (recommended):
- Enable Dynamic TTL.
- Select the variable that reads the
access_tokenfield from the token response as TTL Source Variable (jwtAccessToken/$.access_token). - Check Value Is Inside JWT Token.
- Enter
expin the JWT Claim Name field. - Use Unix Epoch (seconds) as the Value Format (
expis a Unix epoch in seconds). - Enter
30in the Offset field (expire the cache 30 seconds before the token ends). - Enter
300in the Fallback TTL field (5 minutes if TTL cannot be parsed).
Method B — expires_in field:
If the token response is as follows:
{
  "access_token": "eyJhbGciOiJSUzI1NiIsInR5cCI6IkpXVCJ9...",
  "token_type": "Bearer",
  "expires_in": 3600
}
- Enable Dynamic TTL.
- Select
jwtExpiresIn($.expires_in) as TTL Source Variable. - Select Expires In (seconds) as Value Format.
- Again set Offset to
30seconds.
For a detailed explanation of Dynamic TTL fields, see API Call — Dynamic TTL.
3.4) Response — Adding the Token to the Authorization Header
After the token is obtained (or read from cache), the JWT must be written onto the original request that will go to the backend.
BODY tab:
- Set Message Template Operation Type to NOT_CHANGE_BODY. This way the body returned from the token service does not overwrite the original request body coming from the client.
Original Message Data Manipulation / HEADER tab:
We can add the JWT returned from the API call to the Authorization header using the Original Data Manipulation method. However, in the scenario we are covering, our backend service expects the JWT token with a "Bearer" prefix. To use Apinizer's ability to add a prefix, we must set the JWT from the Header tab, not from the Body tab.
- Add a new header to the request going to the backend:
| Name | Source | Prefix | Description |
|---|---|---|---|
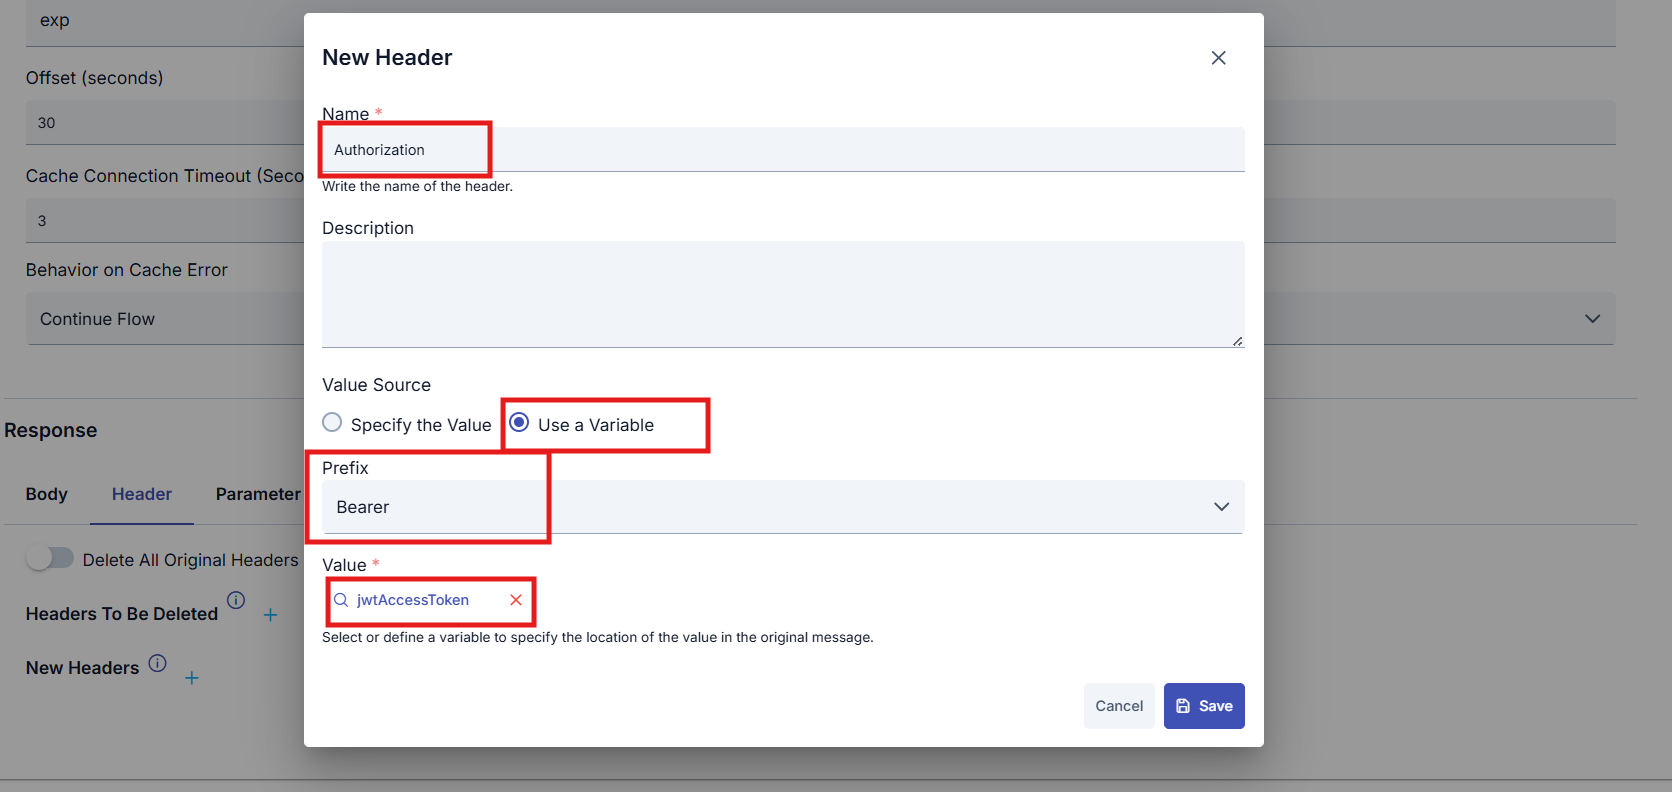
Authorization | jwtAccessToken variable | BEARER | Adds a header in Bearer <access_token> format |
Steps to set the JWT on the header;
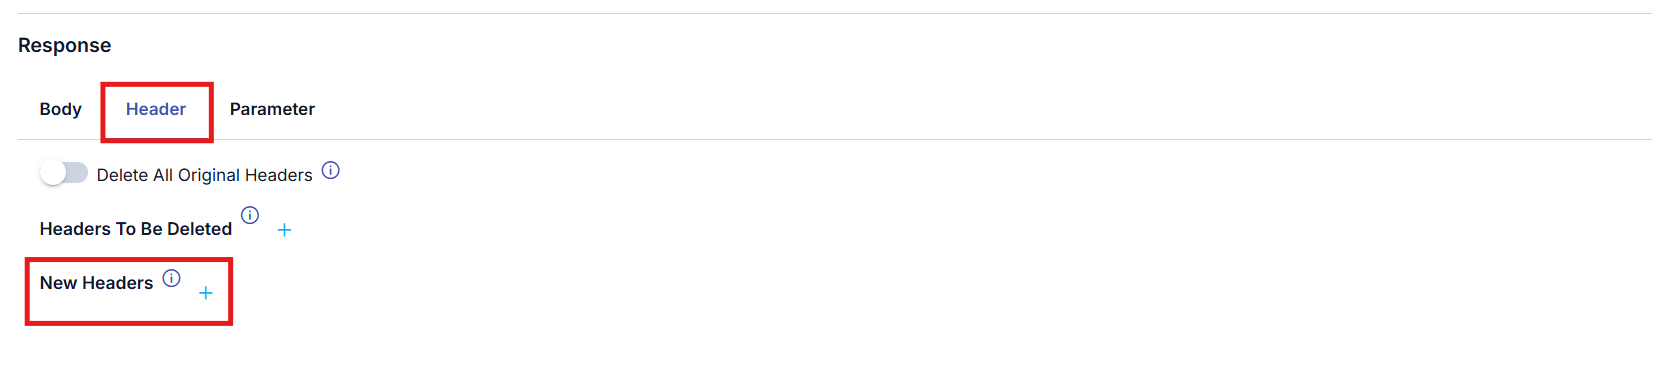
- Under Response, click New Header inside the Header tab.
- On the opened page, select the name of the header where the JWT will be set, the prefix to be added in front of the JWT, and the
jwtAccessTokenvariable from which the JWT value will be taken, then click save to complete setting the JWT on the header.
If the request coming from the client already has an Authorization header and only the JWT obtained by the gateway should go to the backend, delete the old Authorization header before After Call, or prevent client credentials from leaking to the backend with an approach similar to Clear Authentication Information.
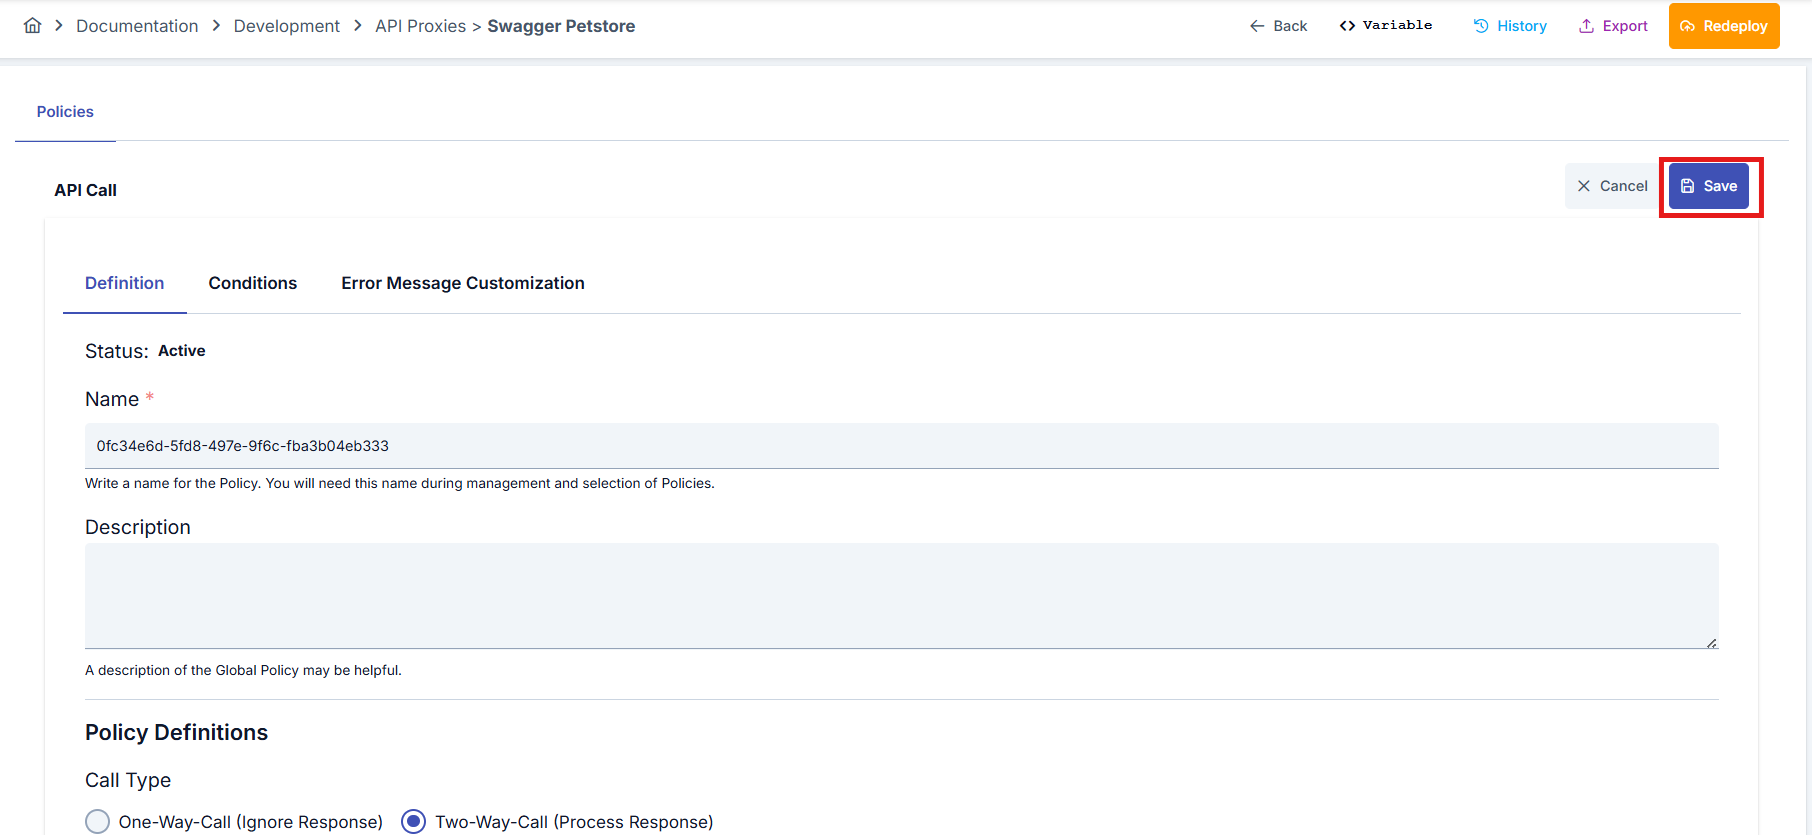
To complete the operations related to obtaining the token via API Call, configuring the cache, and setting the returned response on the header, click the save button to save the API Call policy.
3.5) Error Message Customization (Optional)
The Error Message Customization tab can be used so that a meaningful error is returned to the client if the token service is unreachable or times out.
Example:
{
  "statusCode": 502,
  "errorCode": "BACKEND_TOKEN_UNAVAILABLE",
  "message": "The backend token service is not responding. Please try again later."
}
After the settings to be used in this scenario are completed, click the Save button in the top right corner.
For the change to take effect, the proxy must be Deployed again.
4) Testing the API Proxy
Select the proxy named Swagger Petstore.
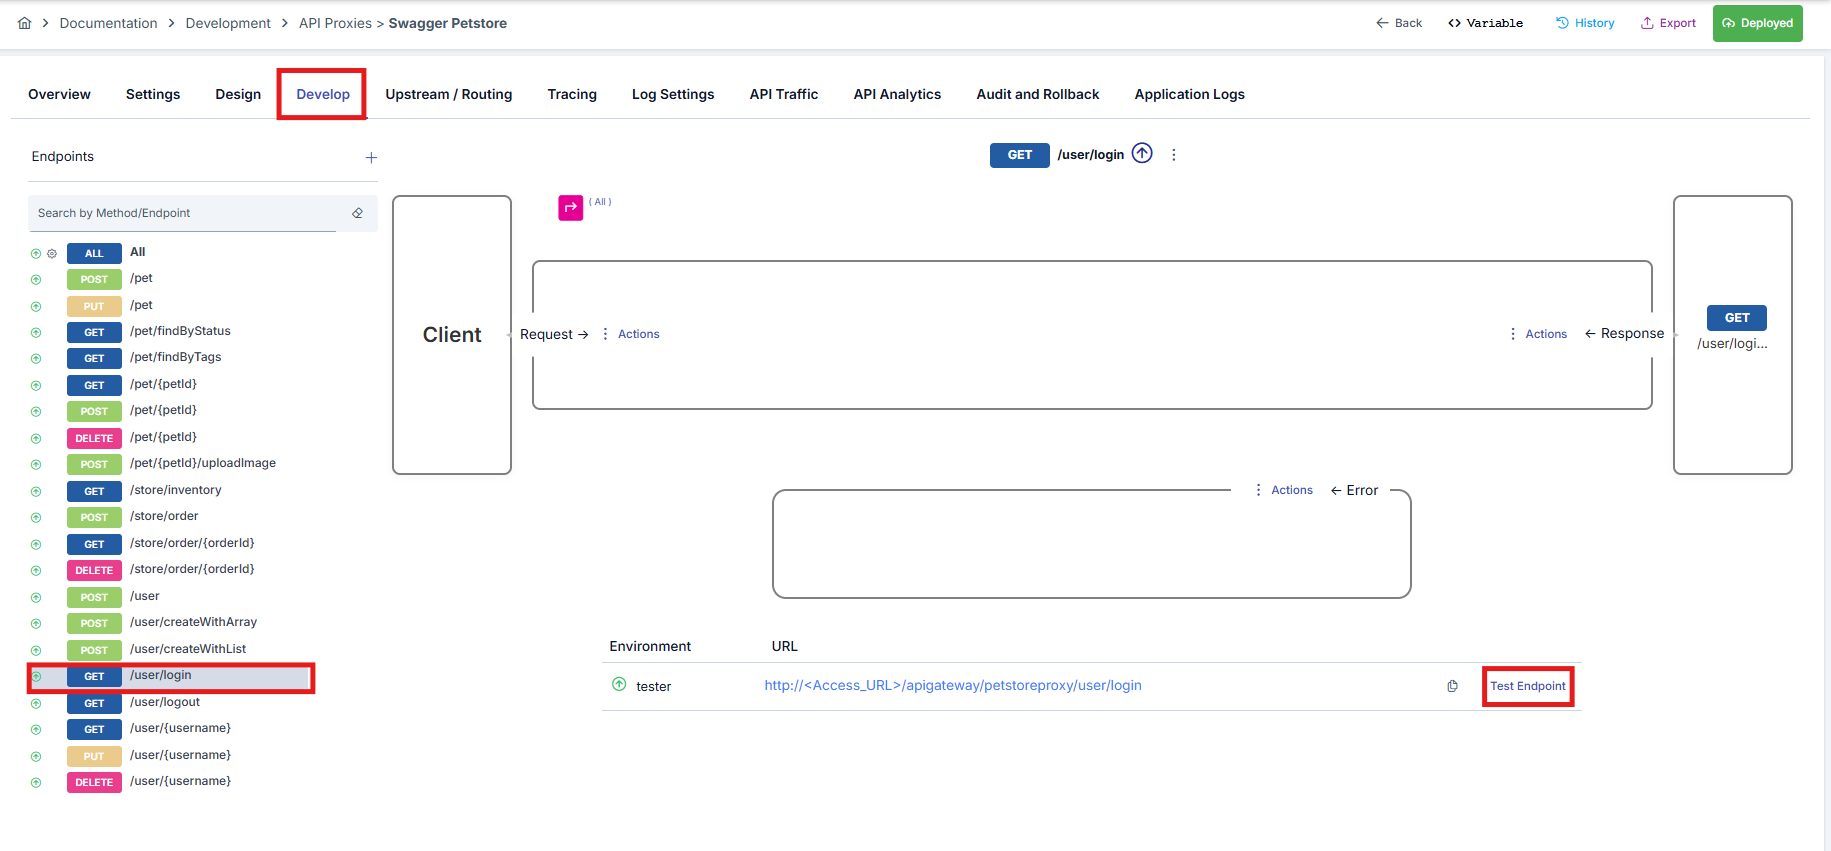
Select an endpoint under the Develop tab. In this scenario the /user/login endpoint will be used.
Click Test Endpoint to test this endpoint.
Click the Send button to send the request directly.
4.1) First request (Cache miss)
On the first request the cache is empty, so the flow proceeds as follows:
- API Call sends a POST to the token endpoint.
- The returned JWT is written to cache (with Dynamic TTL).
- The JWT is added to the Authorization header.
- The Backend API is called.
A successful response is received.
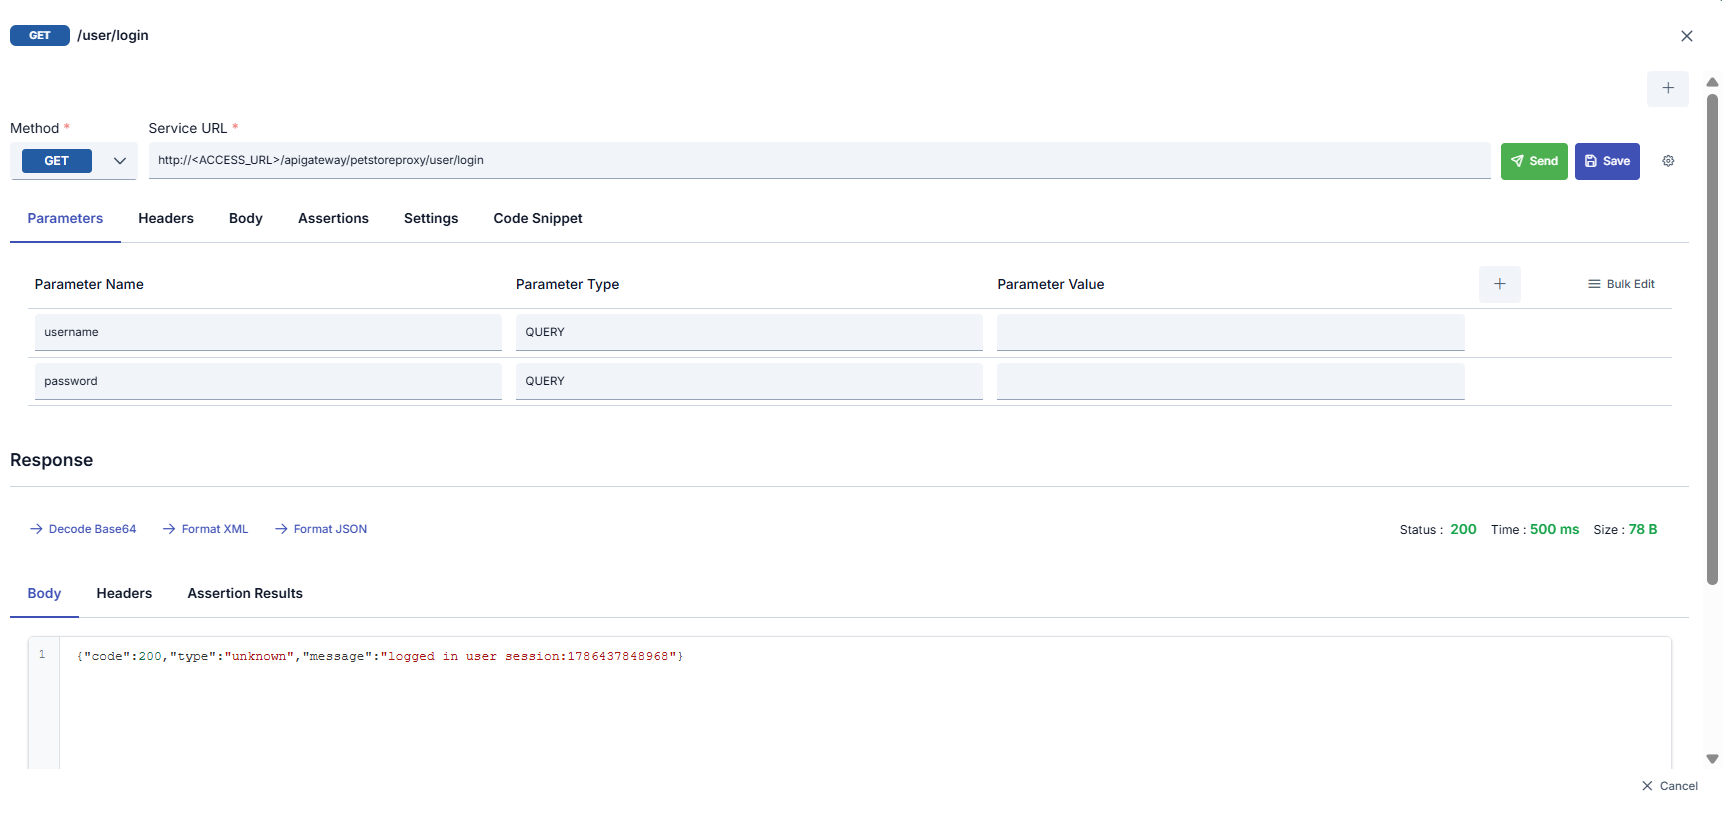
Because the token service is called on the first request, latency may be higher than on subsequent requests. If Trace / step-by-step monitoring is enabled, the duration of the API Call step can be observed.
4.2) Subsequent requests (Cache hit)
When another request is sent to the same proxy within a short time:
- A valid JWT is found in cache.
- The token endpoint is not called.
- The JWT from cache is written to the Authorization header.
- The Backend API is called.
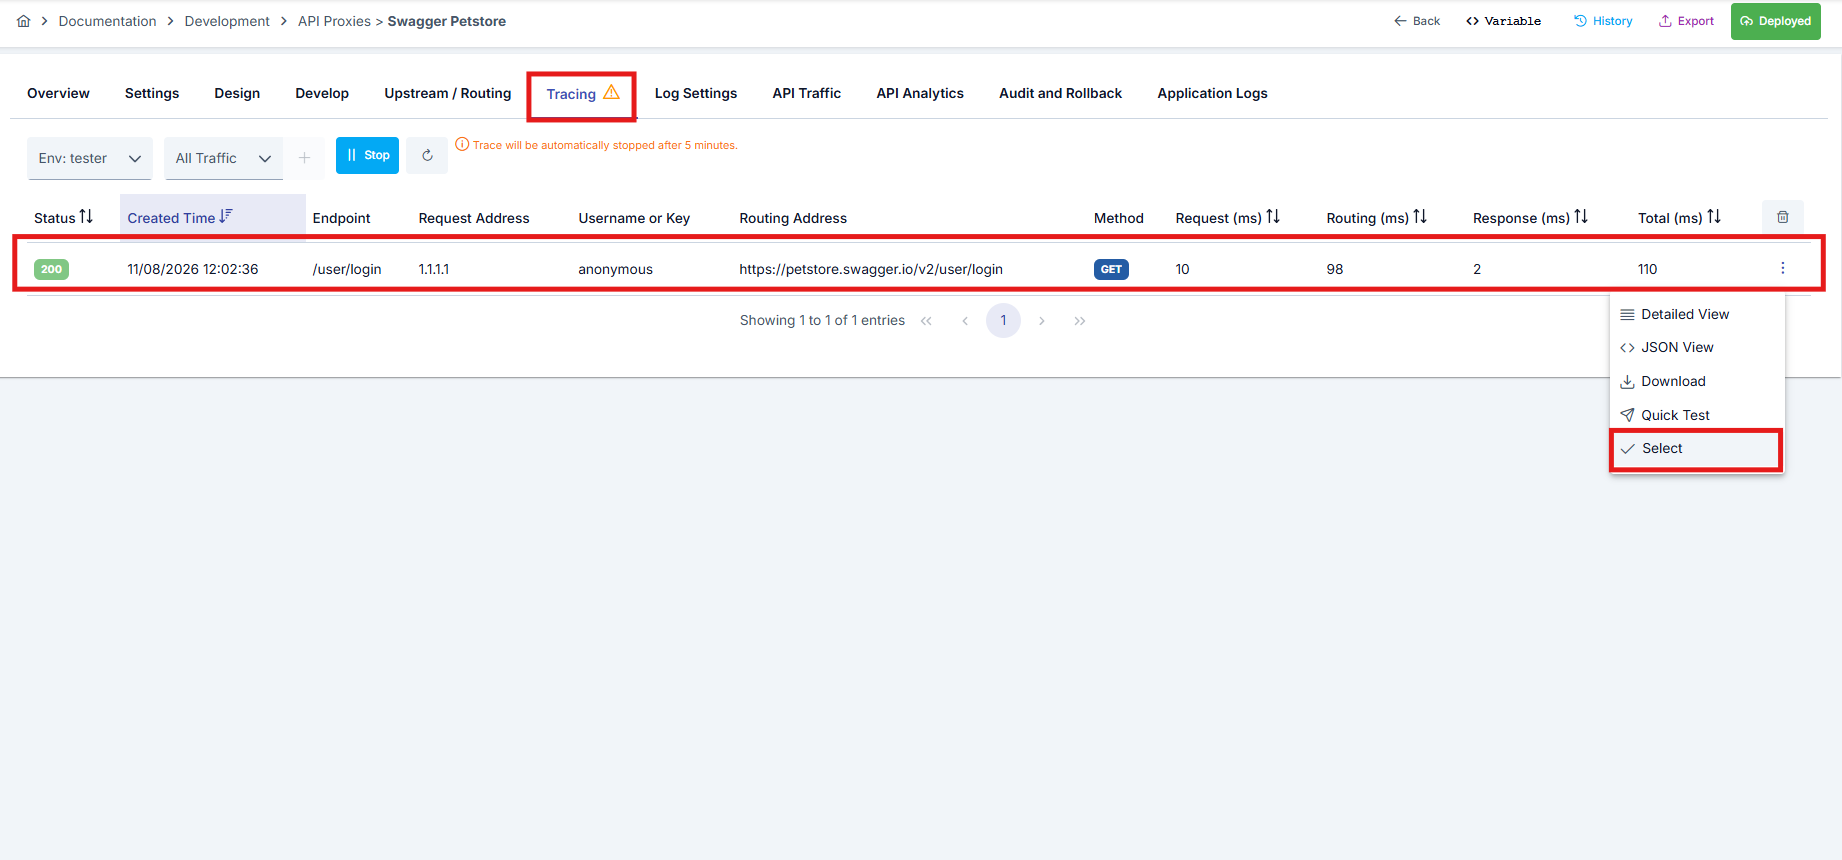
To better observe step by step that the JWT, which is the subject of the scenario, is obtained via API Call and cached, we will examine the request that we expect to return from the cache via trace.
To monitor the request via Trace;
- Go to the Tracing tab and click the Start button on the opened screen.
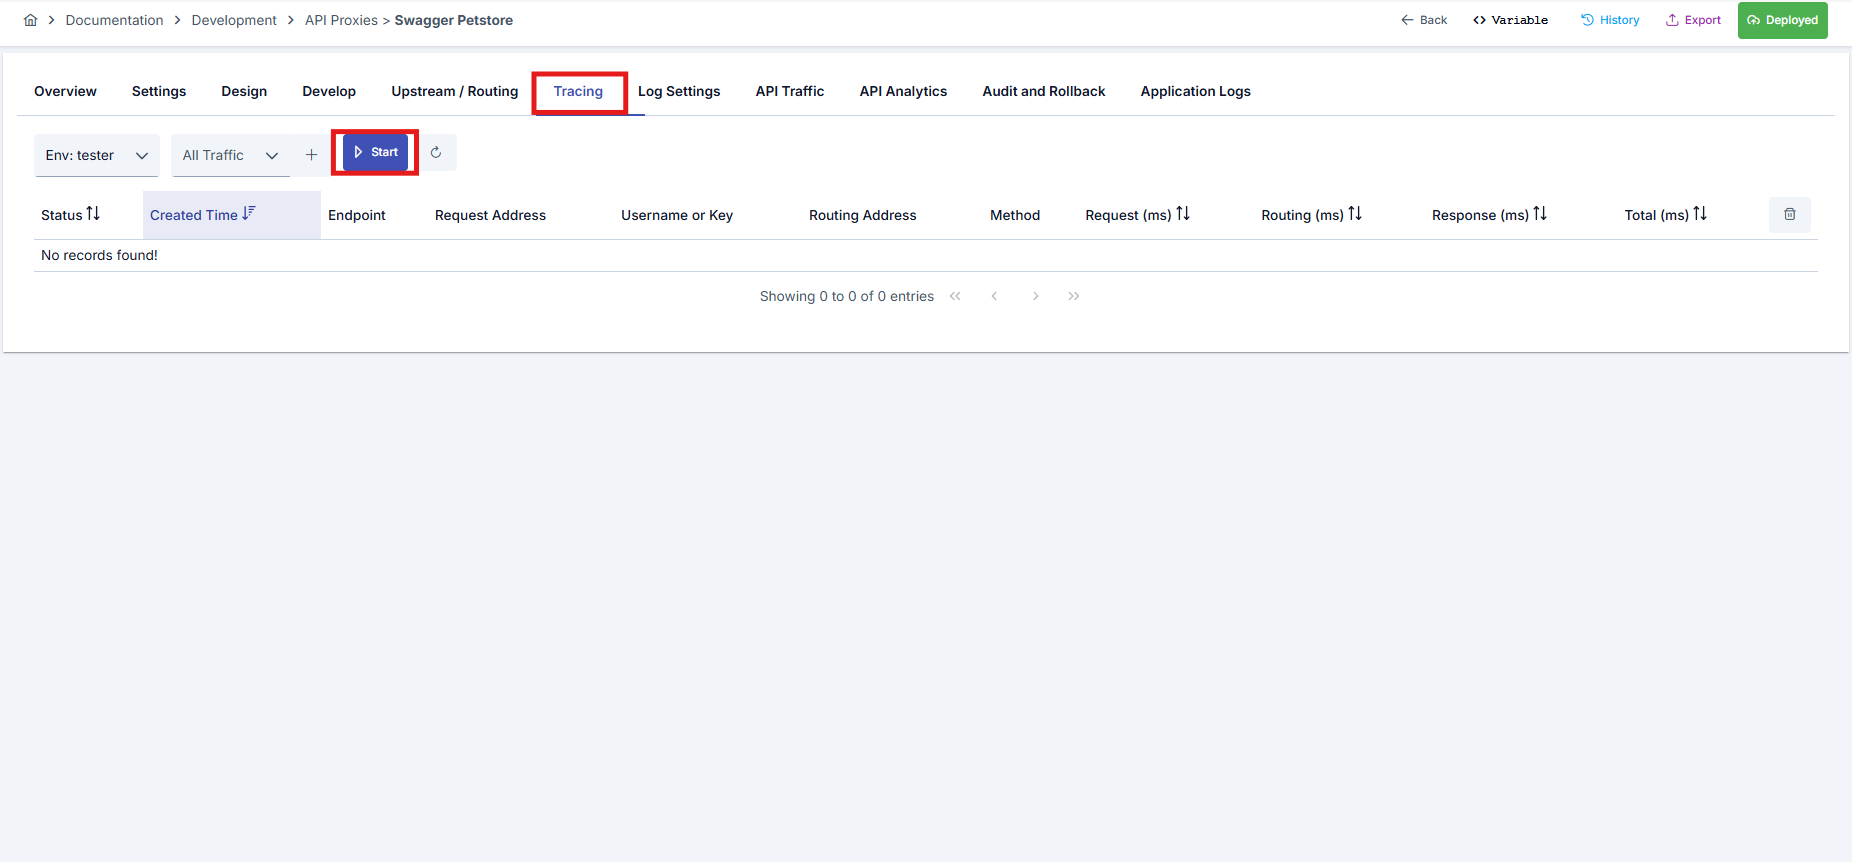
- Return to the Develop tab, select the related endpoint, click the test endpoint button, and send a request with the send button on the opened screen.
- After the request is sent, go back to the Tracing tab and open the detail of the request we sent to observe the details of the flow that took place.
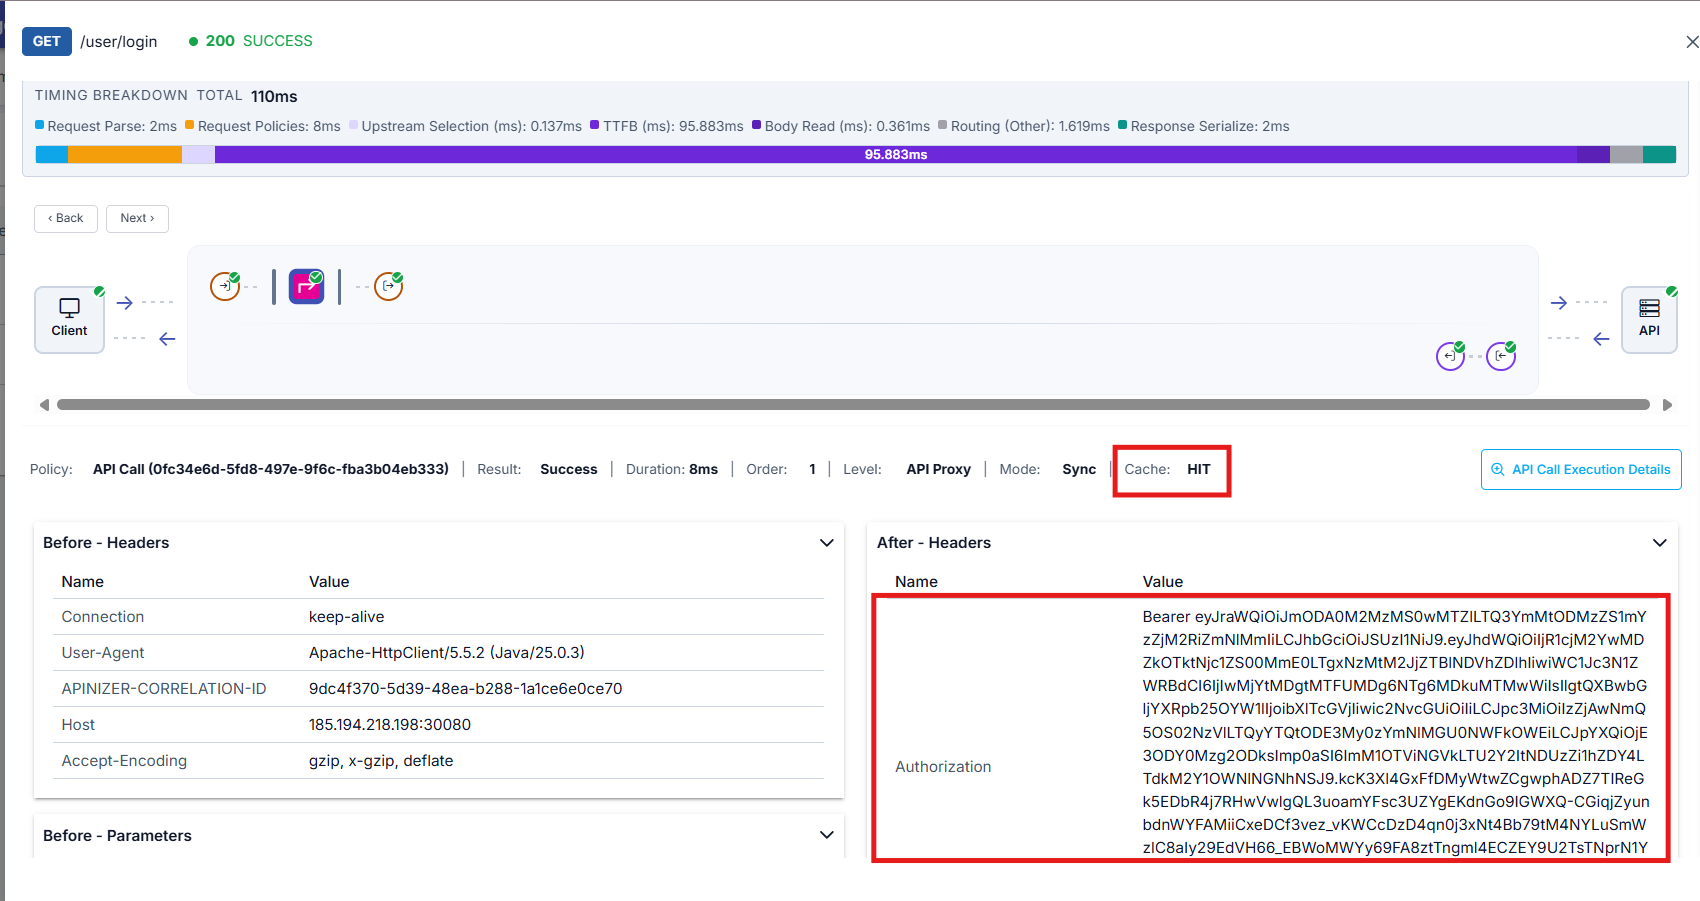
- On the opened screen, select the API Call policy.
- In the detail of the API Call policy, the Cache:HIT value and that the JWT was successfully set on the header are seen.
4.3) When the token expires
Thanks to Dynamic TTL + offset, the cache entry becomes invalid offset seconds before the JWT exp value. On the next request a cache miss occurs again; a new token is obtained and the cache is refreshed. This prevents requests from going to the backend with an expired token.
5) Expected Result and Checklist
When the scenario is configured correctly:
- Every request going to the backend contains a valid
Authorization: Bearer <jwt>header. - Unnecessary calls are not made to the token service during the token TTL.
- When DISTRIBUTED cache is used in a cluster, all Worker instances share the same token.
- If the token cannot be obtained, the customized error message is returned to the client; the request does not go to the backend without credentials.
Checklist:
- API Call is defined as SYNCHRONOUS with the correct token URL
- Body is cleared in Before Call and the token request template is written
- Cache is on; Dynamic TTL is set with JWT
exporexpires_in - Offset is defined (e.g. 30 sec)
- Original body is preserved in After Call (
NOT_CHANGE_BODY) - Bearer token is added to the Authorization header
- Proxy is deployed
- First request and an immediate second request are tested
If you need to use the same token across multiple API Proxies, you can define the API Call policy as a Global Policy and attach it to the relevant proxies. For the full list of policy fields, see the API Call documentation.