API Proxy Creation
With Apinizer, it is very easy to create an API Proxy using an existing API/Web Service as Backend API or to create an API Proxy without Backend API and offer it as an API. In this section, how an API Proxy can be created using the URL information of an API in Swagger 2.x format will be shown, and details of related options and data fields will be explained.
Quick Start The steps followed when creating an example API Proxy below are the same as those described on the Quick Start page, but this section contains explanations about data fields.
API Proxy Creation Steps
1- Development → API Proxies item is selected in the main menu.
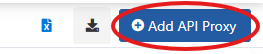
2- The +Add API Proxy button at the top right of the opened interface is clicked.
3- The following options are seen for the API Proxy to be newly created.
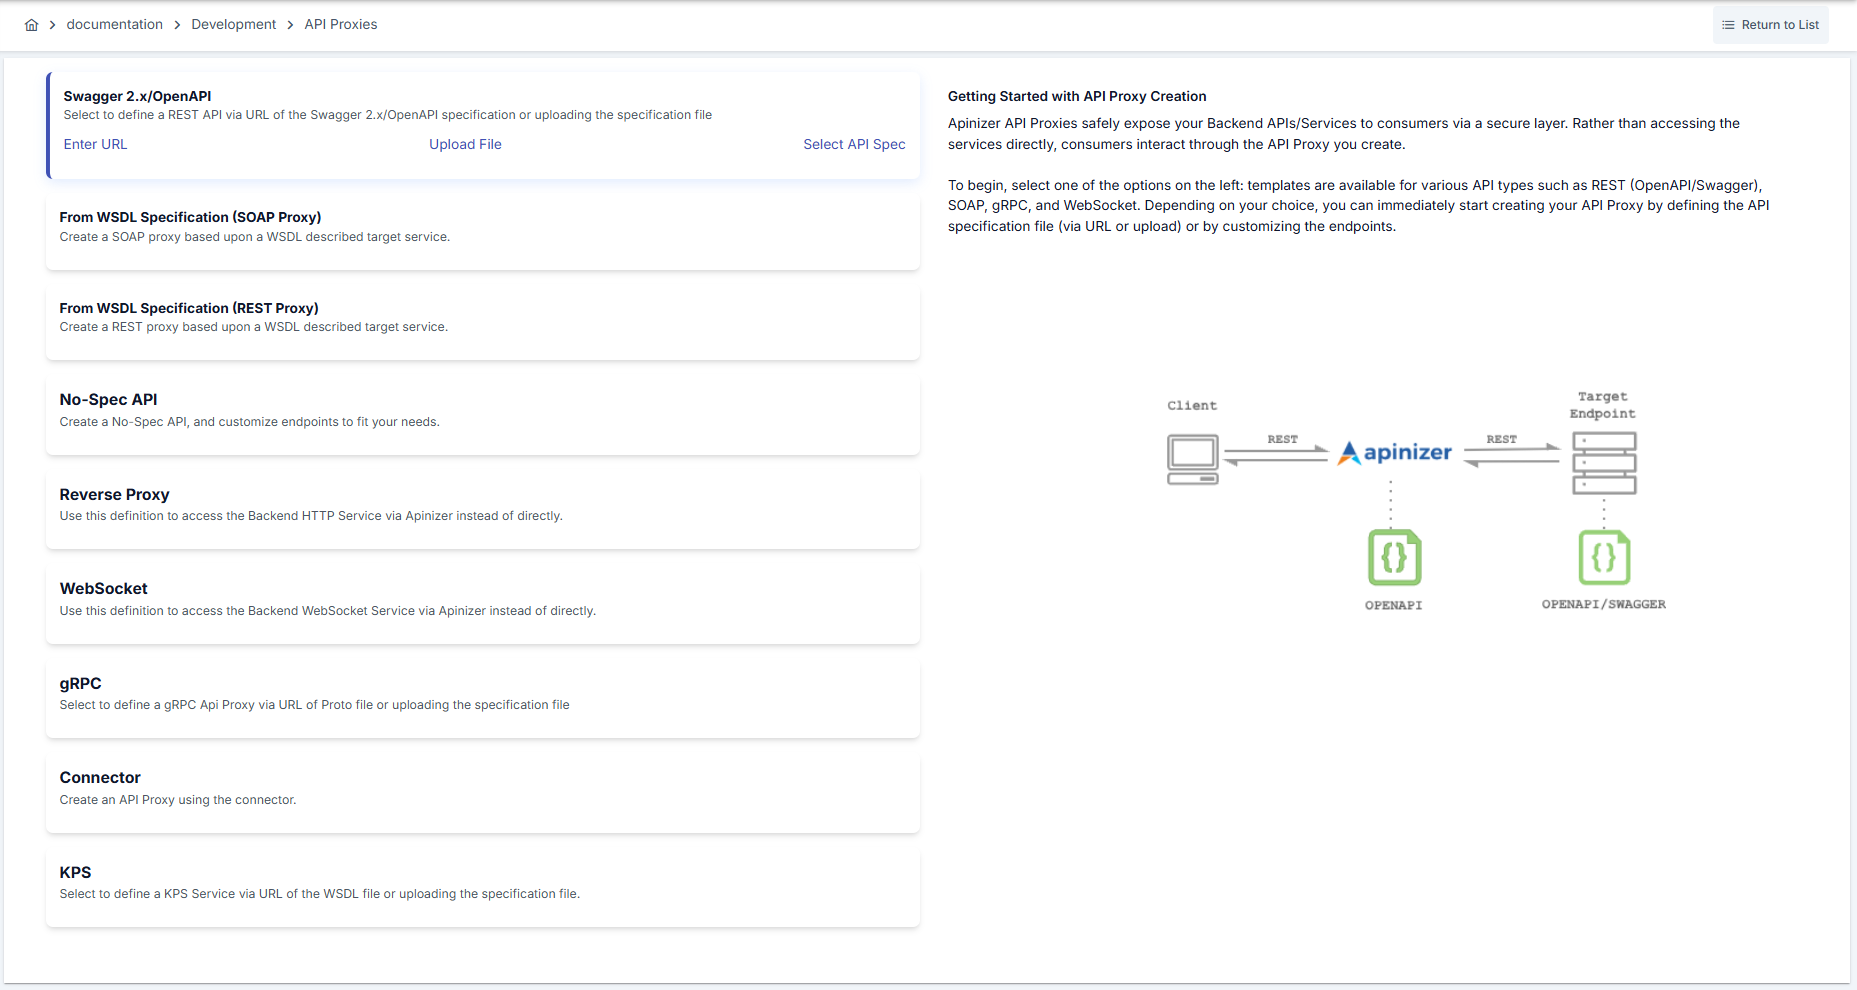
API Proxy Types
The appropriate type is selected for the API Proxy to be created. Existing API Proxy types are described in the table below.
| Type | Description |
|---|---|
| Swagger 2.x | Used to create REST API Proxy from Swagger 2.x definition. For detailed information click here. |
| WSDL (SOAP) | Used to create SOAP API Proxy from WSDL definition. For detailed information click here. |
| OpenAPI/Swagger 3.0.x | Used to create REST API Proxy from OpenAPI/Swagger 3.0.x definition. For detailed information click here. |
| Reverse Proxy | Used to create HTTP Reverse Proxy. It forwards incoming requests to the Backend API regardless of whether there is a related method/endpoint, and returns responses returned from the Backend API to the client. No specification file is needed and there is no need to define the Backend API's methods/endpoints one by one. It is sufficient to provide the Backend API's root context. |
| No-Spec API | Provides the ability to manually define methods/endpoints and create API Proxy for an API that was previously developed with code-first approach and has no specification file. Apinizer automatically creates API specification files in Swagger or OpenAPI formats according to the definitions. |
| gRPC | Used to create gRPC Proxy that forwards incoming gRPC requests to Backend gRPC Server and returns responses returned from Backend gRPC Server to the client. No specification file is needed, but proto file can be used. |
| WebSocket | Used to create WebSocket Proxy. |
| Connector | Provides the ability to create API proxy from connectors. This feature enables converting HTTP to different protocols (such as Kafka, RabbitMQ, ActiveMQ, Mail... etc.). To learn more about connectors, please visit this page. |
API Specification Document Source
Some additional options are also seen below the options.
| Field | Description |
|---|---|
| Enter URL | The URL where the API Specification document of the API for which an API Proxy will be created is accessible is known. API Proxy can be created by specifying this URL. Examples: https://petstore.swagger.io/v2/swagger.json, http://www.dneonline.com/calculator.asmx?WSDL |
| Upload File | If the API Specification document of the API for which an API Proxy will be created is saved as a file on the user, API Proxy can be created by uploading this file. |
| Select API Spec | For the API for which an API Proxy will be created, API Proxy can be created using an API Specification Document previously created with the API Specification Document Editor (API Spec Creator). |
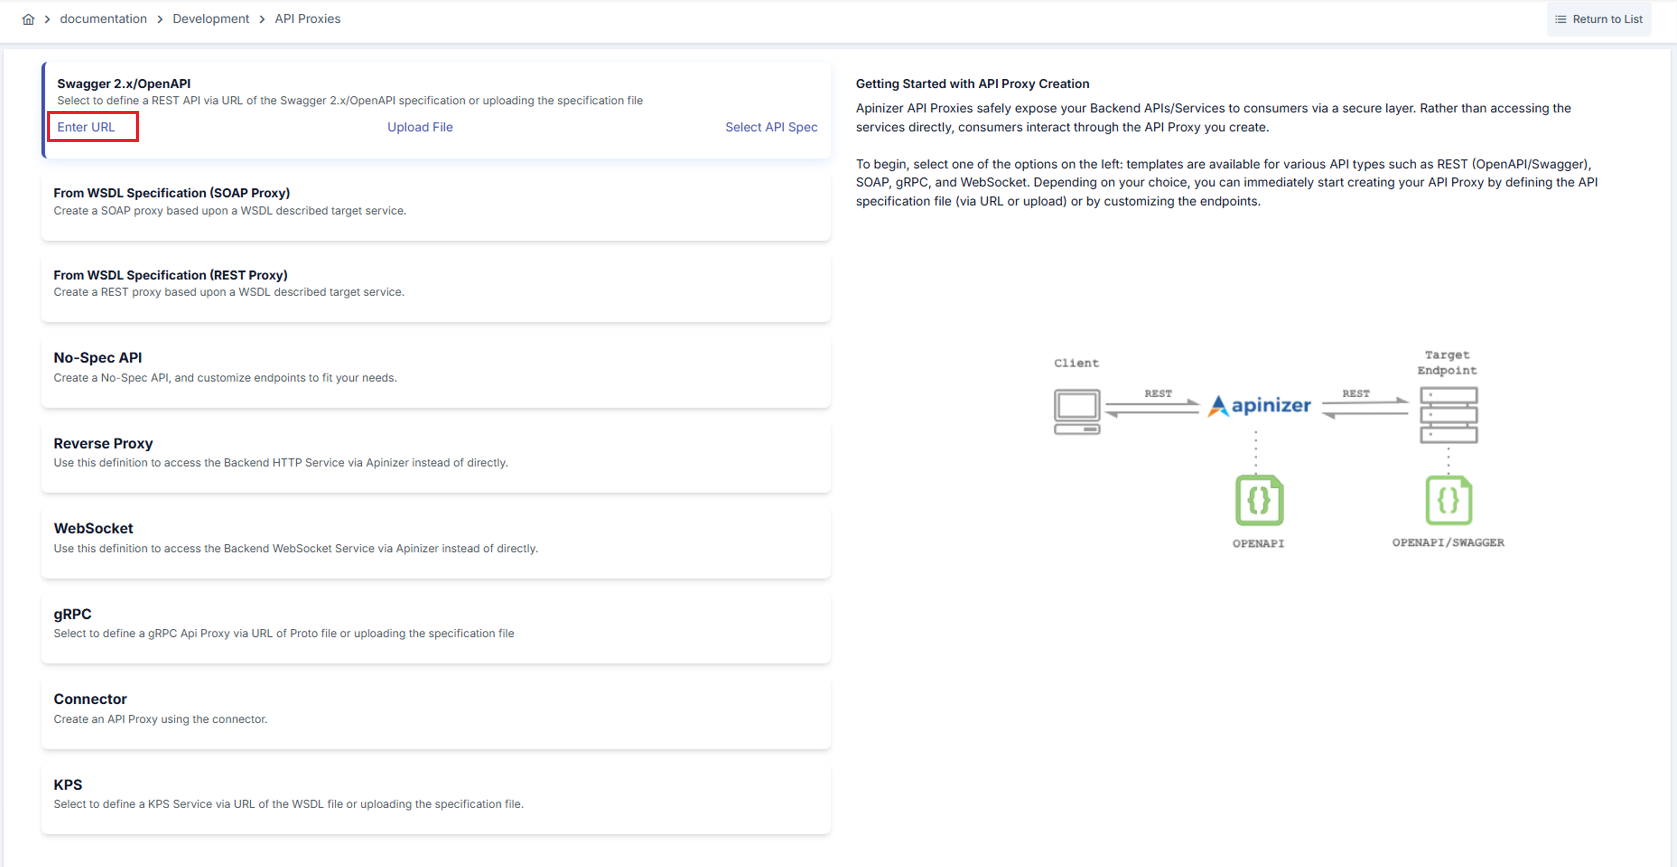
The appropriate type and option is selected for the API Proxy to be created. For this example, the Enter URL link of the Swagger 2.x type is clicked.
4- The following data fields are found in the incoming interface.

| Field | Description |
|---|---|
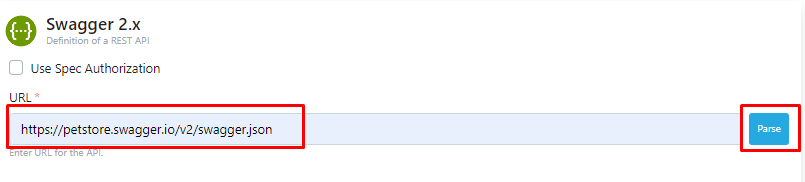
| Use Spec Authorization_ | Some specification files check that the client is authorized to view their content. For this, authentication data must be sent in the HTTP request. If the specification file at the URL to be accessed is such a file, this box is marked and credentials are entered. |
| URL | The address where the specification file will be accessed. |
When Use Spec Authorization is checked, optional Basic Authentication fields and the Spec Authorization List table are shown; add authorization keys with Key Name, Value, and Type columns.

Spec Authorization Support The Spec Authorization feature is available for all URL-based API Proxy types (Swagger, OpenAPI, WSDL, gRPC). Authorization credentials are also automatically used when downloading sub-schema files (such as XSD imports).
Basic Authentication
When Spec Authorization is enabled, HTTP Basic Authentication can optionally be used. When a username and password are entered, Apinizer automatically generates an Authorization: Basic ... header. This is a convenient shortcut for spec URLs protected with Basic Auth.
Both Basic Auth and custom header definitions can be used simultaneously. In this case, both are merged and sent together.
SSL / Certificate Settings
Secure connection and certificate options used when fetching the specification from a spec URL are grouped under SSL / Certificate Settings (collapsible panel).
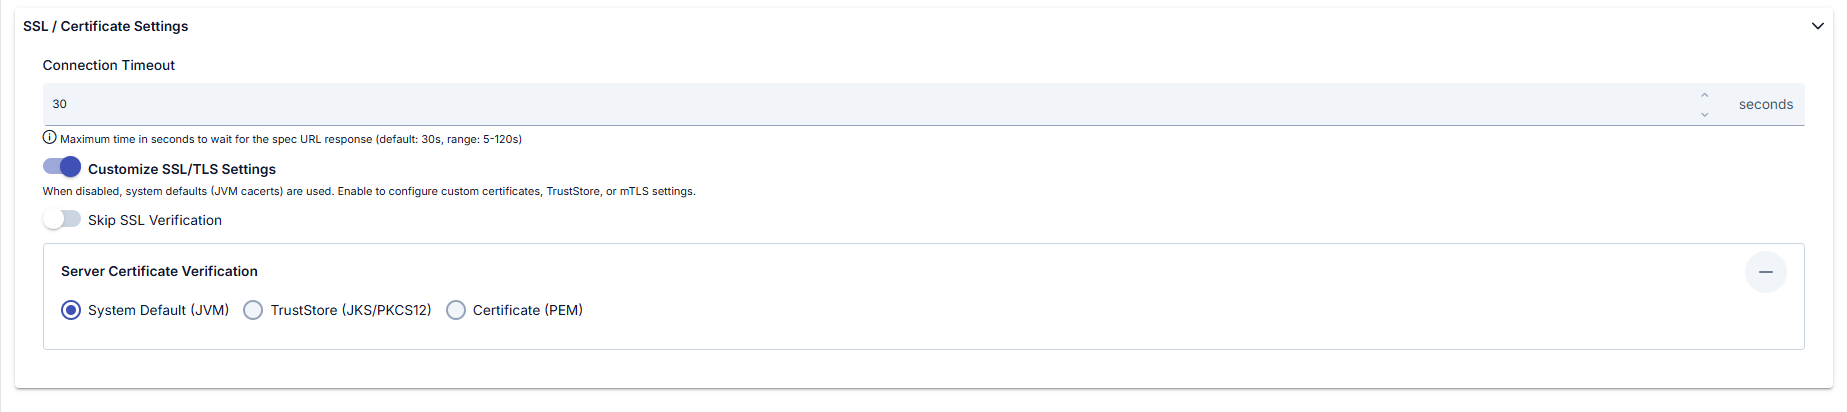
| Field | Description |
|---|---|
| Connection Timeout | Maximum time in seconds to wait for the spec URL response. The field shows seconds as the unit. Help text: maximum wait for the spec URL response (default: 30s, range: 5–120s). |
| Customize SSL/TLS Settings | When disabled, system defaults (JVM cacerts) are used; when enabled, configure custom certificates, TrustStore, or mTLS. Enables the Server Certificate Verification subsection and related fields. |
| Skip SSL Verification | When enabled, server certificate verification is bypassed; useful for self-signed or custom CA environments. |
| Server Certificate Verification | Shown when Customize SSL/TLS Settings is on (collapsible subsection). Radio options: System Default (JVM) (default), TrustStore (JKS/PKCS12), Certificate (PEM). Depending on the selection, TrustStore or PEM upload and pool selection fields appear. |
When TrustStore (JKS/PKCS12) or Certificate (PEM) is selected, use Select Existing, Upload TrustStore (.jks, .p12, .pfx) with password, or Upload PEM (.pem, .crt, .cer) in the dialog as needed.
To reuse uploaded TrustStore or PEM files on other screens later, check Save to Keystore Pool or Save to Certificate Pool and provide a name.
When a reparse is performed after the API Proxy is created, the SSL/TLS settings used during initial creation are automatically preserved and the spec URL is accessed with the same settings.
For this example, the Use Spec Authorization option is not needed. The address https://petstore.swagger.io/v2/swagger.json is written in the URL field and the Parse button on the right is clicked.
5- The Swagger file at the address given in the URL field is parsed and the API's information is displayed.
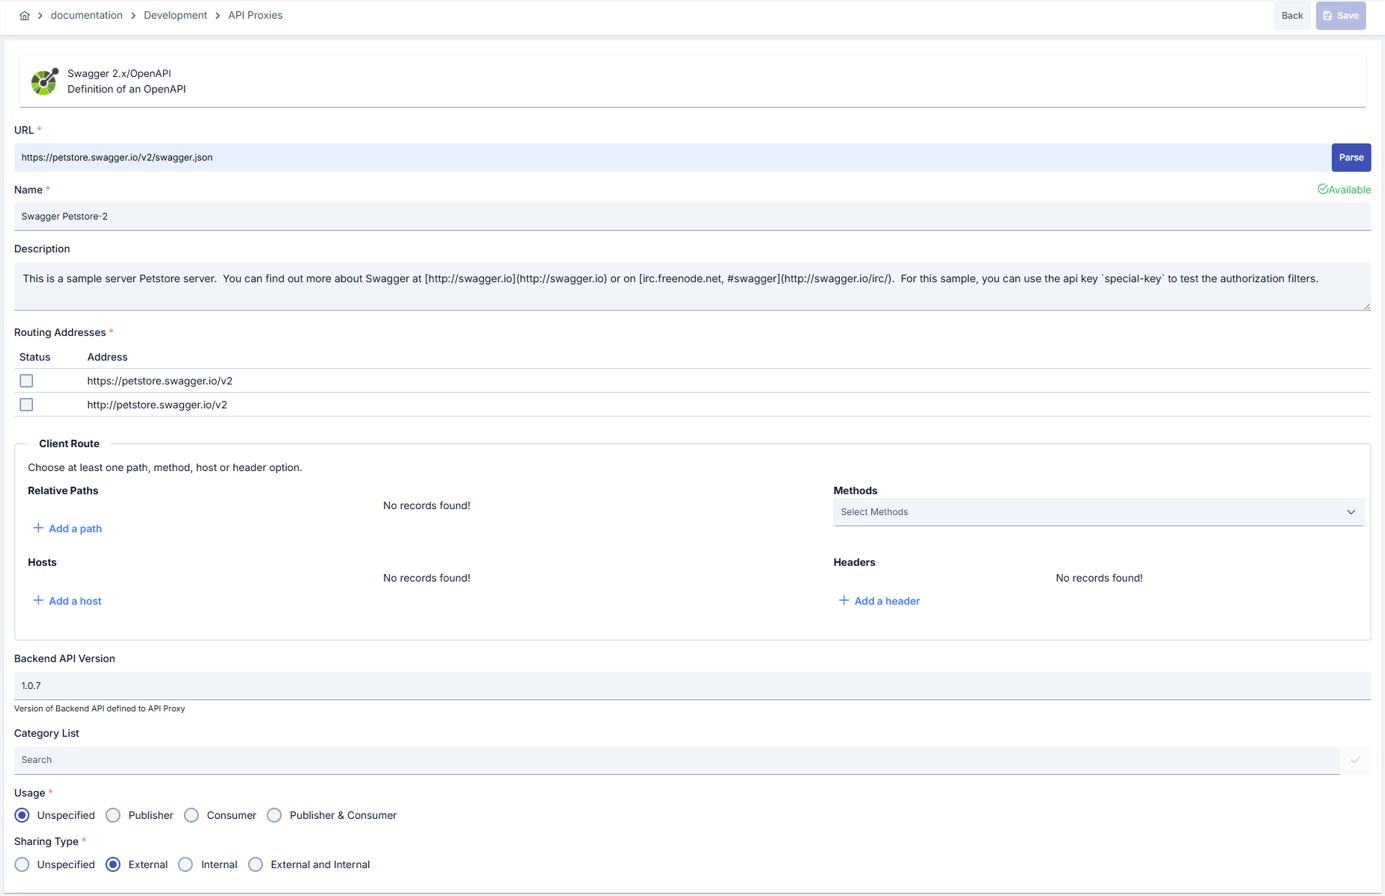
The fields in the incoming interface are described in the table below.
| Field | Description |
|---|---|
| Name | The name given to the API Proxy by the user. This name appears in interfaces. |
| Description | The definition information of the API Proxy. |
| Routing Addresses | Access addresses of the Backend API. Can be activated/deactivated with Status checkbox. Multiple addresses can be added for load balancing. |
| Client Route | The routing method (Path, Method, or Header based) that clients will use to access the API Proxy. Relative Paths: A part of the address where the API Proxy is opened for access. Used to route incoming requests to the appropriate API Proxy. Example: • Apinizer address: https://demo.apinizer.com• Relative Path: /petstoreProxy • Environment address: /apigateway • Endpoint: /findByStatus • Full access address: https://demo.apinizer.com/apigateway/petstoreProxy/findByStatusThings to note: • Must be unique at application level • Cannot be the beginning of another path • If Enable Relative Path is active in project settings, project path is automatically added to the front For gRPC: If the API Proxy type is gRPC, this value should be in the form "/packagename.servicename" in the proto document. For example, if you have a proto file like below, the relative path value should be "/hello.HelloService": proto<br/>syntax = "proto3"<br/>package hello;<br/>service HelloService {<br/>}<br/>For WebSocket: If the API Proxy type is WebSocket, you can visit this page regarding how the relative path value should be entered. Methods: HTTP methods (GET, POST, PUT, DELETE, PATCH, etc.) supported by the API Proxy. Hosts: Host addresses of Backend services. New addresses can be added with "Add a host". Headers: HTTP headers to be added at API Proxy level. New headers can be added with "Add a header". For detailed information see: API Proxy Client Route Usage Guide |
| Backend API Version | The Backend API Version defined for the API Proxy. |
| Category List | Categories can be created to facilitate management of API Proxies. Category list is used to determine which categories the API Proxy belongs to. |
| Usage | Specifies who the source of the Backend API is. Values it can take: Publisher: Backend API has been opened by the company/institution itself. Consumer: Backend API belongs to another company/institution. API Proxy is being created to access that API. Publisher & Consumer: API Proxy created for a Backend API belonging to another company/institution is being created to be used by third parties as well. |
| Sharing Type | Specifies how the Backend API will be shared. Values it can take: External, Internal, External and Internal |
| Body Read Behavior | Controls when the gateway reads the request and response body. Always Read: Reads the body on every request (default). Read If Policy Exists: Reads the body only if a policy that needs body access exists. Never Read: Never reads the body, useful for pass-through proxies. Can be configured independently for request and response bodies. |
Related Pages
Quick start guide
API Specification Document creation
API Proxy settings
SOAP API Proxy creation
REST API Proxy creation
gRPC API Proxy creation
WebSocket API Proxy creation
Connector API Proxy creation
Creating API from database
Creating API with script
Mock API creation