Creating Mock API with API Creator
An API can be instantly created through API Documentation or containing default CRUD operations, and instantly opened to users' access as an API Proxy.
Apinizer enables obtaining different responses according to conditions based on request header, body, or parameter values thanks to conditions added to the response.
API definition documents of Swagger and OpenAPI types for created Mock APIs can be accessed on the fly in JSON and YAML formats.
Creating New Mock API
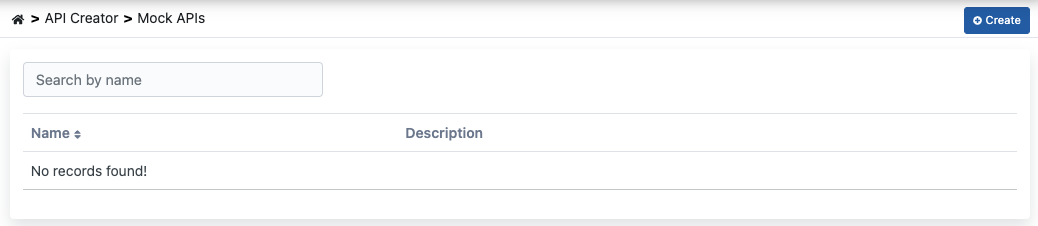
Development → API Creator → Mock API item is selected in the main menu.
The +Create button at the top right of the opened interface is clicked.
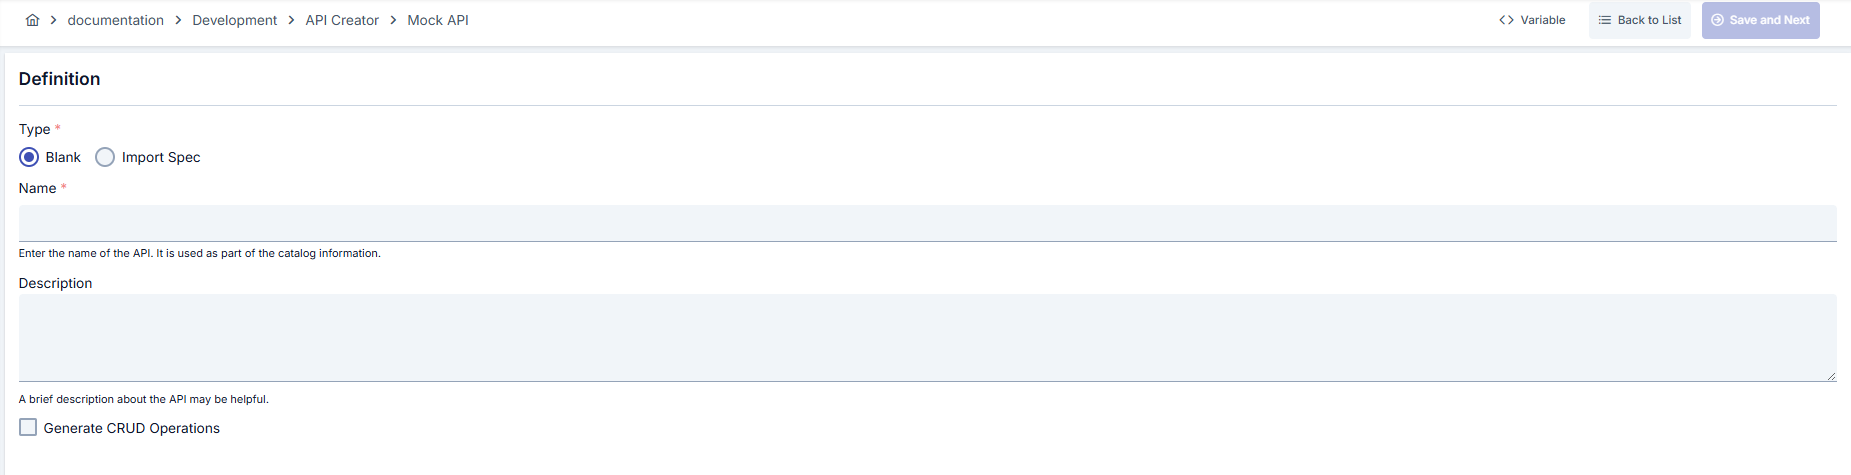
Required fields for the new API to be created are filled and the →Save and Next button at the top right is clicked, starting the API creation process.
Creating Mock API of Blank Type
Creating an API of this type means that API endpoints will be designed by the user.
If the Generate CRUD Operations option is enabled, GET, POST, PUT, DELETE endpoints are automatically added to the API.
Creating Mock API from Open API or Swagger
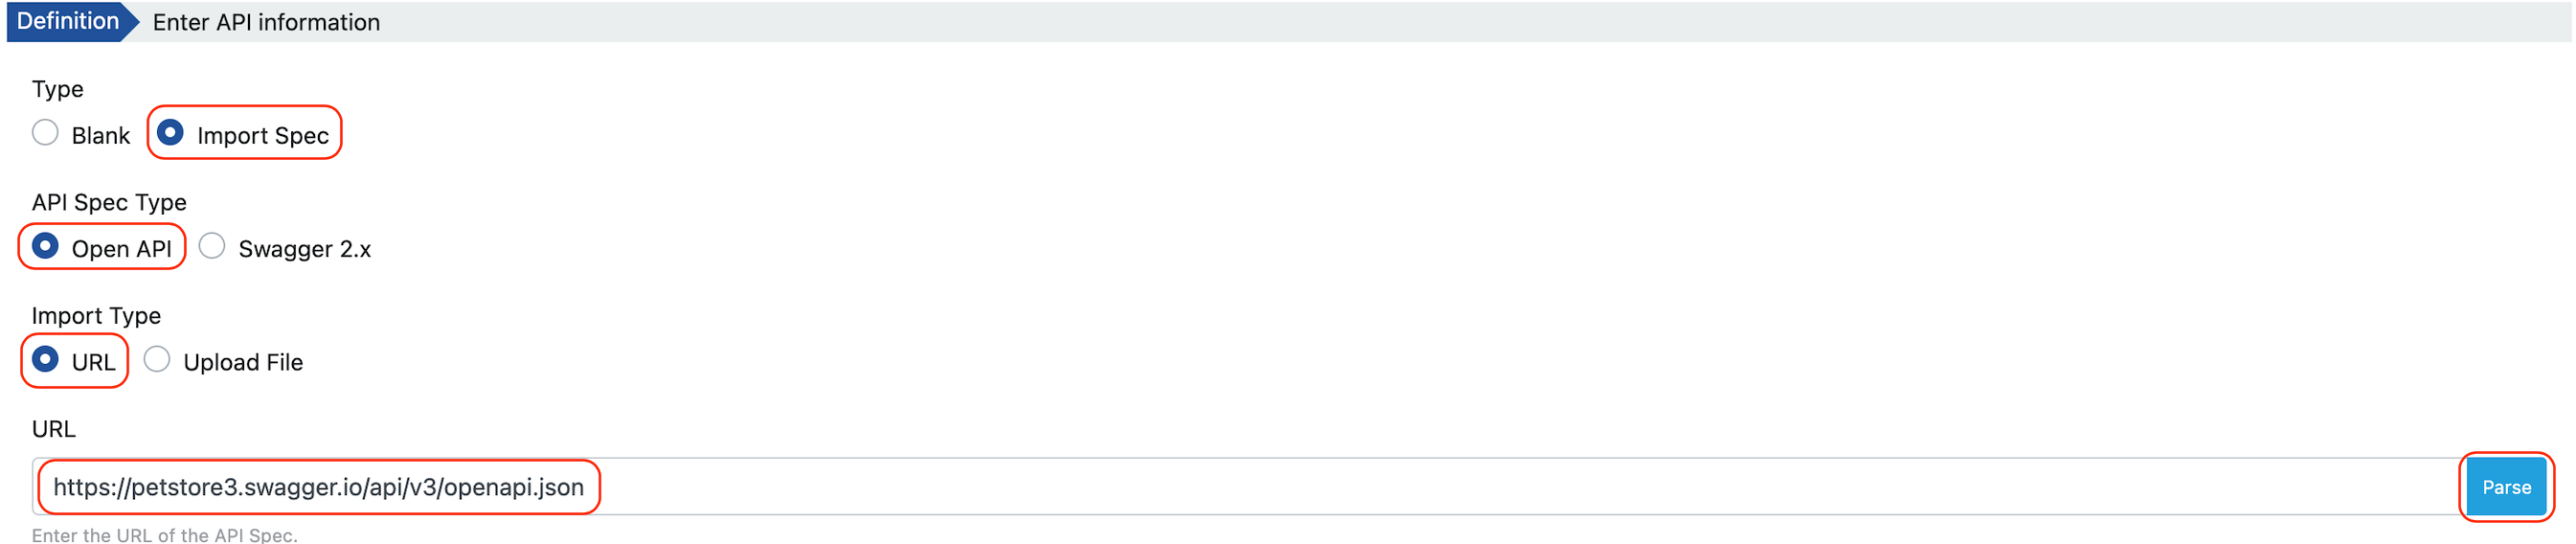
Creating an API of this type means that the API will be created from its definition document.
The type of API document to be imported or whose link will be given must be Swagger or Open API.
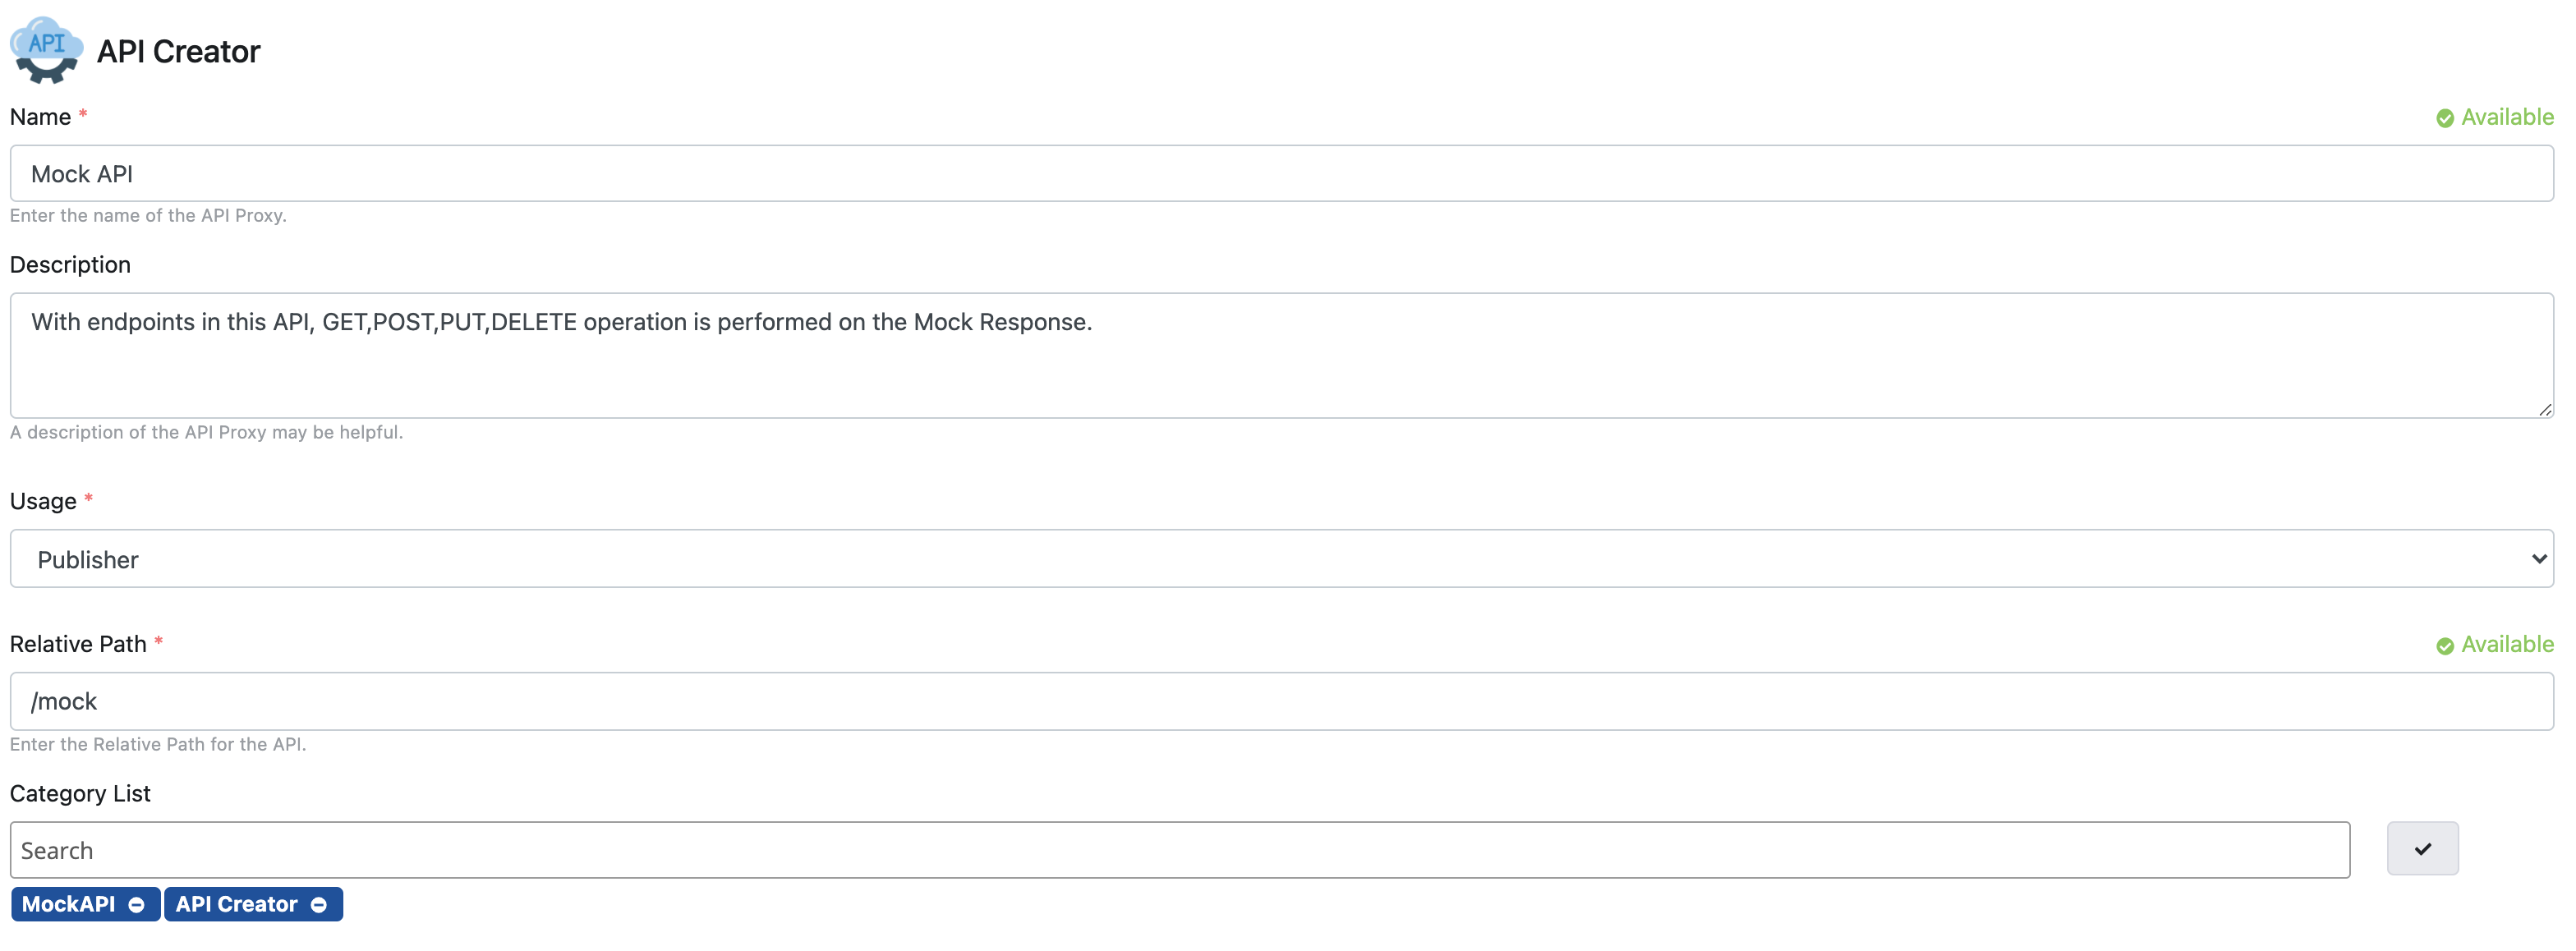
Mock API Definition Fields
Fields used for Mock API definition are shown in the table below.
| Field | Description |
|---|---|
| Type | Mock API Creation type. Done by Blank and uploading Spec file. |
| Name | The name given to the API by the user. This name appears in interfaces. |
| Description | Definition information of the API. |
| Generate CRUD Operations | Selected if ready method/endpoints of GET, POST, PUT, and DELETE types are desired to be created for Mock API. |
| API Spec Type | Type information of the Spec file to be uploaded. Supported types: OpenAPI 3.0.x, Swagger 2.x |
| Import Type | Type information of the Spec file to be uploaded. Supported types: URL, Upload File |
| URL | Address of the Spec file to be uploaded. |
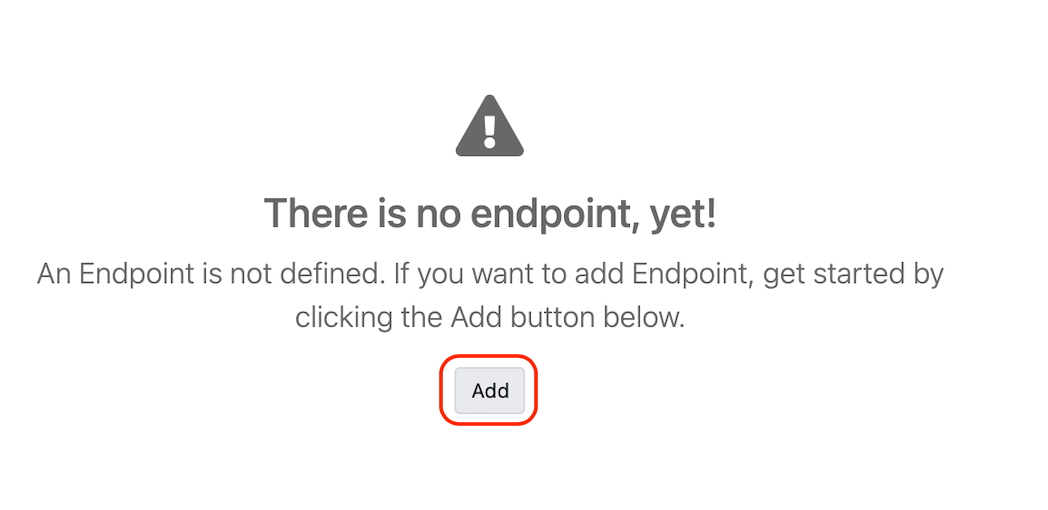
Endpoint Creation
If the Generate CRUD Operations option is selected, method/endpoints of GET, POST, PUT, DELETE types will come ready by default.
A new method/endpoint is added by clicking the Add button.
Method/endpoint is added to the API by clicking the Add button on the screen that appears. Fields in the Method/Endpoint definition screen are filled and the Save button is clicked.
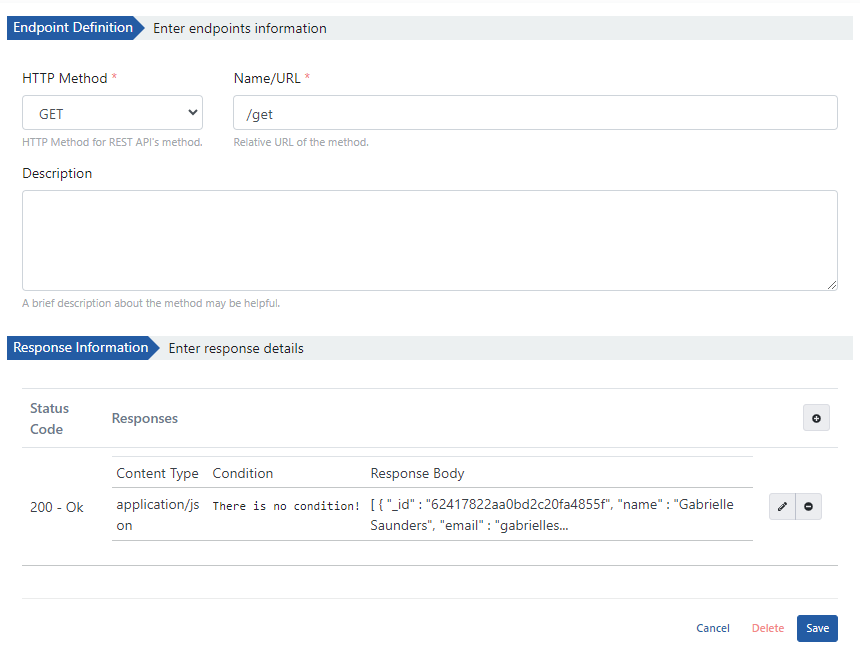
Adding or Editing Response
Responses belonging to method/endpoint are managed from the Response Information section.
Response definitions are created grouped according to Status Code information. Multiple example responses based on conditions can be created within each response definition.
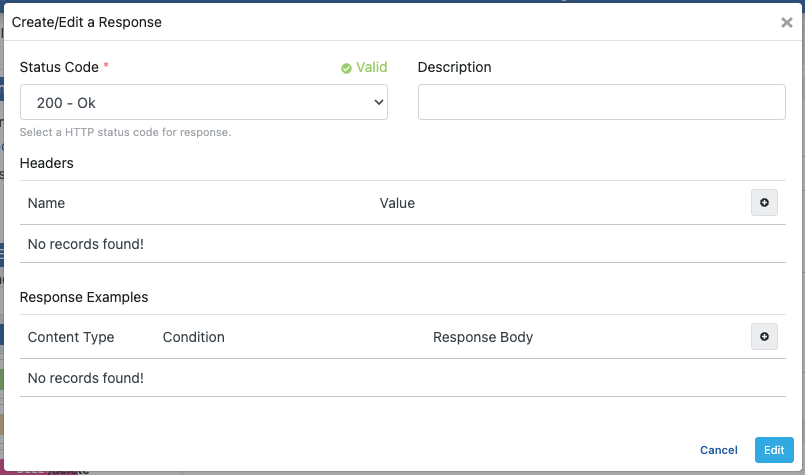
Fields used for response add/edit configuration are shown in the table below.
| Field | Description |
|---|---|
| Status Code | HTTP status code information. |
| Description | Definition information of Method/Endpoint. |
| Headers | HTTP Headers information is entered. |
| Response Examples | Response examples to be sent to the user. |
Adding or Editing Response Examples
Examples can be added by creating multiple body and condition definitions for a response definition. Thus, when a request comes to the same method, different responses can be sent to the client under different conditions.
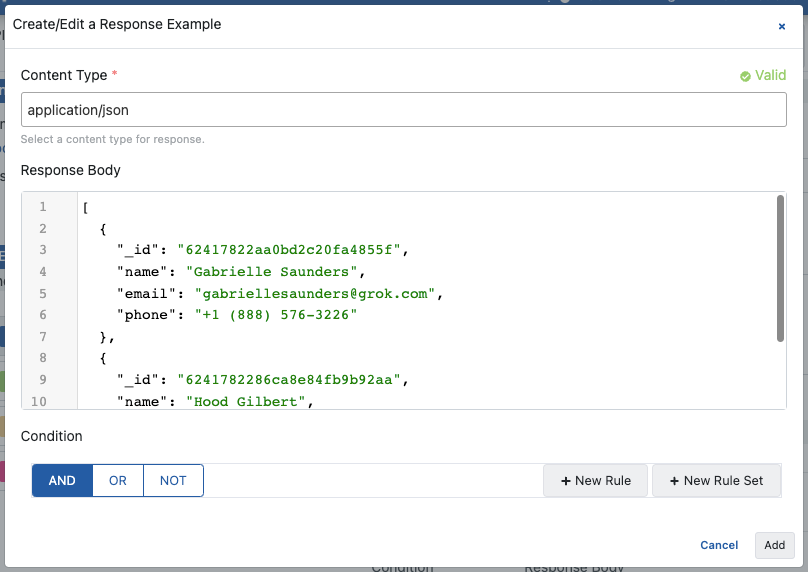
Fields used for Example Response add/edit configuration are shown in the table below.
| Field | Description |
|---|---|
| Content Type | Content type of the body that will be returned as a response. |
| Condition | Used to define under which condition the defined example response will be returned. |
| Response Body | The body of the response to be returned to the user is written. |
Creating API Proxy from Mock API
When there is at least one method/endpoint, an API Proxy is created for Mock API by clicking the Create API Proxy button.
At least one method/endpoint must exist to create an API Proxy from Mock API.
The API Proxy is created by entering the required fields for the API Proxy on the screen that appears and clicking the Save button.
After this step, what can be done is exactly the same as the API Proxy document. You can refer to the API Proxy Creation page for details.
Deploy/Redeploy
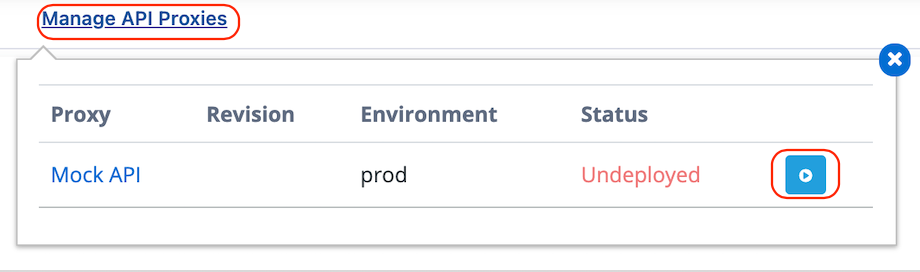
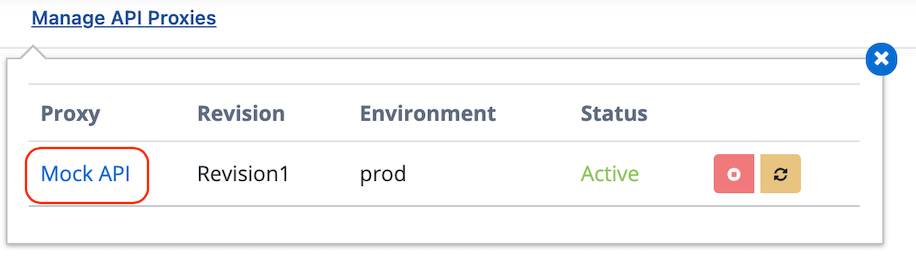
The window opened by clicking the Manage API Proxies link is used to view and manage deployment statuses of API Proxies in Mock API.
In the opened window, Deploy/Undeploy and Redeploy operations for API Proxies created with Mock API are performed in this section. You can refer to the Deployment, Redeployment, Undeployment, Deployment History and Rollback page for details.
To deploy the API Proxy, the following steps are followed.
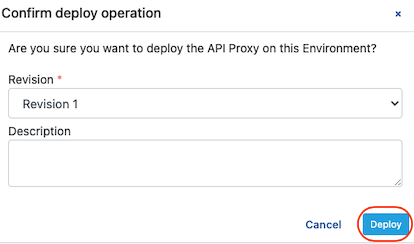
After the above operation, confirmation is required. Information about the deployment operation is created and the (Deploy) Deploy button is clicked.
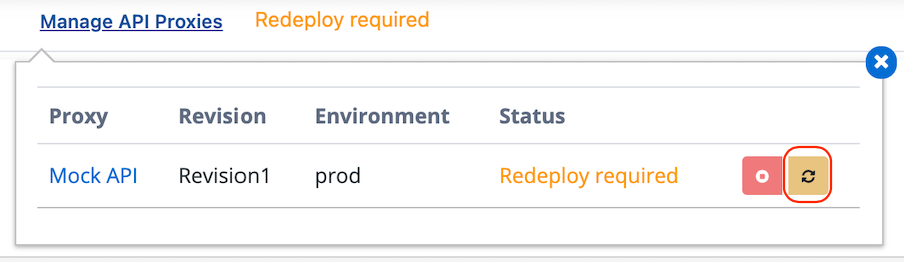
When a new endpoint is added to Mock API or changes are made within an endpoint, all API Proxies created from this API must be redeployed for the changes to take effect.
When you add a new Method/Endpoint or update an existing Method/Endpoint, a notification like the following will appear.

By saying Redeploy, changes are applied to API Proxies.
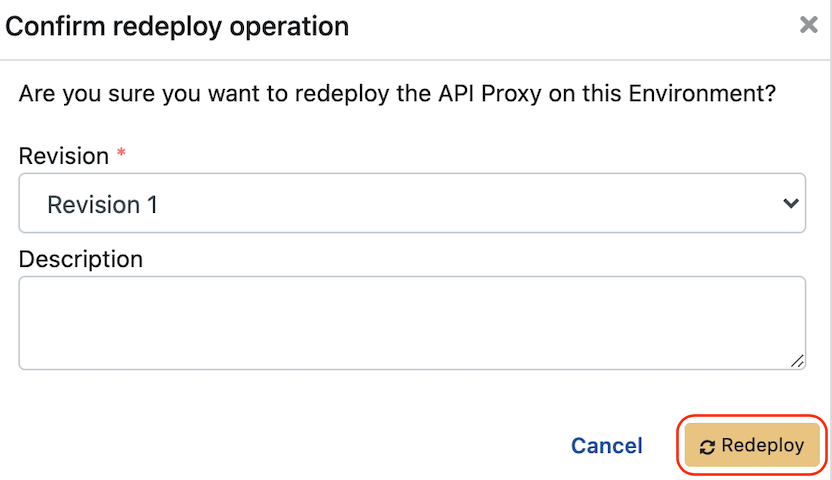
After the above operation, confirmation is required. Information about the redeployment operation is created and the (Redeploy) Redeploy button is clicked.
From the Mock API page, go to the API Proxy by clicking the API Proxy's name.
Similarly, to go to the Mock API page from the API Proxy page, go by clicking the Mock API name in the API Proxy as shown below.

Mock API Deletion
When a Mock API is deleted, all API Proxies connected to it are first removed (undeploy) and then deleted.