WebSocket Routing
If API type is WebSocket, this tab is visible.
Protocols such as SignalR are not plain WebSockets; because they require an HTTP negotiate step and a custom handshake, they do not work with Apinizer's WebSocket proxy type — use Reverse Proxy instead and set upstream directly to the hub URL (e.g. http://host/hub). The layer in front of Apinizer (load balancer, ingress, Nginx, etc.) must also forward WebSocket upgrade headers (Upgrade, Connection) to the backend without modification.
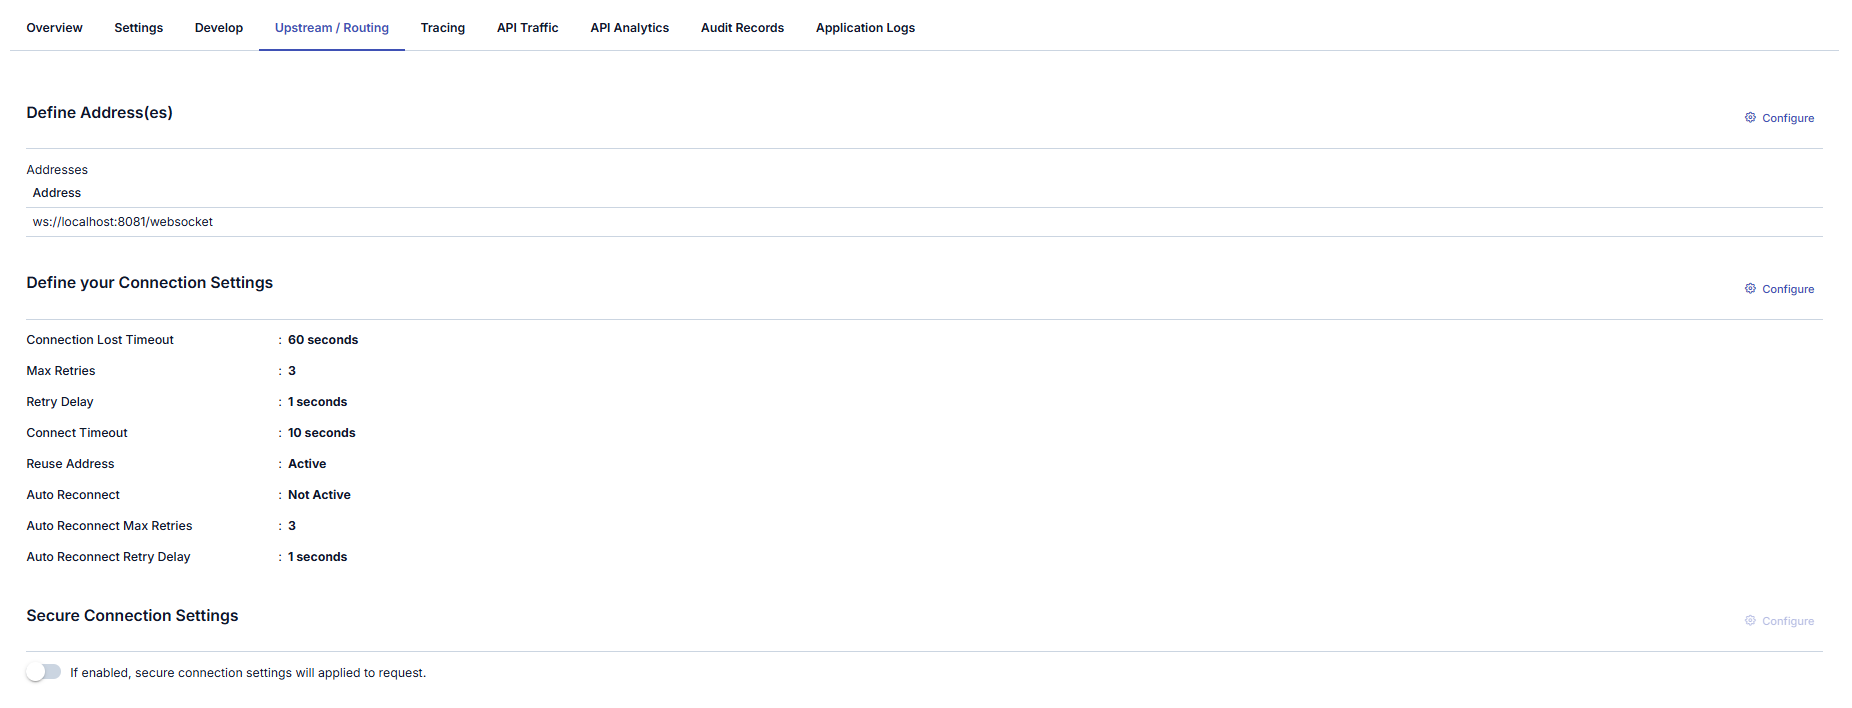
This section contains routing settings for WebSocket API Proxy Type.
After the API Proxy receives messages from clients and executes policies if any, it routes the message to the Backend API. The Routing tab is the tab where this routing operation is configured.
WebSocket Routing Tab settings are shown in the following image:
Adding New Address
A new address can be added from the window that opens when the ➕ button in the column header area at the far right of the window opened with the Configure button is clicked.
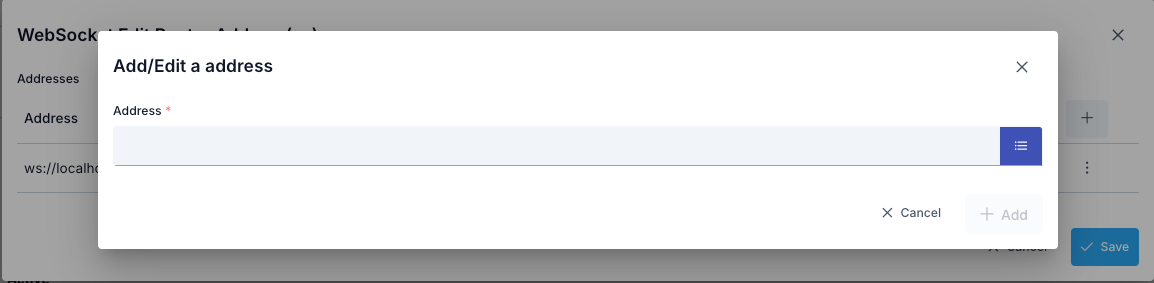
In the new address addition window:
- Backend API address is entered in the Address field or environment variable is used
- Environment Variables Selection Dialog can be opened by clicking the list icon button on the right of the Address field
- Selected environment variable is copied to clipboard and pasted into the Address field
- Conditional routing can be defined with the Condition section
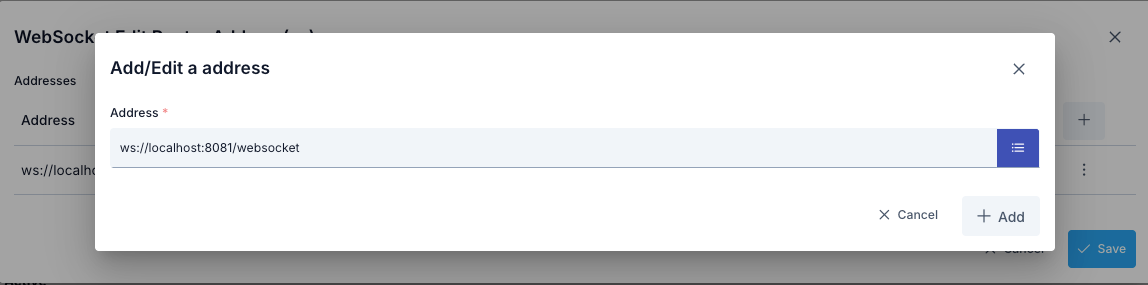
Updating Address
The backend address information where the request will be sent can be updated in the window that opens when the Configure button in the Address (Address) column of the table showing addresses is clicked.

For how this value should be entered, you can visit the WebSocket Proxy Routing Guide page.
If this value is desired to change automatically according to the environment it is in, selection can be made from Environment Variables (Environment Variable).
The address can be updated in the window that opens when the Configure button in the Address (Address) column of the table showing addresses is clicked.
Environment Variables (Environment Variable) Selection dialog detail is specified in the following image.
When the list icon button on the right of the address input field is clicked, the Environment Variables Selection Dialog opens. Through this dialog, all environment variables (Environment Variables) defined in the project can be viewed and selected.
In the Environment Variables Selection Dialog:
- All environment variables are listed (Global and Environment-Specific)
- Filtering can be done by variable name or description with the search box
- Key Name, Description, Type information is displayed for each variable
- The format of the selected variable (
${variableName}) is automatically copied to clipboard with the Copy button - The copied value can be used by pasting it into the Address field
Example Usage:
- Environment variable:
BACKEND_URL = ws://dev-api.example.com(for Development environment) - Environment variable:
BACKEND_URL = wss://api.example.com(for Production environment) - Value entered in Address field:
${BACKEND_URL} - At runtime in Development environment:
ws://dev-api.example.com - At runtime in Production environment:
wss://api.example.com
Deleting Address
The address is deleted by selecting the Remove option from the dropdown menu at the end of the row of the address to be deleted.
At least one address is required for the API Proxy to route. Therefore, after deleting the last address, the save button becomes inactive and does not allow saving.
Connection Settings Configuration
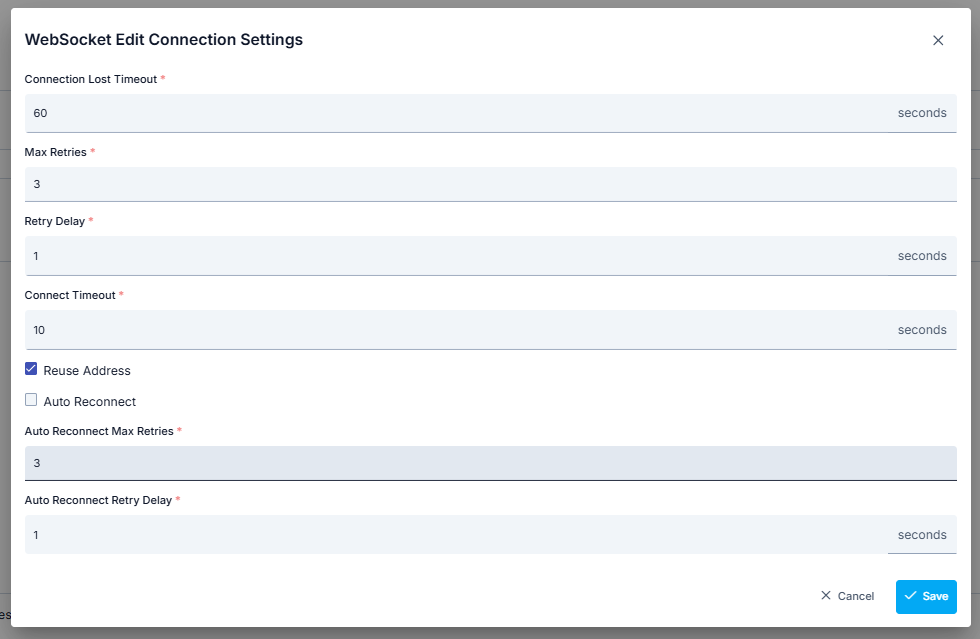
The WebSocket Connection Settings Definition Tab enables configuration of connections made over the WebSocket protocol. This tab contains various parameters necessary to optimize the performance and security of connections. Below are the details of the settings in this tab.
The parameters used for WebSocket Connection settings configuration are shown below.
| Field | Description |
|---|---|
| Connection Lost Timeout (Connection Lost Timeout) | This setting determines how long to wait after the WebSocket connection is lost. If this time is exceeded, a new connection is attempted. |
| Connect Timeout (Connect Timeout) | Expresses the timeout duration valid during connection to the WebSocket server. |
| Retry Delay (Retry Delay) | Specifies the time that should be waited before reconnecting when the connection is lost. |
| Max Retries (Max Retries) | Specifies the maximum number of attempts to reconnect when the connection is lost. |
| Reuse Address (Reuse Address) | A setting that enables the IP address used for network connection to be reused even if the connection is closed. |
| Auto Reconnect (Auto Reconnect) | Enables the client to automatically attempt to reconnect to the server when the connection is unexpectedly closed. |
| Auto Reconnect Max Retries (Auto Reconnect Max Retries) | Determines how many times the client will attempt to reconnect after the connection is broken. |
| Auto Reconnect Retry Delay (Auto Reconnect Retry Delay) | Determines how long to wait between each reconnection attempt. |
These settings provide important information about how your WebSocket connection will be managed and how it will respond to errors.
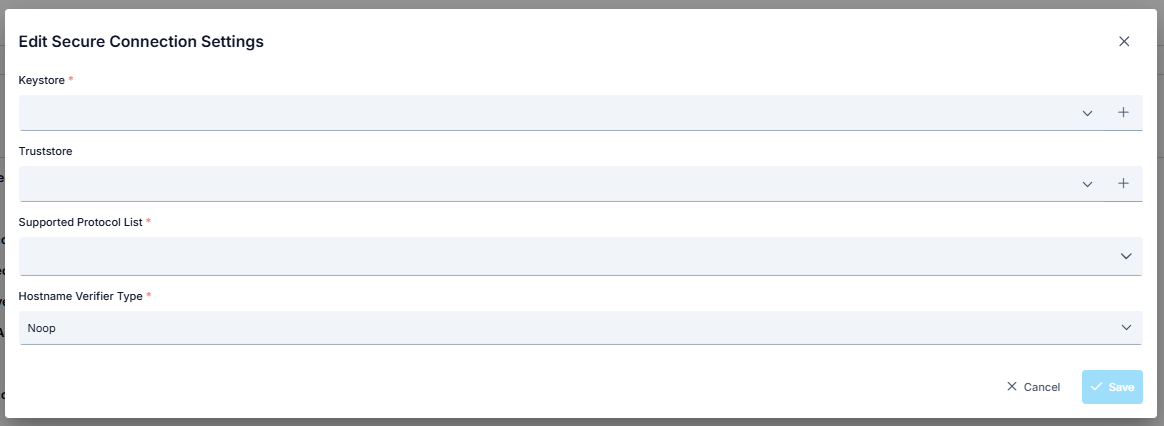
Secure Connection Setting
When this setting is enabled, the selected connection settings are applied to the request.
Thus, the Apinizer client that will send from Apinizer to the target service verifies the target service's certificate and indicates that it also has a certificate and must be verified by the target service.
The target service also verifies the client's certificate, and thus secure communication is established with the client.
The parameters used for connection settings configuration are shown below.
| Field | Description |
|---|---|
| Keystore | Keystore is used to authenticate the client side. Keystore content should contain: If there is no mTLS verification at the server address, it should be empty. (Since the field is required, an empty keystore must be added.) If there is mTLS verification at the server address: client privatekey, Client certificate (with public key), Certificate chain (if any intermediate and root CA certificates) should be present. |
| Truststore | Truststore is used to verify the server certificate. If the server certificate is Self Signed or is a certificate not trusted by Apinizer, Truststore content should contain: The root CA certificate of the target server, Intermediate CA certificates (if any) should be present. Otherwise, the CA certificates owned by Apinizer will be sufficient for secure connection. |
| Supported Protocol List (Supported Protocol List) | Supported protocols are selected. Options: TLSv1.3, TLSv1.2, TLSv1.1, TLSv1, SSLv3 |
| Hostname Verifier Type (Hostname Verifier Type) | Noop Hostname Verification disables hostname verification that could pose a security risk in SSL/TLS connections. To prevent man-in-the-middle (MITM) attacks where an attacker could intercept SSL/TLS communication and impersonate the server, it is important to verify the server's hostname. Instead of using Noop Hostname Verification, you can use one of the following hostname verification implementations provided by the Apache HttpComponents client framework: Default Hostname Verification: This implementation performs standard hostname verification according to rules defined in RFC 2818 and RFC 6125. It checks the common name (CN) of the server certificate and subject alternative names (SANs) to ensure the hostname matches. Strict Hostname Verification: This implementation performs stricter hostname verification than Default Hostname Verification. It requires an exact match between the hostname and the CN or SANs of the server certificate. It also checks whether the hostname is a fully qualified domain name (FQDN) and is not an IP address or wildcard domain name. Browser Compat Hostname Verification: This implementation performs relaxed hostname verification based on rules used by popular web browsers. It allows a wildcard domain name to match any subdomain of the domain name and ignores case sensitivity of the hostname. |