Accessing Apinizer Services with Kubernetes Ingress
Kubernetes provides a powerful platform for managing distributed applications. However, an appropriate way is needed to provide access to these applications from the outside world. At this point, Kubernetes' Ingress object and NGINX Ingress Controller come into play. This document explains step by step how NGINX Ingress Controller will be installed and how to access Apinizer Services with Ingress.
What is Kubernetes Ingress?
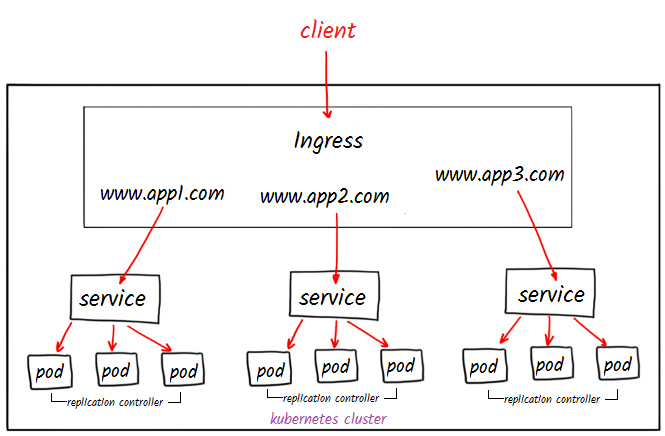
Ingress is a kubernetes object used to provide access to applications in the Kubernetes cluster from the outside world.
It can route requests coming to a specific host name or path to a specific service. For example, it can route a request coming to example.com/app to a Kubernetes service named app-service.
What is Nginx Ingress Controller?
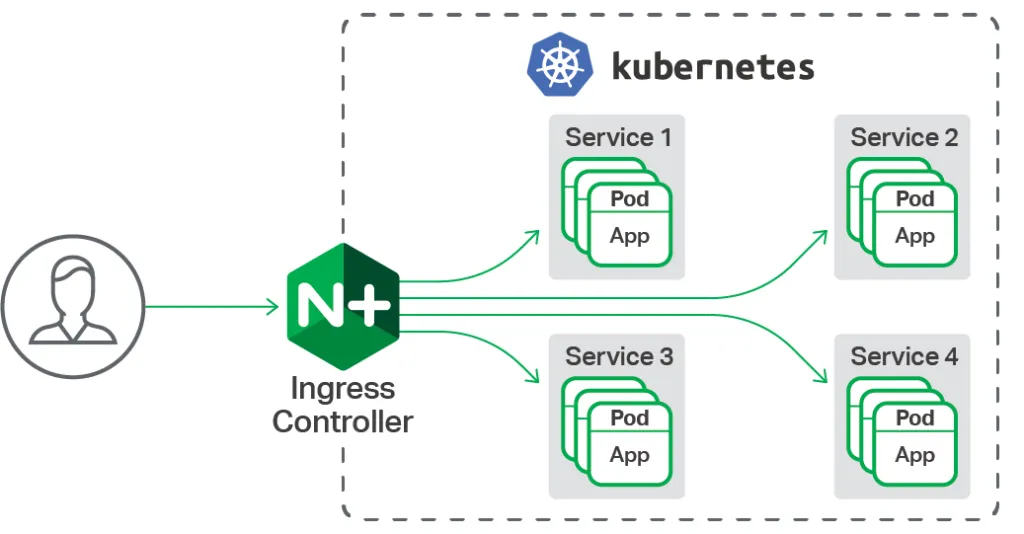
NGINX Ingress Controller uses NGINX to route requests coming to applications running in a Kubernetes cluster. It watches Ingress objects and routes incoming requests to different services according to specific rules. In addition to NGINX in the Kubernetes ecosystem, there are various other Ingress Controllers. The most well-known of these are: traefik, HAProxy, Envoy, Ambassador.
In this document, access to the application is provided by installing NGINX Ingress Controller. When you want to expose your kubernetes cluster to the outside in your cloud provider (AWS, GCP, Azure, etc.), you create a service of type LoadBalancer and an IP is automatically assigned to you. This IP is used to provide external access to the service. However, in on-premises or bare-metal environments, a tool like MetalLB is needed for the LoadBalancer service.
This application will be performed on a virtual machine with Ubuntu operating system located locally.
If you are working in a Cloud environment, you can skip the MetalLB installation.
MetalLB Installation
MetalLB (Metal Load Balancer) is a network load balancer solution for Kubernetes clusters.
You can perform the MetalLB installation to the kubernetes cluster with the following command.
kubectl apply -f https://raw.githubusercontent.com/metallb/metallb/v0.13.5/config/manifests/metallb-native.yaml
Check the status of the created pods with the following command and wait until they are ready ("ready").
kubectl get all -n metallb-system
Creating External IP (external-ip) Pool
An IP address pool needs to be created for MetalLB usage.
Create a yaml file and add the IPAddressPool type content below.
vim ip-pool.yaml
The IP range you specify in the address section will be your IP address that you will access from external environments.
You need to give an empty IP range accessible from the local network
In this example, the range 172.16.100.170-172.16.100.180 is given.
apiVersion: metallb.io/v1beta1
kind: IPAddressPool
metadata:
  name: ip-pool
  namespace: metallb-system
spec:
  addresses:
  - 172.16.100.170-172.16.100.180    #Replace with IP addresses suitable for you.
Apply the yaml file to create an IP address pool.
kubectl apply -f ip-pool.yaml
Now the IP addresses in the specified range have been added to this pool. When you create a service of type LoadBalancer, an IP will be automatically assigned to you.
Nginx Controller Installation
You can install nginx controller to the kubernetes cluster using Helm. The purpose of using Helm is to manage all configuration files needed to bring up applications in the Kubernetes cluster and facilitate the installation process.
In this step, first install helm and then add the Nginx controller repo.
sudo snap install helm --classic
helm repo add ingress-nginx https://kubernetes.github.io/ingress-nginx
helm repo update
Now you can perform the nginx-controller installation using Helm.
helm install ingress-nginx ingress-nginx/ingress-nginx --namespace ingress --set controller.ingressClassResource.name=nginx --create-namespace
When you run the command above, it will give you this output.

After the Nginx Controller installation is successfully completed, there is a certain control stage.
Now it should be checked whether an IP has been assigned in the external-ip field of the ingress-nginx-controller (loadbalancer type) service created during installation.
kubectl get svc -n ingress-nginx
When checked, it is seen that an external-ip has been assigned to provide external access.

Nginx controller is now ready.
Now, the next step to provide access to the Apinizer application is to create an Ingress object.
In this way, we can facilitate access to the Apinizer Management Interface by defining a specific DNS name and prefix.
Apinizer Deploy Example
The namespace and POD where the Apinizer Management Interface runs are shown in the following command output.

The Ingress definitions we will make to access our application running in this pod (so that the screen below can appear) are explained in the next section.
Creating Ingress Object
Before using Ingress, an Ingress resource must be created to define how your application will be accessed at which URLs.
The Ingress resource specifies rules that are watched by Nginx Ingress Controller and route incoming requests to targets.
Create a yaml file and create an Ingress object in Kubernetes by editing the relevant configurations according to yourself.
vi ingress.yaml
Add the Ingress content and edit the fields specified in the warning section below according to yourself.
apiVersion: networking.k8s.io/v1
kind: Ingress
metadata:
  name: manager-ingress
  namespace: apinizer
  annotations:
    kubernetes.io/ingress.class: "nginx"
    nginx.ingress.kubernetes.io/rewrite-target: /index.html
spec:
  rules:
  - host: demo.apinizer.com
    http:
      paths:
      - path: /
        pathType: Prefix
        backend:
          service:
            name: manager
            port:
              number: 8080
If You Are Using Certificate:
You can edit the key, cert and namespace fields below according to your environment.
kubectl create secret tls api-tls-secret --key tls.key --cert tls.crt -n apinizer
apiVersion: networking.k8s.io/v1
kind: Ingress
metadata:
  name: manager-ingress
  namespace: apinizer
  annotations:
    kubernetes.io/ingress.class: "nginx"
    nginx.ingress.kubernetes.io/rewrite-target: /index.html
spec:
  ingressClassName: nginx
  tls:
  - hosts:
    - api.test.com  			# You should write your own domain here
    secretName: api-tls-secret  # Secret will be used here
  rules:
  - host: api.test.com 			# You should write your own domain here
    http:
      paths:
      - path: /
        pathType: Prefix
        backend:
          service:
            name: manager
            port:
              number: 8080
You can edit the specified fields according to your application.
host: demo.apinizer.com In this field, Ingress rules are defined. The Host field specifies which DNS name incoming requests will be routed to.
path: / In this field, it is specified which target incoming requests will be routed to according to a specific URL path. In this example, requests with the / path match this rule.
pathType: Prefix In this field, it is specified that the specified path is a prefix. That is, requests with the / path match all paths starting with the / prefix.
backend: service: name: manager In this field, the name of the target service to which requests will be routed is written.
port: number: 8080 In this field, your service's port number (8080) is specified.
We will continue without using a certificate in this application.
Create an ingress object using the yaml file.
kubectl apply -f ingress.yaml
You can run the following command to check the correctness and operability of the created Ingress object.
kubectl get ing -A
The Ingress object has been created and the IP information created in the ingress-nginx-controller service is visible in the address field.
Also, you should see the host address you specified in the Ingress YAML file here.

Important: It may be necessary to wait 1-2 minutes and check a few times for the Ingress to assign an address.
To see the result of this work, you can make a request to the following address:
curl -H "Host: demo.apinizer.com" http://172.16.100.170
If you have not purchased a domain name from a service provider, you can make a local registration on your own computer for testing purposes. How to do this is explained in the document below according to a server with Ubuntu operating system.
As a first step, if you want to add a DNS record on your own computer to manage your domain name, you can follow the steps below.
DNS Definition
As a first step, open the /etc/hosts file with a text editor.
This file is a local DNS (Domain Name System) file where IP addresses and corresponding host names are matched.
vi /etc/hosts
Add the external-ip address provided by the ingress-nginx-controller service from Nginx Controller and the DNS address you specified in the Ingress YAML file to this file.
<external-ip> demo.apinizer.com
Result
The curl command can be used in the test step or access can be provided through the browser.
When a request is made to demo.apinizer.com/apinizer/management/health address, the result should be as follows:

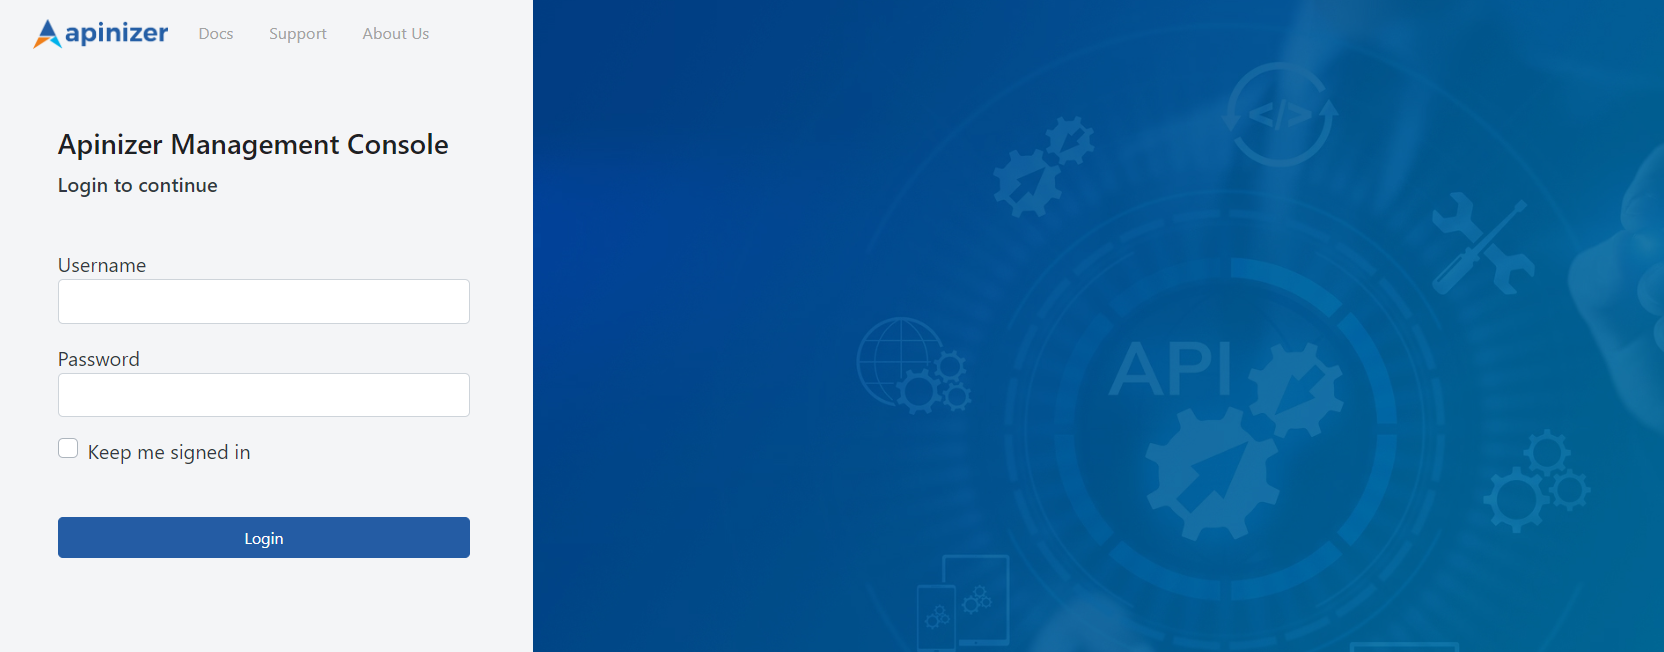
When accessed via browser, the Apinizer Management Interface screen will appear.
You are now using an ingress to provide access to Apinizer and the expected result was successful.