Script-2-API Usage
Script-2-API enables you to create REST APIs by creating methods with JavaScript or Groovy script languages without needing any code editor.
You can use, update, or delete message sections in code with custom-defined variables.
This content explains, in order, defining Script-2-API for a REST API that manages email operations, creating the sendMail method to send emails, and creating, deploying, and testing the REST API as an API Proxy.
1. Creating Script-2-API
REST API definition is made by easily entering the general information of the API on the Script-2-API screen.
1.1. Creating the /sendMail Method
In the image below, the /sendMail method is created in Groovy to send emails by retrieving email information from the request message body.
To add a method, click the Add button, enter the method information, and press the Save button.
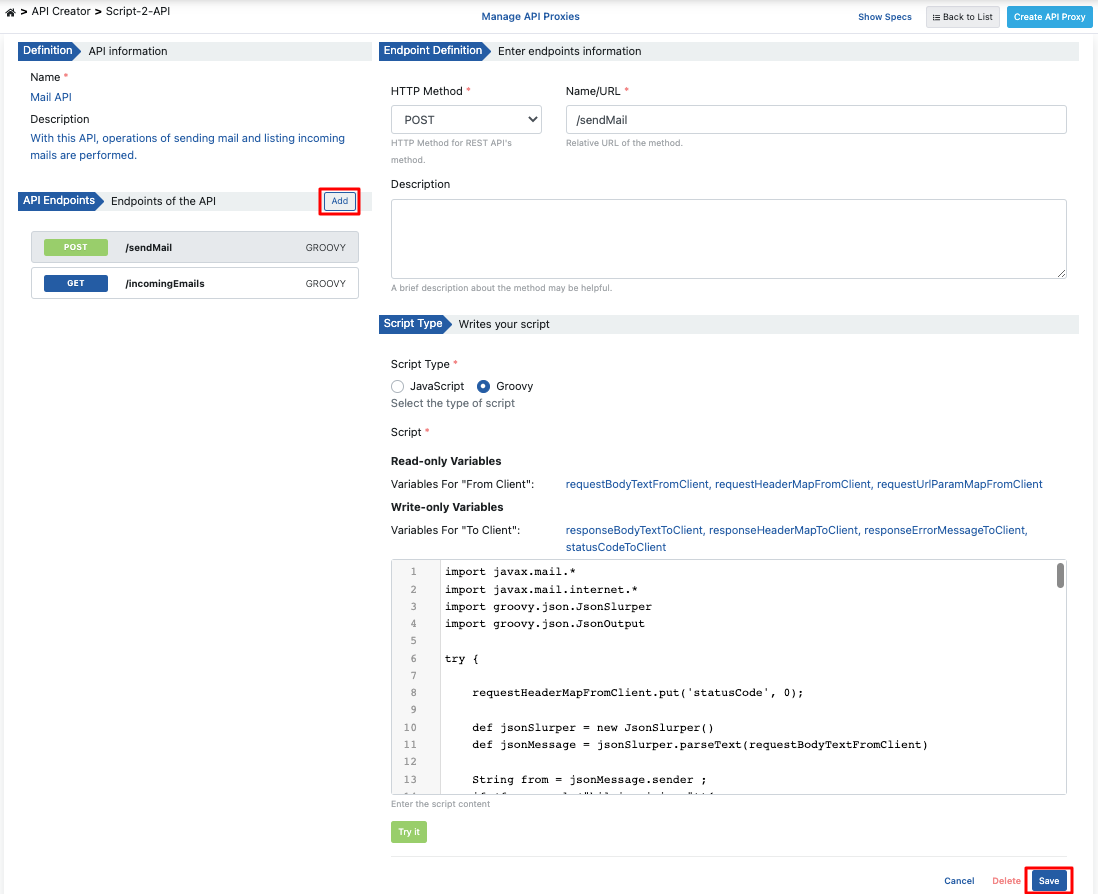
You can test the script code by clicking the Try It button.
Groovy code;
import javax.mail.*
import javax.mail.internet.*
import groovy.json.JsonSlurper
import groovy.json.JsonOutput

try {
    requestHeaderMapFromClient.put('statusCode', 0);
    def jsonSlurper = new JsonSlurper()
    def jsonMessage = jsonSlurper.parseText(requestBodyTextFromClient)

    String from = jsonMessage.sender;
    if (from.equals("bilgi.apinizer")){
        from="info@apinizer.com";
    } else if(from.equals("apinizer.hata")){
        from="warning@apinizer.com";
    } else {
        statusCode=400;
        requestErrorMessageFromClient = JsonOutput.toJson([
            isTheOperationSuccessful: false,
            errorMessage: 'Hatalı gönderen bilgisi',
            errorCode:'01-ERR-02'
        ])
        return;
    }

    String to=jsonMessage.reciever;
    String cc=jsonMessage.recieverInformation;
    String bcc=jsonMessage.recieverInformation;

    if(!to?.trim() && !cc?.trim() && !bcc?.trim()){
        requestErrorMessageFromClient = JsonOutput.toJson([
            isTheOperationSuccessful: false,
            errorMessage: 'En az bir alıcı eklenmeli',
            errorCode:'01-ERR-03'
        ])
        statusCode=400;
        return;
    }

    String subject=jsonMessage.subject;
    if(subject?.trim()){
        subject=""
    }

    String content=jsonMessage.content;
    if(content?.trim()){
        content=""
    }

    String mimeType=jsonMessage.contentType;
    if(mimeType?.trim()){
        mimeType="text/html;charset=utf-8"
    }

    // Init constants of sender email account.
    String email = "apinizer.hata"
    String password = ""
    String host = "mail.apinizer.com"
    String port = "25" // "465" "587"

    // Set up properties.
    Properties props = System.getProperties()
    props.put("mail.smtp.user", email)
    props.put("mail.smtp.host", host)
    props.put("mail.smtp.port", port)
    props.put("mail.smtp.auth", "false")
    props.put("mail.smtp.starttls.enable", "false")
    props.put("mail.smtp.socketFactory.class", "javax.net.ssl.SSLSocketFactory")
    props.put("mail.smtp.ssl.trust", host) // Change host to "*" if you want to trust all host.

    Session session = Session.getInstance(props, new javax.mail.Authenticator() {
        protected PasswordAuthentication getPasswordAuthentication() {
            return new PasswordAuthentication(email, password);
        }
    });

    // Set up message.
    MimeMessage message = new MimeMessage(session)
    message.setFrom(new InternetAddress(from))
    if(to?.trim()){
        message.addRecipients(Message.RecipientType.TO, new InternetAddress(to))
    }
    if(cc?.trim()){
        message.addRecipients(Message.RecipientType.CC, new InternetAddress(cc))
    }
    if(bcc?.trim()){
        message.addRecipients(Message.RecipientType.BCC, new InternetAddress(bcc))
    }
    message.setSubject(subject)
    message.setContent(content, mimeType)

    try {
        // Send mail.
        Transport.send(message)
    } catch (MessagingException e) {
        e.printStackTrace();
        statusCode=500;
        responseErrorMessageToClient = JsonOutput.toJson([
            isTheOperationSuccessful: false,
            errorMessage: 'Error occurred while sending mail:' + e.getMessage(),
            errorCode:'01-ERR-04'
        ])
        return;
    }

    statusCode=200;
    responseBodyTextToClient = JsonOutput.toJson([
        isTheOperationSuccessful: true,
        errorMessage: '',
        errorCode:''
    ])
} catch (MessagingException e) {
    e.printStackTrace();
    statusCode=500;
    responseErrorMessageToClient = JsonOutput.toJson([
        isTheOperationSuccessful: false,
        errorMessage: 'Error occurred while sending mail:' + e.getMessage(),
        errorCode:'01-ERR-05'
    ])
    return;
}
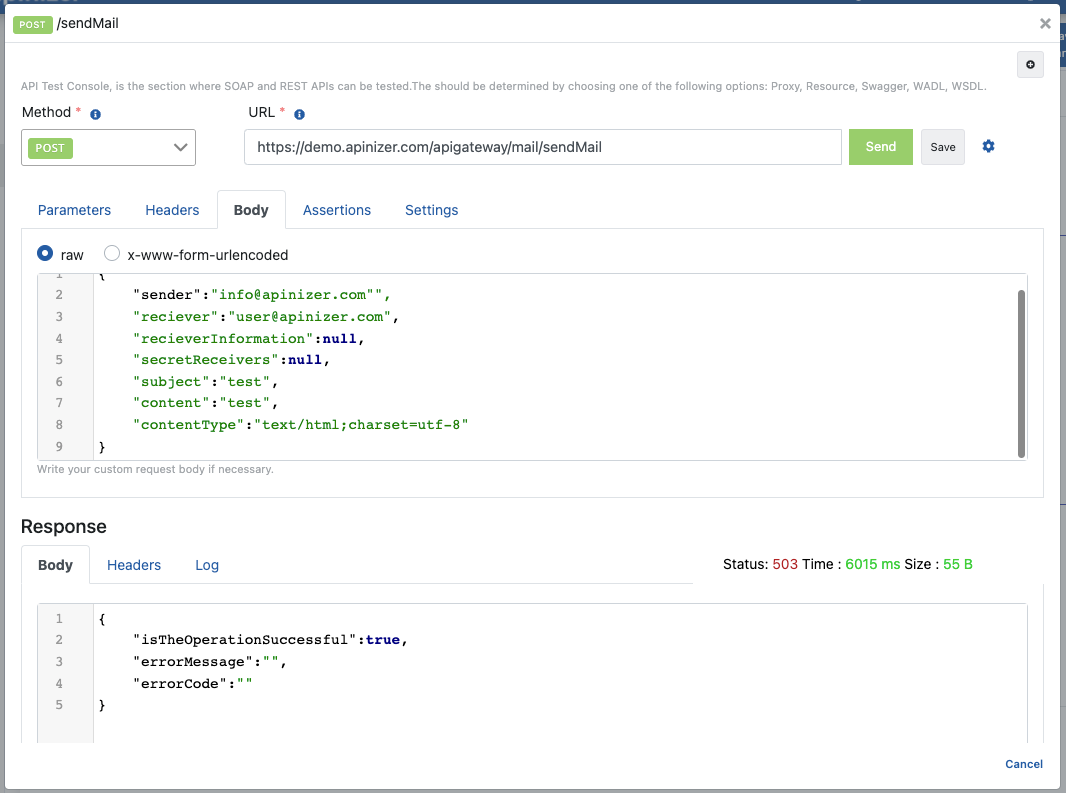
When sending an email, the request body should contain the following JSON body;
{
 "sender":"info@apinizer.com",
 "reciever":"user@apinizer.com",
 "recieverInformation":null,
 "secretReceivers":null,
 "subject":"test",
 "content":"test",
 "contentType":"text/html;charset=utf-8"
}
When a successful response is returned, you encounter a message template example in the following template;
{
 "isTheOperationSuccessful":true,
 "errorMessage":"",
 "errorCode":""
}
When an error response is returned, you encounter a message template example in the following template;
Script Error: {
 "isTheOperationSuccessful":false,
 "errorMessage":"Error occurred while sending mail:Invalid Addresses",
 "errorCode":"01-ERR-04"
}
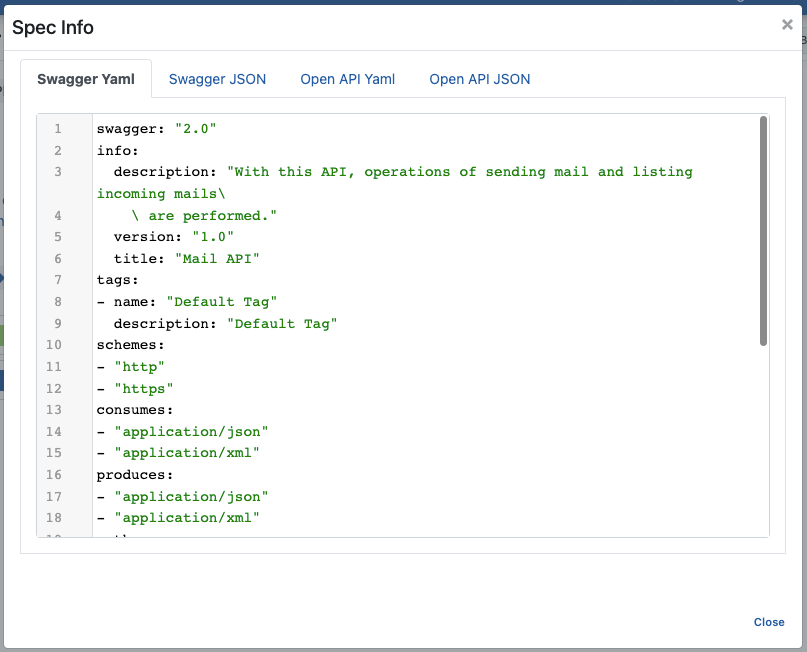
2. Viewing API Definition Documents
Click the Show Specs link to access the API definition files for Mail API.

The image below shows the Spec Information dialog:
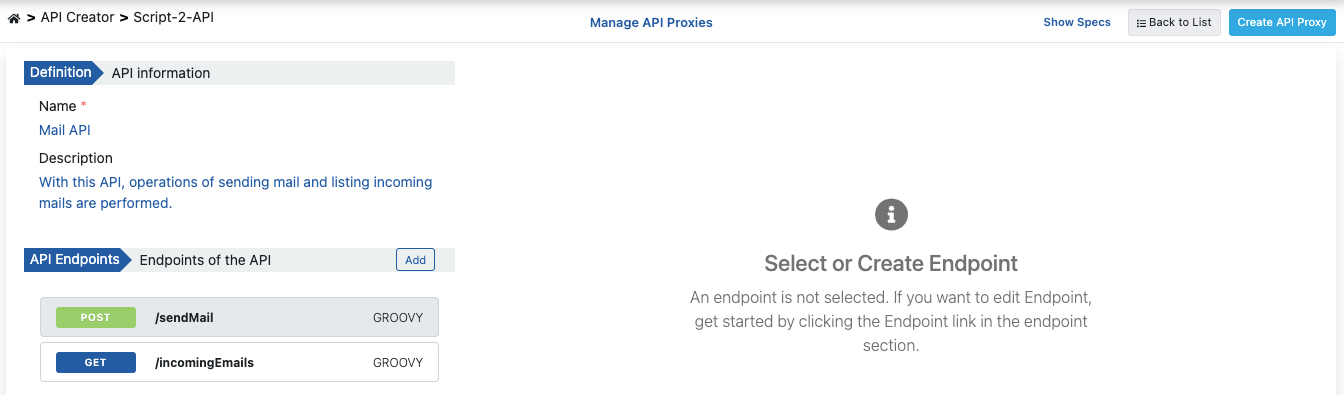
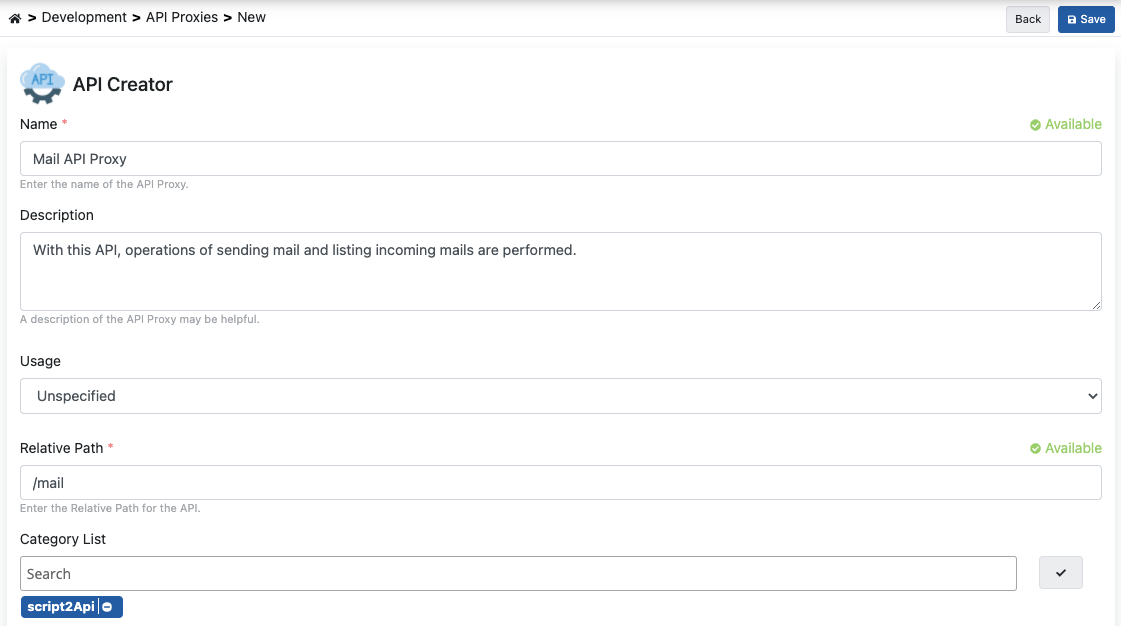
3. Creating API Proxy
You can instantly create an API Proxy by clicking the Create API Proxy button from the Script-2-API screen.

When creating the API Proxy, fill in the input fields shown in the image below and click the Save button.
3.1 Deploying the API Proxy
Mail API Proxy can be quickly deployed to a defined environment and made available for client consumption.
This operation can be managed through the dialog opened by the Deploy button on the API Proxy screen.

This operation can also be managed from the Script-2-API screen via the Manage API Proxies link.

4. Testing
The image below shows testing the /sendMail method from the API Proxy page;