Variables
Variables are used for transfer information like receiving and sending values from the header, parameter or body of the message.
Variables can be defined to be used throughout the project.
Ready-made variables come with the first installation on the Apinizer Platform. When you create a new project, all the variables in the variables section under the Administration menu are copied to the relevant project.
Since the variables created under the Administration menu are used by copying them to the projects, updating or deleting these variables do not affect the definitions where they are used.
All variables are moved to the Admin page with the "Move to Global" option, making them usable in all projects, and their management is handed over to the Admin user.
Variable Types
5 different types of variables are created in Apinizer:
- Header
- Parameter
- Body
- Context Value
- Custom Variable
Creating a Header Type Variable
In order to create a variable of this type, Header is selected as the type and the relevant input fields are filled.
The picture below shows the variable settings:
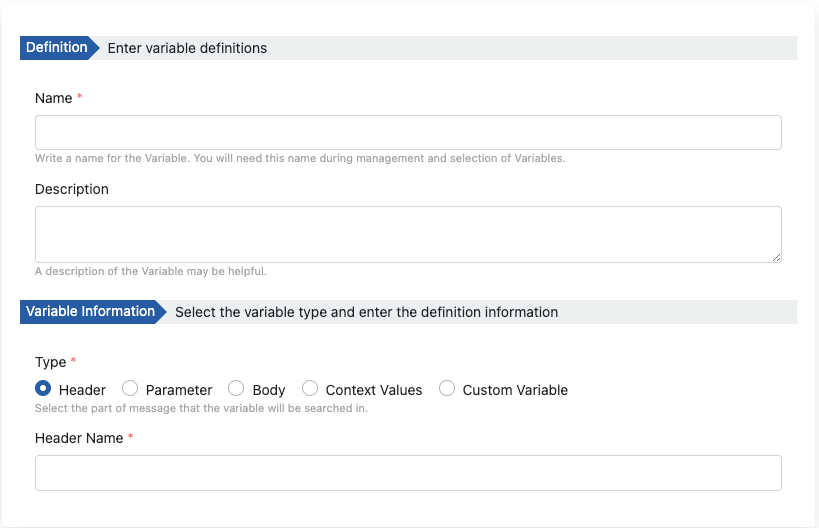
Variable name and header name can be defined differently. A variable name is a system-wide unique definition. Header name is the expected value from the client.
Field | Description |
|---|---|
Name | This is the field where the name of the variable definition is entered. |
Description | A description can be written to facilitate the management of the created variable. |
Type | This is the field where the variable is expected in which part of the message. |
Header Name | This is the field where the header name expected in the request from the client is entered. If this field contains multiple values, the first value is used. |
Creating a Parameter Type Variable
In order to create a variable of this type, the relevant input fields are filled by selecting Parameter as the type.
The picture below shows the variable settings:
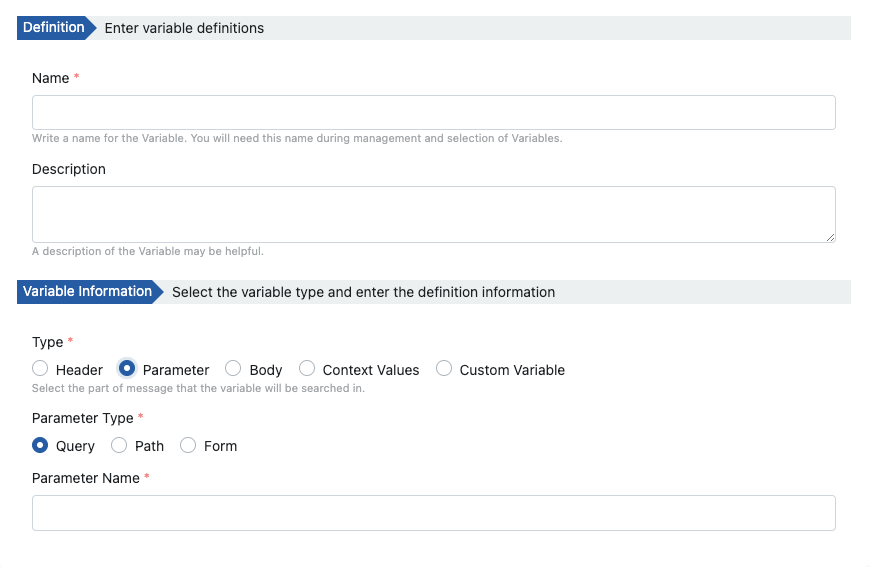
Variable name and parameter name can be defined differently. A variable name is a system-wide unique definition. Parameter name is the expected value from the client.
Field | Description |
|---|---|
Name | This is the field where the name of the variable definition is entered. |
Description | A description can be written to facilitate the management of the created variable. |
Type | This is the field where the variable is expected in which part of the message. |
| Parameter Type | This is the field where the request type from the client is selected for the parameter. Its default value is "QUERY". Values that can be read as form parameter values; x-www-form values and attacted text data part values. Adding, deleting, editing can be done in x-www-form values, text data part is read-only, cannot be added/edited. Reading can be done from anywhere. Adding/deleting/editing values is only valid for the request line. |
Parameter Name | This is the field where the parameter name expected in the request from the client is entered. If the value of the Parameter Type is Query and is a multiple value, the initial value is used. |
Creating a Body Type Variable
In order to create a variable of this type, Body is selected as the type and the relevant input fields are filled.
The picture below shows the variable settings:
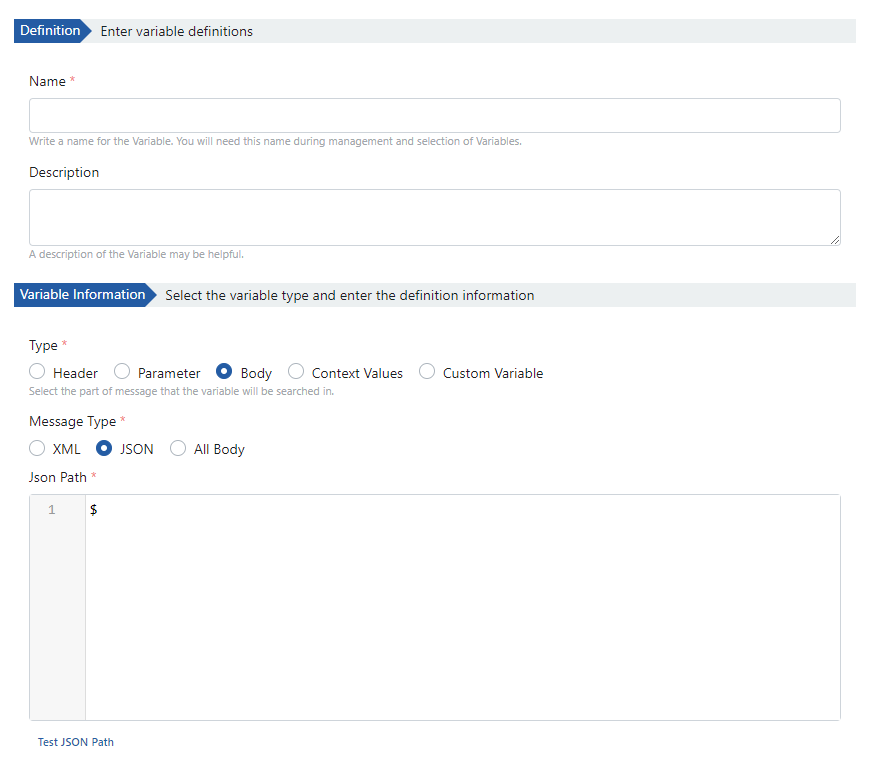
The fields used for variable creation configuration are shown in the table below.
Field | Description |
|---|---|
Name | This is the field where the name of the variable definition is entered. |
Description | A description can be written to facilitate the management of the created variable. |
Type | This is the field where the variable is expected in which part of the message. |
| Message Type | This is the field where the type of message content is selected. Its default value is "JSON". |
JSON/XML Path | This is the field where the JSON/XPath information required to get the value of the request from the client is entered. |
There are some differences in the operation logic of XPath. It is important to understand this. So please visit this page.
Creating a Context Value Type Variable
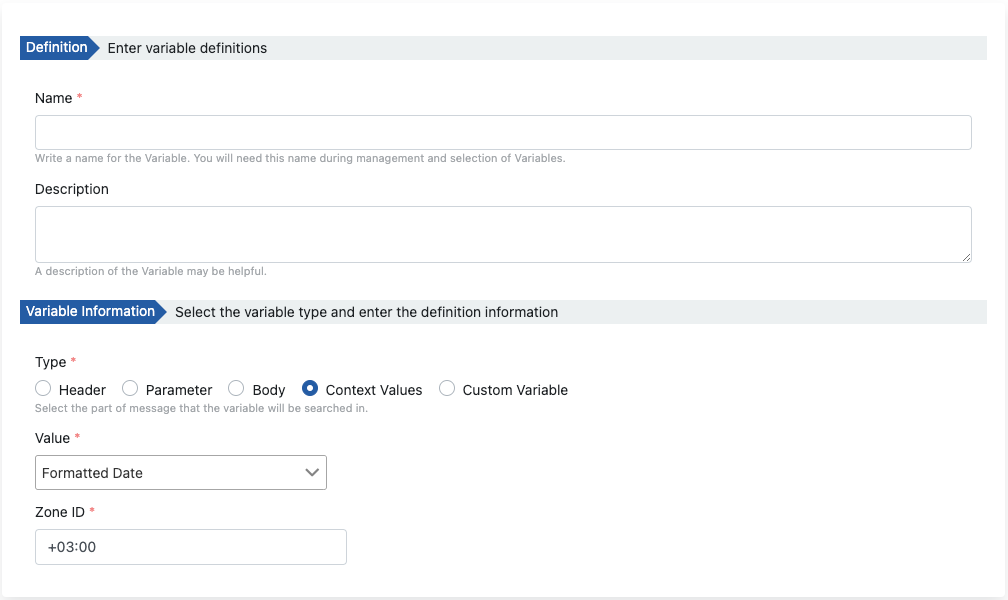
In order to create a variable of this type, Context Values is selected as the type and the relevant input fields are filled.
The picture below shows the variable settings:
Field | Description |
|---|---|
Name | This is the field where the name of the variable definition is entered. |
Description | A description can be written to facilitate the management of the created variable. |
Type | This is the field where the variable is expected in which part of the message. |
| Value | This is the field where the default value expected in the request from the client is selected.
|
| Zone ID | If a value from the Date/Time group is selected, this field becomes active. Example value: "+03:00" or "Europe/Istanbul". For more please visit here. |
Creating a Custom Variable
In order to create a variable of this type, Custom Variable is selected as the type and only the name field is filled.
It is possible to assign a value, read its value, and change its value from the Script and Business Rule policies with the entered name of this variable.
It is mostly used to transfer data from one policy to another.
The picture below shows the variable settings:
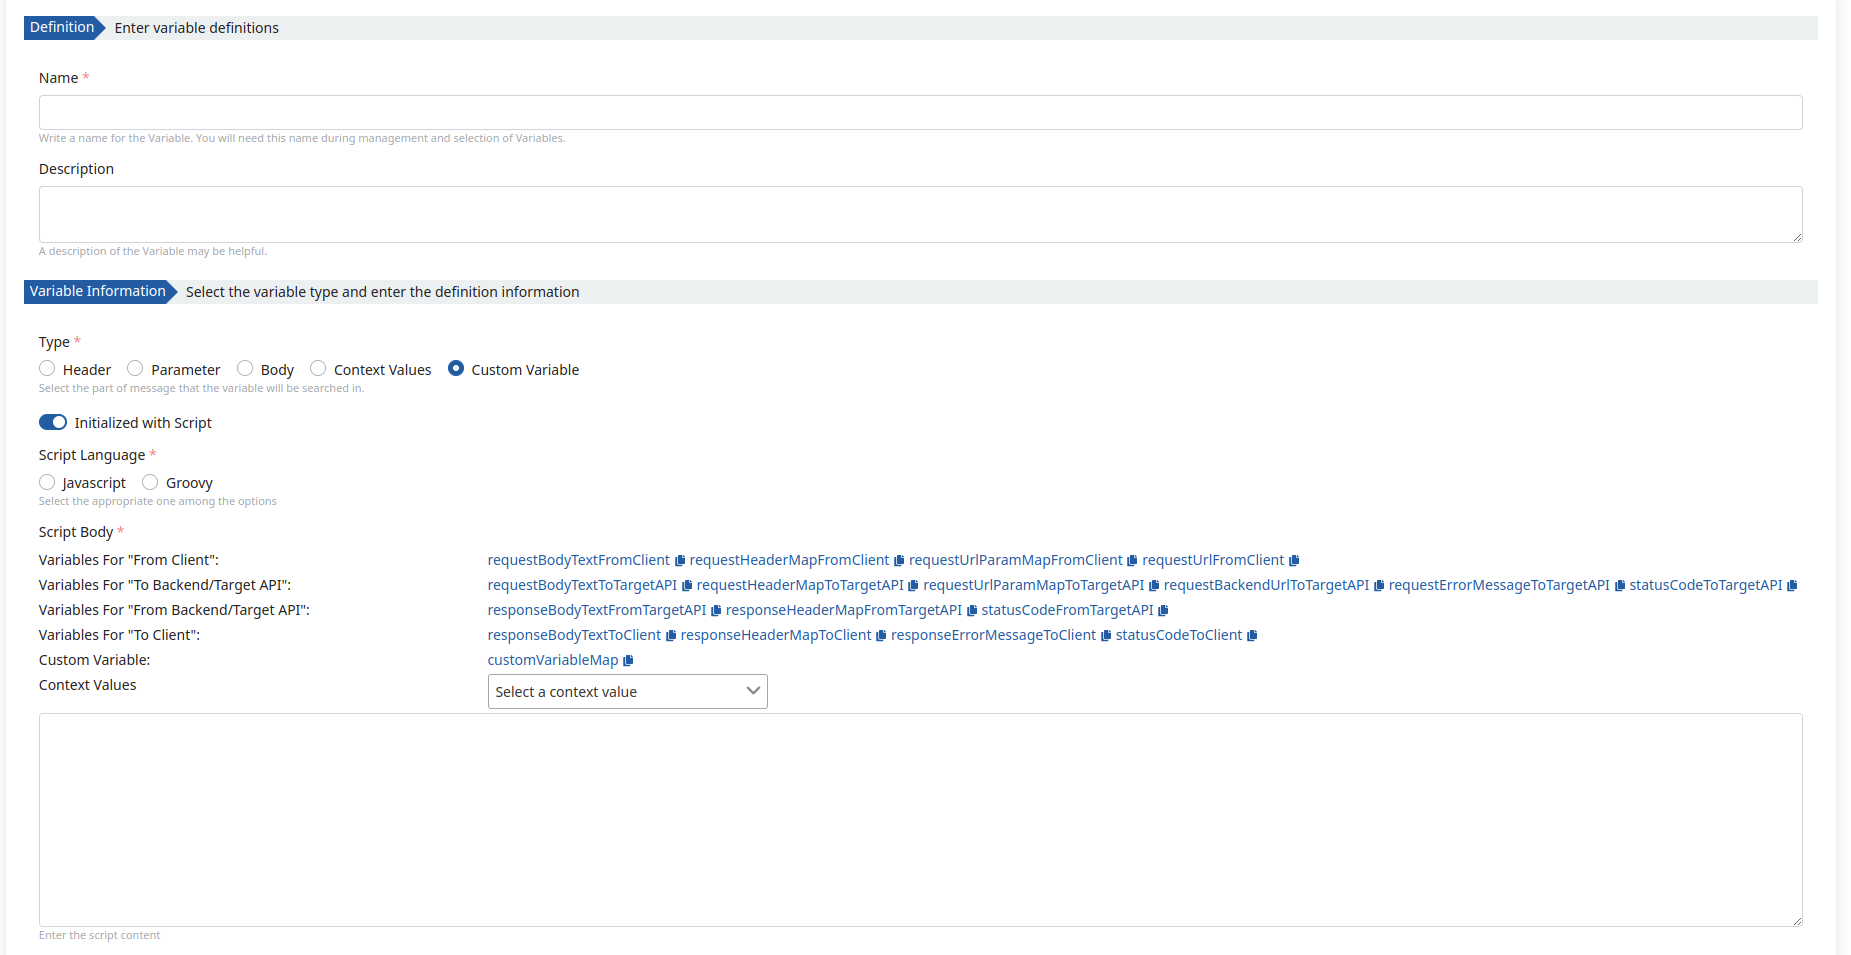
Field | Description |
|---|---|
Name | This is the field where the name of the variable definition is entered. |
Description | A description can be written to facilitate the management of the created variable. |
Type | This is the field where the variable is expected in which part of the message. |
Initialized with Script | This field is used to set the initial value of the Custom Variable. It only works if the variable has not been created yet or is null. To give the initial value, the name used here must be exactly the same as the variable name added to the customVariableMap object. For example, if the variable name is "test", the last line of the script should be written as customVariableMap.put("test",value). |
Script Language | This is the field where the script language is selected. |
Script Body | This is the field where the script content is entered. |
The first value is always taken on the variables screen, even when the header and parameter value are multiple, the first value is used. It can only be used if the script policy has multiple values, seperated by #.
When showing in log records, it is shown as key: val1#val2#val3.