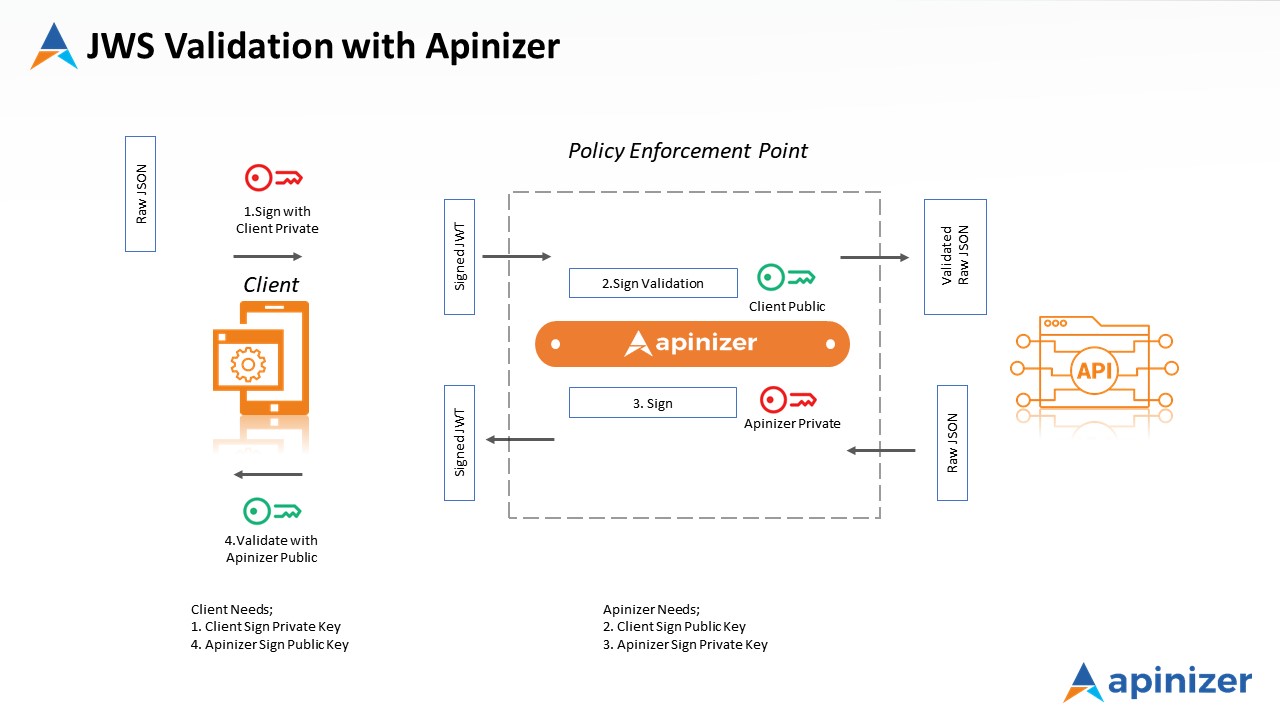
JWT Validation
In this scenario, it will be explained how a JWT sent to a REST architecture API named Swagger PetStore is controlled with the JOSE Validation policy.
The image below shows the JOSE Validation workflow that will be applied to a request.
1) Creating the API Proxy
In this scenario, a REST API named Swagger Petstore(https://petstore.swagger.io) will be used.
First, this address must be defined as an API Proxy.
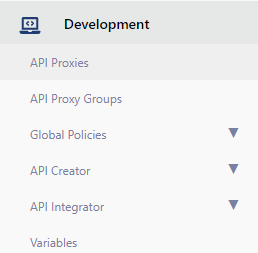
For this, click on the API Proxies option under the Development menu.
Since no proxy definition has been made before on the opened page, the text No records found! appears.
Here, click on the Create button located in the top right corner and start creating a new Api Proxy.

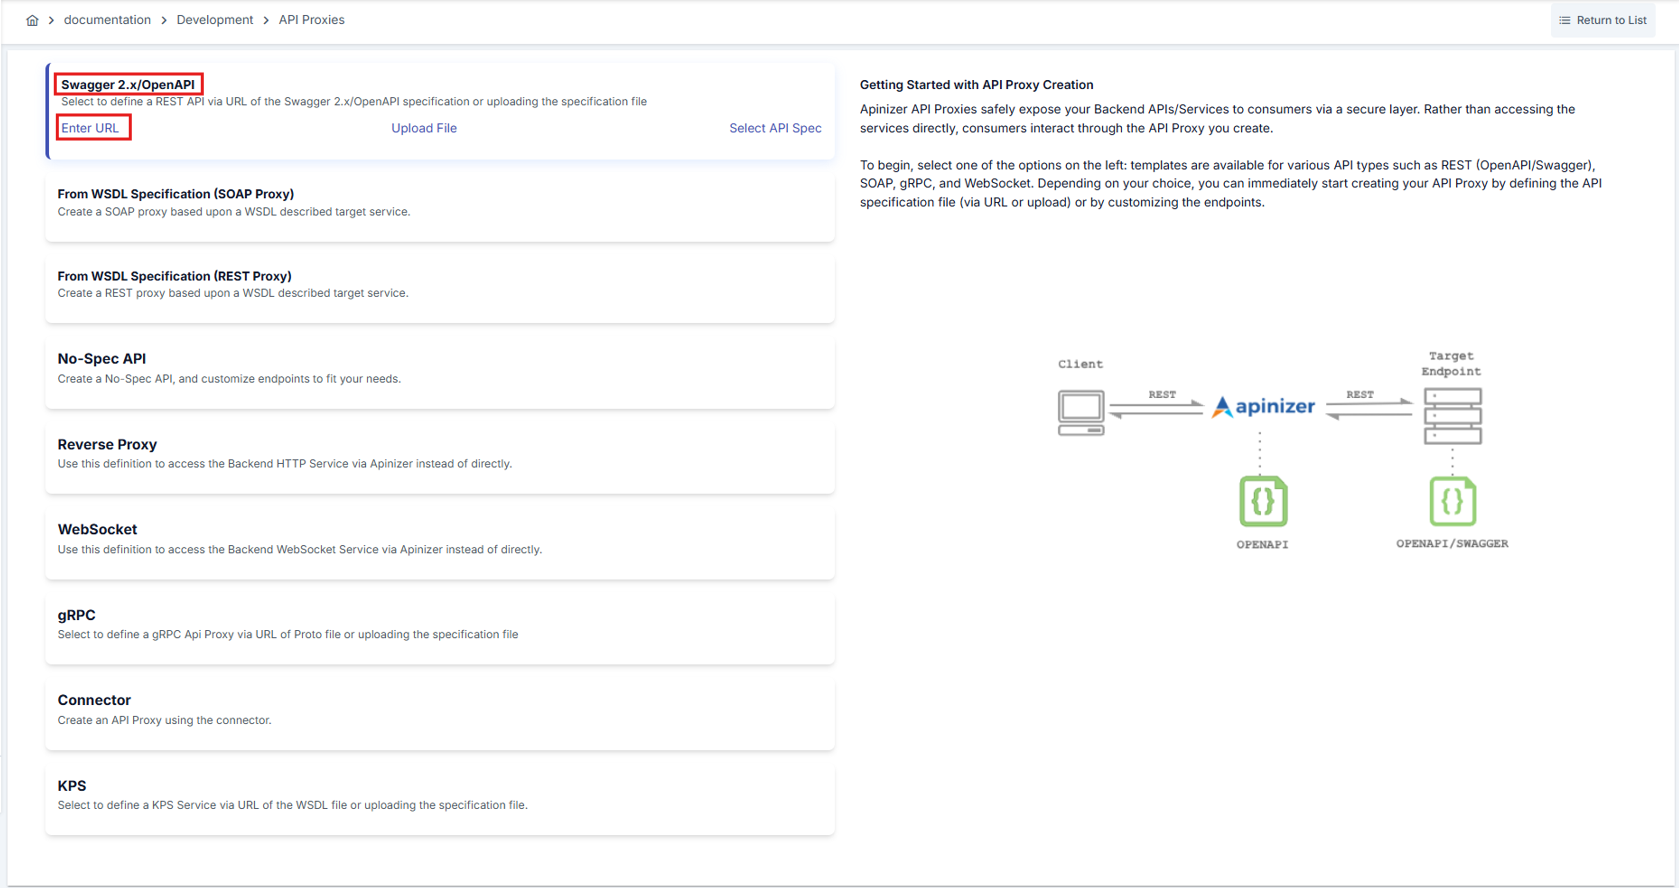
In this section, it is necessary to select what type the API Proxy to be created is.
Since the type of API to be used in this scenario will be Swagger 2.X, this type is selected.
Click on the Enter URL expression to switch to the screen where the address of the API to be used will be entered.
As seen in the image below, enter the address to be accessed in the URL section and click the Parse button.

After the Parse operation is performed, the screen shown in the image below appears.
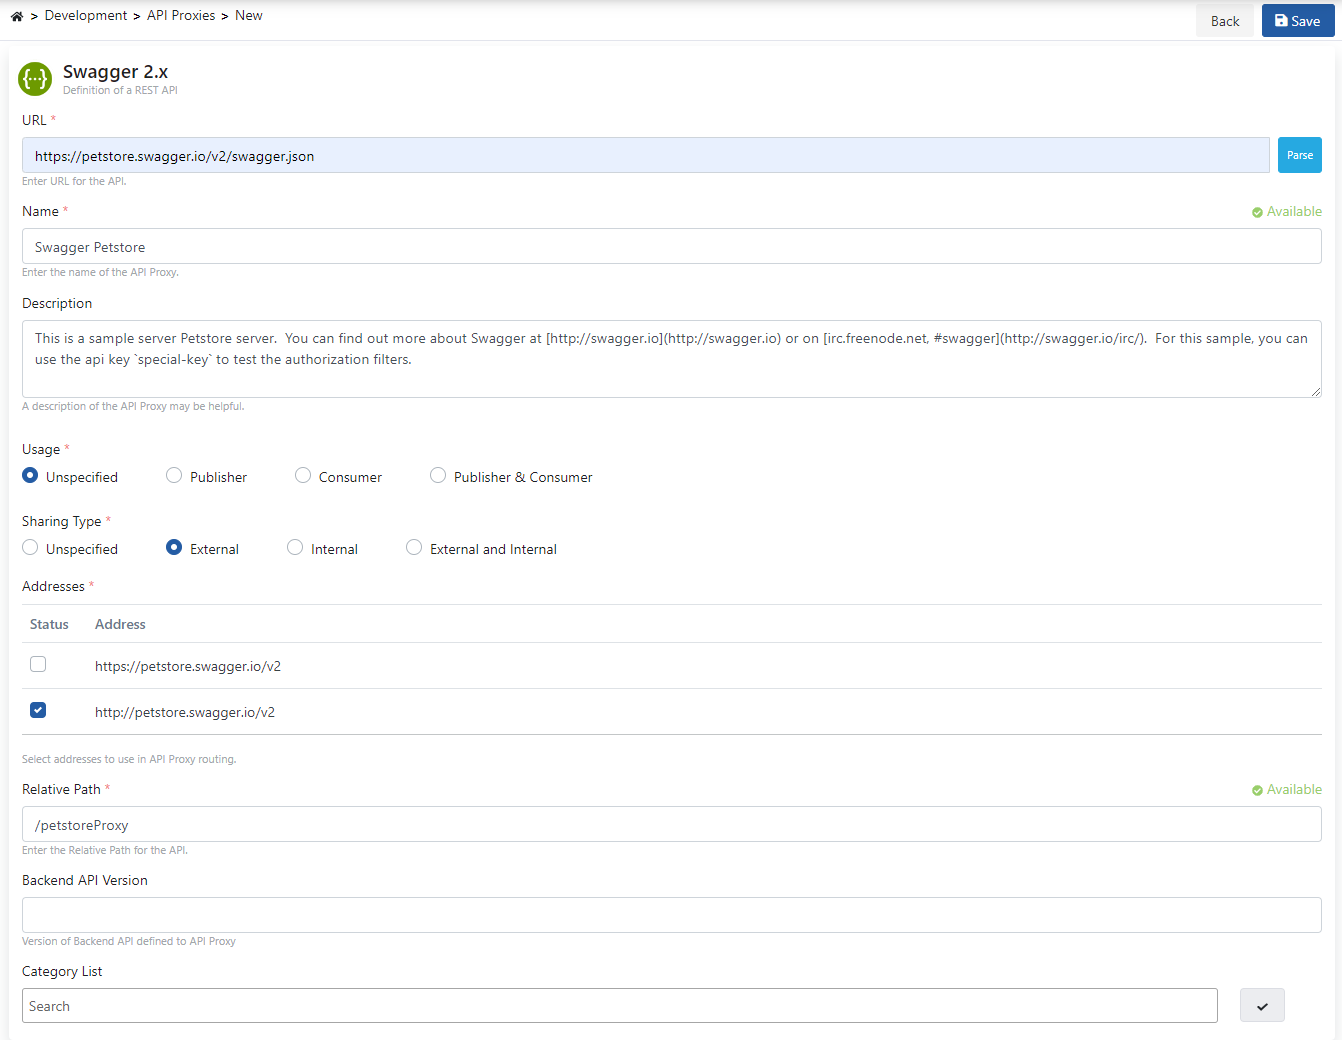
Settings for the API Proxy can be made from this screen. To get detailed information about these settings, you can visit the API Proxy Creation document.
The settings of the Api Proxy to be used in our scenario are as follows.

After the save operation, click on the Develop tab on the opened page.
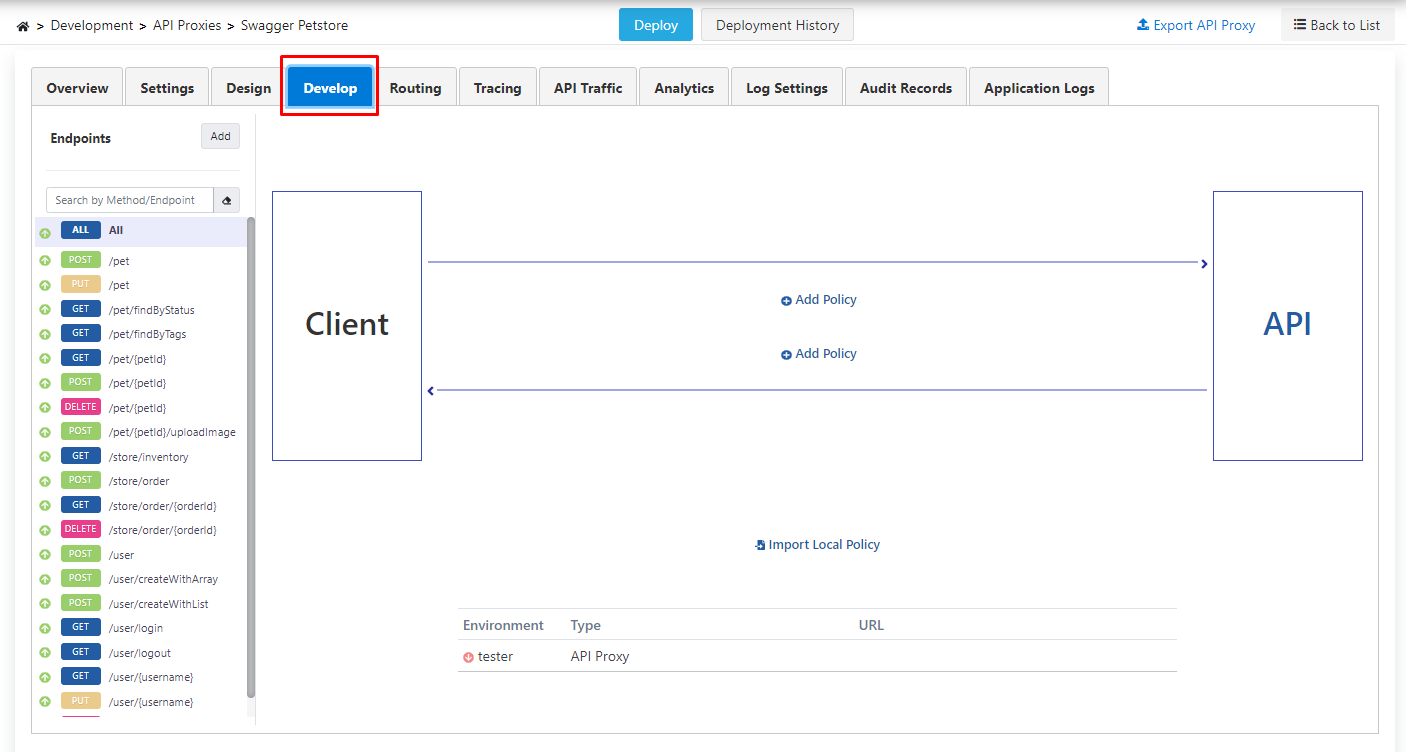
Here, endpoints belonging to the REST API are listed.
JOSE Validation policy can be added to all methods with the All expression or to a single method.

To perform signature verification in JOSE Validation, JSON Web Keypair Sets must be added.
2) JSON Web Keypair Sets
To add JSON Web Keypair Sets, go to the JSON Web Keypair Sets menu under Secret Manager from the left menu.
On the opened screen, click on the Create button placed in a rectangle in the top right corner.

This document will focus on the production of JSON Web Keypair Sets with Apinizer or with Keycloak (a 3rd party software).
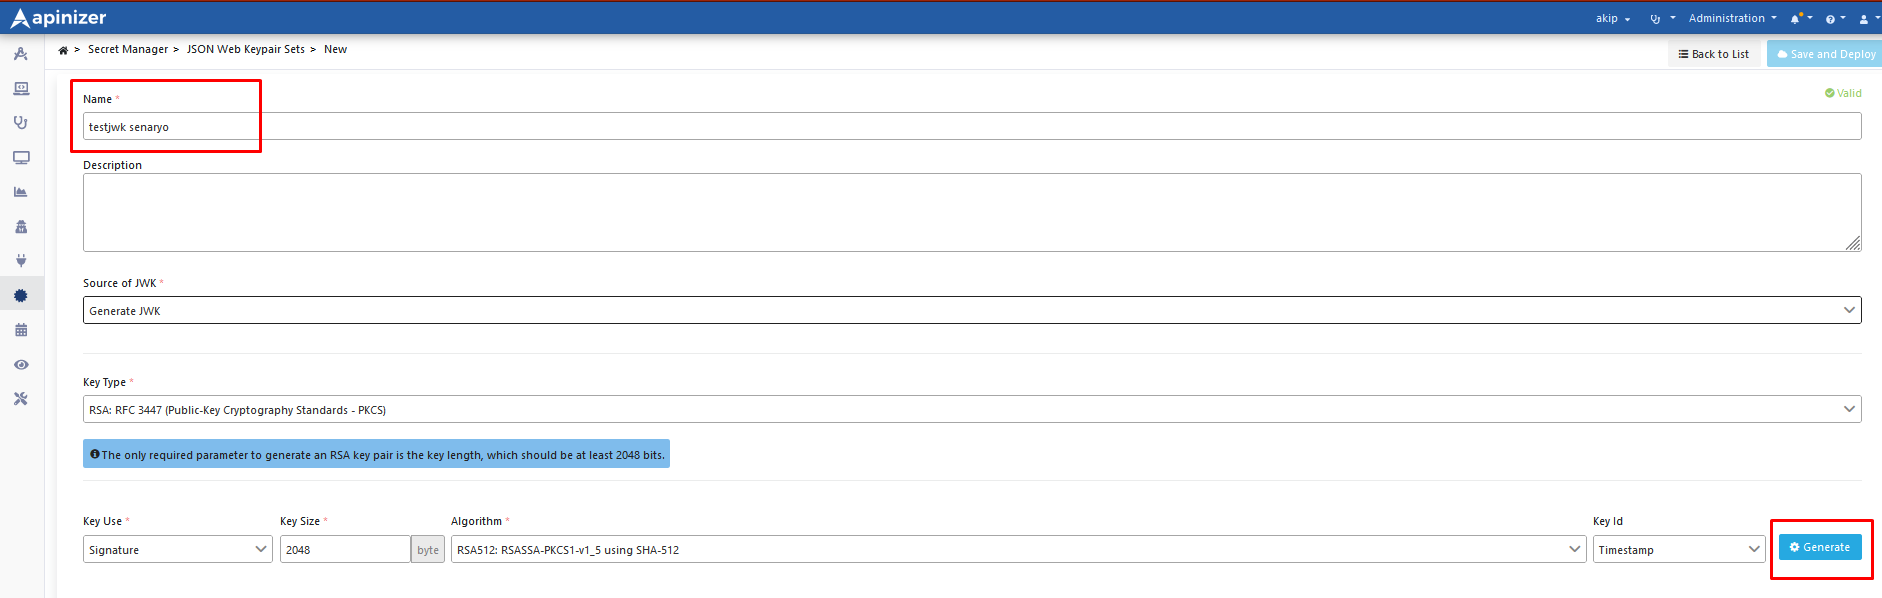
2.1) JWK Production from Apinizer:
In this scenario, the Name field will be used as testjwk scenario.
JWK is created with the Generate JWK option and using the desired algorithm.
As a result of using the Generate button, JWK is created. The created Public Key is ready to be used in verification operations.
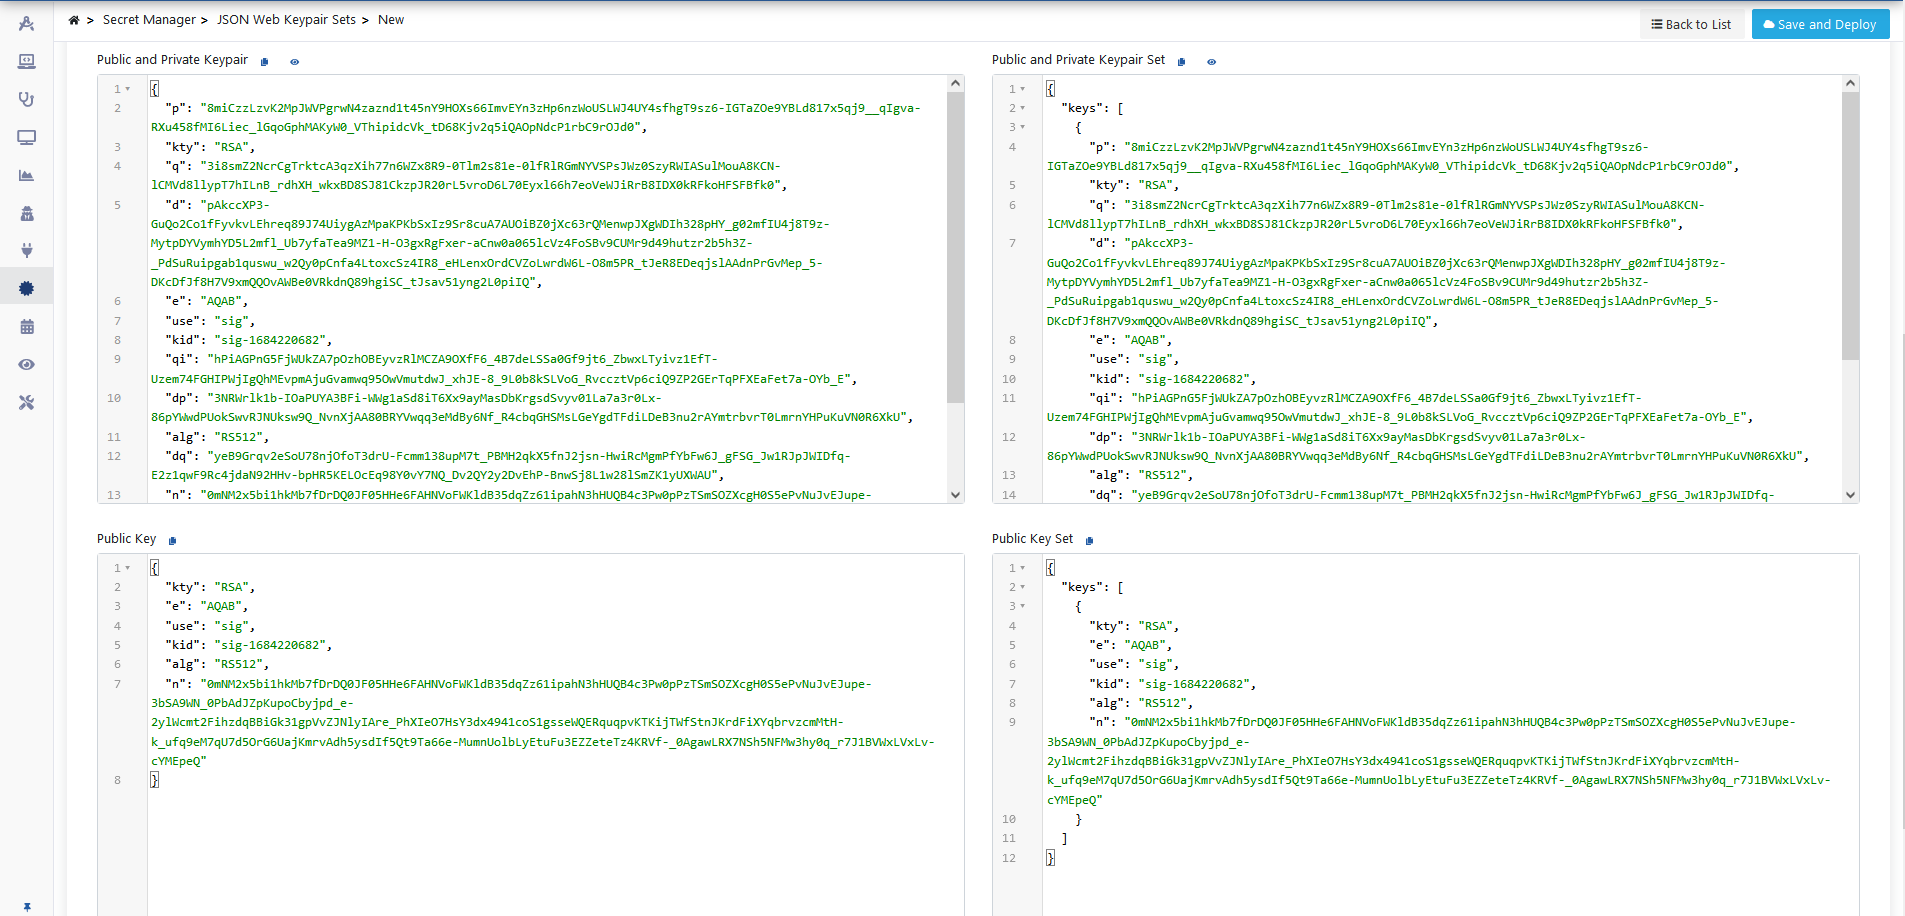
As the final step, click the Save And Deploy button to save.
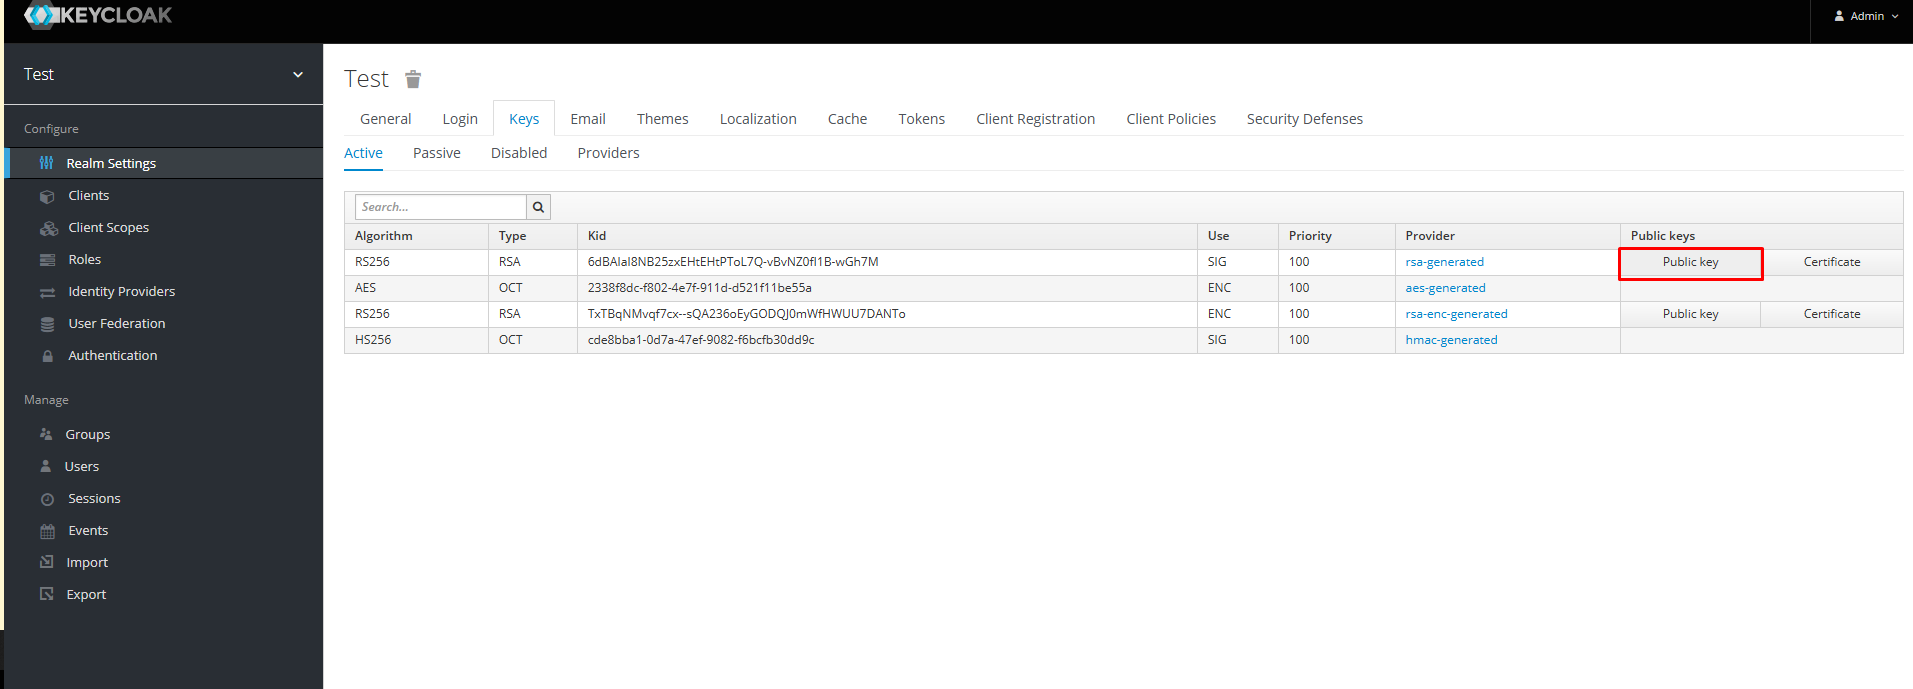
2.2) JWK Production from Keycloak:
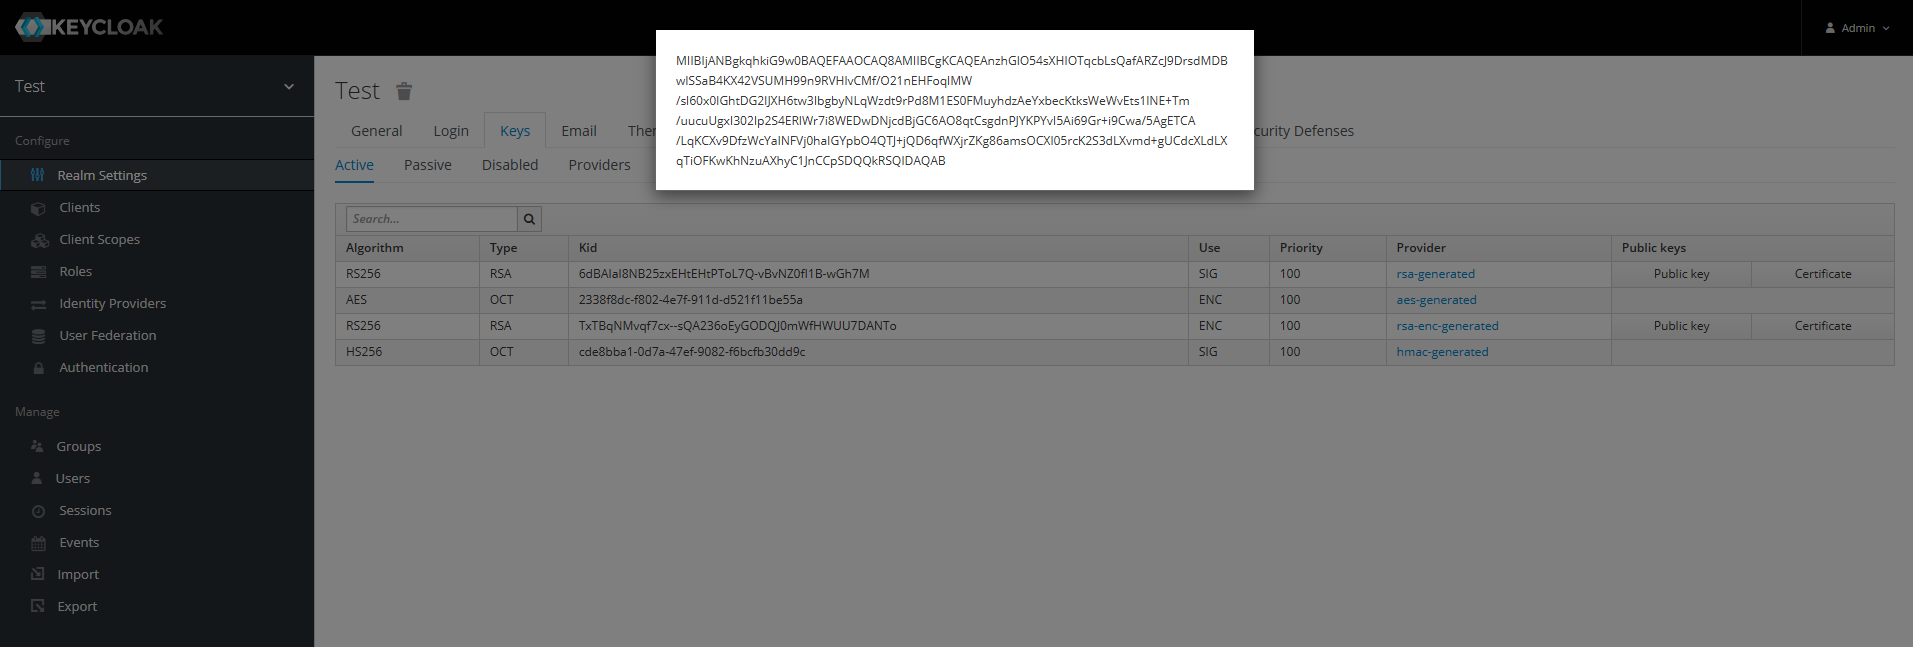
From Keycloak, go to Realm Settings > Keys menu and click on the Public key field to get the Public key.
The Public key must be converted to JWK with a 3rd party tool. For this, the following address can be used: https://russelldavies.github.io/jwk-creator/
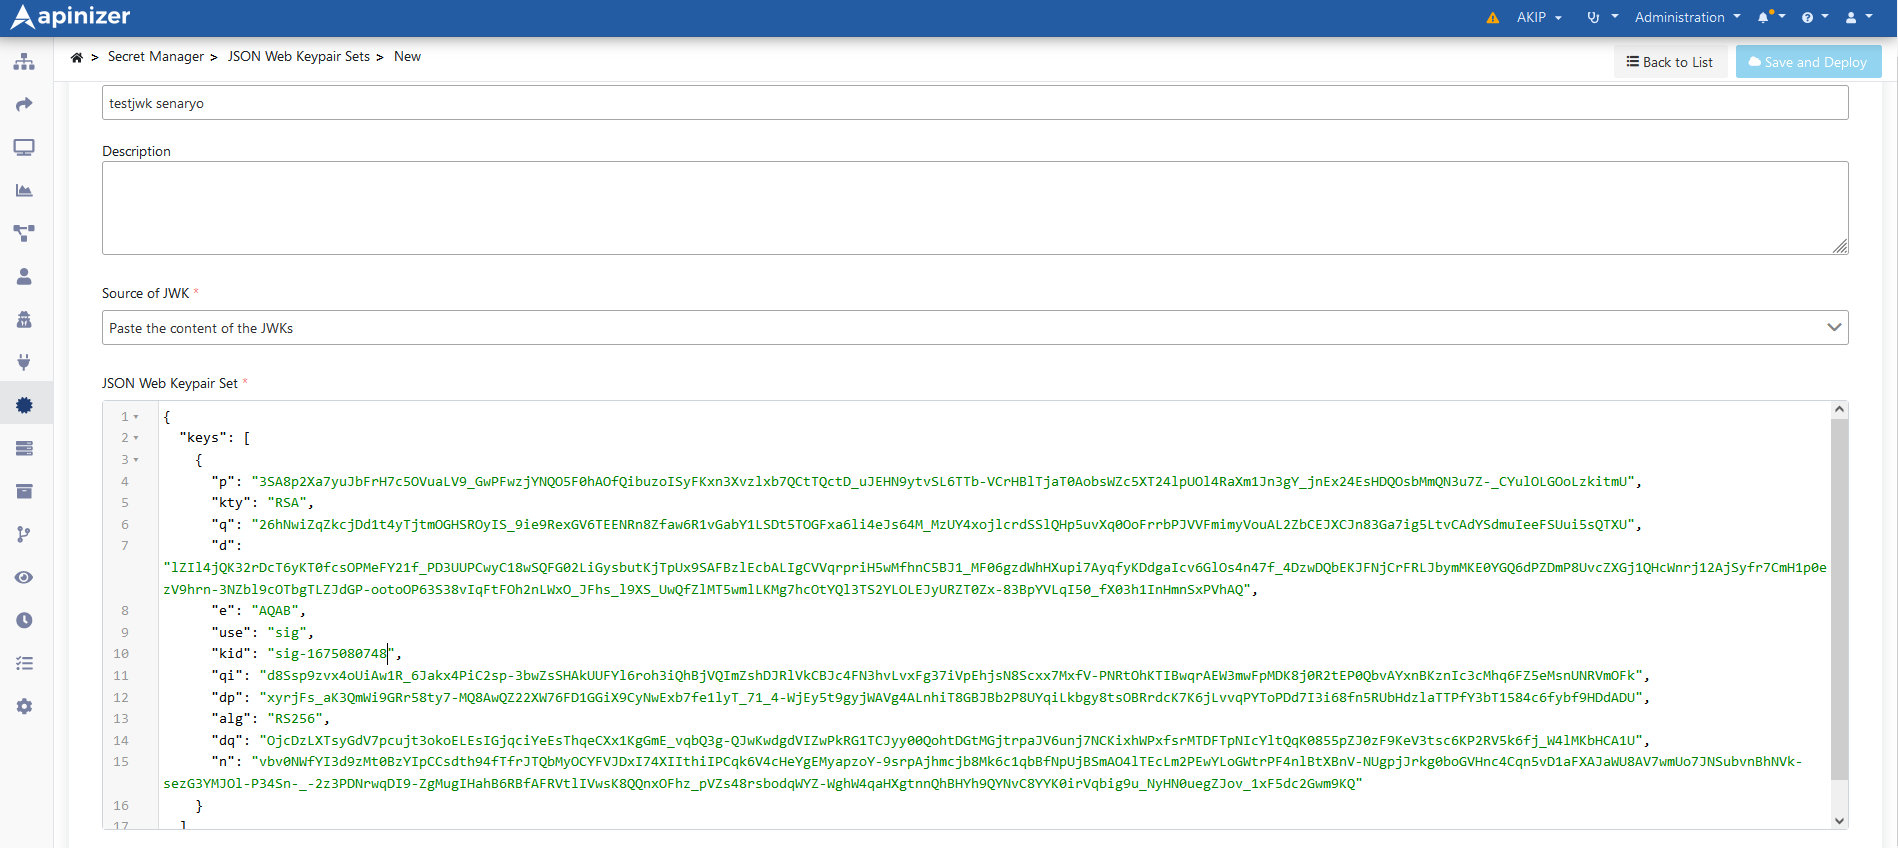
To save the public key converted to JWK to Apinizer;
-
Go to the JSON Web Keypair Sets page from the Secret Manager menu under the left menu.
-
In this scenario, the Name field will be used as testjwk scenario.
-
Select the Paste the content of the JWT option and enter the JWK in the relevant field.
-
Enter the value in the Kid field in Keycloak into the Key id field and then click the Save and Deploy button to save.
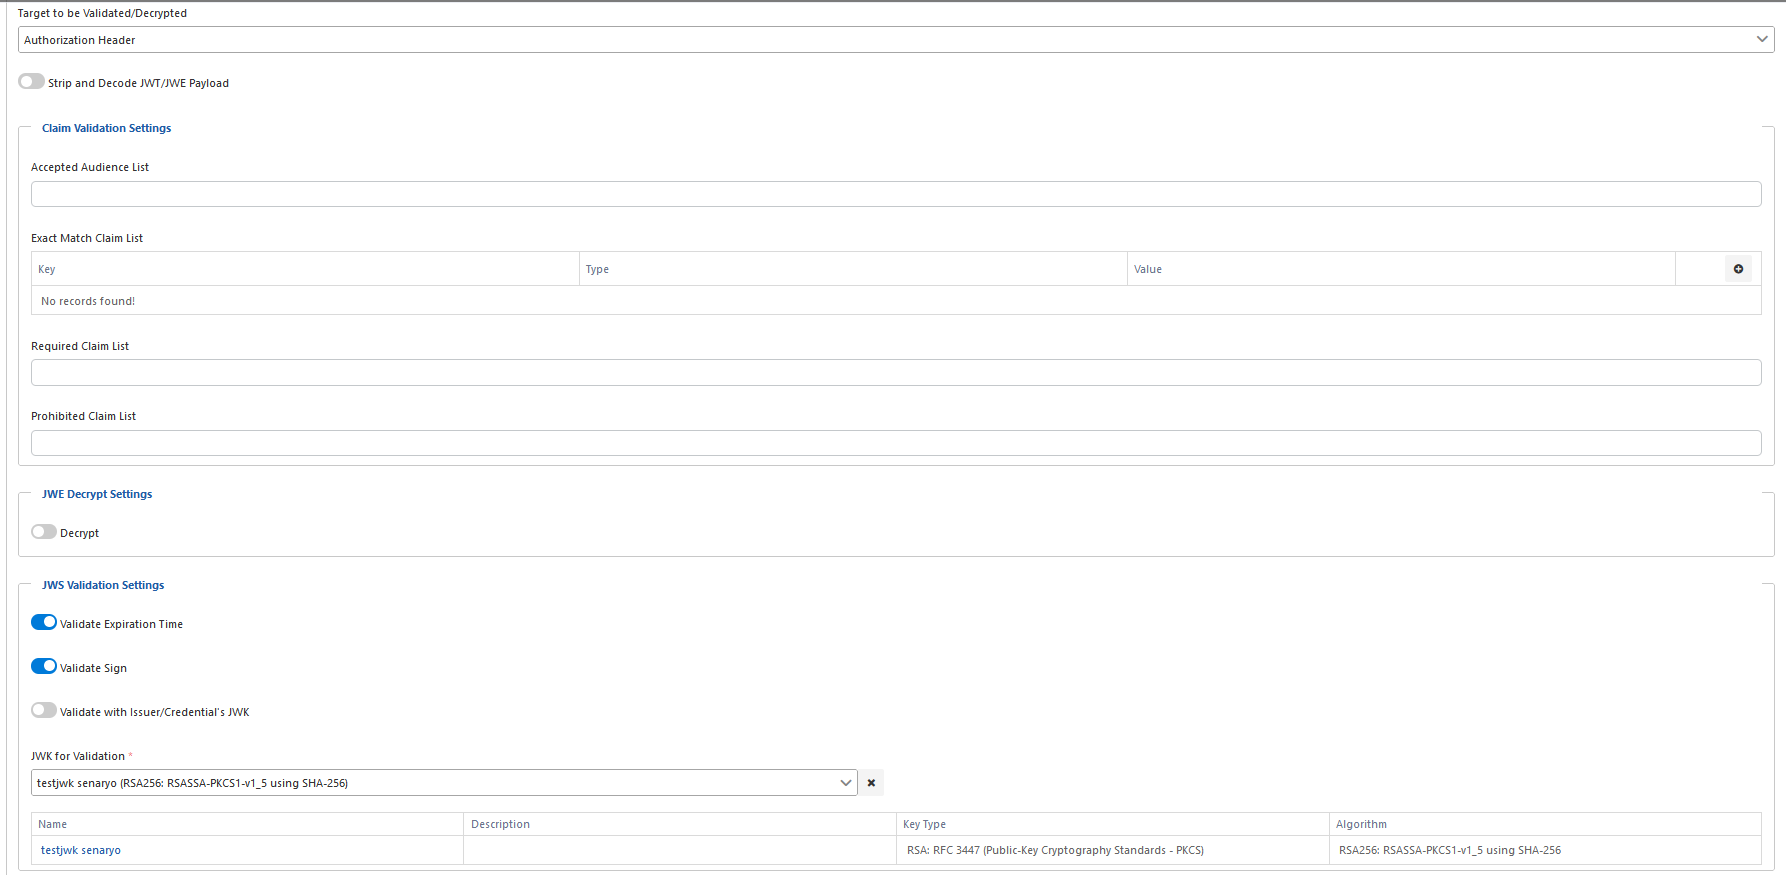
3) Adding Authentication Policy
The JOSE Validation policy is now ready to use.
Go to the page where API Proxies are listed and select the proxy named Swagger Petstore from here.
Then go to the Develop tab and click the Add Policy button.
On the opened page, select the JOSE Validation policy.

Selected
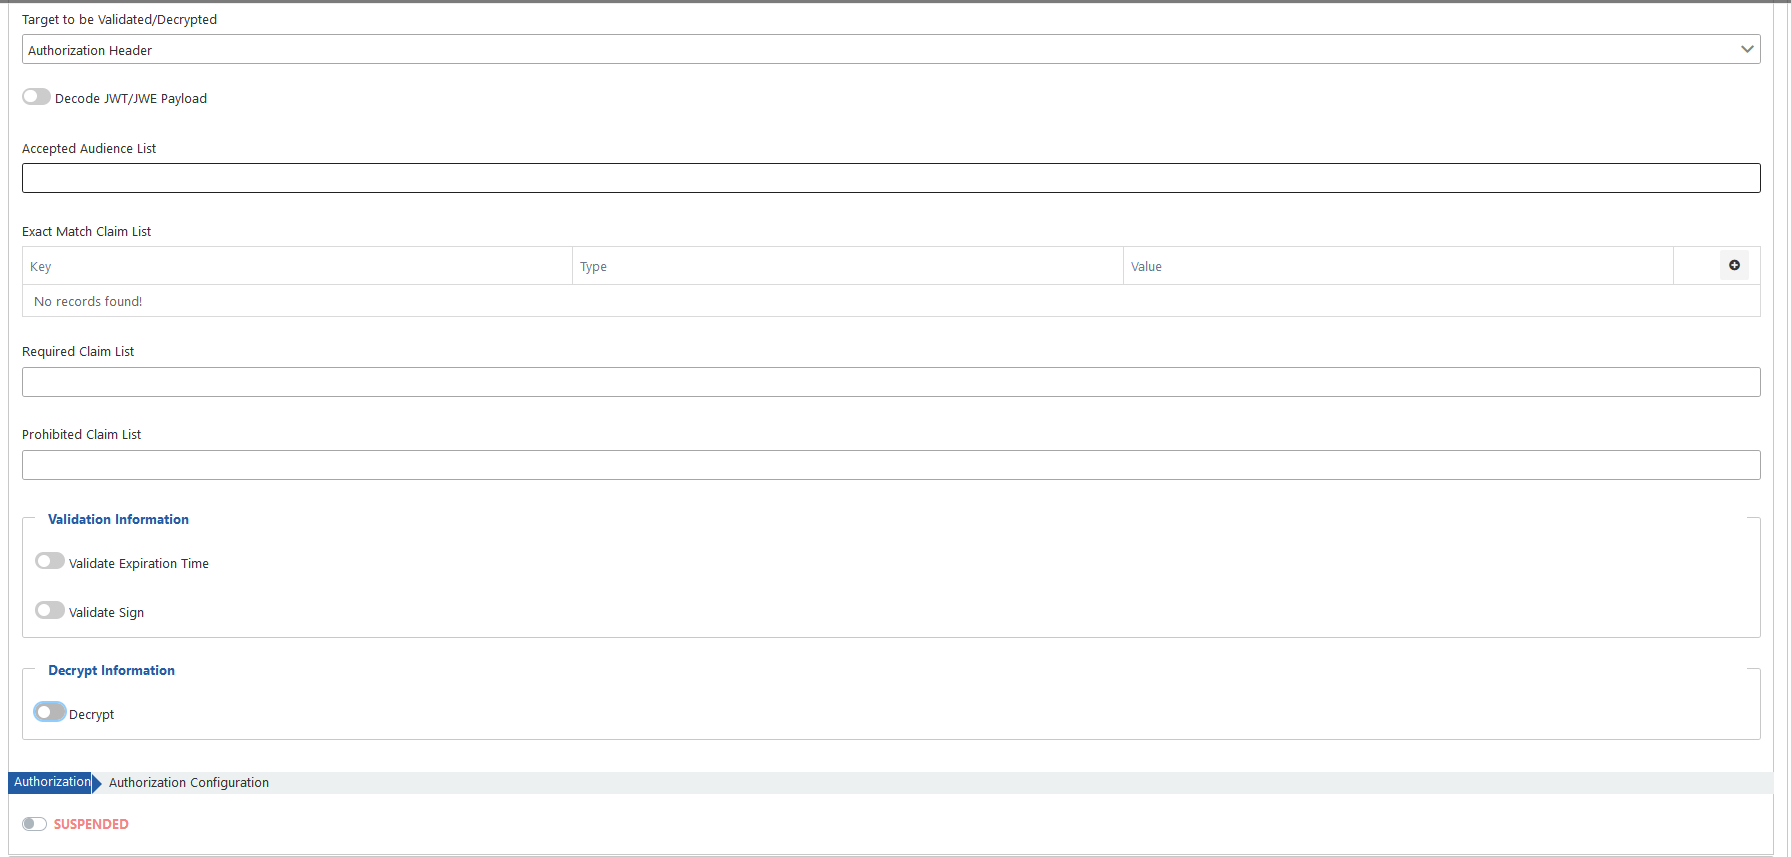
If you want to examine the expressions on this screen one by one, you can visit the JWKS Configuration page.
The settings to be used in this scenario are as shown in the image below. After making these changes, click the Save button located in the top right corner.
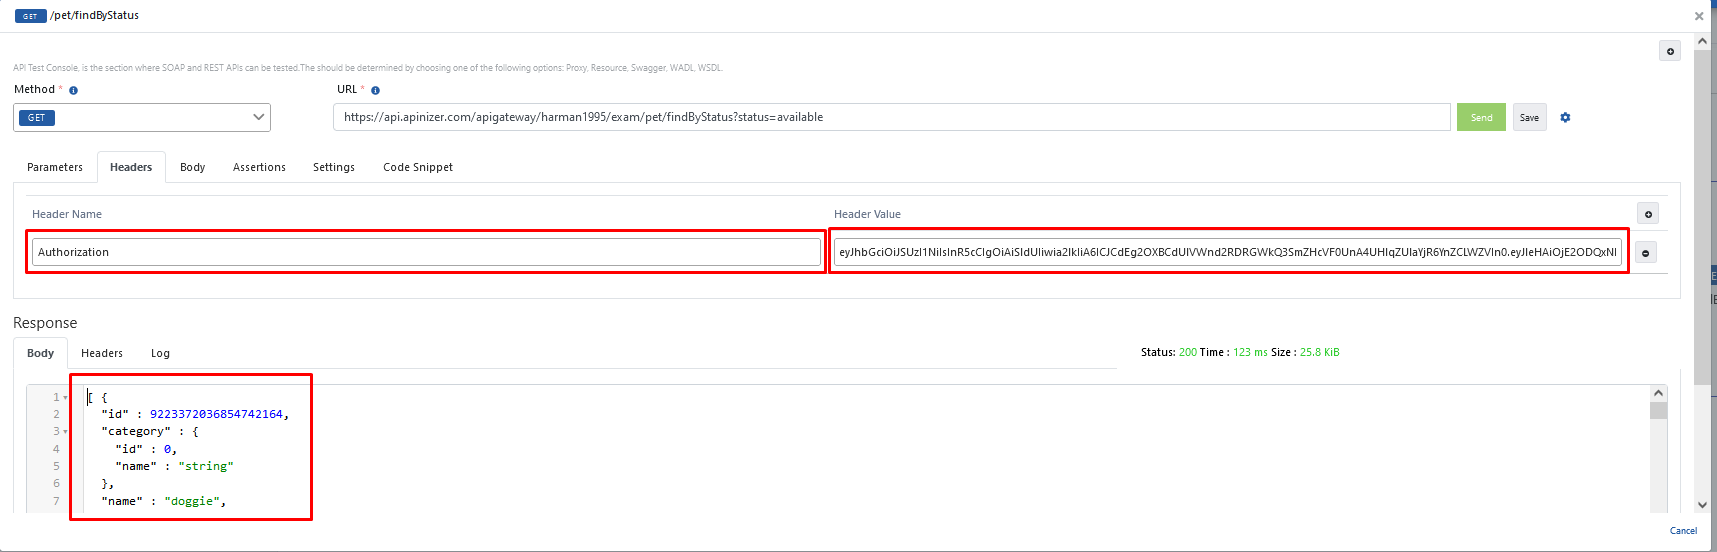
4) Testing the API Proxy
Select the proxy named Swagger Petstore.
Select the endpoint named /pet/findByStatus under the Develop tab.
Click on the Test Endpoint expression to test this endpoint.
Enter the desired status value as pending in the URL, and when the Send button is pressed, it is seen that the returned response is an error message.
Place the Authorization header in the Header and use the token information produced from Keycloak or Apinizer here.
When you click the Send button, the answer received is the expression in the rectangle below on the image.
If an inappropriate token value is used, an error will be received.