Application of JSON Transformation and Script Policy on Created Mock API
In this scenario, the application of JSON Transformation and Script policies to a Mock API created on Apinizer will be tested.
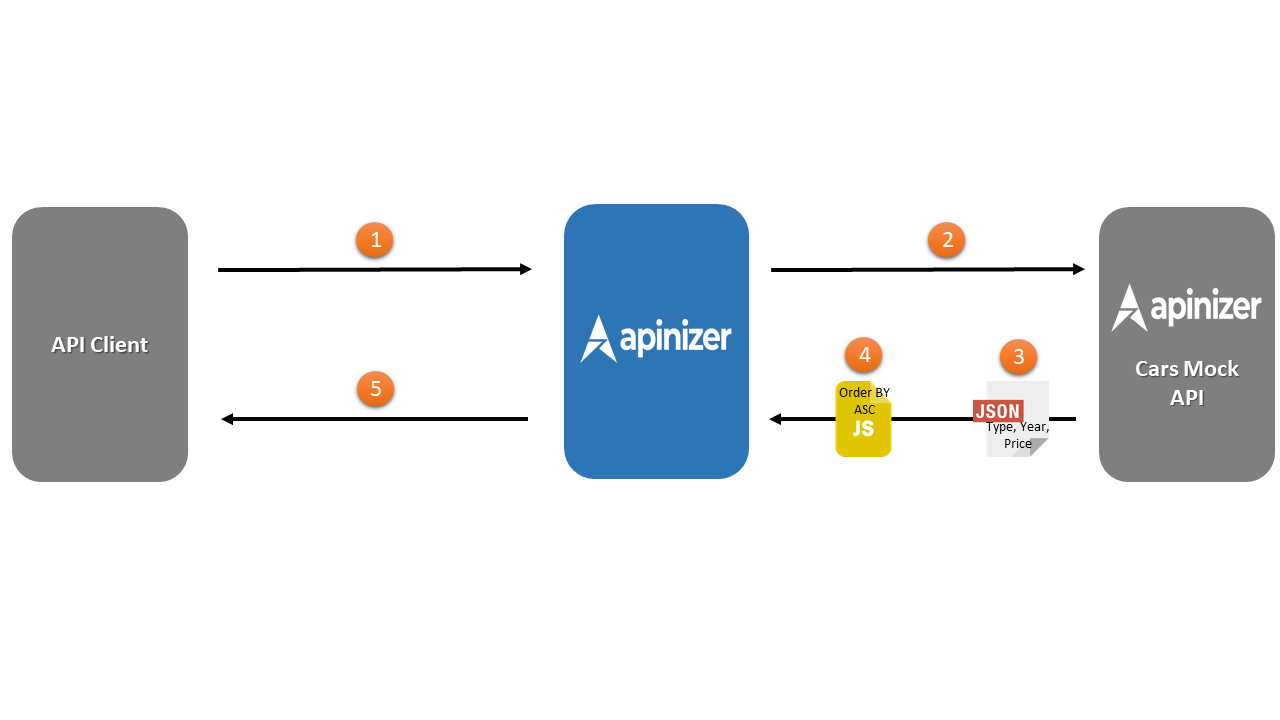
The numbering in the diagram below corresponds to the order of operations.
- API Client makes a request to Apinizer.
- Apinizer makes a request to Cars Mock API.
- The tip, yıl, fiyat keys in the response returned from Cars Mock API are converted to type, year, price key expressions by applying the JSON Transformation policy and transmitted to Apinizer.
- The operation of the Script policy is optional. Because this policy works if there is any Order By parameter in the request coming from the API Client.
- Response is given from Apinizer to API Client.
Creating Mock API
First, the design of the Mock API to be requested is performed.
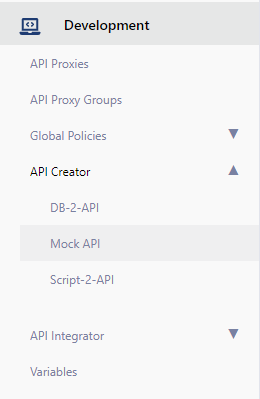
For this, the Mock API option found in the API Creator menu under the Development menu is selected.
Since no Mock API has been created before, the text No records found appears on the page.
Click the Create button in the top right corner and start creating Mock API.

If the expressions on this screen are examined one by one,
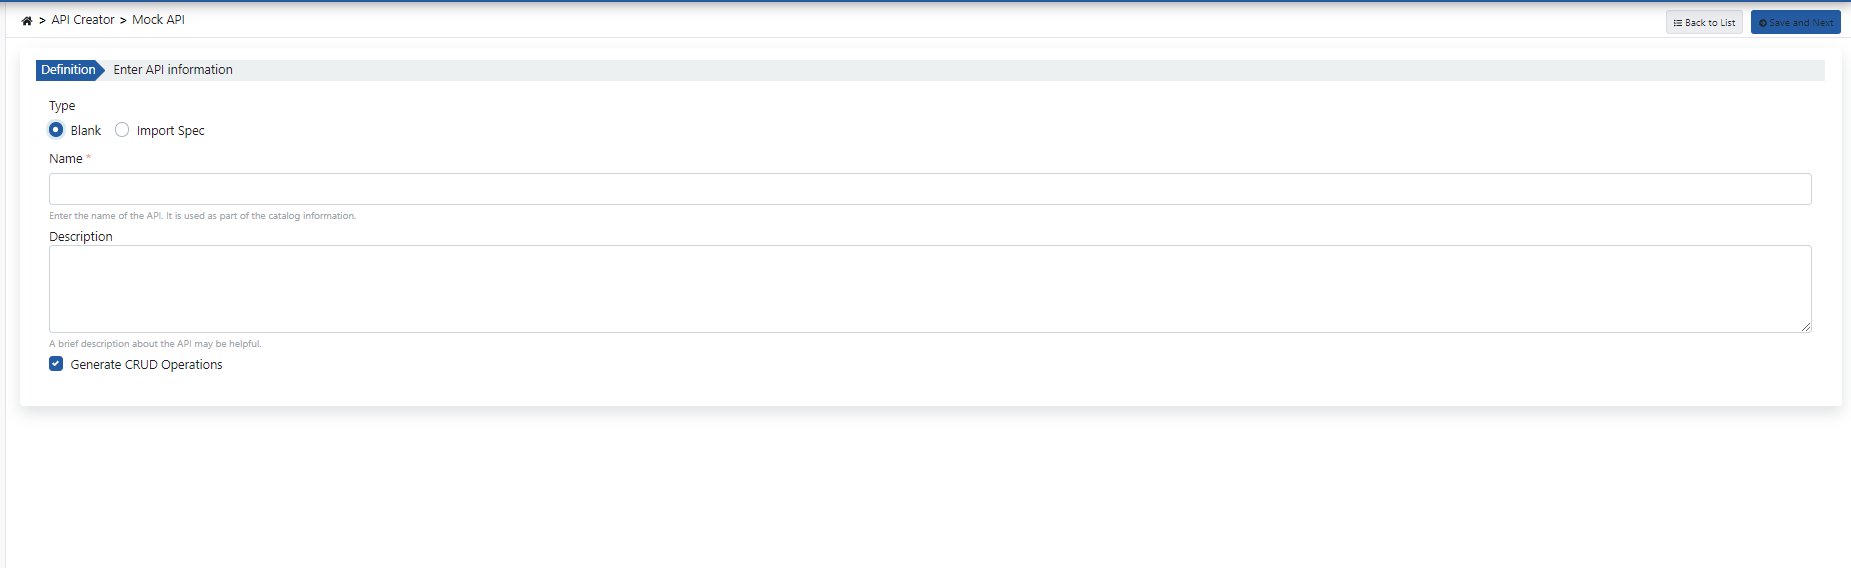
- There are two different options for creating Mock API.
- When the Blank expression is selected, Name and Description expressions are present.
- The API's name is determined with the Name field.
- Descriptions for this API can be written with the Description expression.
- With the Generate Crud Operations expression, it is specified that GET, POST, DELETE, PUT operations will come ready in the Mock API to be created.
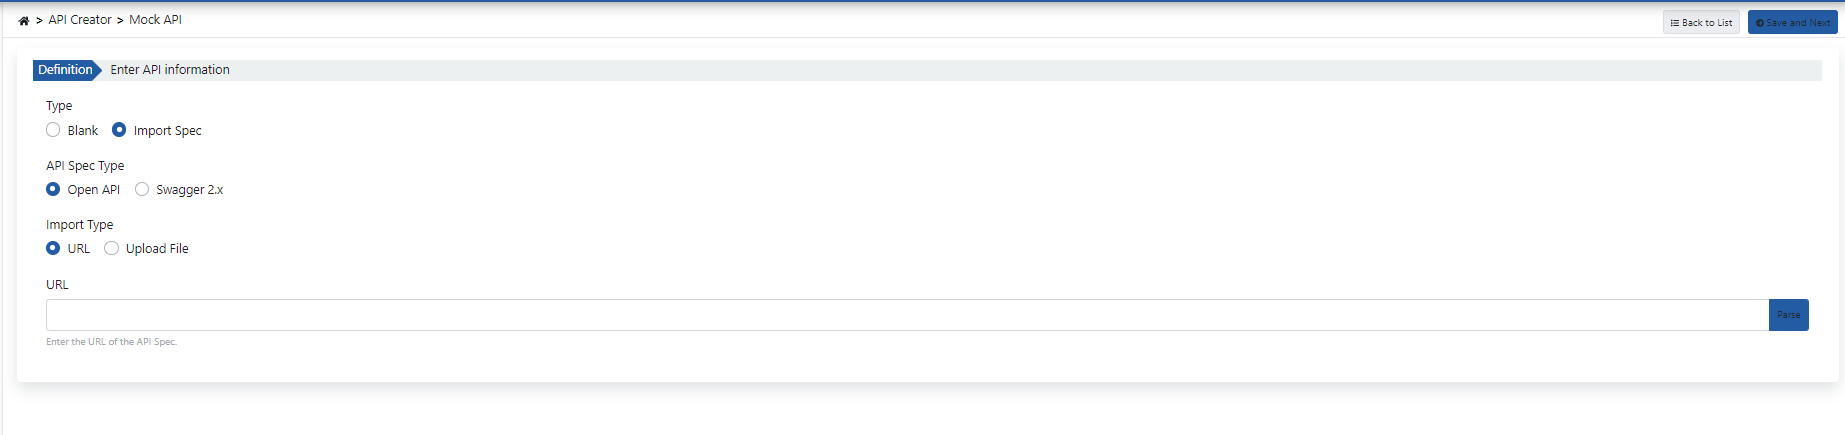
- If the Import Spec option is selected, the page will be created as in the image below.
- With this expression, an existing API can be included in Apinizer.
- The options under the API Spec Type expression specify what type the API to be added is.
- Import Type specifies how the addition operation will be performed.
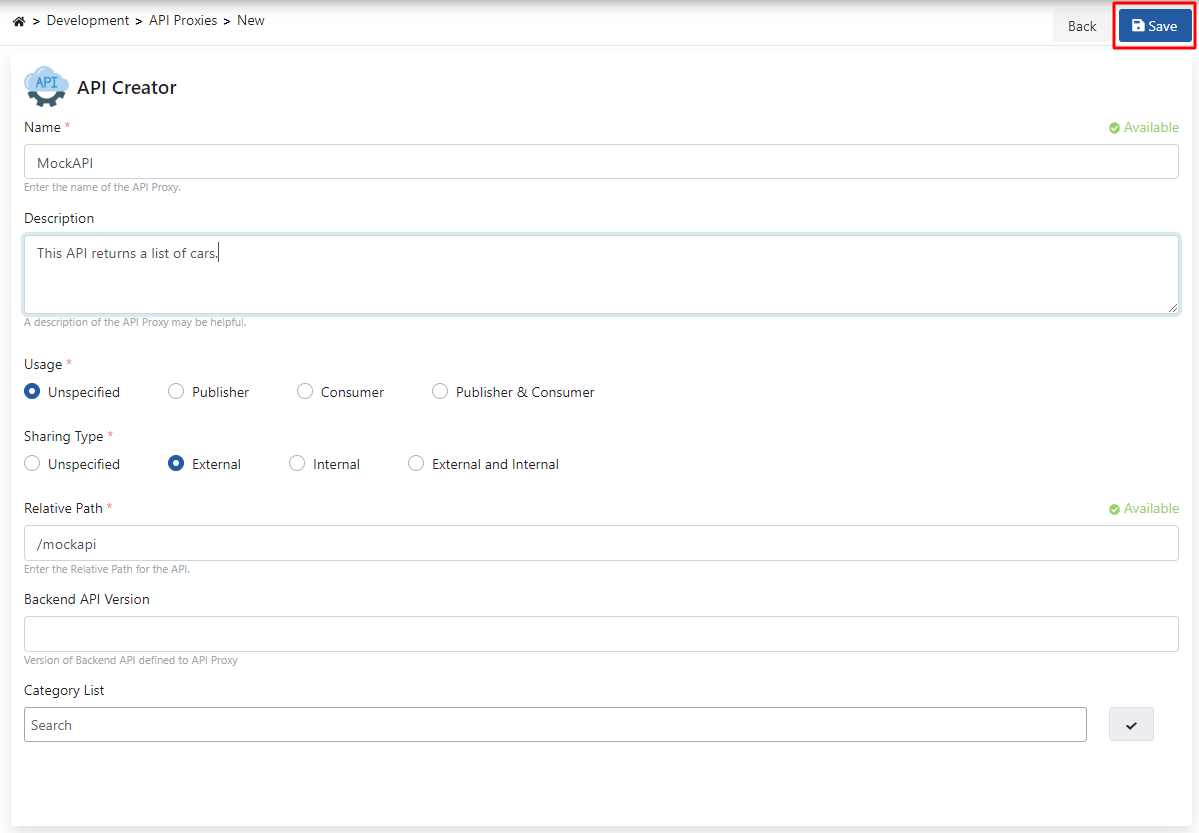
In this scenario, an empty Mock API will be created, so the "Blank" expression is selected and the relevant fields are filled as shown in the image.
Click the Save and Next button to save the operation and proceed to the next step.
If the expressions on this screen are examined one by one,
- The name and description information belonging to the API is seen in the Definition - API Information field.
- In the API Endpoints -Endpoints of the API field, the endpoints that the Mock API has are located.
- A new endpoint can be added with the Add button found in this field, or changes can be made on existing endpoints by selecting them.
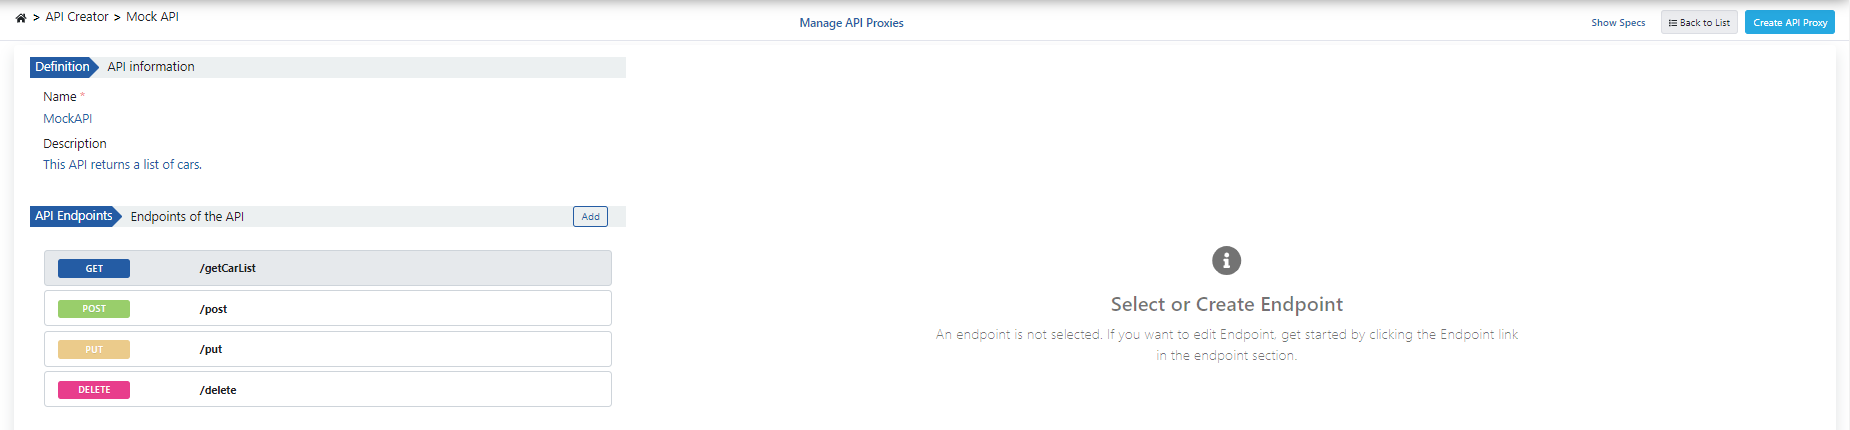
In this scenario, tests will be performed through an endpoint named "/getCarList" of type "GET".
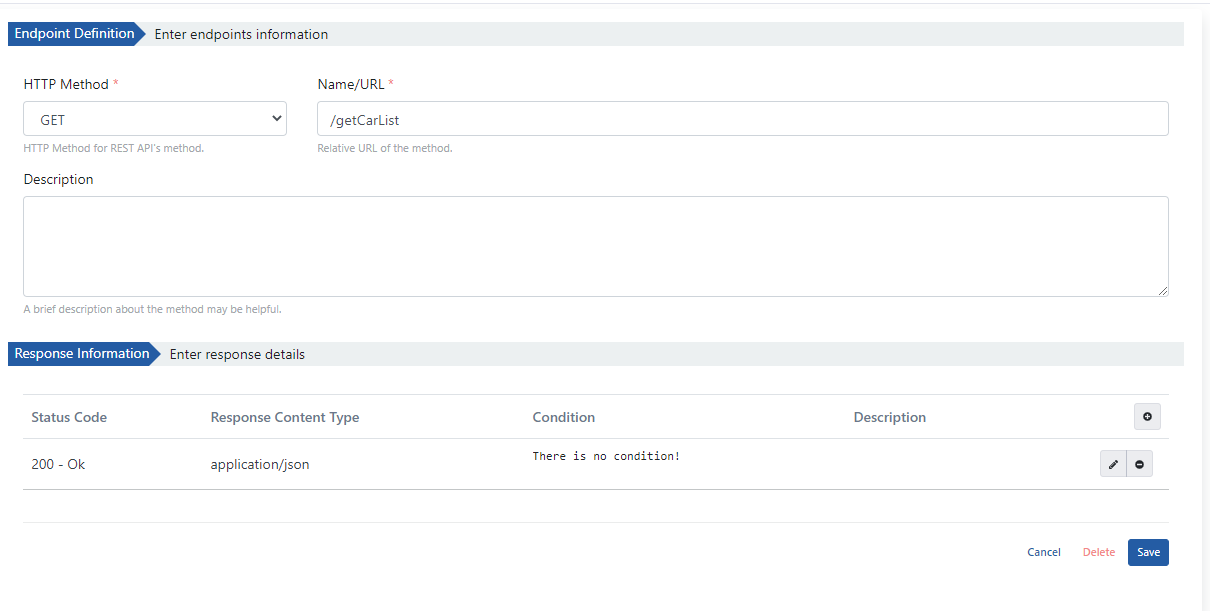
If the fields on the page that will appear after selecting the relevant endpoint are examined;
- The type of endpoint to be created is determined with the HTTP Method field.
- The endpoint's name is specified in the field right next to it.
- A description can be added to this endpoint with the Description expression.
- The responses to be received when a request is made are determined with the Response Information - Enter Response Details field.
- New responses can also be created with the button containing "+" in this field.
- In this scenario, a response design that only returns "200" response will be performed.
- The button containing a pencil icon enables editing operations of the relevant response to be returned.
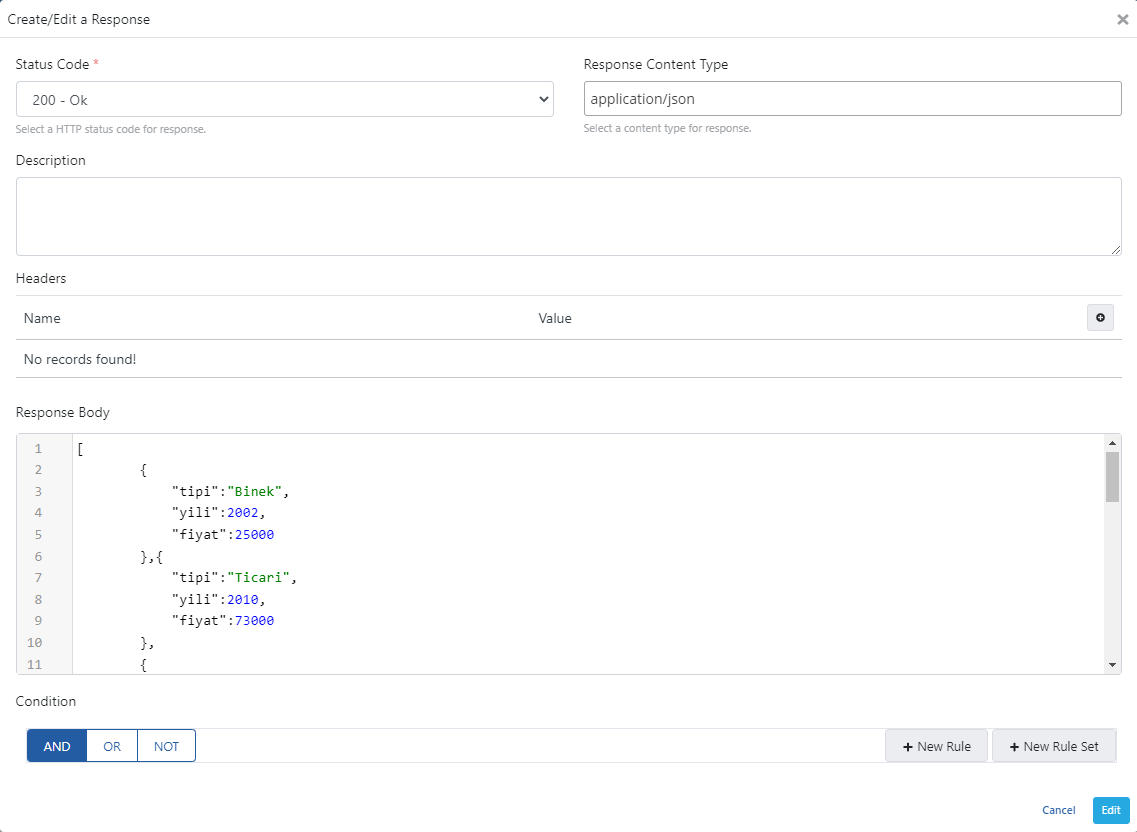
If the expressions on this screen are examined one by one,
- The response to be received when making a request to the endpoint is specified in Response Body.
- A list with type, year, and price is found in this field.
- The type of response to be returned is determined with the Status Code field, and the type of content to be returned is determined with the Response Content Type field.
- If a Headers parameter will be sent in the response, it is specified in the Headers field.
- If a condition is desired to be created in this response, a rule definition can be made from the Condition field.
- After these changes, click the Edit button to save the edits.
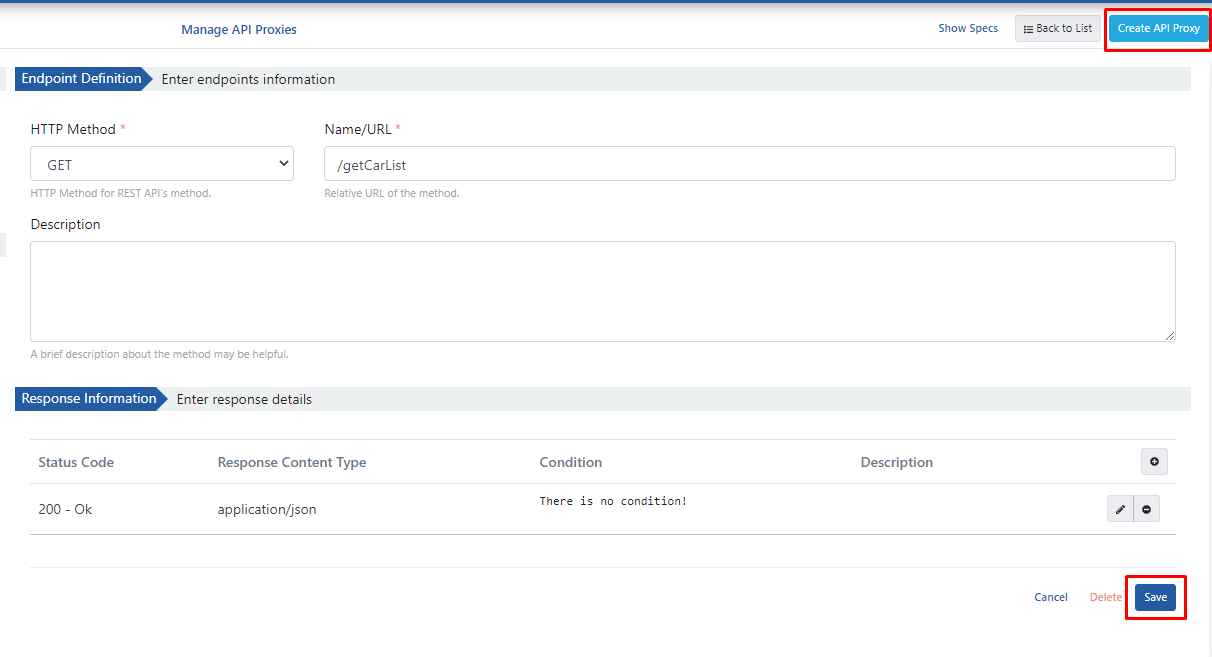
Click the Save button in the bottom right corner to save the changes.
An API Proxy is also created from Mock API with the Create API Proxy button in the top right corner.
Creating API Proxy from Mock API
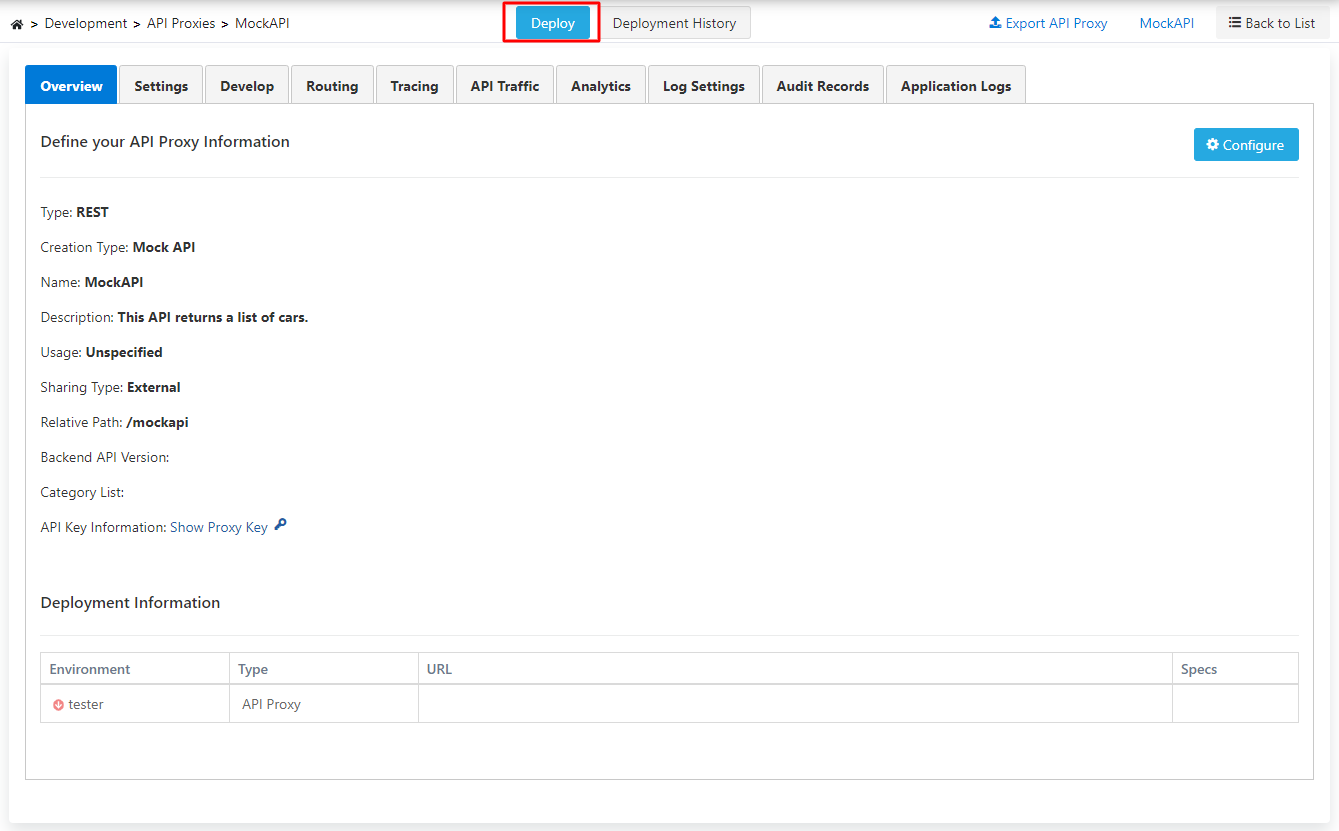
The proxy's usage and category are determined.
A suitable Relative Path is given to the proxy and the Save button in the top right corner is clicked.
Click the Deploy button and the proxy is deployed.
The /getCarList endpoint under the Develop menu is selected and the Test Endpoint button is clicked.
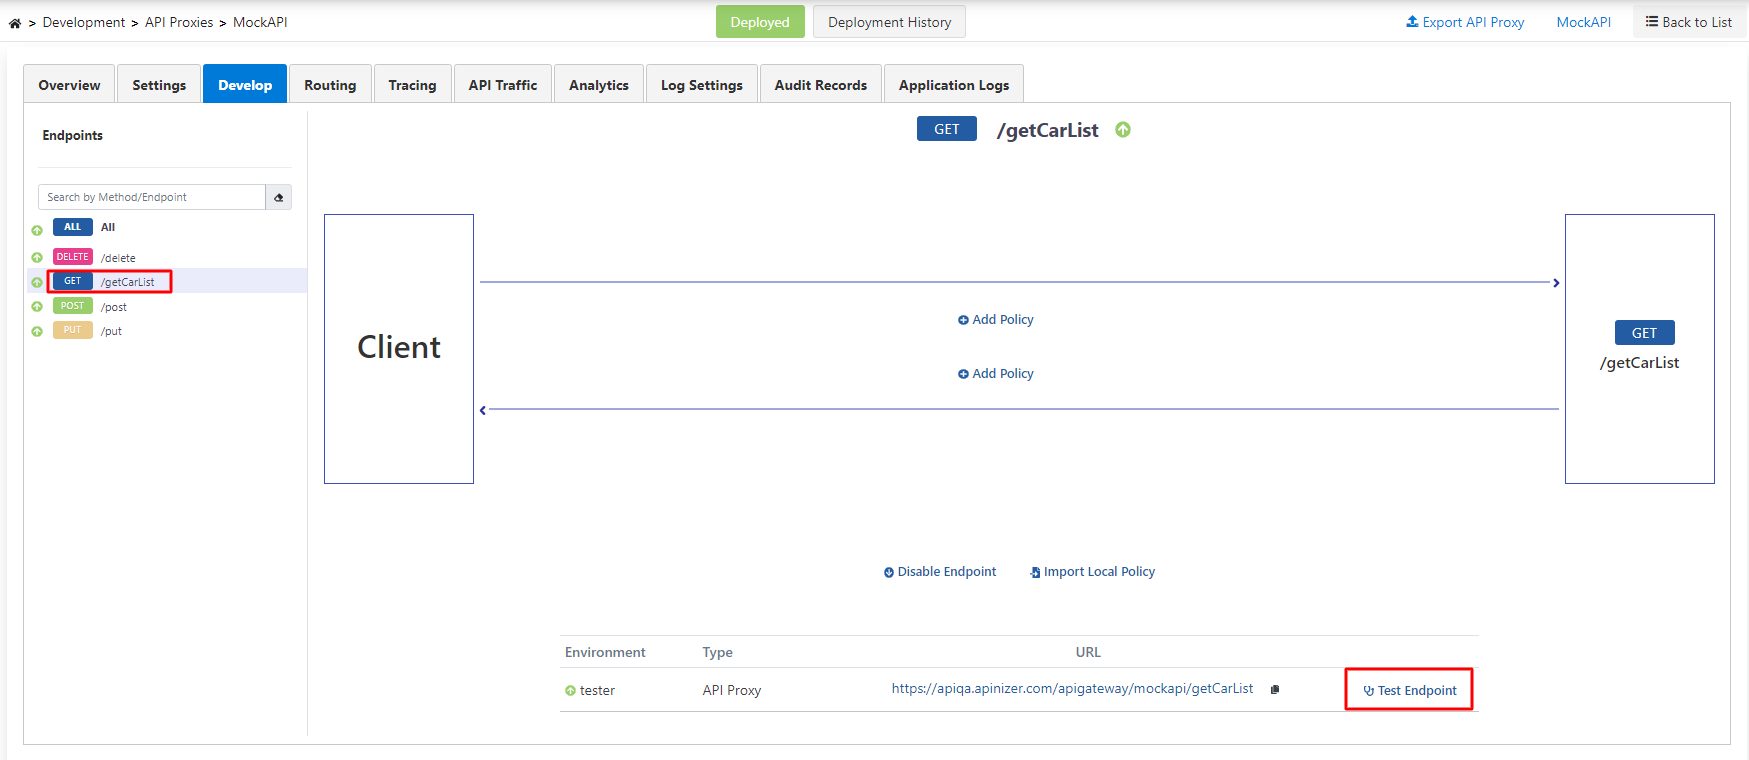
In the first test to be performed, no policy application will be made in any way.
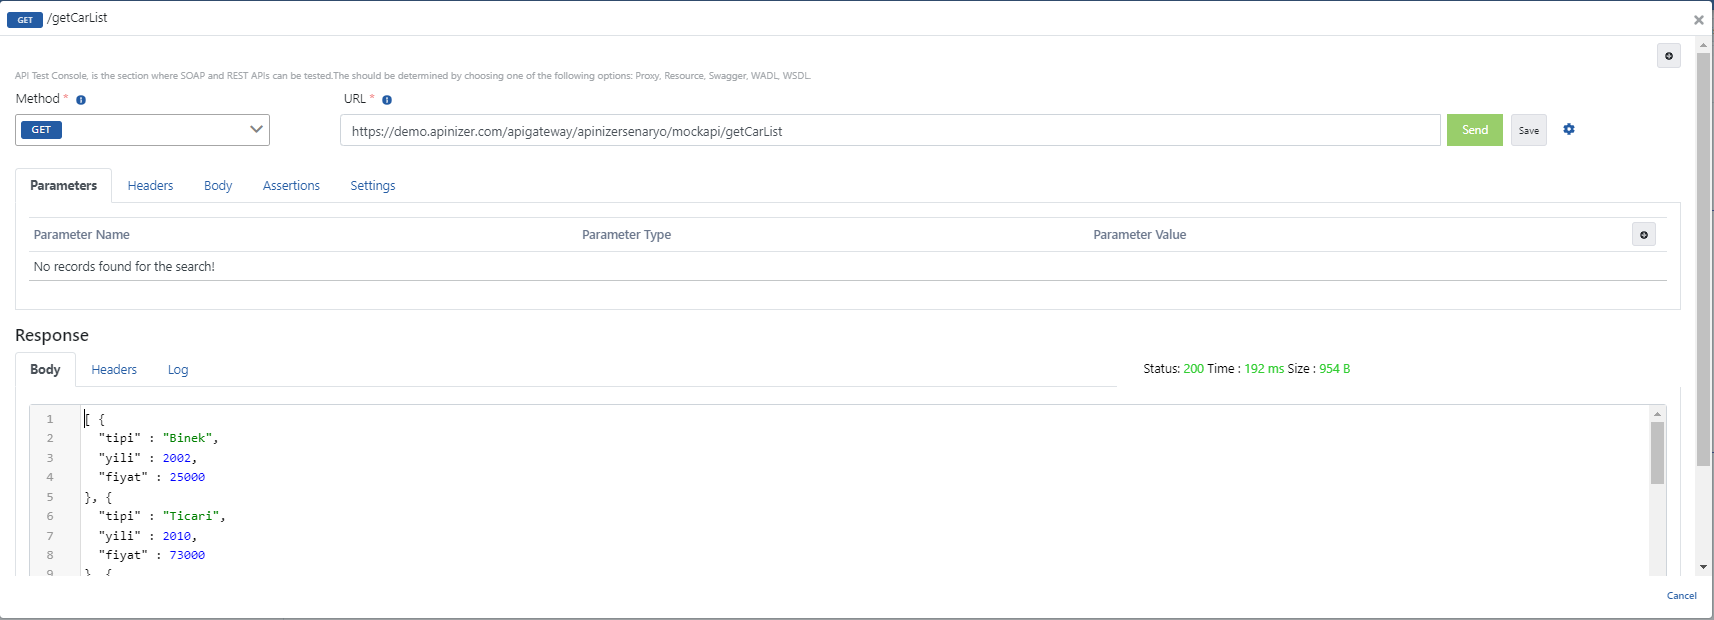
When a request is made to the address in the URL field, JSON data in the Response field is seen as a response.
If the returned response is examined, it returns a list containing "tip", "yil", and "fiyat" key expressions.
Adding JSON Transformation Policy
A policy must be added to enable the key expressions in the scenario to change.
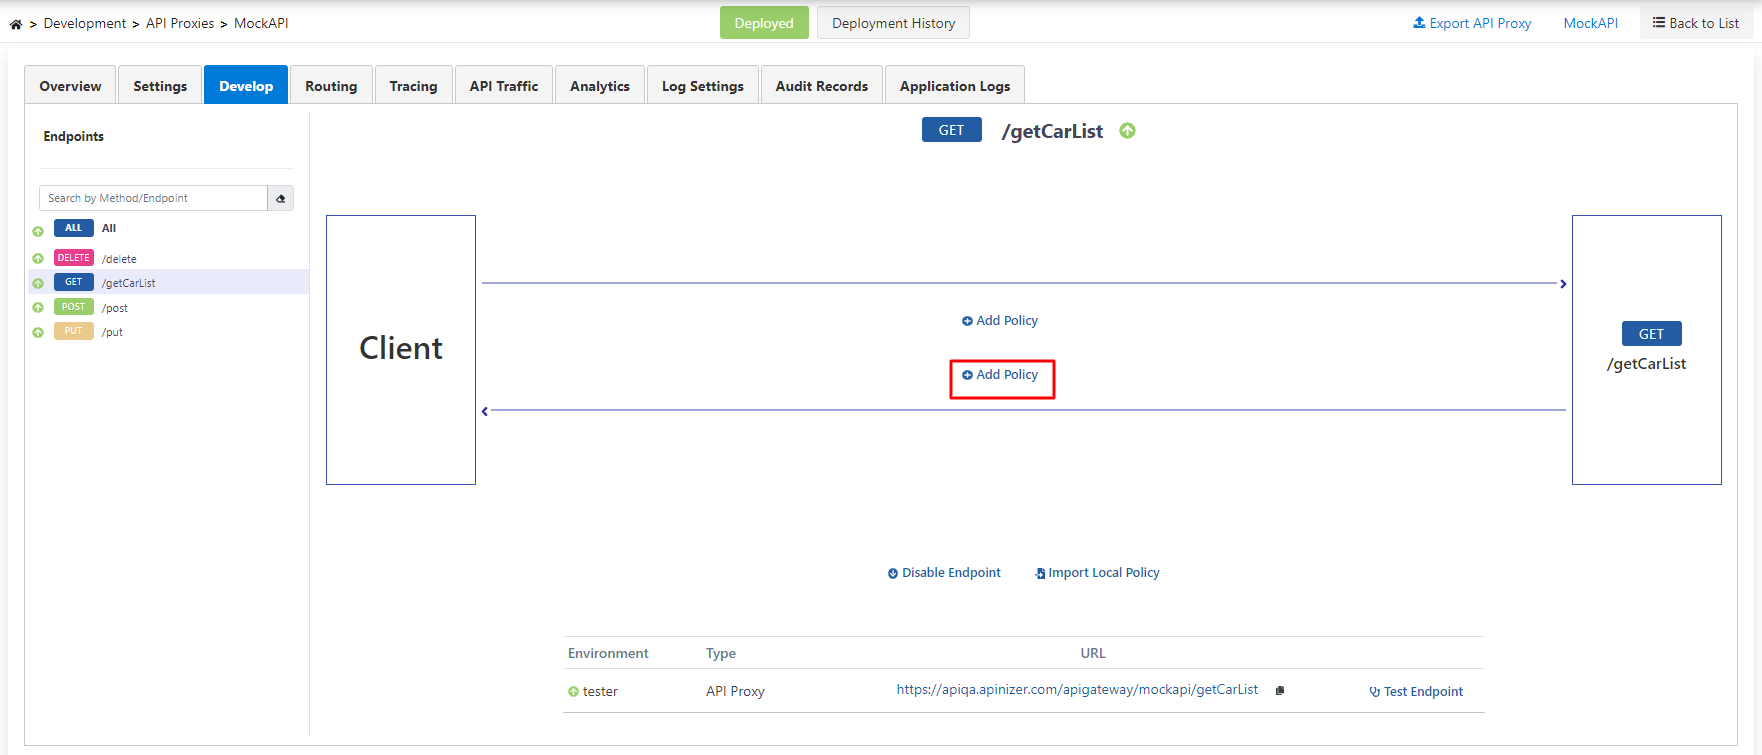
This policy will be in the field that will go as a response from the API to the Client.
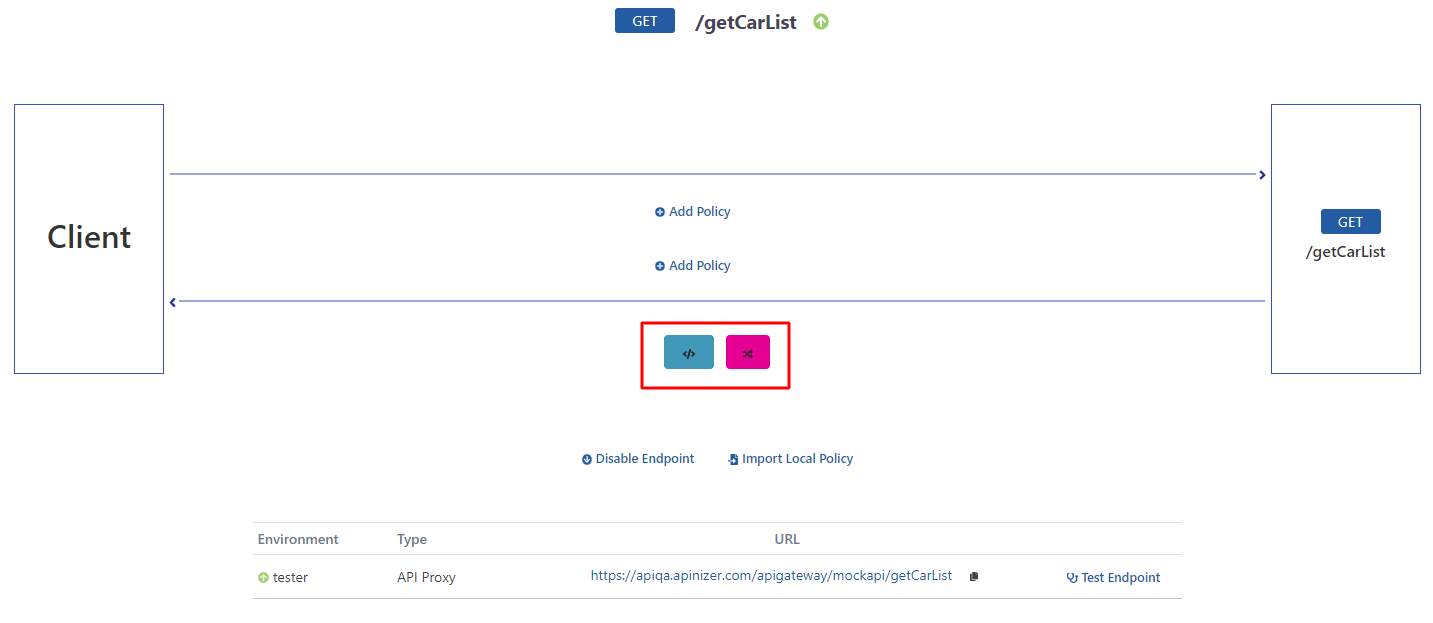
Click the Add Policy expression in the field seen in the image below.
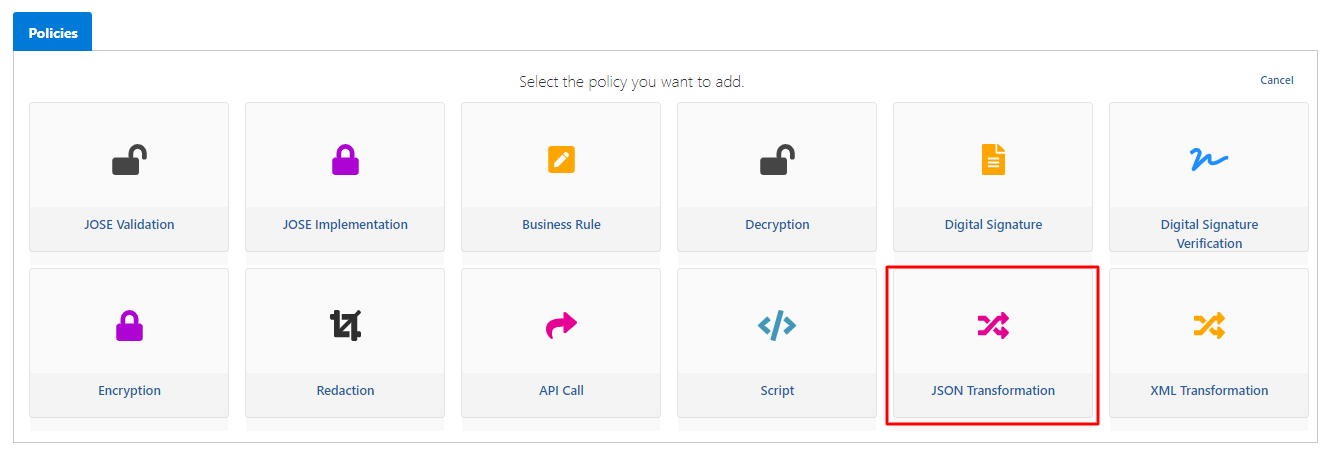
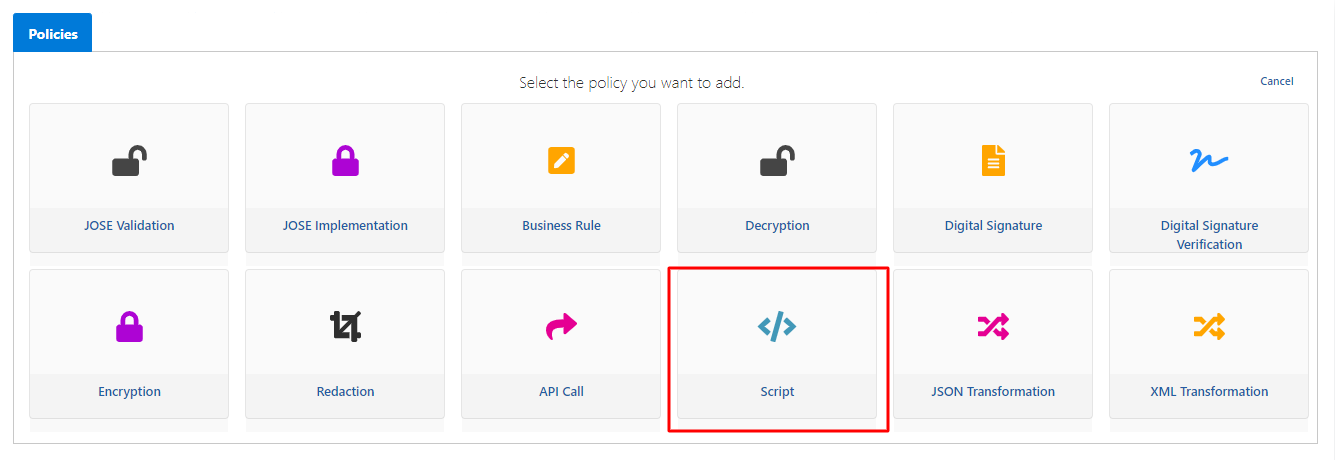
On the opened screen, the JSON Transformation policy marked in the image below is selected.
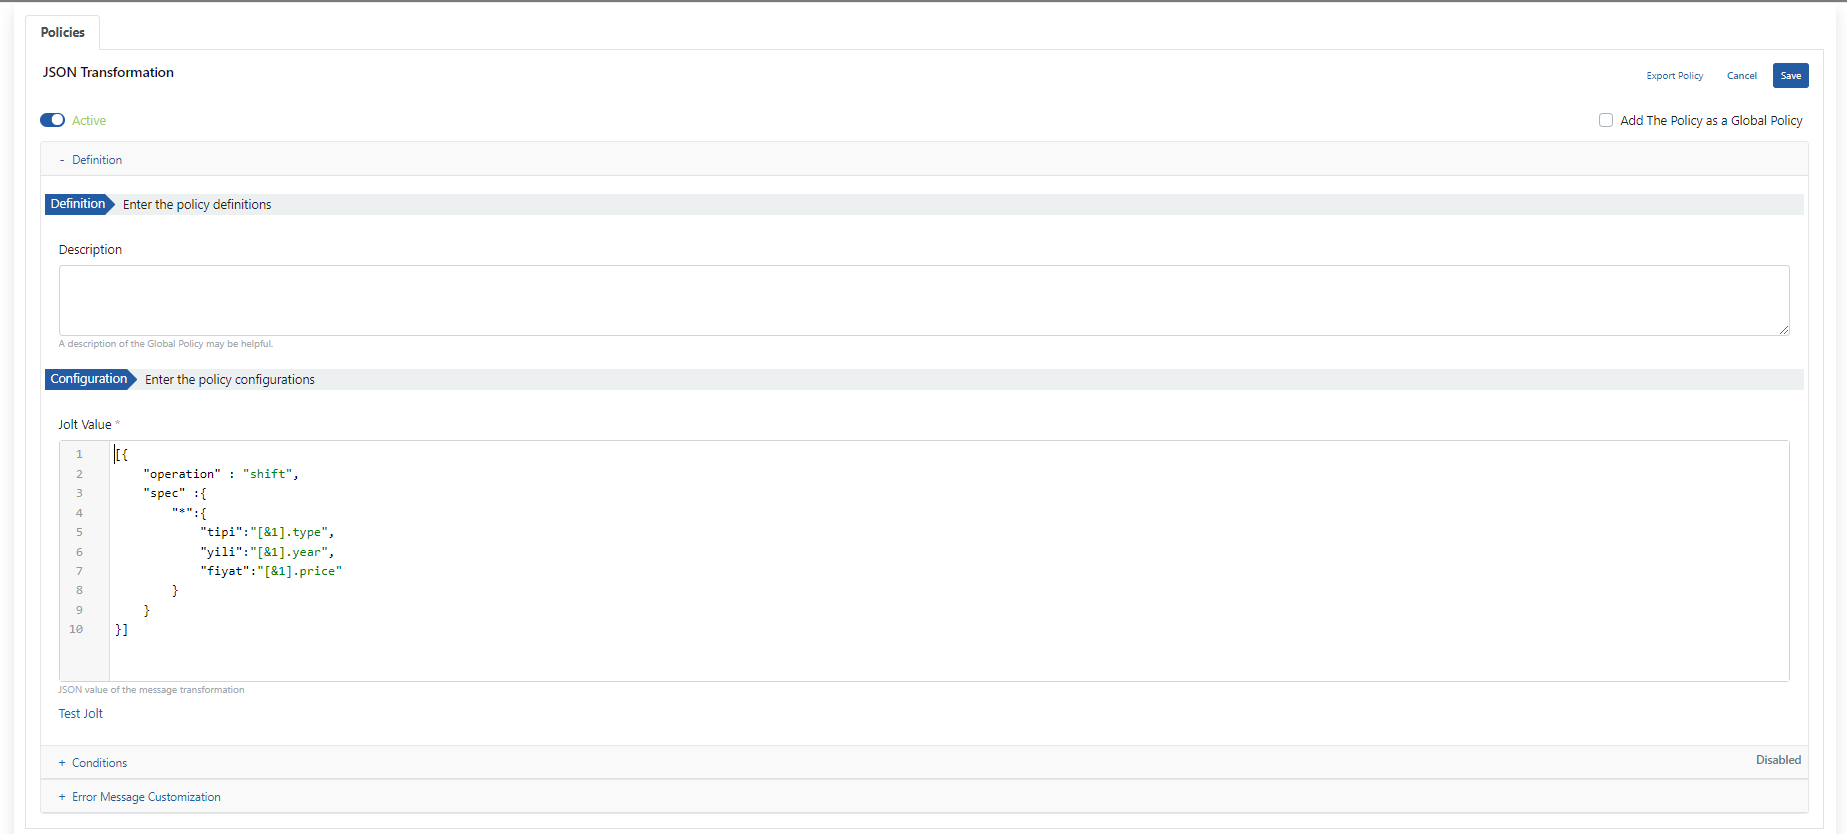
If the expressions on this screen are examined;
- A description can be added to the policy to be used with the Description field.
- The Jolt Value required for the message to be changed is written with the Configuration - Enter the policy configurations field.
- The written configuration is tested with the Test Jolt expression.
- The created policy is saved by clicking the Save button.
- Click the Redeploy button for the changes to take effect.
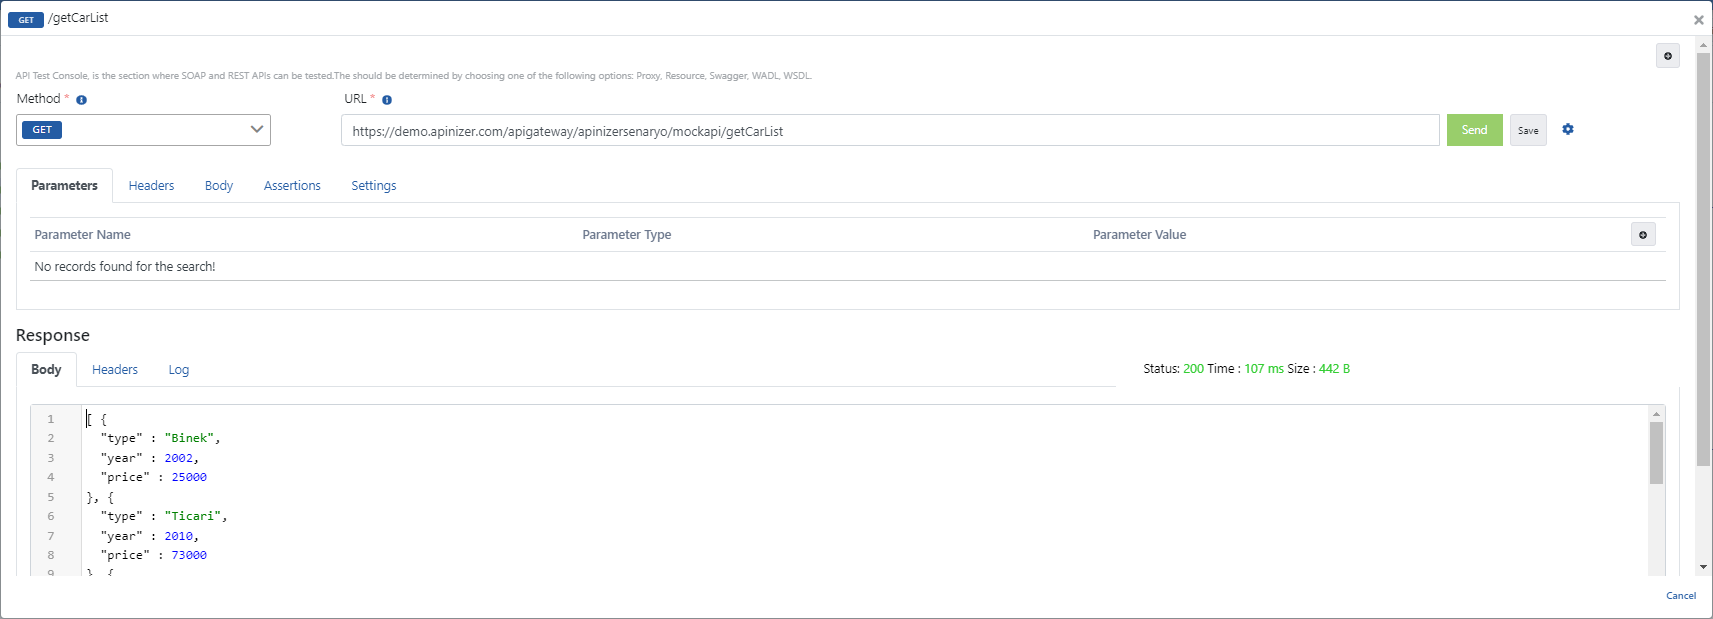
- Proceed to testing the selected endpoint.
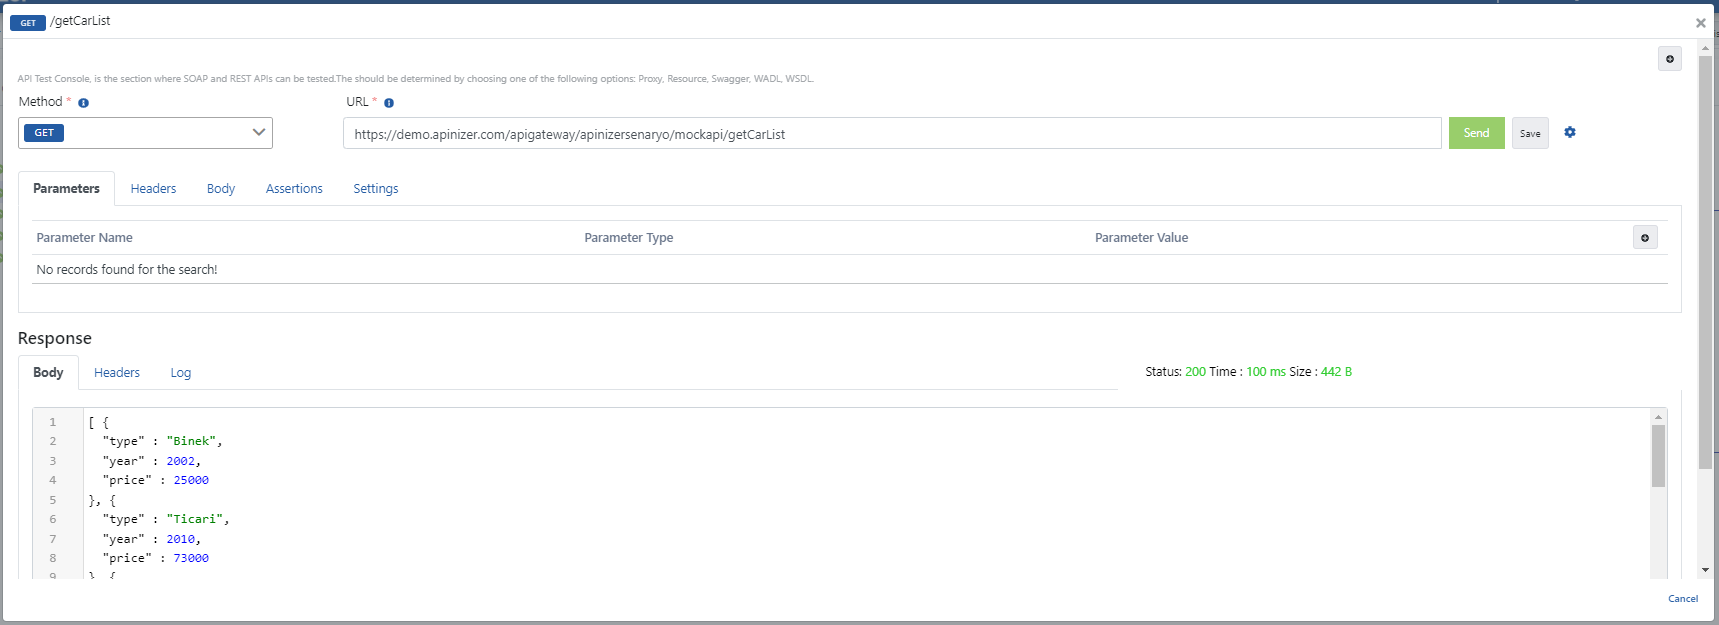
As seen in the image below, when a request is made to the specified endpoint, it is seen that the key expressions in the response returning from Mock API have changed.
Adding Script Policy
Next is the execution of the script that will sort according to the "Order By" parameter value to be sent from the client.
For this, the Script policy must be added to the field where the response sent from Mock API to the client is located.
Click the Add Policy expression and select the Script policy from here.
If the expressions on this screen are examined one by one,
- The programming language with which the Script to be created will be written is selected with the Script Language field.
- The Script Body field contains both the field where the script will be written and ready functions that facilitate use when writing scripts.
- In this scenario, the function named ResponseBodyTextToClient will be used.
- To get information about other ready functions, you can click this link.
- After writing the script to be used, click the Save button and the policy is saved.

After the last additions on the proxy, it is Redeployed.
First, the JSON Transformation policy must be run and then the Script policy must be run.
For this, the icon belonging to the JSON Transformation policy must be moved to the end. The usage desired to be created is shown in the image below.
Testing the API Proxy
Click the Test Endpoint expression.
In the first test, no query parameters are sent to the mock API and the answer in the "Response" field is obtained.
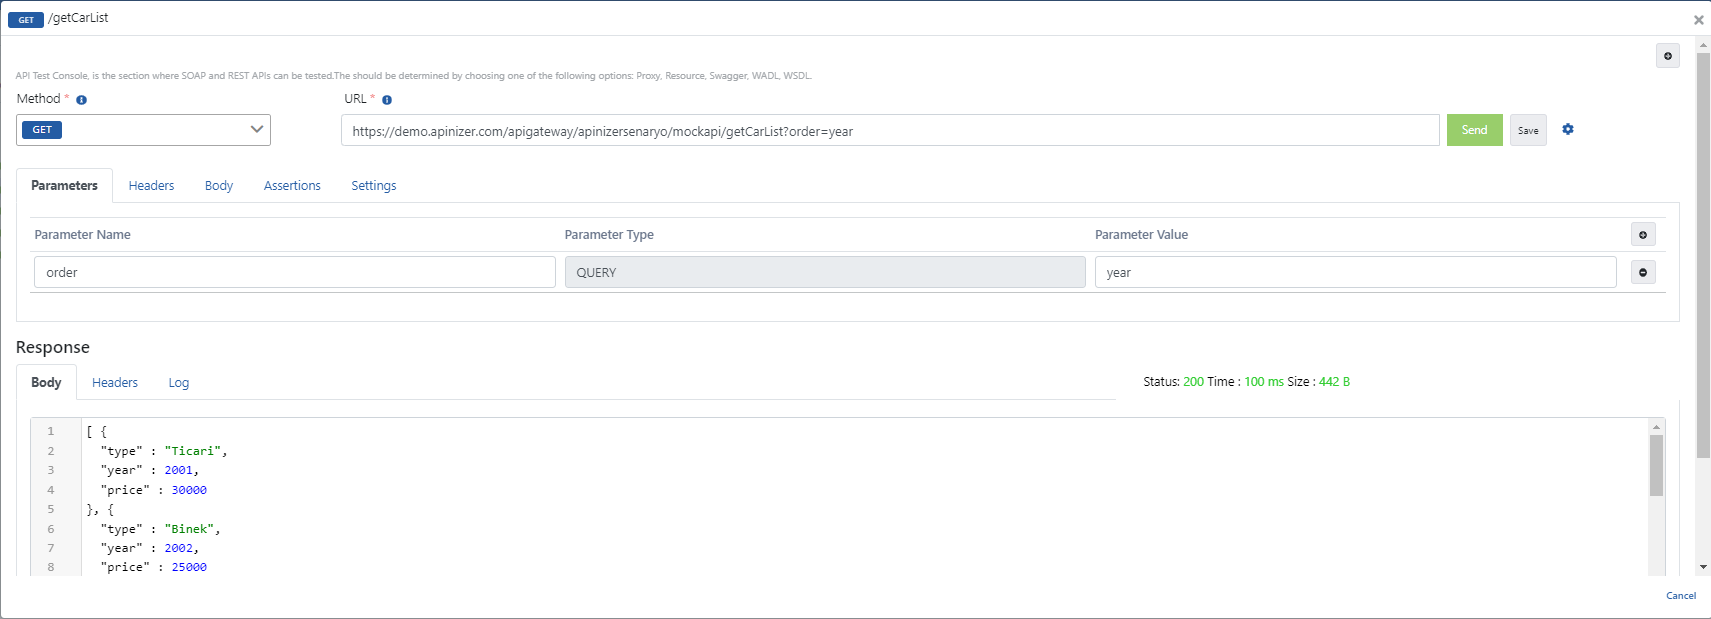
Then, the order=year query parameter is added to sort the response to be received by year.
Finally, the order=price query parameter is added to sort the response to be received by year.
