API Portal Settings
Portal Settings (API Portal Settings) controls the portal's basic settings, behaviors, and content pages. This page manages general settings, email notifications, security settings, features, legal regulations, portal content management (Home Page, Footer, How It Works, Pending Page, Navigation Menu), SEO settings, Login Log (login audit database and connector configuration), and Danger Zone.
Portal Appearance controls visual elements (logo, colors, font).
General Settings
The portal's basic configuration settings are made in this section.
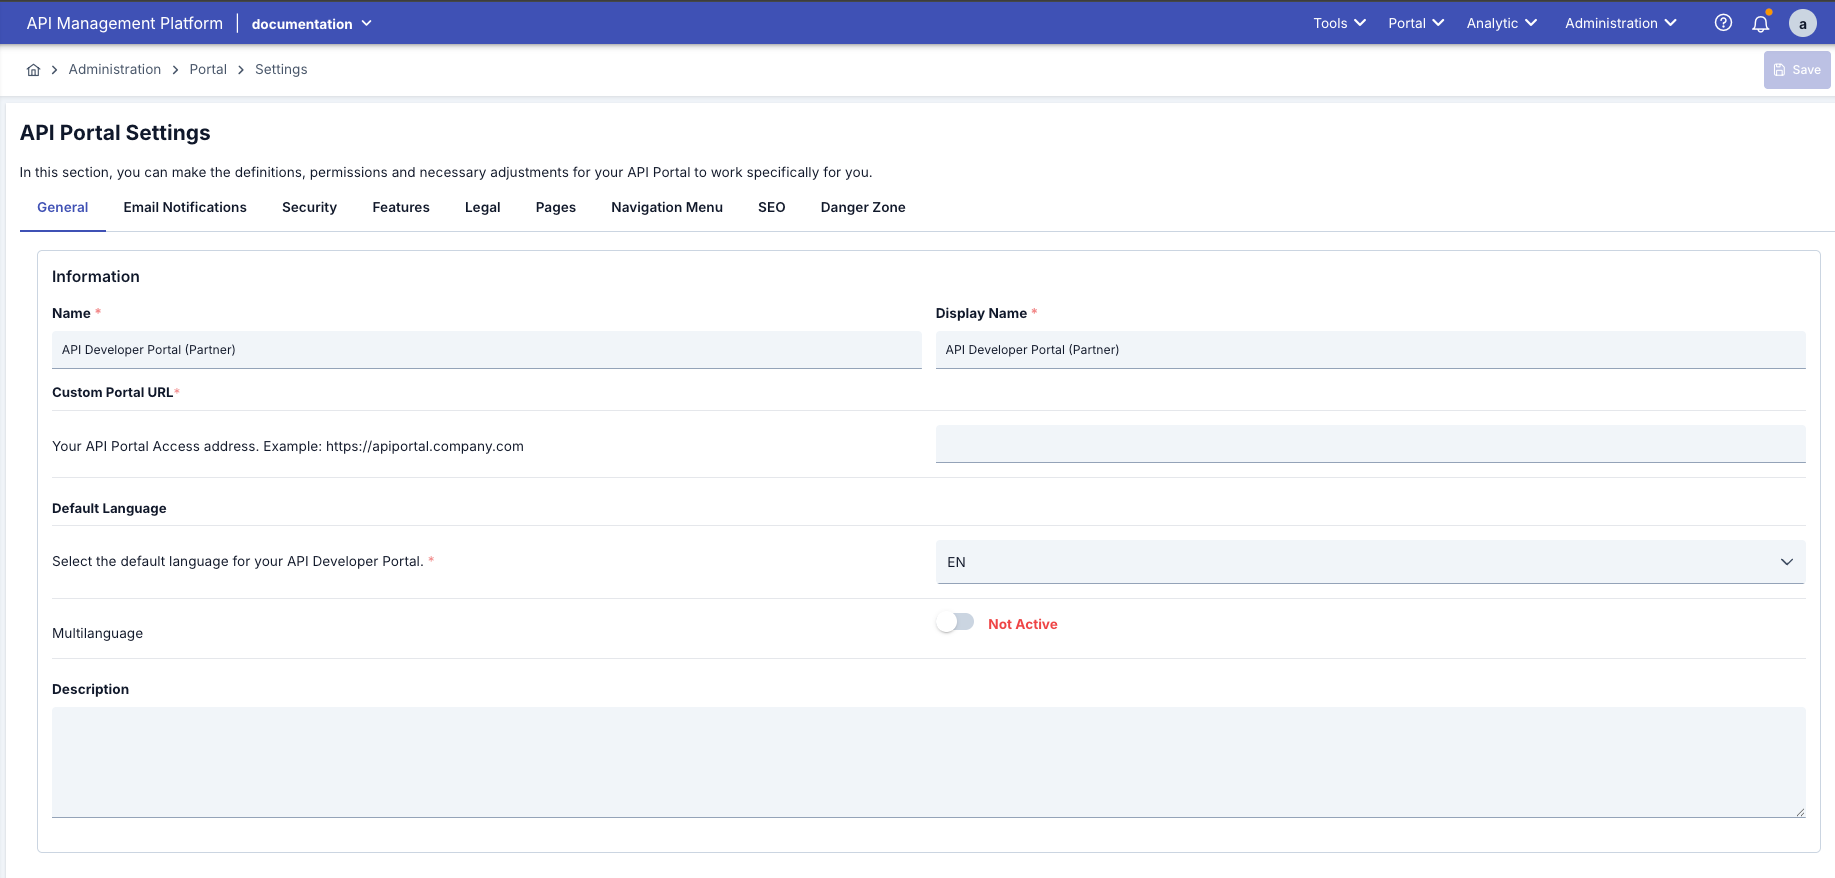
Fields used for Portal Settings configuration are shown in the table below.
| Field | Description | Usage in Portal Interface |
|---|---|---|
| Name | Used to identify API Portal within the system. Used as a technical identifier. Portal is identified in system logs and reports. Required, unique field. Example: <companyName>-developer-portal | Technical identity within portal; not directly visible in interface but this value is included in logs and reports. |
| Display Name | A more understandable and user-friendly name is given to the portal. Used in marketing and communication. Enables users to remember the portal more easily. Optional, user-friendly. Example: <companyName> API Developer Portal | Used as the title visible in portal top menu and email templates. |
| Custom Portal URL | Used as the access address to API Portal. Determined as the base address of all portal URLs in links in email notifications, API key activation links, Corporate domain is used. Must be in full URL format (http:// or https://) Example: https://apiportal.company.com | Base address of all portal links; buttons in registration/approval email, redirects like "Forgot Password" are created according to this URL. |
| Default Language | Shown as the default language when the user first enters API Portal. You can select any language defined in the system (TR, EN, DE, FR, ES, etc.). Portal opens in the selected language and users can switch to their preferred language using the language switcher. | Automatic language selection at portal entry; determines which options will be listed in the language switcher component. |
| Language Options | Determines which languages will be available to users in the portal. You can select as many languages as you want from all languages defined in the system (Turkish, English, German, French, Spanish, etc.). Each language can be enabled separately. Enabled languages appear as a language switcher in the portal and users can switch between these languages. Controls the multi-language feature. | Determines whether content in enabled languages will be shown. When multiple languages are enabled, the portal switches to multilanguage mode. |
| Description | Defined as descriptive information for system administrators. Used to explain the purpose and scope of the portal. A note is left for other administrators. Example: This portal was created for our external partner companies to access our APIs. All APIs requiring customer data access are published here. Portal is configured in accordance with GDPR and ISO 27001 standards. | Administrative note only; not shown in Portal user interface. |
When multiple language options are enabled in Portal settings, the system automatically switches to Multilanguage mode.
If the Multilanguage feature is activated from Portal Settings, Interface and form fields are displayed in all enabled languages, and separate data entry can be made for each language. The system is not limited to Turkish and English only; it supports all languages defined in the system (German, French, Spanish, Italian, etc.).
Important: Content entry is required for each language. If content is not entered for an enabled language, pages may appear empty in that language.
Email Notifications
Automatic emails sent to users from the portal are configured in this tab. Automatic emails are sent for operations such as user registration, approval, rejection, API subscription.
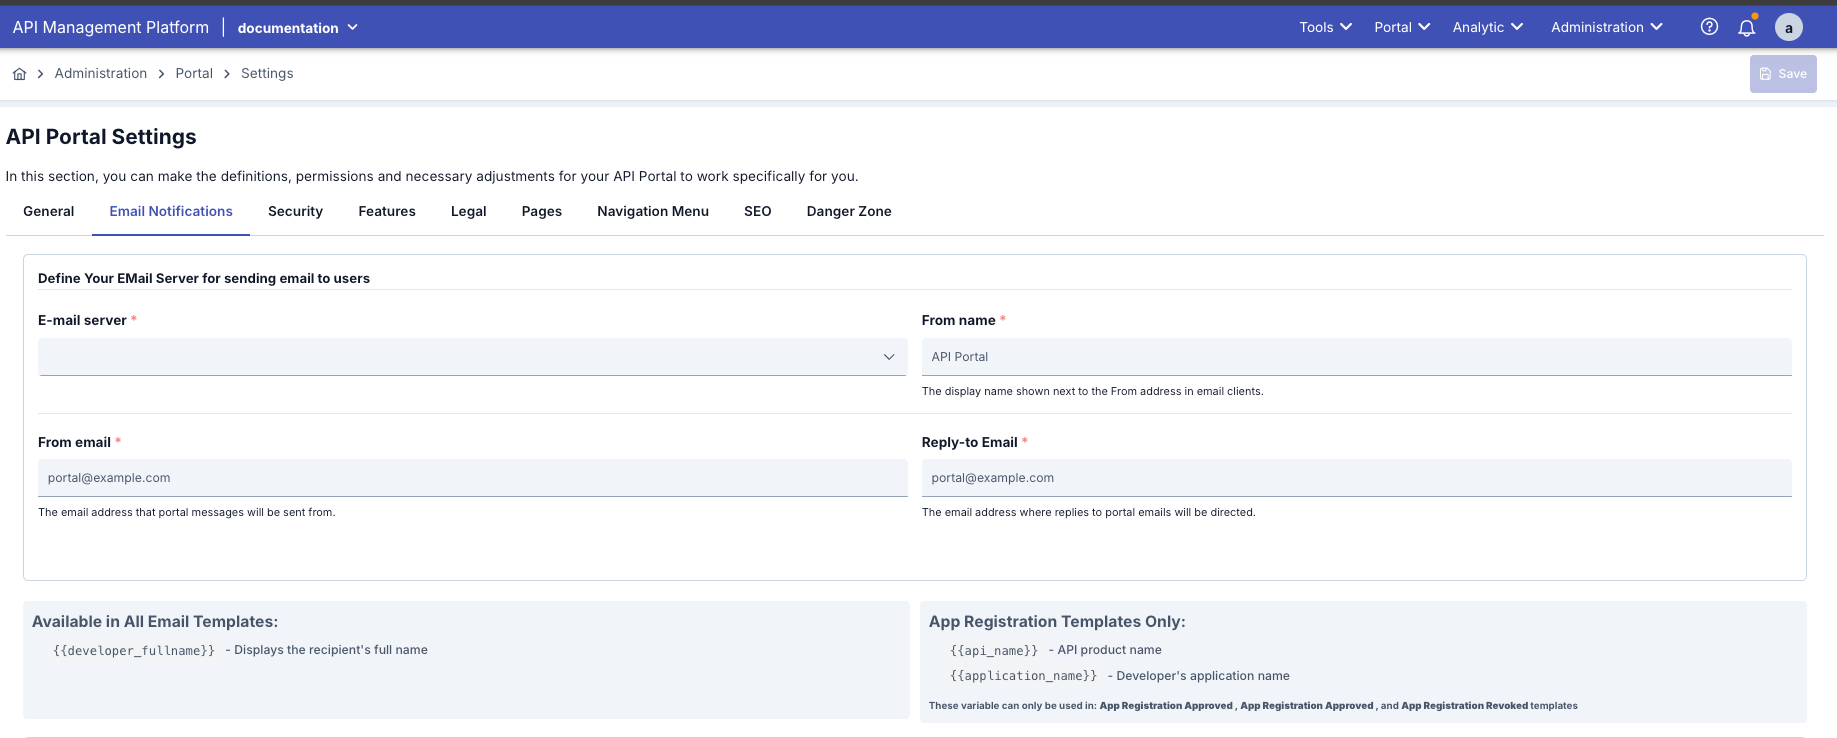
Fields used for Email Settings are shown in the table below.
| Field | Description |
|---|---|
| E-mail server | The address of the email server used by API Portal to send emails. Predefined email server settings are selected. Selection is made from the Connection Config Email list. This setting includes SMTP server information. |
| Display Name | Determines the name with which email messages will be sent. Users understand where the email came from by seeing this name |
| Sender Email | Specifies the address from which emails sent from API Portal will be sent. For example, "no-reply@apinizer.com". Emails are sent from this address. |
| Reply Email | Specifies the address that will be used when the user presses the "Reply" button. Example: "support@acmecorp.com" Must be a real support email. |
Email Templates
There are 8 different email types sent automatically from the portal. Each can be customized separately.
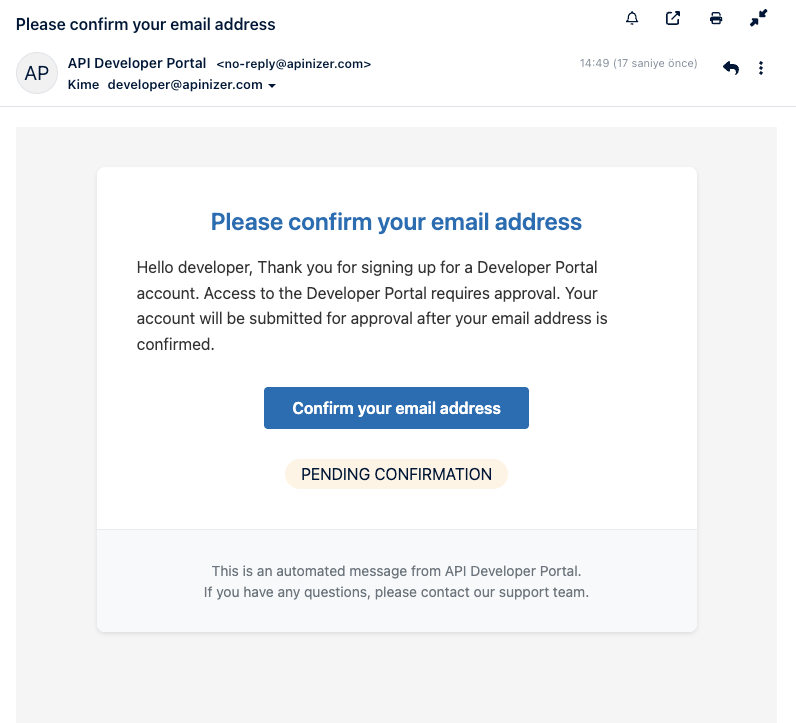
Confirm Your Email Address
When Sent:
- When a new user registers on the portal
- When the user needs to verify their email address
Effect on Portal: The account does not become active until the user clicks the link in this email. Portal login cannot be done without email confirmation (depending on setting).
Email Triggering Steps:
Clicks "Register" button on portal, Fills registration form, Presses "Sign Up" button
"Confirm Email Address" email is automatically sent, Email reaches the address entered by the user, Contains special confirmation link
Subject: Your configured subject, Title: Your configured title, Body: Your configured content, Button: Your configured button text (e.g., "Confirm My Email")
Clicks confirmation link/button in email, Redirected to portal, Email address is verified
[If Auto Approve Account = ACTIVE] Account is automatically approved, Welcome email is sent, User can enter portal
[If Auto Approve Account = PASSIVE] Administrator approval is awaited, "Your account is being reviewed" message is shown, Welcome email is sent after administrator approves
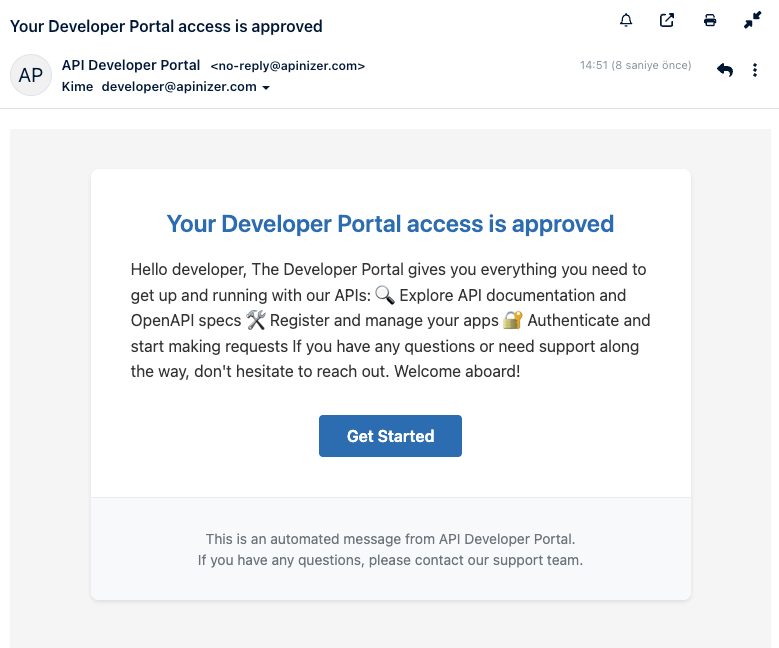
Welcome
When Sent:
- When the user's account is approved
- After manual approval by administrator or in automatic approval situation
Effect on Portal: Notifies the user that their account is active. Tells them they can now log in to the portal.
Email Triggering Steps:
User has clicked the link in "Confirm Email Address" email, Email address has been verified
[SCENARIO 1: Auto Approve Account = ACTIVE] Account is automatically approved, "Welcome" email is sent immediately
[SCENARIO 2: Auto Approve Account = PASSIVE] Administrator receives notification, Administrator enters Manager, Goes to Portal Management → Developer Accounts section, Sees pending user, Clicks [Approve] button, "Welcome" email is sent
Subject: Your configured subject, Title: Your configured title, Body: Your configured content, Button: Your configured button text (e.g., "Go to Portal")
Can now log in to portal, Can review APIs, Can register application
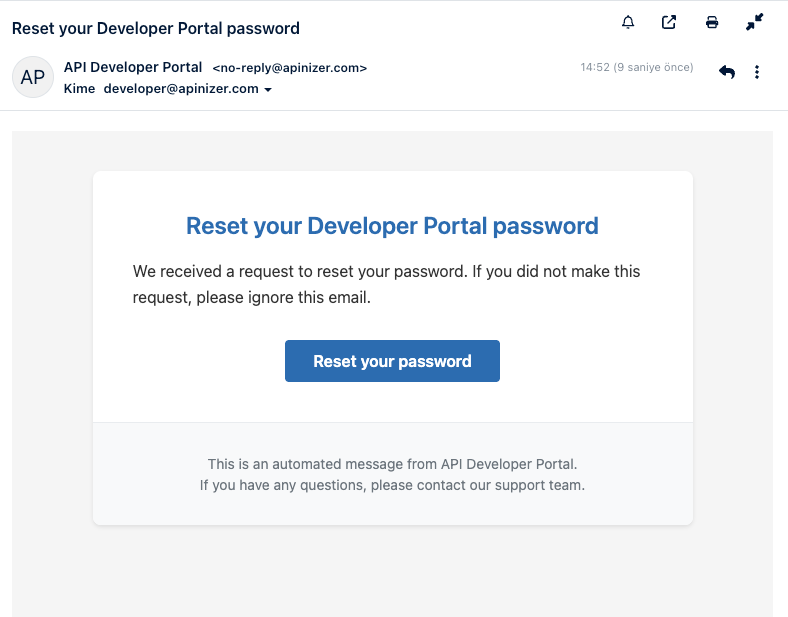
Password Reset
When Sent:
- When user clicks "Forgot Password" button
- When administrator initiates password reset process for user
Effect on Portal: User sets a new password by clicking the link in this email. Link becomes invalid after a certain period (security).
Email Triggering Steps:
Clicks "Forgot Password?" link on portal login page, Enters email address, Presses "Reset Password" button
"Reset Password" email is automatically sent, Email contains special reset link, Link is valid for a certain period (e.g., 24 hours)
Subject: Your configured subject, Title: Your configured title, Body: Your configured content, Button: Your configured button text (e.g., "Reset My Password")
Clicks reset link/button in email, Redirected to password reset page on portal, Enters new password (twice)
New password is saved, "Your password has been successfully updated" message, User can log in with new password
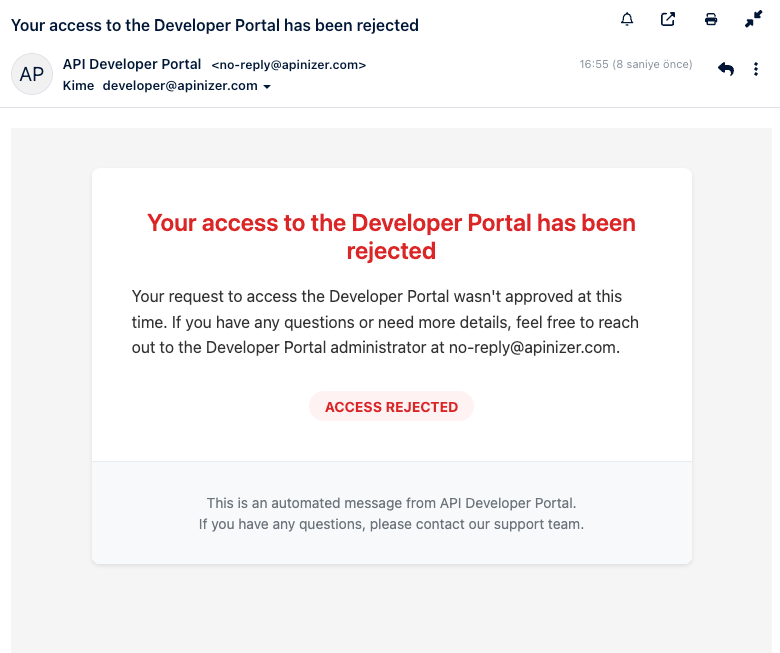
Account Access Rejected
When Sent:
- When administrator rejects user's registration request
- When user is not deemed suitable in manual approval process
Effect on Portal: User cannot log in to portal. Account is not created or is deleted.
Email Triggering Steps:
User has registered on portal, Has verified email address, Waiting for manual approval (Auto Approve Account = PASSIVE)
Administrator enters Manager, Goes to Portal Management → Developer Accounts section, Sees pending users with "Pending Approval" filter, Reviews relevant user
Clicks [Reject] button, Enters rejection reason if desired (optional), Confirms
User account is deactivated or deleted, "Account Access Rejected" email is sent
Subject: Your configured subject, Title: Your configured title, Body: Your configured content
Gets error if tries to log in, Sees "Your account is not active" message
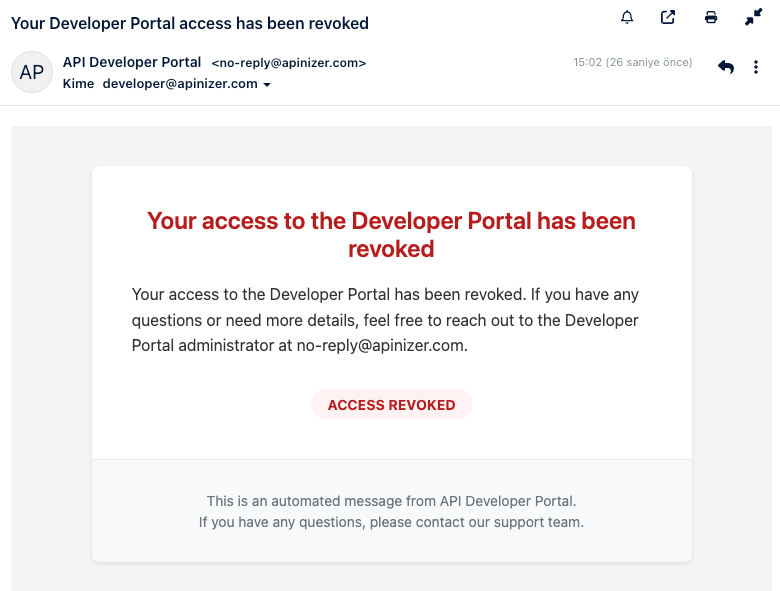
Account Access Cancelled
When Sent:
- When access of a previously active user is cancelled
- When user is disabled by administrator
- In case of security or policy violation
Effect on Portal: User can no longer log in to portal. Existing sessions are closed. API keys are disabled.
Email Triggering Steps:
User was previously approved, Is actively using Portal, Has API access
Security violation is detected, Usage policy is violated, Contract/membership ends, Manual administrator decision
Administrator enters Manager, Goes to Portal Management → Developer Accounts section, Finds relevant user, Selects [Revoke Access], Enters cancellation reason (optional), Confirms
User account is instantly disabled, All active sessions are closed, API keys are deactivated, "Account Access Rejected" email is sent
Subject: Your configured subject, Title: Your configured title, Body: Your configured content
Immediately logged out (if active session exists), Cannot log in again, API calls return 401 Unauthorized, All application registrations become passive
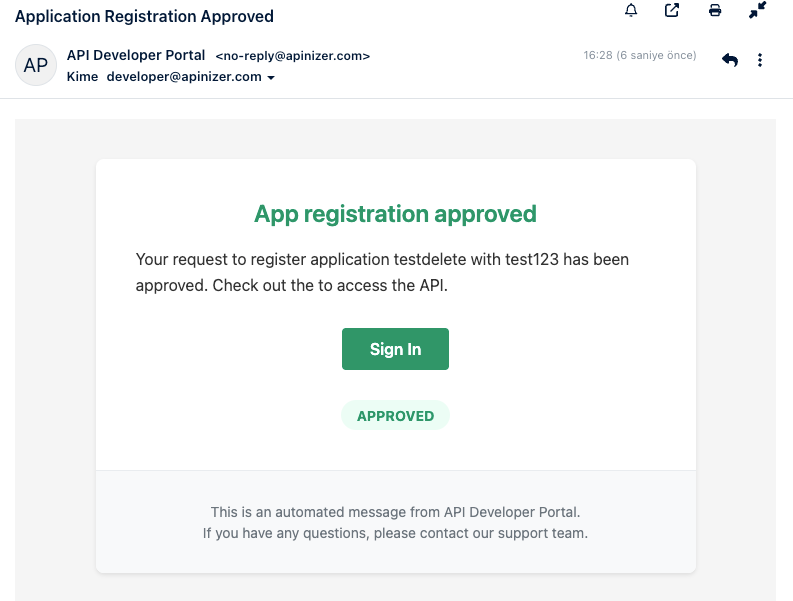
App Registration Approved
When Sent:
- When user's app registration request for an API is approved
- When administrator gives manual approval or in automatic approval situation
Effect on Portal: User can start using the API. API keys become active. User can access API documentation.
Email Triggering Steps:
User logs in to portal, Reviews API catalog, Selects relevant API, Clicks "Subscribe" or "Register App" button
Enters Application Name, Adds Description, Selects Plan (Free, Basic, Premium, etc.), Presses "Submit" button
[SCENARIO 1: Auto Approve API Subscribe = ACTIVE] Registration is automatically approved, API keys are instantly created, "App Registration Approved" email is sent
[SCENARIO 2: Auto Approve API Subscribe = PASSIVE] Administrator receives notification, Administrator enters Manager, Goes to API Management → Subscriptions section, Sees pending requests with "Pending Approval" filter, Reviews relevant request, Clicks [Approve] button, API keys are created, "App Registration Approved" email is sent
Subject: Your configured subject, Title: Your configured title, Body: Your configured content (enriched with variables), Button: Your configured button text (e.g., "API Documentation")
Goes to "My Apps" section in portal, Sees API keys (Client ID, Secret), Reads API documentation, Makes first API call, Tests and takes to production environment
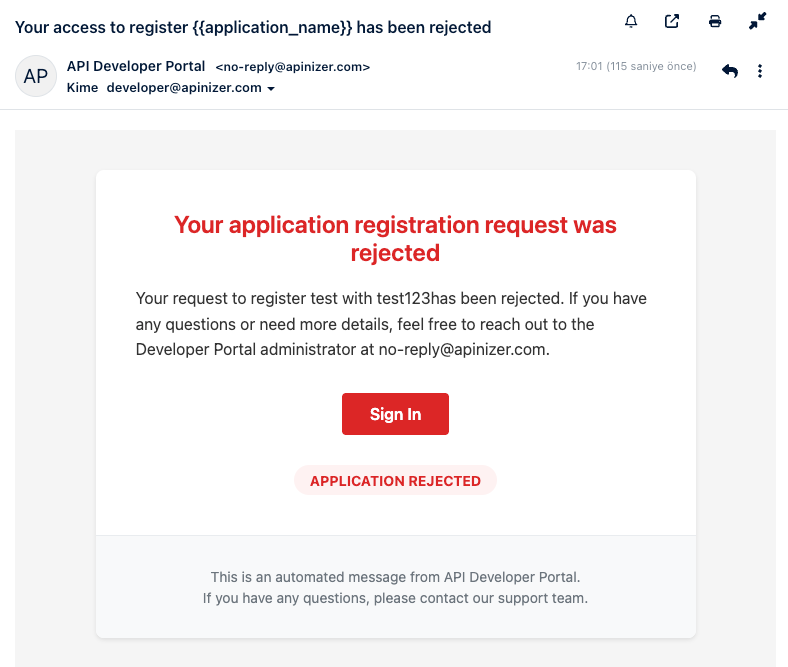
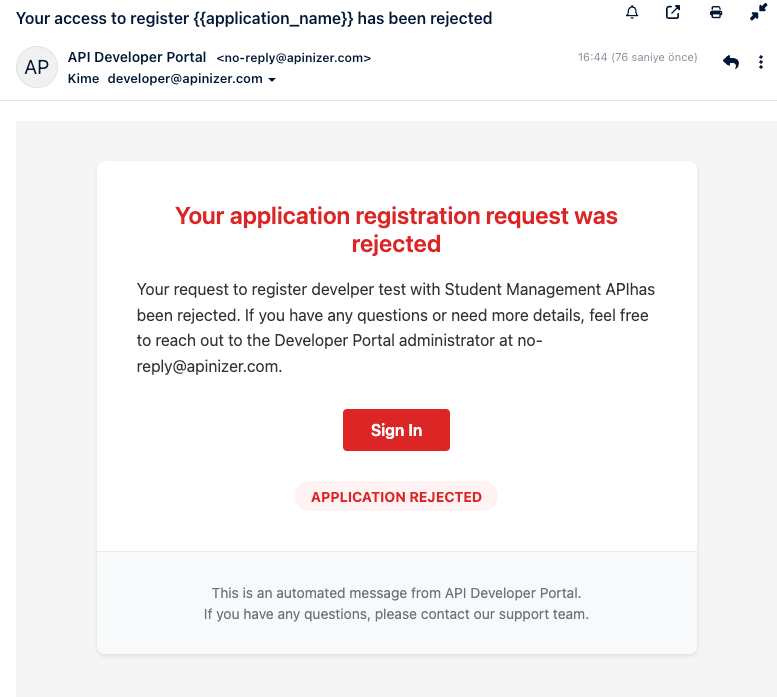
App Registration Rejected
When Sent:
- When user's app registration request for an API is rejected
- When administrator does not deem the request suitable
Effect on Portal: User cannot use that API. API keys are not created. User can apply again.
Email Triggering Steps:
User has subscribed to API, Has entered application information, Waiting for manual approval (Auto Approve API Subscribe = PASSIVE)
Administrator enters Manager, Goes to API Management → Subscriptions section, Sees pending requests with "Pending Approval" filter
Selects [Reject], Enters rejection reason (optional, not shown to user), Confirms
Subscription request is marked as rejected, API keys are not created, "App Registration Rejected" email is sent
Subject: Your configured subject, Title: Your configured title, Body: Your configured content, Button: Log In
Sees request was rejected in portal, Can try again with a different plan, Can contact support, Can subscribe to another API
App Registration Revoked
When Sent:
- When a previously approved app registration is revoked
- In case of API usage policy violation
- When access is removed by administrator
Effect on Portal: User's API access is cut off. Existing API keys are disabled. API calls fail (401 Unauthorized).
Email Triggering Steps:
User's app registration was previously approved, Is actively using API, API keys are working
API usage policy violation, Rate limit violations (continuous), Payment issues (in paid plans), Security violation is detected, Abuse is detected, Contract termination, Manual administrator decision
Administrator enters Manager, Goes to API Management → Subscriptions section, Finds relevant subscription in Active subscriptions list, Selects [Revoke], Enters revocation reason (optional), Confirms
Subscription is instantly revoked, All API keys are disabled, Rate limiter keys are cleared, "App Registration Revoked" email is sent
Subject: Your configured subject, Title: Your configured title, Body: Your configured content, Button: Log In
API calls fail from that moment, Returns HTTP 401 Unauthorized or 403 Forbidden, User sees "Revoked" status in portal, "Access Revoked" warning on Application page
The template found in the image below should be used for Confirm email address, Welcome, Account Access Rejected, Account Access Cancelled, App Registration approved, App Registration Rejected, App Registration Revoked, and Password Reset emails.
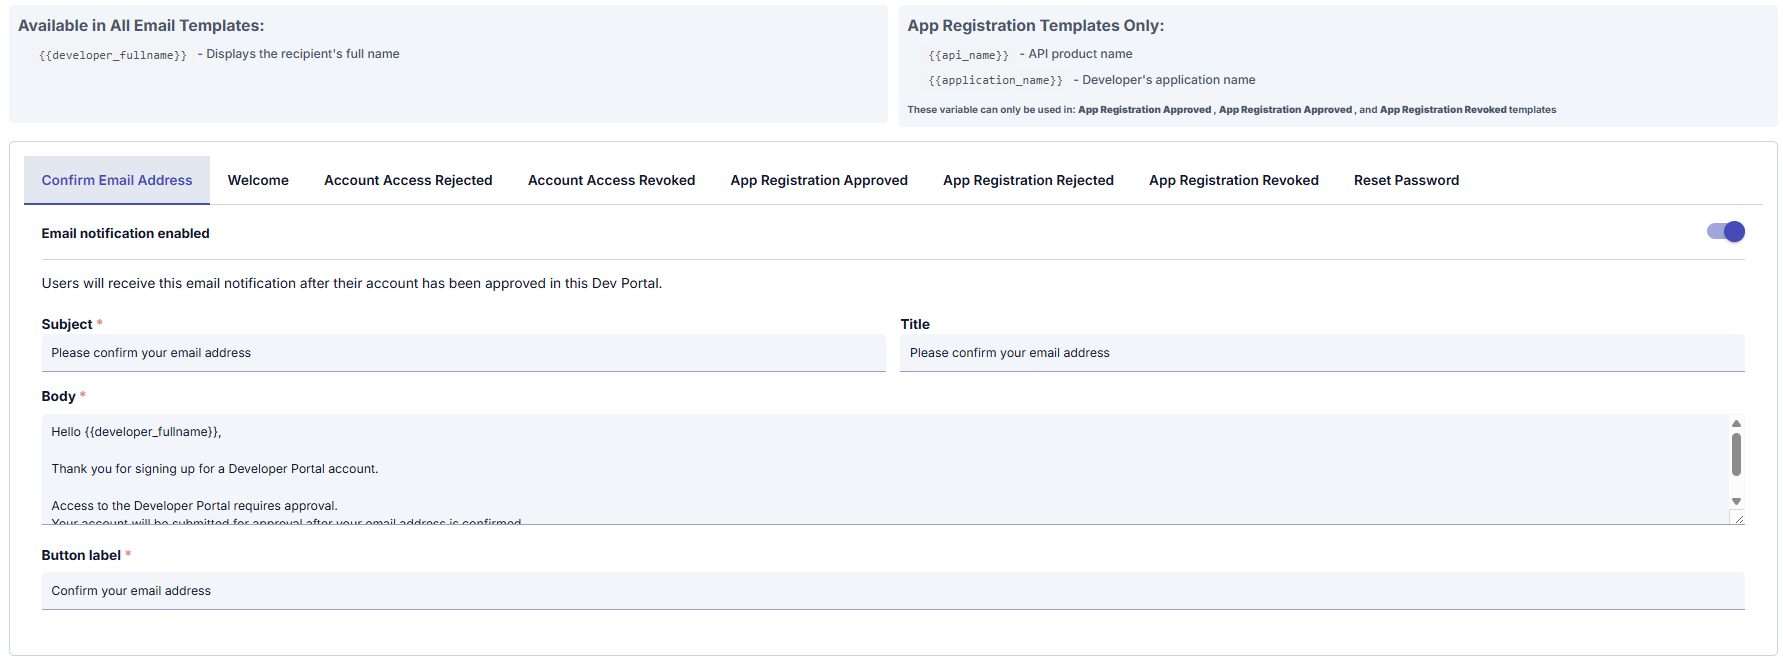
In All Email Templates:
{{developer_fullname}}
- If {{developer_fullname}} is used in the email template → The name of the user who will receive the notification is automatically written in that place. This way, personalized addressing is provided in sent emails
In App Registration Approved, App Registration Approved, and App Registration Revoked Email Templates:
{{api_name}} - API product name
{{application_name}} - Developer's application name
- If {{api_name}} is used in the email template → The name of the API product that the notification is related to is automatically written in that place.
- If {{application_name}} is used in the email template → The name of the application that the notification is related to is automatically written in that place.
This way, the user sees which API the notification they received is for. If they have multiple applications, they can easily understand which application the notification is about.
Fields used for Email Settings configuration are shown in the table below.
| Field | Description |
|---|---|
| Email notification active | Determines whether email notification is active. If active, email is sent to the user. This setting can be customized for each email. |
| Subject | Specifies the text that will appear in the email's subject line. Usually a heading that summarizes the email content. |
| Title | Specifies the title of the email content. The title text visible to the user in the email. |
| Content | Email content. Contains the detailed text of the message to be sent to the user. Can be personalized with placeholders in email templates (e.g., {{developer_fullname}}). |
| Button label | Specifies the text that will appear on the button in the email content. Users perform operations by clicking this button. For example, "Confirm your email address". |
Security
Privacy settings to be used on the API Developer Portal side are managed through this screen.
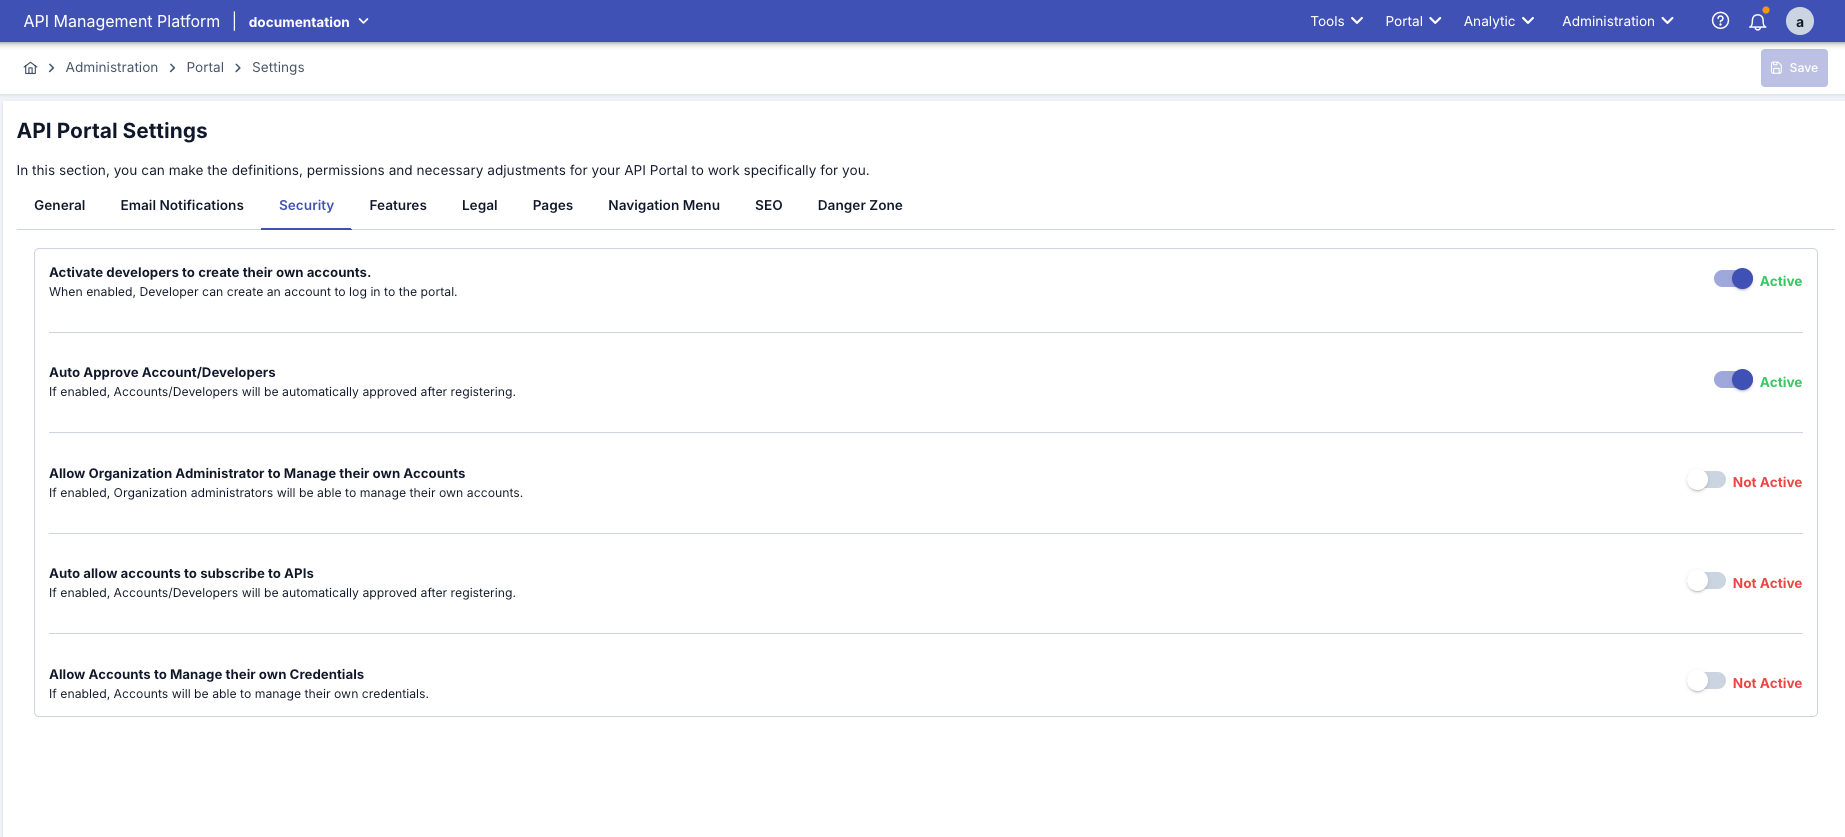
Fields used for Security Settings configuration are shown in the table below.
| Field | Description | Usage in Portal Interface |
|---|---|---|
| Activate developers to create their own accounts | Security tab → Enable Account Register. Used to open or close new user registration on the portal, control self-service registration feature. When active, Users can register themselves on the portal, "Sign Up" button is visible, Registration form is accessible. | Determines visibility of "Sign Up/Register" button on portal login page; if passive, self-signup is closed. |
| Auto Approve Account/Developers | Security tab → Auto Approve Account. Used to automate or make manual the user approval process, adjust security level, provide access control. When active, user is automatically approved when registered, Can enter portal immediately after email confirmation, No administrator intervention needed, Welcome email is automatically sent. | Determines whether users who confirm email after registration will automatically become active; if passive, manual approval from Manager is required. |
| Allow Organization Administrator to Manage their own Accounts | Security tab → Organization Manager Account Manage. Manages whether there is the possibility of assigning Organization Manager role when creating new registration through Account/Developer menu. This assignment allows the account/developer to create their own account/developer on the API Portal side. When active, only portal administrators (admin) can do user management, organization administrators can only see their own accounts, centralized control is provided. | Controls whether organization administrators can manage users/accounts within Portal (affects permissions on Portal → Accounts screen). |
| Auto allow accounts to subscribe to APIs | Security tab → Auto Approve API Subscribe. When a developer or account registers on the API portal, subscription permission to APIs is automatically given. That is, there is no need for manual approval by an administrator. When active, when user registers app for an API, it is automatically approved, API keys are immediately created and become active, user can instantly start using the API, app Registration Approved email is automatically sent. | Ensures that when user Subscribe/Register App, the plan is automatically approved and API keys are immediately defined; in passive, manual approval flow works in Manager. |
| Allow Accounts to Manage their own Credentials | Security tab → Enable Credential Manage. Used to give or not give users permission to manage their own API keys, limit credential management due to security policy. When active, users can see their own API keys, create new credentials, delete or renew existing credentials, see API secrets. | Opens/closes developers' permission to generate, recreate, or delete client ID/secret in My Apps section in Portal. |
Features
Features to be used on the API Developer Portal side are managed through this screen.
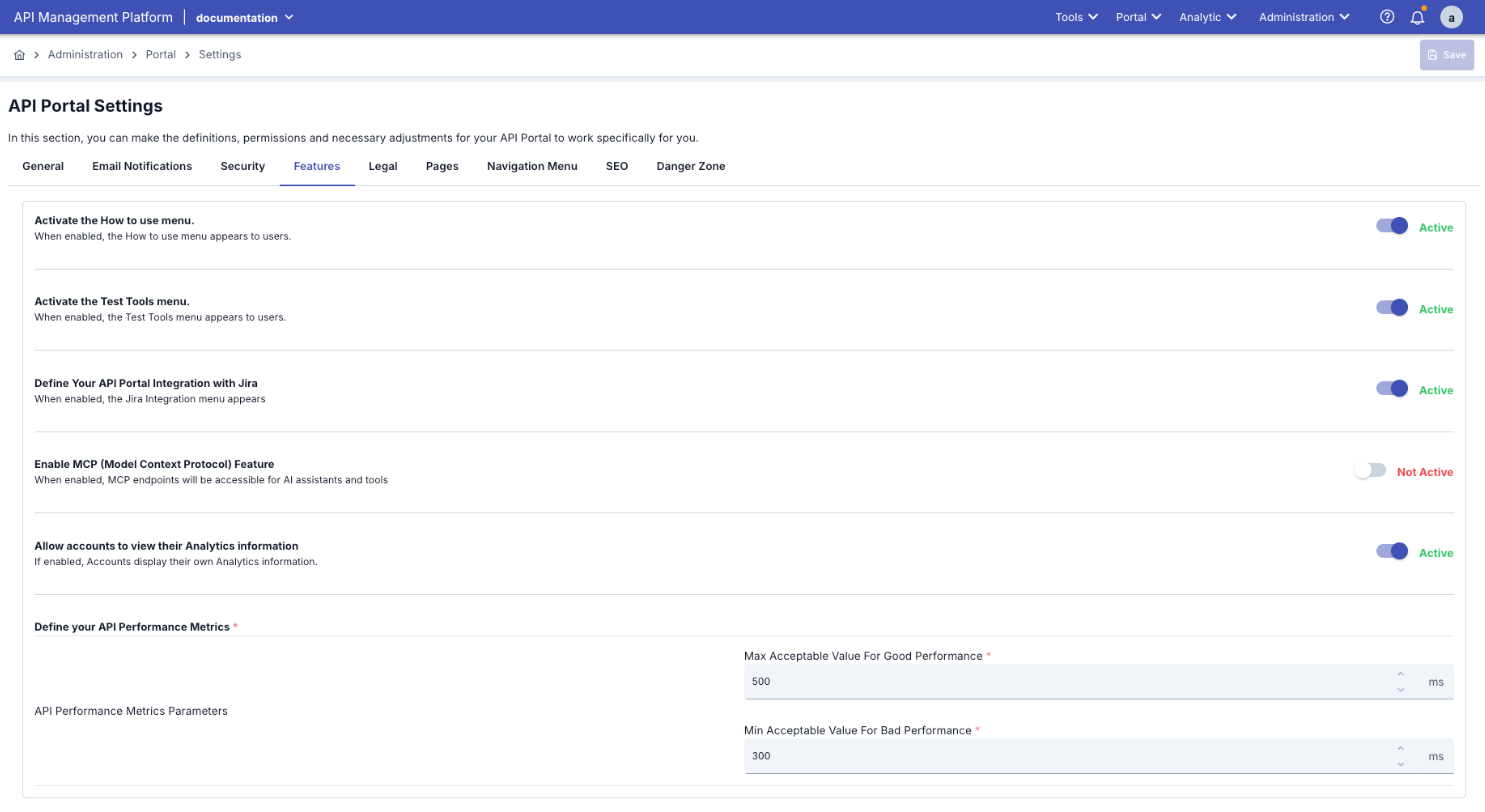
Fields used for Feature Settings configuration are shown in the table below.
| Field | Description |
|---|---|
| Activate the How to use menu | Features tab → Enable How It Works. How to use menu becomes visible to users. Used to show or hide a page that will guide users on the portal. When active, "How It Works" / "Nasıl Çalışır" link appears in menu, How It Works HTML content defined in Portal Appearance is shown, users can access this page. |
| Activate the Test Tools menu | Features tab → Enable Test Tools. Test tools menu becomes visible to users. Used to enable users to test APIs through the portal, provide Swagger UI-like test interface. When active, "Try It" button appears in API documentation, users can make API calls through portal, Request/Response preview becomes active. |
| Define Your API Portal Integration with Jira | Features tab → Enable Jira Integration. Jira Integration menu becomes visible. Used to provide ability to create Jira tickets through portal, automate support process. When active, Users can open Jira tickets from portal, "Report Issue" or "Request Feature" buttons appear, Jira integration works. |
| Enable MCP (Model Context Protocol) Feature | Features tab → Enable MCP. AI assistants and tools can access and use the system's context data. When active, MCP features can be used. |
| Allow accounts to view their Analytics information | Features tab → Enable Analytics. Accounts view their own analytics information. Used to show API usage statistics to users, activate Dashboards. When active, Analytics dashboard becomes visible to users, API call statistics are shown, Charts and reports are in active state. |
| Define your API Performance Metrics | Features tab → Performance Metrics. In this section, configurations are made for the following fields; Max Acceptable Value For Good Performance: The maximum value indicating that a request's response time within expected time is normal is entered. Min Acceptable Value For Bad Performance: The minimum value indicating that a request's response time within expected time is abnormal is entered. |
Legal
Legal settings to be used on the API Developer Portal side are managed through this screen.
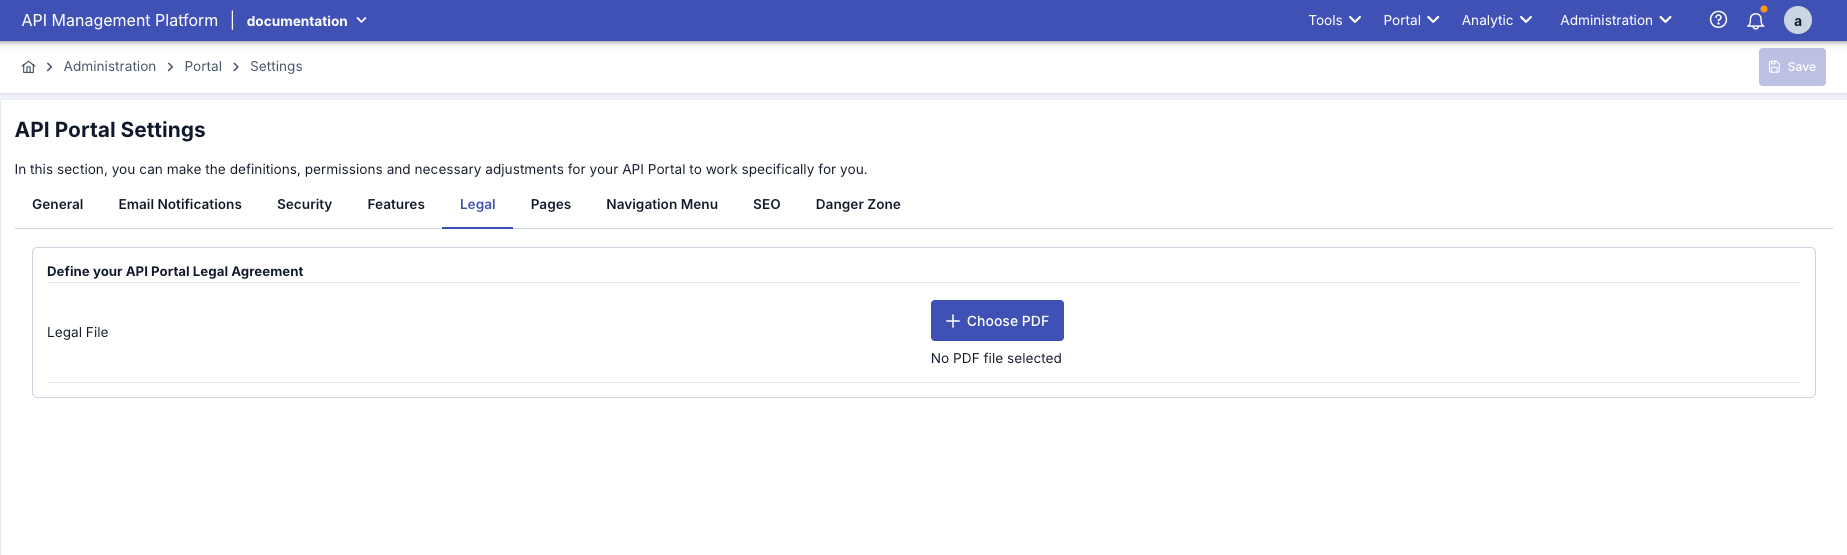
The field used for Legal Settings configuration is shown in the table below.
| Field | Description |
|---|---|
| Define your API Portal Legal Agreement | A document specifying the terms of use, privacy policy, and legal obligations valid when using API Portal. 1. Prepare your PDF file (Terms of Service, Privacy Policy, etc.) 2. Click "Upload PDF" button 3. Select and upload the file 4. Uploaded file will be visible and you can preview with "Open" |
SEO
SEO settings to be used on the API Developer Portal side are managed through this screen.
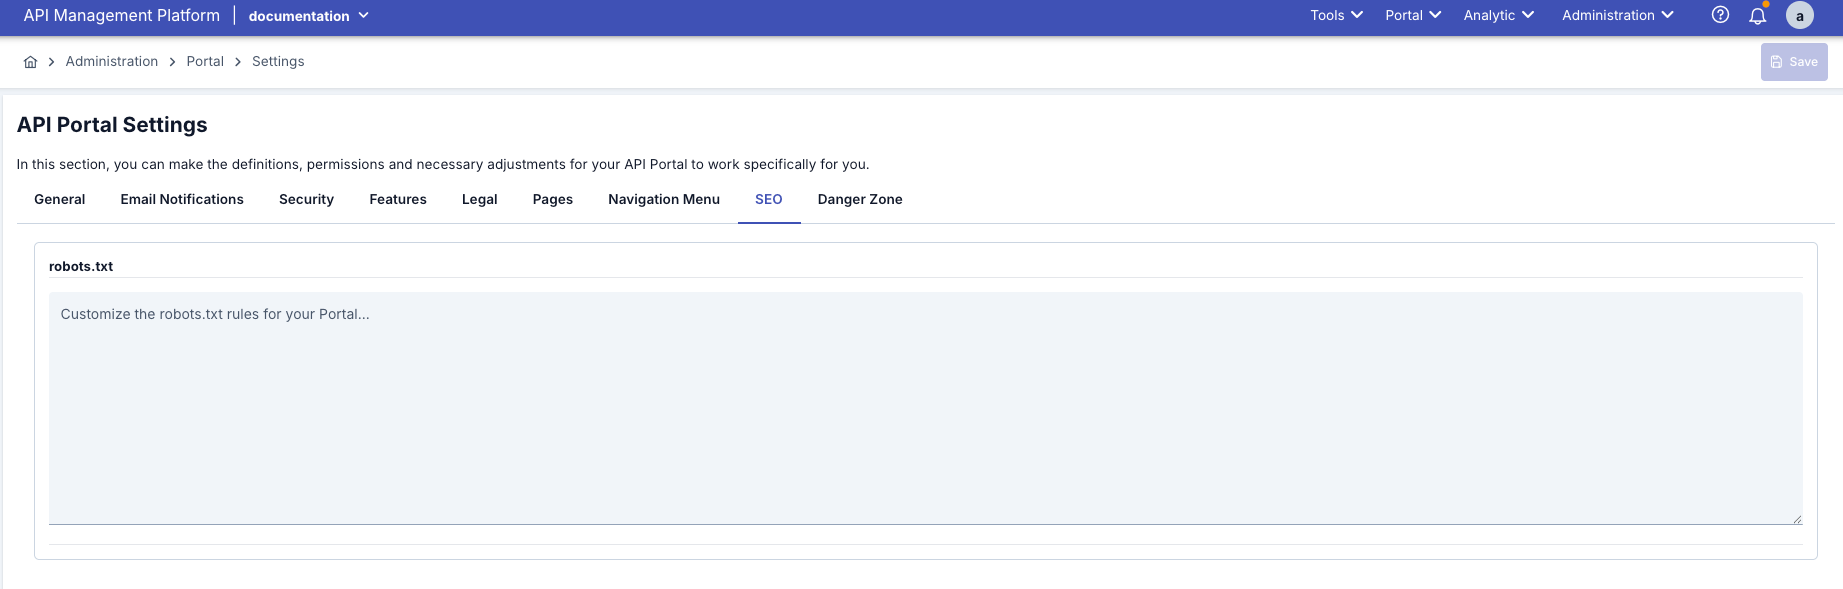
The field used for SEO Settings configuration is shown in the table below.
| Field | Description |
|---|---|
| SEO robots.txt | A text file that tells search engine bots which pages they can crawl and index on your site or which pages they cannot access. This way, site owners enable search engines to crawl their sites more efficiently and in a controlled manner. |
Portal Content Management
In the API Portal Settings page, you can manage the portal's content pages. In this section, you can configure settings for the home page, footer, "How It Works" page, pending page, and navigation menu.
Overview of Portal Pages
When each portal is created, the system automatically creates a set of default pages. These pages provide the portal's basic functionality and can be viewed by users.
Default Portal Pages:
| Page Type | Description | Access Status | Default Content |
|---|---|---|---|
| Portal Home | The main page that users see when they first enter the portal | Public (Open to everyone) | Default welcome message and portal introduction |
| Footer | Footer area visible at the bottom of the portal | Public (Visible on all pages) | Default footer content (empty or minimal) |
| How It Works | Portal usage guide page | Public (if feature is active) | Default usage guide content |
| Pending Page | Page for users waiting for account approval | Private (Only users in waiting status) | Default waiting message |
| Login Page | User login page | Public (Users not logged in) | Automatically created by system |
| Register Page | User registration page | Public (if registration permission exists) | Automatically created by system |
| API Catalog | Page listing published APIs | Public (Logged in users) | Automatically created by system |
| My Apps | Page where users manage their applications | Private (Only logged in users) | Automatically created by system |
Page Access Statuses
Portal pages are categorized according to their access status:
Public Pages
Public pages can be viewed by everyone, including users who are not logged in:
- Portal Home: Home page is open to everyone
- Footer: Visible on all pages
- How It Works: Open to everyone if feature is active
- Login Page: Login page is open to everyone
- Register Page: Open to everyone if registration permission exists
- API Catalog: Published APIs are visible to everyone (login may be required for details)
Public pages are critical for portal promotion and user acquisition.
Private Pages
Private pages can only be viewed by logged in and authorized users:
- My Apps: Only logged in users can see their own applications
- Analytics: Only logged in users can see their own statistics
- API Details: Some API details are only open to subscribed users
- Pending Page: Only users in waiting status can see it
Private pages require user authentication. Users who are not logged in cannot access these pages.
Conditional Pages
Conditional pages are shown or hidden based on certain conditions:
- How It Works: Visible if "How It Works" is active in Portal Settings → Features
- Test Tools: Visible if "Test Tools" is active in Portal Settings → Features
- Analytics: Visible if "Analytics" is active in Portal Settings → Features and user is logged in
- Jira Integration: Visible if "Jira Integration" is active in Portal Settings → Features
Conditional pages are controlled by the portal administrator through feature settings.
Portal Pages Working Logic
1. Page Creation and Management:
Pages for each portal are created in two ways:
- Automatically Created by System
- Managed by Administrator
Automatically Created Pages:
- Created automatically by the system when portal is created
- Come with default content
- Cannot be deleted or disabled
- Only their content can be edited
Examples:
- Login Page
- Register Page
- API Catalog
- My Apps
These pages provide the portal's basic functionality and are managed by the system.
Administrator-Managed Pages:
- Managed from Portal Settings → Portal Content Management section
- Content can be fully customized
- HTML format content can be added
- Multi-language support available
Examples:
- Portal Home
- Footer
- How It Works
- Pending Page
The content of these pages can be customized by the portal administrator.
2. Page Content Management:
Portal page content is managed in the following ways:
| Management Method | Description | Pages Used |
|---|---|---|
| HTML Editor | Creating content with HTML code | Portal Home, Footer, How It Works, Pending Page |
| System Management | Content automatically created by system | Login, Register, API Catalog, My Apps |
| Dynamic Content | Content from APIs and database | API Catalog, My Apps, Analytics |
3. Multi-Language Support:
Portal pages offer multi-language support:
- Default Language: Determined from Portal Settings → General Settings (can be selected from all languages defined in the system)
- Language Options: Any number of languages can be activated from all languages defined in the system (Turkish, English, German, French, Spanish, Italian, etc.)
- Content Management: Separate content can be prepared for each language
- Automatic Redirect: System shows appropriate content based on user's language preference
When multi-language feature is active, separate content can be prepared for Portal Home, Footer, How It Works, and Pending Page in all enabled languages. The system is not limited to Turkish and English only; it supports all languages defined in the system.
4. Page Visibility Control:
Page visibility is controlled based on the following factors:
- Portal Settings: Pages can be activated/deactivated from feature settings
- User Status: Based on logged in/not logged in user status
- User Roles: Based on user role (Admin, Developer, Guest)
- API Subscription Status: Some pages are only open to subscribed users
Page Management Operations
You can perform the following operations to manage portal pages:
Edit Portal Home, Footer, How It Works, and Pending Page content with HTML editor
Prepare content in all enabled languages for each page (Turkish, English, German, French, etc.)
Preview changes before saving
Control page visibility from feature settings
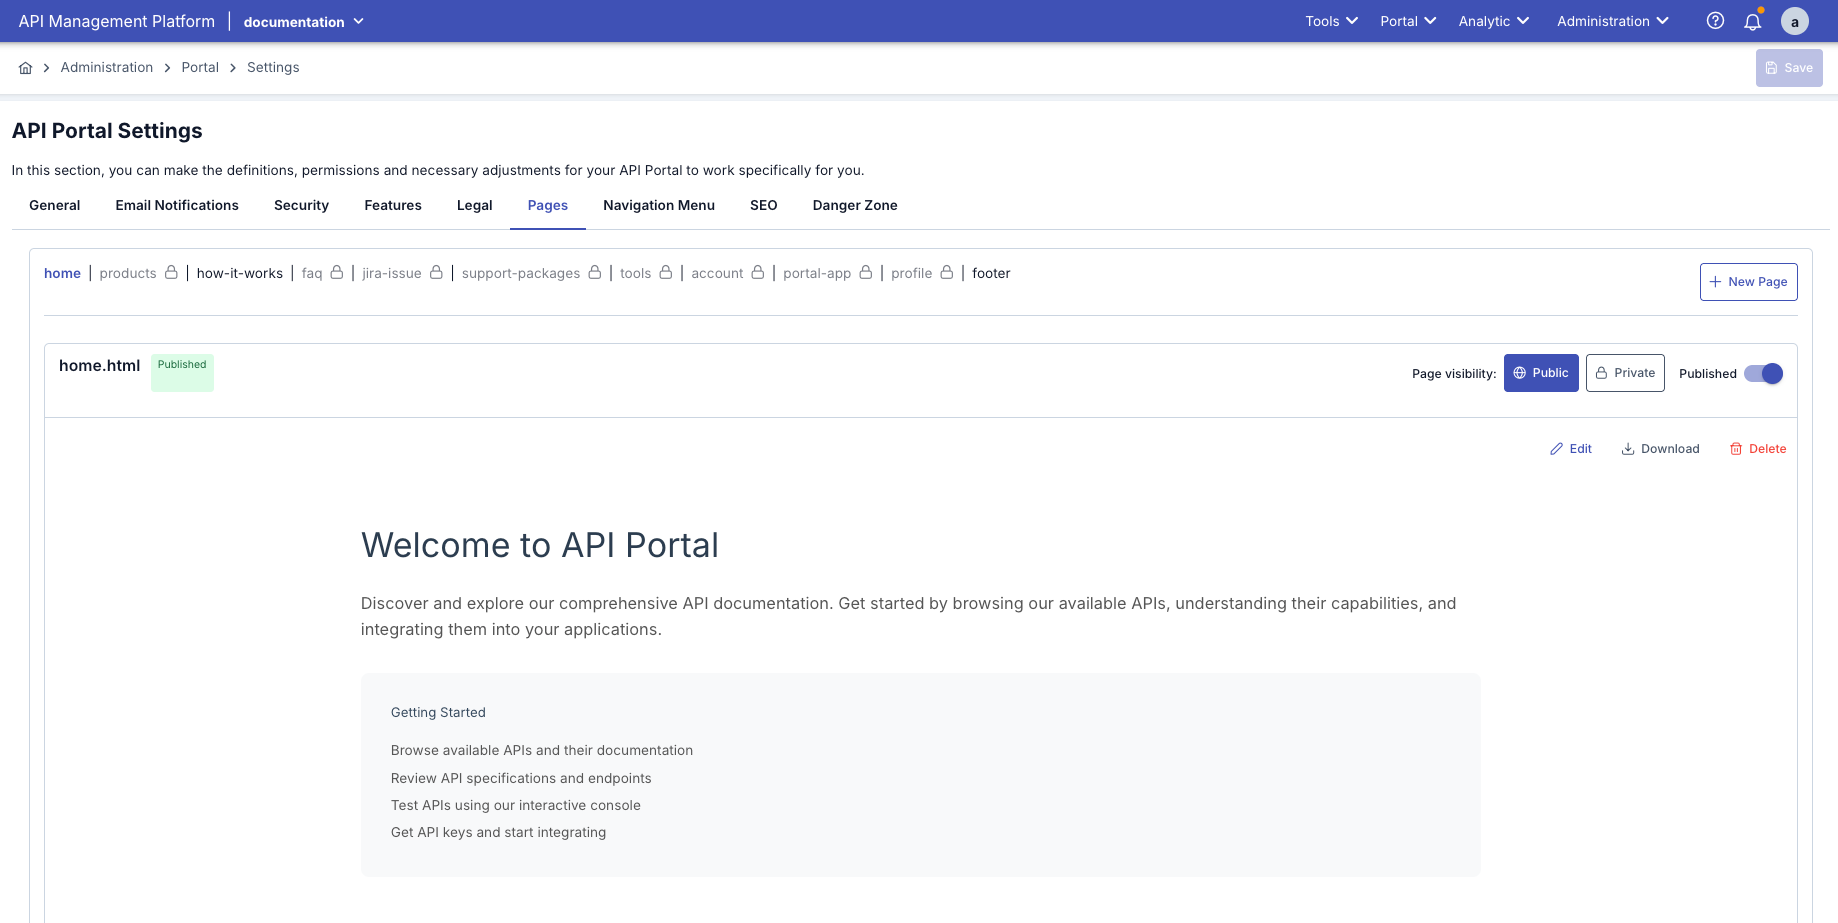
Portal Home Page
The portal home page is the page that users see when they first enter the portal. This page contains portal introduction texts, guiding descriptions, links, or visual content.
Portal Home Page Features:
| Feature | Description |
|---|---|
| Access Status | Public (Open to everyone) - Everyone including users not logged in can access |
| Default Content | Comes with default welcome message and portal introduction when portal is created |
| Content Format | HTML format content can be added (headings, paragraphs, lists, links, images) |
| Multi-Language | Content can be prepared in all enabled languages (Turkish, English, German, French, Spanish, etc.) |
| Preview | Changes can be previewed before saving |
| URL | Portal main URL (e.g., https://portal.company.com/) |
Default Home Page Content:
When the portal is created, the home page comes with default content:
- Welcome Title: "Welcome to [Portal Name]"
- Short Description: General information about the portal
- Action Cards:
- "How It Works?" - Redirects to How It Works page
- "Discover Our APIs" - Redirects to API catalog
- "Register" - Redirects to registration page
- "Contact Us" - Redirects to contact page
Default content can be fully customized by the portal administrator. You can add any content you want with the HTML editor.
- Click on "Portal Home" or "Home Page" tab in API Portal Settings page
- Home page content editing screen opens
HTML editor is located on the left. In this editor you can:
- Write HTML code
- Use Markdown format
- Add headings, paragraphs, lists, links
- Add images and tables
The HTML editor offers rich text editing features. You can switch between code view and visual view.
If multi-language is active in portal settings, you will see a separate tab for each enabled language:
- Portal Home (TR): Turkish content area
- Portal Home (EN): English content area
- Portal Home (DE): German content area (if enabled)
- Portal Home (FR): French content area (if enabled)
- And other enabled languages...
You can prepare separate content for each language. The system shows appropriate content based on user's language preference.
"Preview" section is located on the right:
- You can see in real-time how your HTML content will appear on the portal
- Preview automatically updates as you make changes
- You can check mobile and desktop views
- After preparing the content, click the "Save" button at the top of the page
- Changes are saved and immediately reflected on the portal home page
- Portal users will see the new content when they refresh the page
Home Page Content Examples:
The home page usually contains the following content:
- Portal welcome message and title
- Short description about the portal
- Action cards like "How It Works?", "Discover Our APIs", "Register", "Contact Us"
- Featured APIs or features
- Corporate information and links
- Images, banners, or video content
- Statistics or success stories
Home Page Access Logic:
Home page access works as follows:
-
Users Not Logged In:
- Can view the home page
- Can get information about the portal
- Can register by clicking "Register" button
- Can see API catalog with "Discover Our APIs" (only published APIs)
-
Logged In Users:
- Can view the home page
- Can access "My Apps" menu
- Can subscribe to APIs
- Can access Analytics page (if feature is active)
-
Administrators:
- Can view the home page
- Can access all features
- Can perform portal management operations
Since home page content is in HTML format, you can also use CSS styles and JavaScript code. However, complex scripts may affect portal performance. For security reasons, only use scripts you trust.
Footer
Footer is the content area displayed at the bottom of the portal. It usually contains contact information, legal texts, copyright statements, or corporate links.
Footer Features:
| Feature | Description |
|---|---|
| Access Status | Public (Open to everyone) - Visible on all pages |
| Default Content | Comes with default footer content when portal is created (usually empty or minimal) |
| Visibility | Visible at the bottom of all portal pages (Home, APIs, How It Works, etc.) |
| Content Format | HTML format content can be added (tables, lists, links, images) |
| Multi-Language | Content can be prepared in all enabled languages (Turkish, English, German, French, Spanish, etc.) |
| Script Support | JavaScript code can be executed (e.g., live chat widgets) |
Default Footer Content:
When the portal is created, the footer comes empty or with minimal content by default. It needs to be customized by the administrator.
Footer Visibility Logic:
Footer is visible on all portal pages:
- Home page
- API catalog
- API detail pages
- How It Works page
- Login and Register pages
- User panel pages (My Apps, Analytics)
Footer content is displayed consistently on all portal pages. This way, users can access contact information and legal links on every page.
- Click on "Footer" or "Footer" tab in API Portal Settings page
- Footer content editing screen opens
Prepare footer content in the HTML editor on the left:
- Contact information (address, phone, email)
- Social media links and icons
- Legal texts (Terms of Service, Privacy Policy)
- Copyright information
- Corporate links
- Logo or images
Since footer content is in HTML format, you can add tables, lists, and links.
If multi-language is active:
- Footer (TR): Turkish footer content
- Footer (EN): English footer content
- Footer (DE): German footer content (if enabled)
- Footer (FR): French footer content (if enabled)
- And other enabled languages...
You can prepare separate footer content for each enabled language.
- You can preview how the footer will appear on the portal on the right
- After making changes, click the "Save" button
- Footer content is immediately reflected at the bottom of the portal
Footer Content Examples:
Footer usually contains the following information:
- Company name and logo
- Contact information (address, phone, email)
- Social media icons (LinkedIn, Twitter, GitHub, etc.)
- Quick links (About Us, Support, Documentation)
- Legal links (Terms of Service, Privacy Policy)
- Copyright information (© 2024 Company Name)
If you use <script> tags in footer content, these scripts are executed safely. However, for security reasons, only use scripts you trust.
How It Works
The "How It Works" page is an informative page that explains the system's general operation, API access process, or registration/step-by-step usage guide to portal users.
How It Works Features:
| Feature | Description |
|---|---|
| Access Status | Public (Open to everyone) - Everyone can access if feature is active |
| Default Content | Comes with default usage guide content when portal is created |
| Visibility Control | Visible if "How It Works" is active in Portal Settings → Features |
| Menu Location | Appears as "How It Works?" or "Nasıl Çalışır?" link in portal top menu |
| Content Format | HTML format content can be added (step-by-step guide, icons, lists) |
| Multi-Language | Content can be prepared in all enabled languages (Turkish, English, German, French, Spanish, etc.) |
| URL | Portal URL + /how-it-works (e.g., https://portal.company.com/how-it-works) |
Default How It Works Content:
When the portal is created, the How It Works page comes with default content:
- Title: "How It Works" or "Nasıl Çalışır"
- General Description: General information about portal usage
- Step-by-Step Guide: Basic usage steps
- API Access Process: How to access APIs
- Registration Process: How to register on the portal
The How It Works page can be fully customized by the portal administrator. You can add step-by-step guides, images, icons, and examples to the content.
How It Works Visibility Logic:
The visibility of the How It Works page depends on the following conditions:
-
If Feature is Active:
- Portal Settings → Features → "How It Works" is active
- "How It Works?" link appears in portal top menu
- Everyone (logged in/not logged in) can access the page
-
If Feature is Passive:
- Link does not appear in portal top menu
- Users cannot access even if page content is prepared
- Direct URL access may not be possible
For the How It Works page to be visible, the "How It Works" feature must be activated in Portal Settings → Features section.
- Click on "How It Works" or "How It Works" tab in API Portal Settings page
- How It Works content editing screen opens
Prepare content in the HTML editor on the left:
- Step-by-step usage guide
- API access process description
- Registration and account creation steps
- API usage examples
- Frequently asked questions
- Icons, numbered lists, and images
The How It Works page is prepared to enhance user experience and explain portal usage.
If multi-language is active:
- How It Works (TR): Turkish content
- How It Works (EN): English content
- How It Works (DE): German content (if enabled)
- How It Works (FR): French content (if enabled)
- And other enabled languages...
You can prepare separate content for each enabled language.
- The How It Works page appears as "How It Works?" or "Nasıl Çalışır?" link in portal top menu
- When this link is clicked, the content you prepared is shown
- For it to appear in the menu, the "How It Works" feature must be active in Portal Settings → Features section
- After preparing the content, click the "Save" button
- Changes are saved and the page becomes accessible from the portal menu
How It Works Content Examples:
This page usually contains the following information:
- Steps to register on the portal
- Process of discovering and reviewing APIs
- Application registration and API subscription process
- Getting and using API keys
- Steps to make API calls
- Troubleshooting and support information
Pending Page
The Pending Page is a waiting page that users view while waiting for account approval or until a certain operation is completed. This page informs users about their status and explains what they need to do.
Pending Page Features:
| Feature | Description |
|---|---|
| Access Status | Private - Only users in waiting status can see it |
| Default Content | Comes with default waiting message when portal is created |
| Visibility | Automatically shown only for users in certain statuses |
| Content Format | HTML format content can be added (messages, instructions, images) |
| Multi-Language | Content can be prepared in all enabled languages (Turkish, English, German, French, Spanish, etc.) |
| Automatic Redirect | System automatically redirects to this page based on user status |
Default Pending Page Content:
When the portal is created, the Pending Page comes with default content:
- Title: "Your Account is Pending Approval" or "Hesabınız Onay Bekliyor"
- Description: Information about account approval process
- Waiting Message: "Your account is being reviewed. You will be notified once it's approved."
- Contact Information: Instructions to contact support team
Pending Page content should help users understand their status and know what they need to do. A reassuring and informative tone should be used.
Pending Page Display Scenarios:
The Pending Page is automatically displayed in the following situations:
Waiting for Account Approval
Scenario: User has registered and confirmed email, but account has not yet been approved by administrator.
Conditions:
- Portal Settings → Security → "Auto Approve Account" = PASSIVE
- User has confirmed email address
- Administrator has not yet approved the account
User Experience:
- When user tries to log in, Pending Page is displayed
- "Your account is pending approval" message is shown
- User cannot access portal content
Waiting for API Subscription Approval
Scenario: User has subscribed to an API, but subscription has not yet been approved.
Conditions:
- Portal Settings → Security → "Auto Approve API Subscribe" = PASSIVE
- User has subscribed to API
- Administrator has not yet approved the subscription
User Experience:
- When user goes to API detail page, Pending Page may be displayed
- "Your subscription is pending approval" message is shown
- User cannot use the API
Account Suspension
Scenario: User account has been temporarily suspended.
Conditions:
- Administrator has suspended user account
- Account is not completely deleted, only temporarily disabled
User Experience:
- When user tries to log in, Pending Page is displayed
- "Your account is temporarily suspended" message is shown
- Contact information is provided
Pending Page content should help users clearly understand their status. Ambiguous messages negatively affect user experience.
- Click on "Pending Page" or "Pending Page" tab in API Portal Settings page
- Pending Page content editing screen opens
Prepare content in the HTML editor on the left:
- Message informing user about status
- Instructions explaining what they need to do
- Information about waiting period
- Contact information (for questions)
- Visual elements (icons, animations)
Pending Page is the page users view while waiting for account approval or during manual approval process.
If multi-language is active:
- Pending Page (TR): Turkish content
- Pending Page (EN): English content
- Pending Page (DE): German content (if enabled)
- Pending Page (FR): French content (if enabled)
- And other enabled languages...
You can prepare separate content for each enabled language.
Pending Page is displayed in the following situations:
- User has registered and confirmed email, but account has not yet been approved (Auto Approve Account = PASSIVE)
- User has subscribed to API, but subscription has not yet been approved (Auto Approve API Subscribe = PASSIVE)
- User account has been suspended or temporarily disabled
Pending Page content should help users understand their status and know what they need to do.
- After preparing the content, click the "Save" button
- Changes are saved and users in waiting status will see this page
Pending Page Content Examples:
This page usually contains the following information:
- "Your account is pending approval" message
- Information about approval process
- Estimated waiting time
- Contact information (support team for questions)
- Instructions for status check
- Reassuring messages
Navigation Menu
Navigation Menu allows you to manage the menu structure visible at the top of the portal. You can control which pages appear in this menu, their order, and visibility.
Navigation Menu Features:
| Feature | Description |
|---|---|
| Location | At the top of the portal, between logo and user menu |
| Default Menu Items | Comes with default menu items when portal is created |
| Dynamic Menu | Menu items are shown/hidden based on user status |
| Customizable | Menu items can be added, edited, deleted, and sorted |
| Multi-Language | Menu labels can be displayed in multiple languages |
| Conditional Visibility | Menu items are shown based on user role or status |
Default Menu Items:
When the portal is created, the following default menu items are automatically created:
| Menu Item | Description | Visibility | URL |
|---|---|---|---|
| Home | Home page link | Open to everyone | / |
| APIs | API catalog page | Open to everyone | /api-products |
| How It Works | How It Works page | If feature is active | /how-it-works |
| Test Tools | Test tools page | If feature is active and logged in | /tools |
| My Apps | User's applications | Only logged in | /my-apps |
| Analytics | Analytics page | If feature is active and logged in | /analytics |
Default menu items are automatically created by the system and cannot be deleted. However, their visibility and order can be changed.
Menu Item Visibility Logic:
Menu item visibility is determined based on the following factors:
- Always Visible
- Visible If Feature is Active
- For Logged In Users
System Menu Items:
- Home: Always visible (cannot be deleted)
- APIs: Always visible (cannot be deleted)
These menu items provide the portal's basic functionality and should always be accessible.
Conditional Menu Items:
- How It Works: Visible if "How It Works" is active in Portal Settings → Features
- Test Tools: Visible if "Test Tools" is active in Portal Settings → Features
- Analytics: Visible if "Analytics" is active in Portal Settings → Features
These menu items automatically appear in the menu when the related feature is activated.
User Menu Items:
- My Apps: Only logged in users can see
- Analytics: Only logged in users can see (if feature is active)
- Test Tools: Only logged in users can see (if feature is active)
These menu items are automatically hidden when user is not logged in.
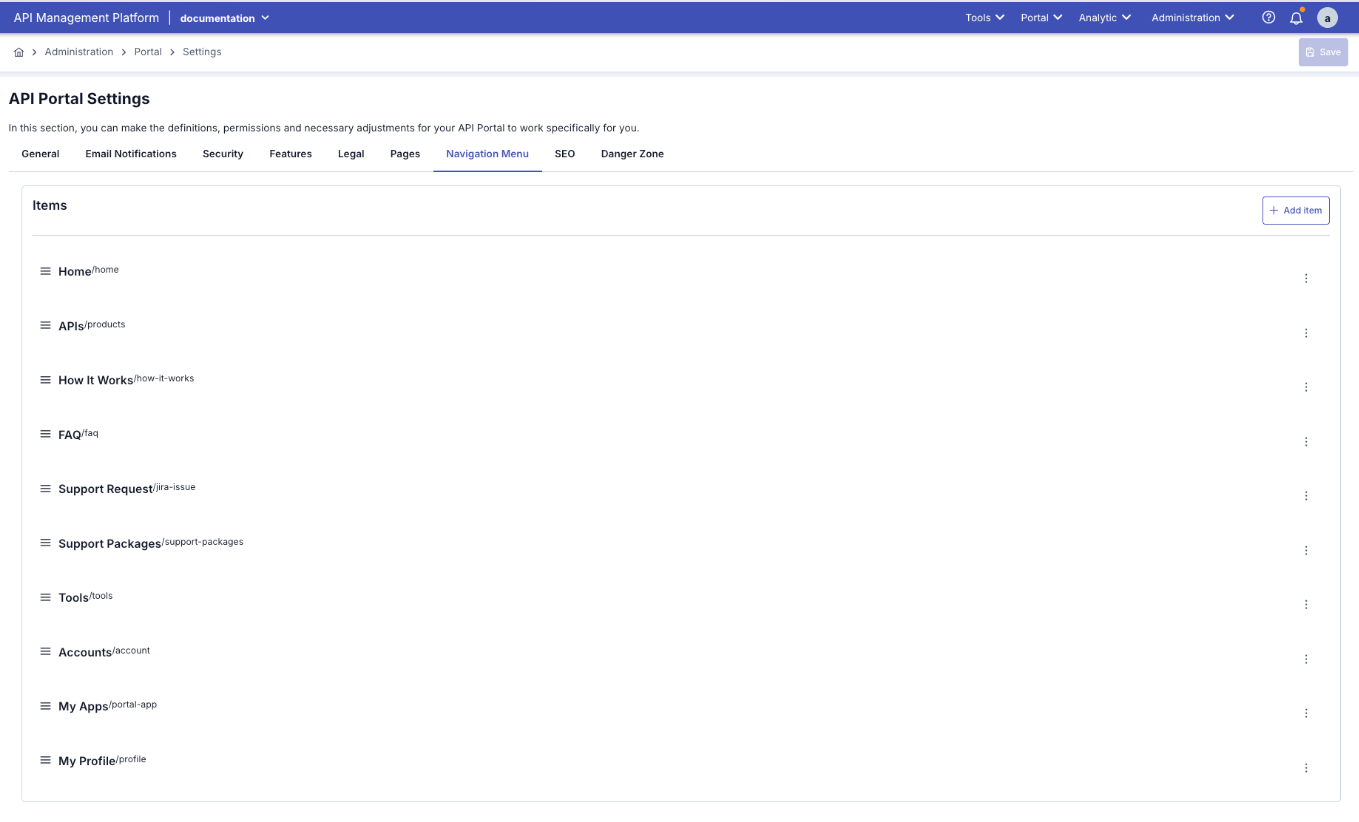
- Click on "Navigation Menu" or "Navigation Menu" tab in API Portal Settings page
- Navigation menu management screen opens
You can perform the following operations in the navigation menu:
Menu Items:
- Home: Home page link
- APIs: API catalog page
- How It Works: How It Works page (visible if feature is active)
- Test Tools: Test tools page (visible if feature is active)
- My Apps: User's applications page (for logged in users)
- Analytics: Analytics page (if feature is active and user is logged in)
Menu Item Settings:
- Visibility: Determine whether menu item will be visible
- Sorting: Change order of menu items (drag & drop or sequence number)
- Label: Change the display name of menu item
- Link: Determine which page the menu item will redirect to
To add a new menu item:
- Click "+ Add Menu Item" or "+ Add Menu Item" button
- Menu item form opens
- Label: Enter the name that will appear in the menu
- Link: Enter the URL to redirect to (internal or external link)
- Order: Determine its position in the menu
- Visibility: Select which users it will be visible to (All, Only Logged In, Only Guests)
- Click "Save" button
To edit an existing menu item:
- Click "Edit" or edit icon next to the menu item
- Menu item form opens
- Make changes
- Click "Save" button
To delete a menu item:
- Click "Delete" or delete icon next to the menu item
- Say "Yes" in the confirmation dialog
- Menu item is removed from the menu
You cannot delete system menu items (Home, APIs). You can only delete custom menu items you added.
To change the order of menu items:
- Drag and drop menu item to desired position
- Or change order from sequence number field
- Changes are previewed immediately
- After making all changes, click the "Save" button at the top of the page
- Menu structure is saved and immediately appears in portal top menu
Navigation Menu Features:
| Feature | Description |
|---|---|
| Dynamic Menu | Menu items are shown/hidden based on user status |
| Multi-Language Support | Menu labels can be displayed in multiple languages |
| Conditional Visibility | Menu items are shown based on user role or status |
| Custom Links | Links to internal pages or external websites can be added |
| Sorting | Menu item order can be customized |
Navigation menu directly affects the portal's user experience. You can provide a better experience by organizing the menu structure according to users' needs.
Portal Content Management Summary
Portal Pages Management Logic:
Portal content management works according to the following principles:
1. Default Pages:
- Automatically created by the system when each portal is created
- Come with default content
- Content can be customized
- Cannot be deleted or disabled
2. Content-Manageable Pages:
- Managed from Portal Settings → Portal Content Management section
- HTML format content can be added
- Multi-language support available
- Preview feature available
3. Access Control:
- Public Pages: Open to everyone (including users not logged in)
- Private Pages: Only logged in users
- Conditional Pages: Shown/hidden based on feature settings
4. Multi-Language Support:
- If multi-language is active in Portal Settings → General Settings
- Content can be prepared in all enabled languages for each page (Turkish, English, German, French, Spanish, etc.)
- System shows appropriate content based on user's language preference
5. Page Updates:
- Content changes are immediately reflected on the portal
- Page refresh is sufficient
- Browser cache may need to be cleared
Portal Pages Comparison Table:
| Page | Default Content | Access | Customizable | Multi-Language | Preview |
|---|---|---|---|---|---|
| Portal Home | Yes | Public | Yes | Yes | Yes |
| Footer | Minimal | Public | Yes | Yes | Yes |
| How It Works | Yes | Public (if feature active) | Yes | Yes | Yes |
| Pending Page | Yes | Private (users in waiting) | Yes | Yes | Yes |
| Login Page | System | Public | No | Yes | No |
| Register Page | System | Public (if permission exists) | No | Yes | No |
| API Catalog | System | Public | No | Yes | No |
| My Apps | System | Private | No | Yes | No |
When managing portal content pages, consider user experience. Content should be clear, understandable, and user-friendly. If multi-language support exists, prepare quality content for each language.
Login Log
The Login Log tab appears in the API Portal Settings header between SEO and Danger Zone. Use this tab to control whether portal user login audit records are written to MongoDB and whether they are forwarded to configured connectors (Elasticsearch, Kafka, Webhook, etc.). These settings are scoped per portal.
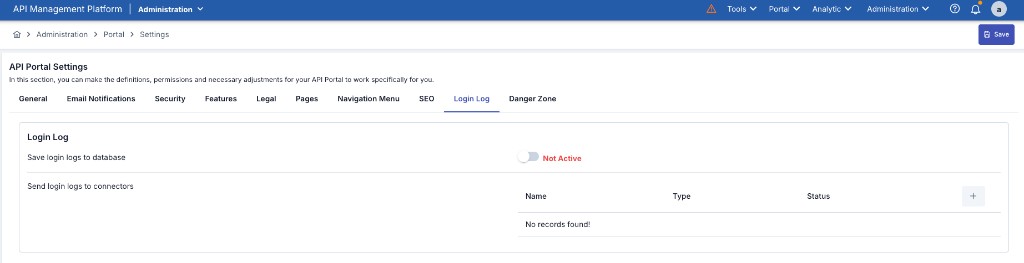
| Field | Description |
|---|---|
| Save login logs to database | When enabled, login logs are written to the MongoDB portal_login_logs collection. When disabled, records are only sent to connectors; if connectors are also inactive, records may be lost. |
| Send login logs to connectors | Forwards login logs to external connection configurations (environment-scoped ConnectionConfig). The table shows Name, Type, and Status; use the + button to add a connector. |
For event types, JSON payload examples, and connector setup steps, see Login Log Connector Configuration (Portal section). To view and filter login records in the UI, see API Portal Login Logs.
Danger Zone
Danger Zone is the section where critical and irreversible operations for the portal are performed. This section contains permanent operations such as portal deletion.
All operations in the Danger Zone section are irreversible. Before performing these operations, evaluate all effects and make necessary backups.
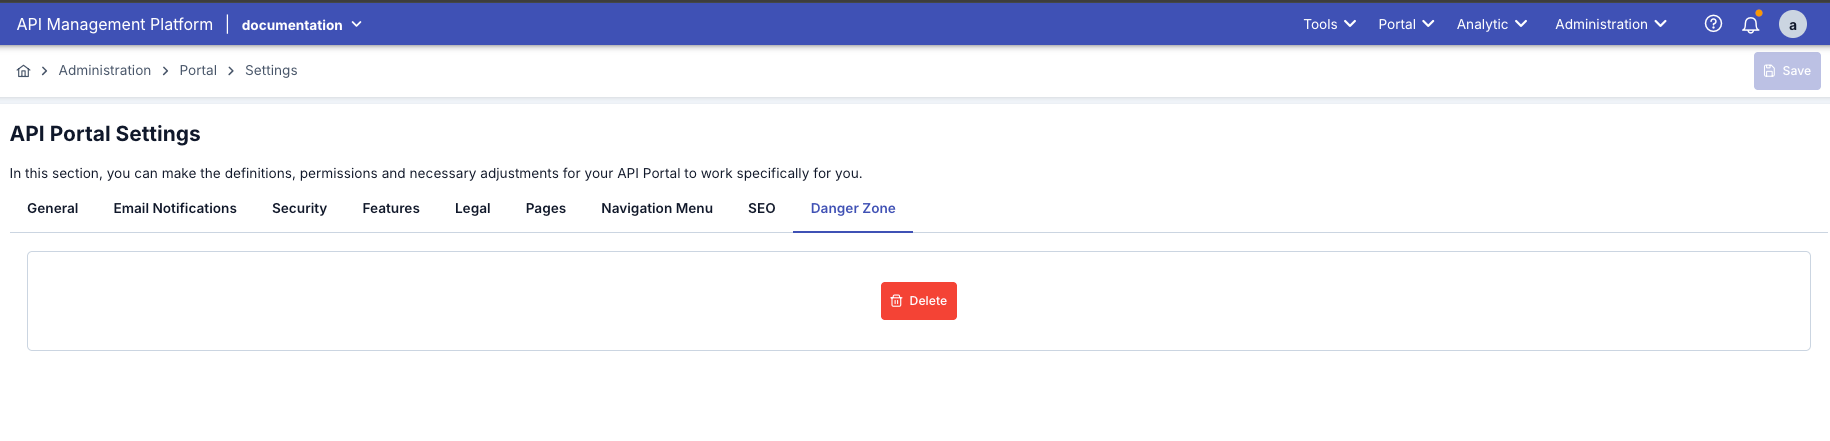
Portal Deletion
Portal deletion permanently deletes the portal and all its data. This operation cannot be undone.
- Click on "Danger Zone" or "Danger Zone" tab in API Portal Settings page
- Critical operations are listed
- Click "Delete Portal" or "Delete Portal" button
- Confirmation dialog opens
- You are asked to enter the portal name exactly in the confirmation dialog
- Make sure you enter the portal name correctly
- This step is to prevent accidental deletion
- After entering the portal name correctly, click "Yes, Delete" or "Yes, Delete" button
- Portal is permanently deleted
- All data (users, APIs, content, statistics) is deleted
Portal Deletion Operation Effects:
| Data Type | Status |
|---|---|
| Portal Configuration | Permanently deleted |
| User Accounts | All user accounts are deleted |
| API Products | All API products are deleted |
| Application Registrations | All application registrations are deleted |
| API Keys | All API keys are deleted |
| Content | All content pages are deleted |
| Statistics | All analytics data is deleted |
| Files | All uploaded files are deleted |
Portal deletion operation cannot be undone. Before deletion:
- Backup important data
- Inform all users
- Evaluate alternative solutions (such as making portal passive)