API Proxy Endpoint Configuration
Endpoint Configuration
In this tab, policies, protocol conversion settings, and endpoint management operations can be performed for the selected API Proxy.
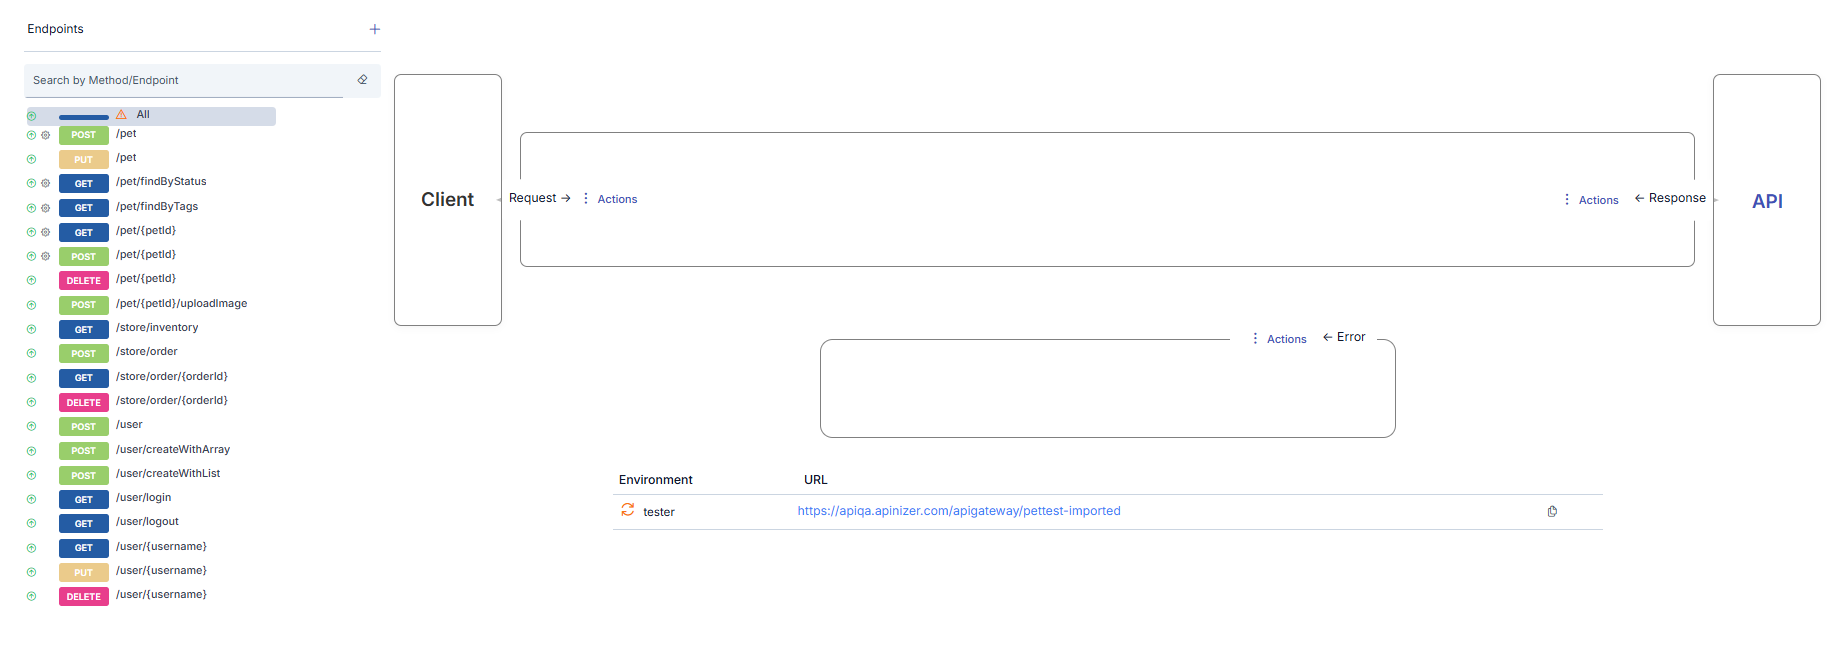
Endpoint Operations
Each API Proxy has its own endpoints that act as proxies for the endpoints of the Backend API placed in front of it.
If the API Proxy has been created using an API Specification File created with the API Specification Document Editor, by providing the address of a WSDL, Swagger, or OpenAPI file, or by uploading such a file, an endpoint with the same name is automatically created in the API Proxy for each endpoint that exists in that file.
Users may want to add new ones, update existing ones, delete, or disable endpoints for a certain or indefinite period for the following possible reasons:
- One or more new endpoints have been added to the Backend API
- One or more endpoints have been deleted from the Backend API
- The name or HTTP method of one or more endpoints in the Backend API is desired to be hidden from clients
- One or more endpoints in the Backend API are desired to be completely or temporarily closed to client access
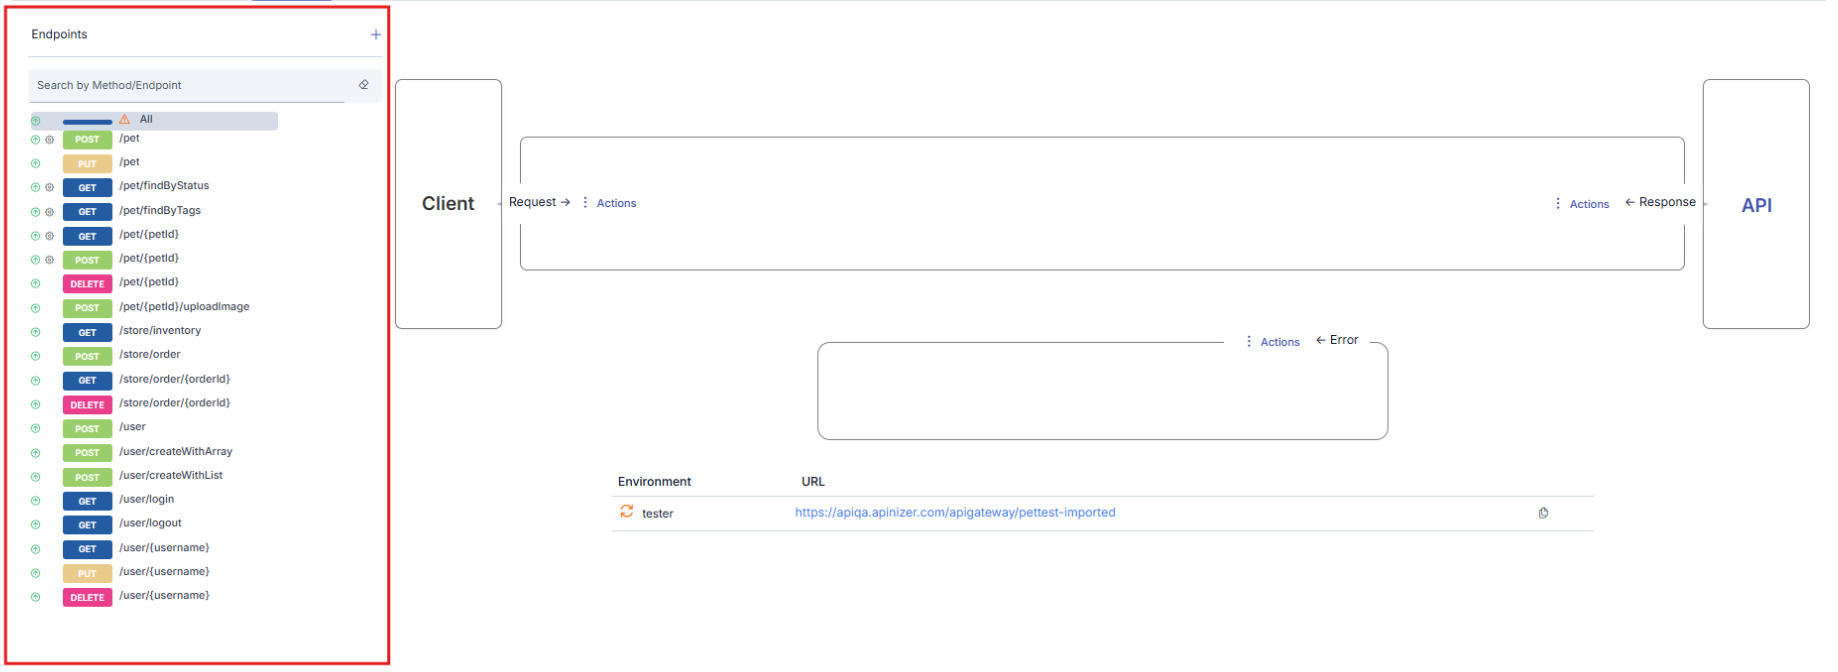
Selecting Endpoint
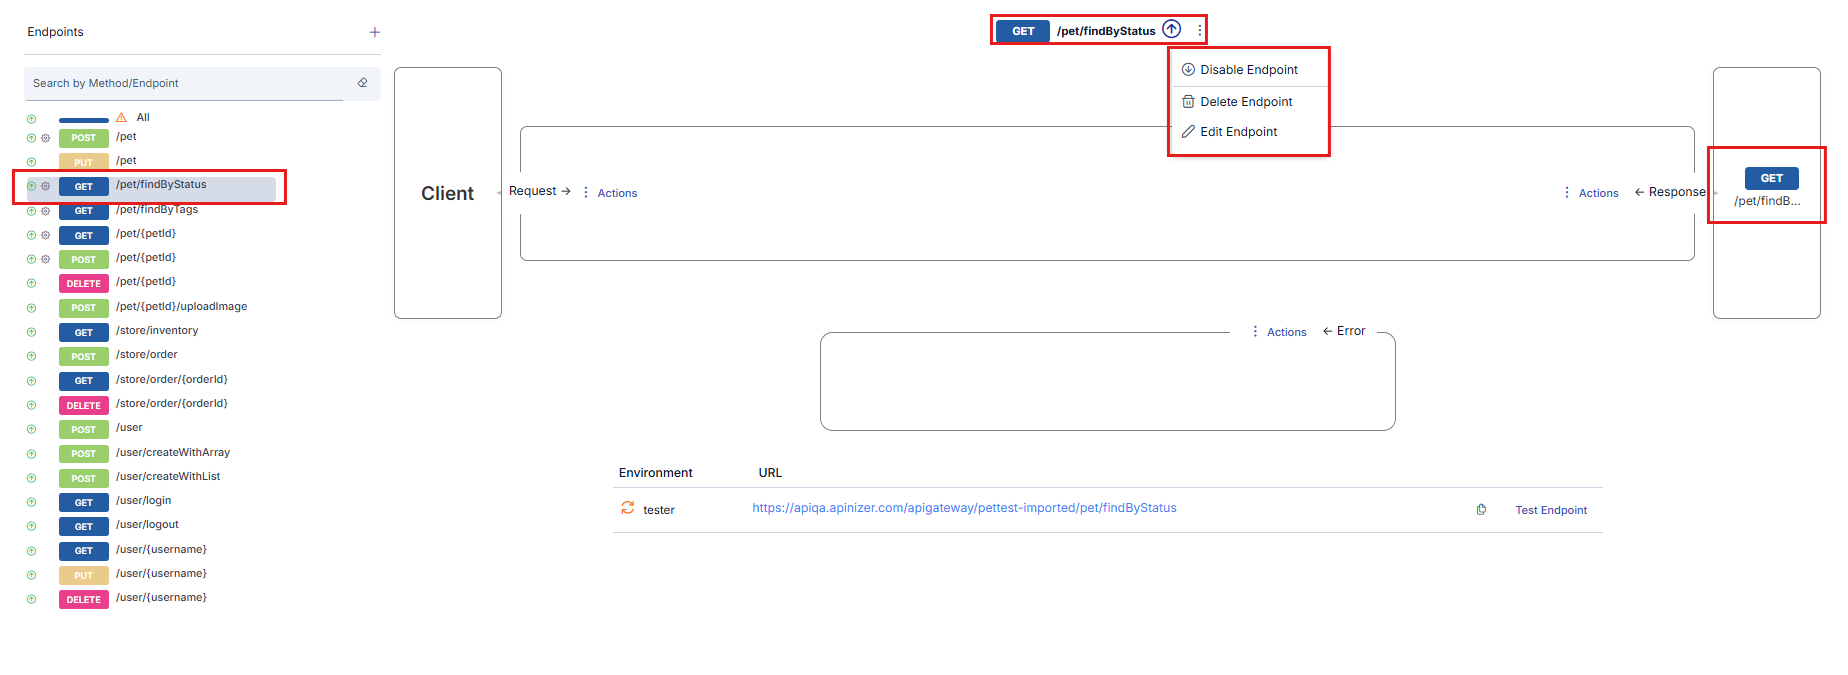
When the name of any endpoint in the endpoint list is clicked, that endpoint is selected and the interface is updated accordingly.
- In the list, the color changes to indicate which endpoint is selected.
- In the upper middle section, which endpoint is selected is shown.
- In the lower middle section, links to operations that can be performed for this endpoint are displayed.
- On the right side, which endpoint of the Backend API the selected endpoint is related to is visible.
Adding and Updating REST Endpoint Settings
Endpoint addition and update operations can be performed in REST type API Proxies. Endpoint addition is not allowed in SOAP, GRPC, and WEBSOCKET type API Proxies and in API Proxies created with Connectors or of Reverse Proxy type.
The information in the window that opens when the Edit Endpoint link is clicked is the same as the information in the window that opens when the Add button is pressed, and its image is shown below:
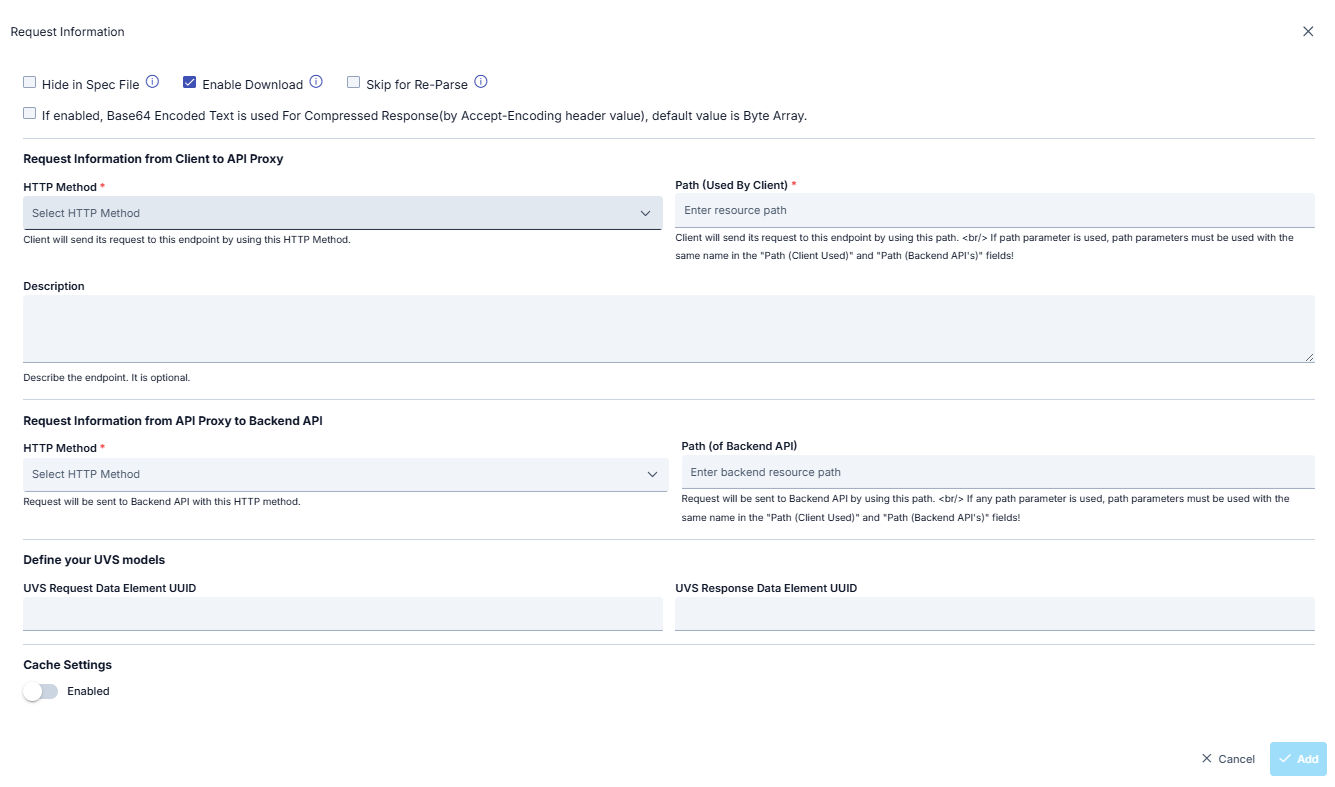
REST Endpoint Settings Fields
| Field | Description |
|---|---|
| Hide in Spec File | If this option is selected, this method is not shown in the Specification File. |
| Enable Download | If the result returned from the API Method/Endpoint is of Byte Array type, this option is marked for the result to be handled as a file. Otherwise, the content is returned to the client as encoded text. To decide whether the result is Byte Array, it is checked whether the Content Type Header value is in the "Byte Array Types" list in system settings. If it is in this list, it is decided that the result is of Byte Array type. |
| Skip for Re-Parse | When this field is marked, it indicates that this endpoint should not be updated when the API Proxy is subjected to a "re-parse" operation. For example, even if this endpoint has been deleted from the specification file, it remains undeleted after the re-parse operation. |
| If enabled, Base64 Encoded Text is used For Compressed Response(by Accept-Encoding header value), default value is Byte Array | It is decided whether the response message to be returned from this method is compressed by checking whether the values gzip, deflate, or br are in the Accept-Encoding value. If one of these values exists, the status of the response message is compressed. If the returned message is in compressed state and the response is Byte Array type and: • If this option of the method is active, the returned message is compressed as Byte Array and returned to the client. • If this option of the method is passive, the returned message is encoded with Base64 and converted to text, then the text version is compressed and returned to the client. |
| HTTP Method (From Client to API Proxy section) | The HTTP method with which requests will be sent to the method/endpoint to be added. Required. |
| Path (From Client to API Proxy section) | The address from which the method/endpoint to be added will be accessed. This address is written relative to the root address of the API. Required. |
| Description (From Client to API Proxy section) | Description information about the method/endpoint to be added. Optional. |
| Backend HTTP Method (From API Proxy to Backend API section) | The HTTP method with which requests coming to this method will be sent to the Backend API. |
| Cache Settings | If this setting is activated, method/endpoint-based cache settings are activated. |
| Cache Key Type | There are two options for Cache Key Type: • Use Query Params: Used to determine the key to be created for caching based on HTTP Query parameters in the request. For example, when the query parameter is /methodName?param1=value1¶m2=value2, the key to be kept in cache consists of the value param1=value1¶m2=value2, and when a request comes in this way again, the result in cache is returned.• Create Custom Key: Used to create the key to be created for caching with the fields to be selected in the request. When this value is selected, the key is created with the fields specified in the "Variable List" table. |
| Variable List | This field becomes active if "Create Custom Key" is selected as the Cache Key Type. With this option, the cache key to be created is made with the combination of fields to be specified from the header, parameter, or body sections of the request message. Custom key can be created using Variable. |
| Capacity | The maximum number of responses that can be stored in cache. |
| Invalidation Requires Authn | Selected if authorization is required to invalidate the cache. |
| Handling Action | If authorization is required to invalidate the cache, the action to be taken for unauthorized requests is selected: • Continue: If this option is selected, when one of the values no-cache, no-store, or max-age=0 is sent in the Cache-Control header information, if the sender is not authorized, it continues to work as if this value was not sent.• Stop: If this option is selected, when one of the values no-cache, no-store, or max-age=0 is sent in the Cache-Control header information, if the sender is not authorized, it stops the flow and returns an error message.This field becomes active when the "Invalidation Requires Authn" option is marked. |
| TTL (seconds) | The duration for which the cached response will be valid is entered in seconds. |
| Cache Null Value | Marked if empty values are also desired to be cached. |
Deleting Endpoint
The Delete Endpoint link is clicked. After the confirmation process, the endpoint is deleted.
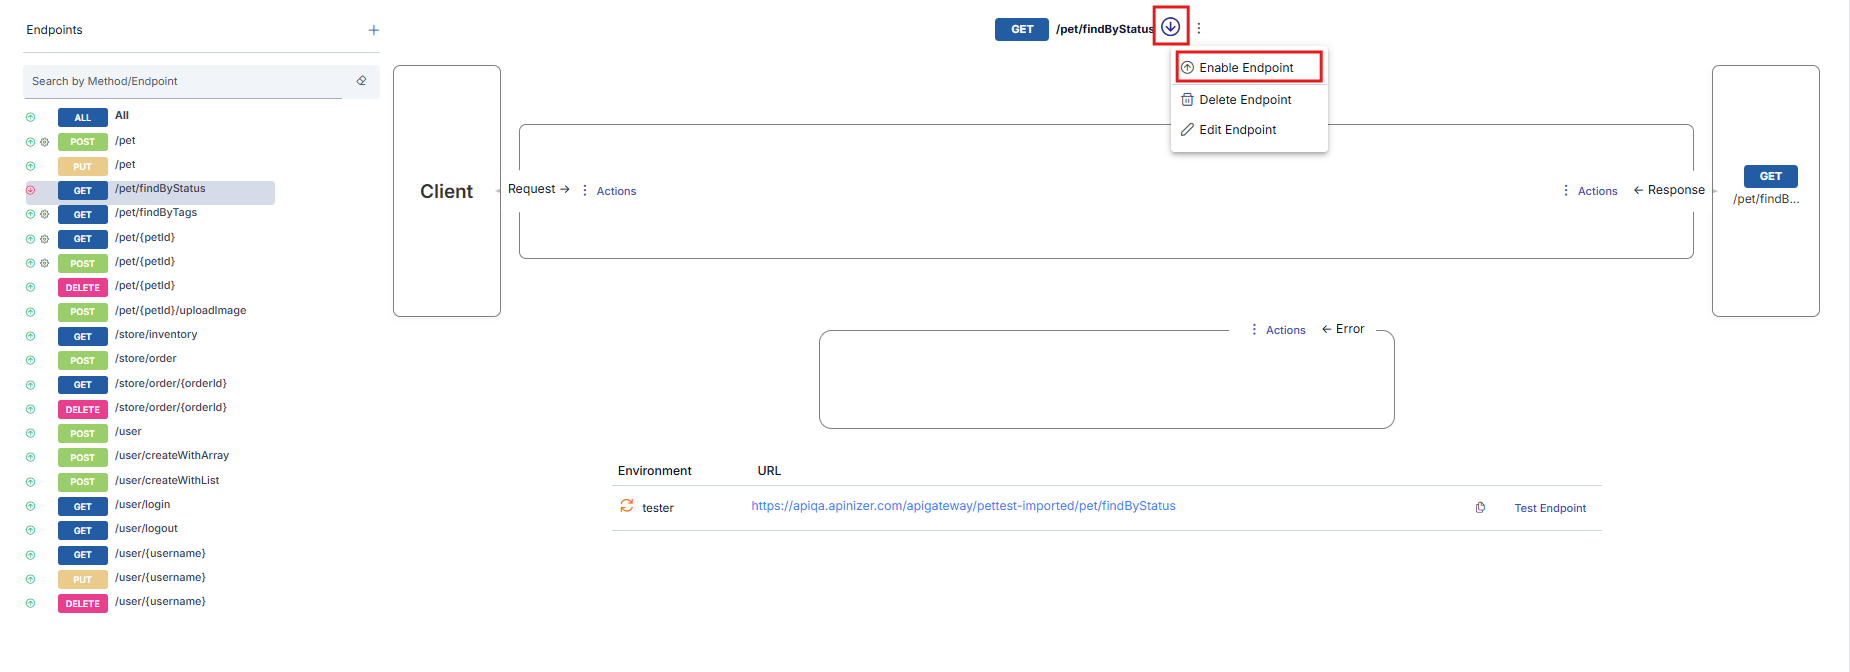
Temporarily Disabling Endpoint
It is possible to close an endpoint to access without deleting it. For this, the Disable Endpoint link is clicked. When the link is clicked, the endpoint is disabled, and along with this, the following changes occur in the interface.
- The icon next to the endpoint changes to show that the endpoint is out of use.
- The Disable Endpoint link disappears. Instead, the Enable Endpoint link appears.
Testing Endpoint
If an API Proxy has been deployed to at least one environment, endpoints can be easily tested from this tab. For this, when the Test Endpoint link is clicked for the selected endpoint, the Test Console opens for this endpoint.