Renewing a Certificate in a Truststore
This scenario renews an expired trusted certificate inside an existing truststore with KeyStore Explorer (KSE). The updated file is uploaded to Key Stores in Apinizer, not to the Certificates screen.
A truststore is not a certificate. It is the container (.p12, .pfx, or .jks) that holds trusted certificates. In Apinizer that container lives under Keystore Management and is selected as the TrustStore for mTLS, Gateway HTTPS, and backend SSL verification.
The KeyStore Explorer user interface is in English. Menu names in this document match the labels in KSE.
Certificate, Truststore, and Keystore
| What | Purpose | In this scenario |
|---|---|---|
| Certificate | A single identity document (.cer, .crt, .pem) | The expired entry and the new entry that replaces it |
| Truststore | The file that holds trusted certificates. No private key. | The .p12 / .jks file opened and updated in KSE |
| Keystore | Your identity: a Key Pair (private key + certificate) | Out of scope |
Tell the entry type from the icon. A lock or ribbon with a red cross is a Trusted Certificate (it may be expired). A key icon is a Key Pair; do not delete that.
Step 1: Open the Truststore File
In KeyStore Explorer, use File → Open and select the existing truststore (.p12, .pfx, or .jks).

Enter the file password in Unlock KeyStore and confirm.

The list shows each entry with its alias, algorithm, and expiry date. A red cross means the certificate has expired.
Step 2: View the Expired Certificate
Do not use Examine in the top menu to open the entry in the list. Examine does not show a store entry; it inspects a certificate from a live TLS host or from a file on disk. Fetching the new certificate is Step 3.
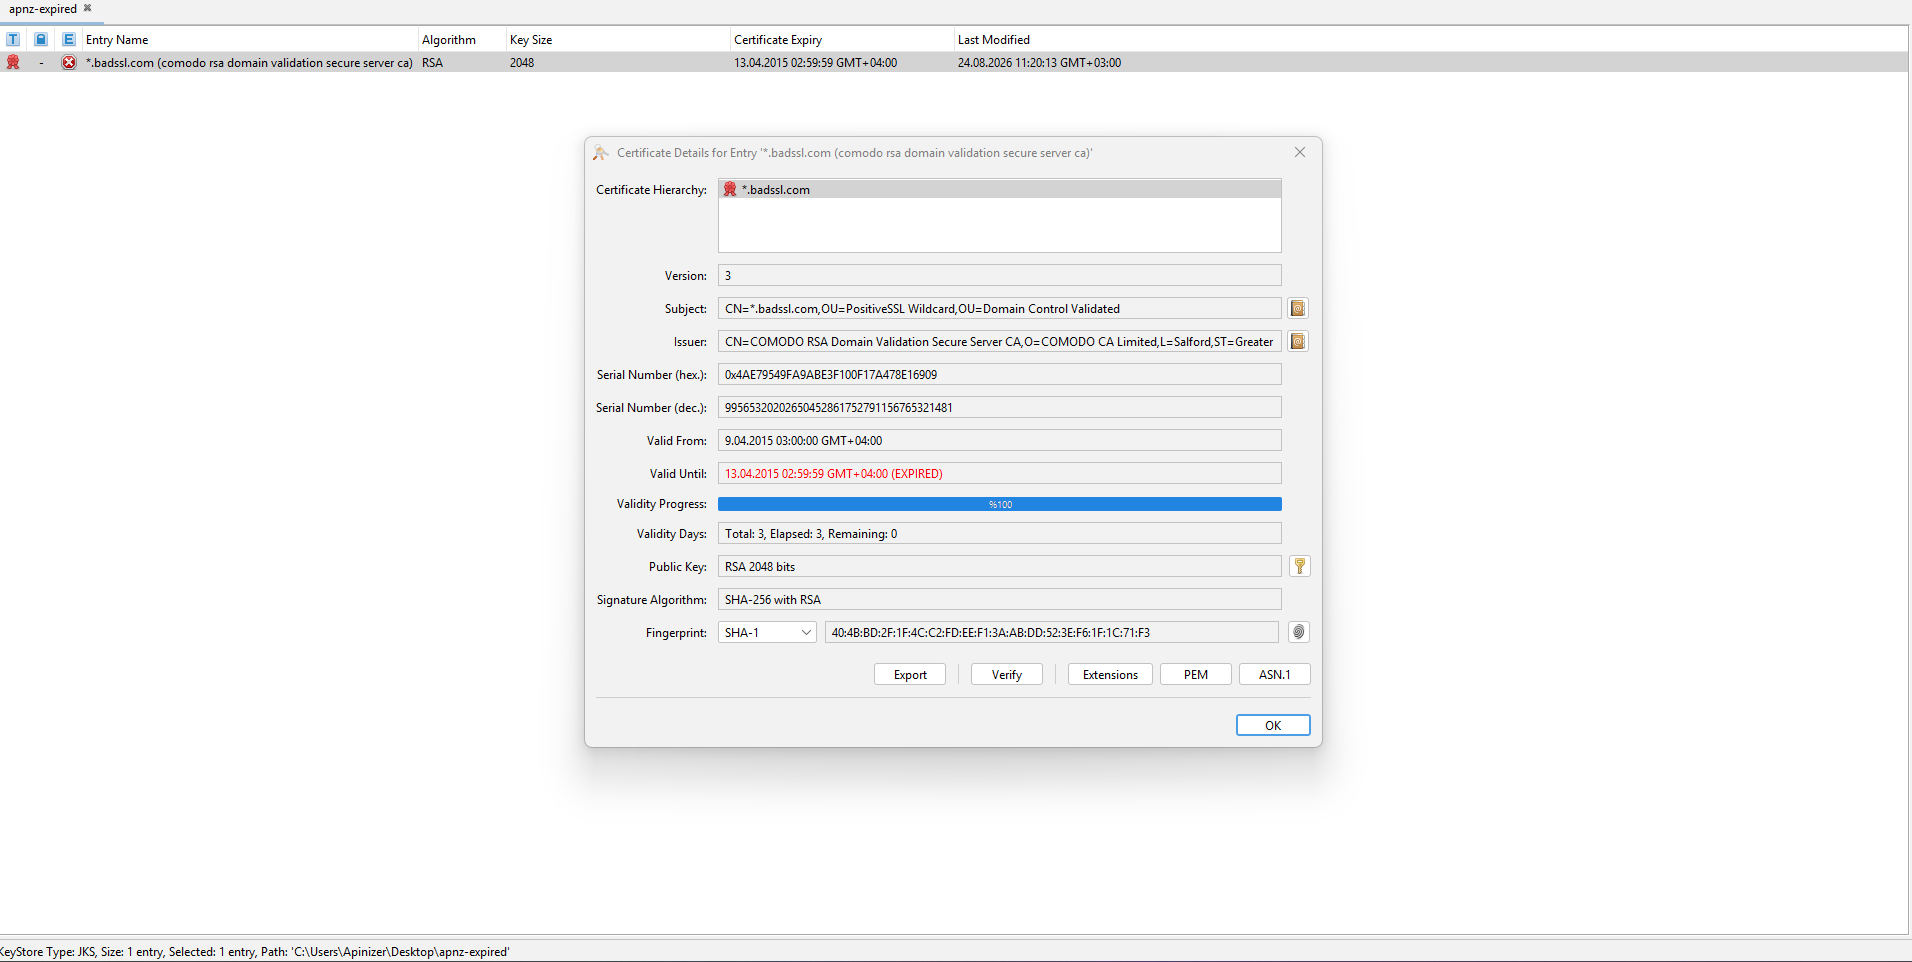
Double-click the expired row. Alternatively, right-click and choose View Details → Certificate Chain Details.
Certificate Details shows (EXPIRED) on the Valid Until line. Check Subject, Issuer, and the validity dates, then close the window with OK.
Step 3: Get the New Certificate from the Server
If you do not already have the new certificate as a .cer file, fetch it from the live host in KSE.
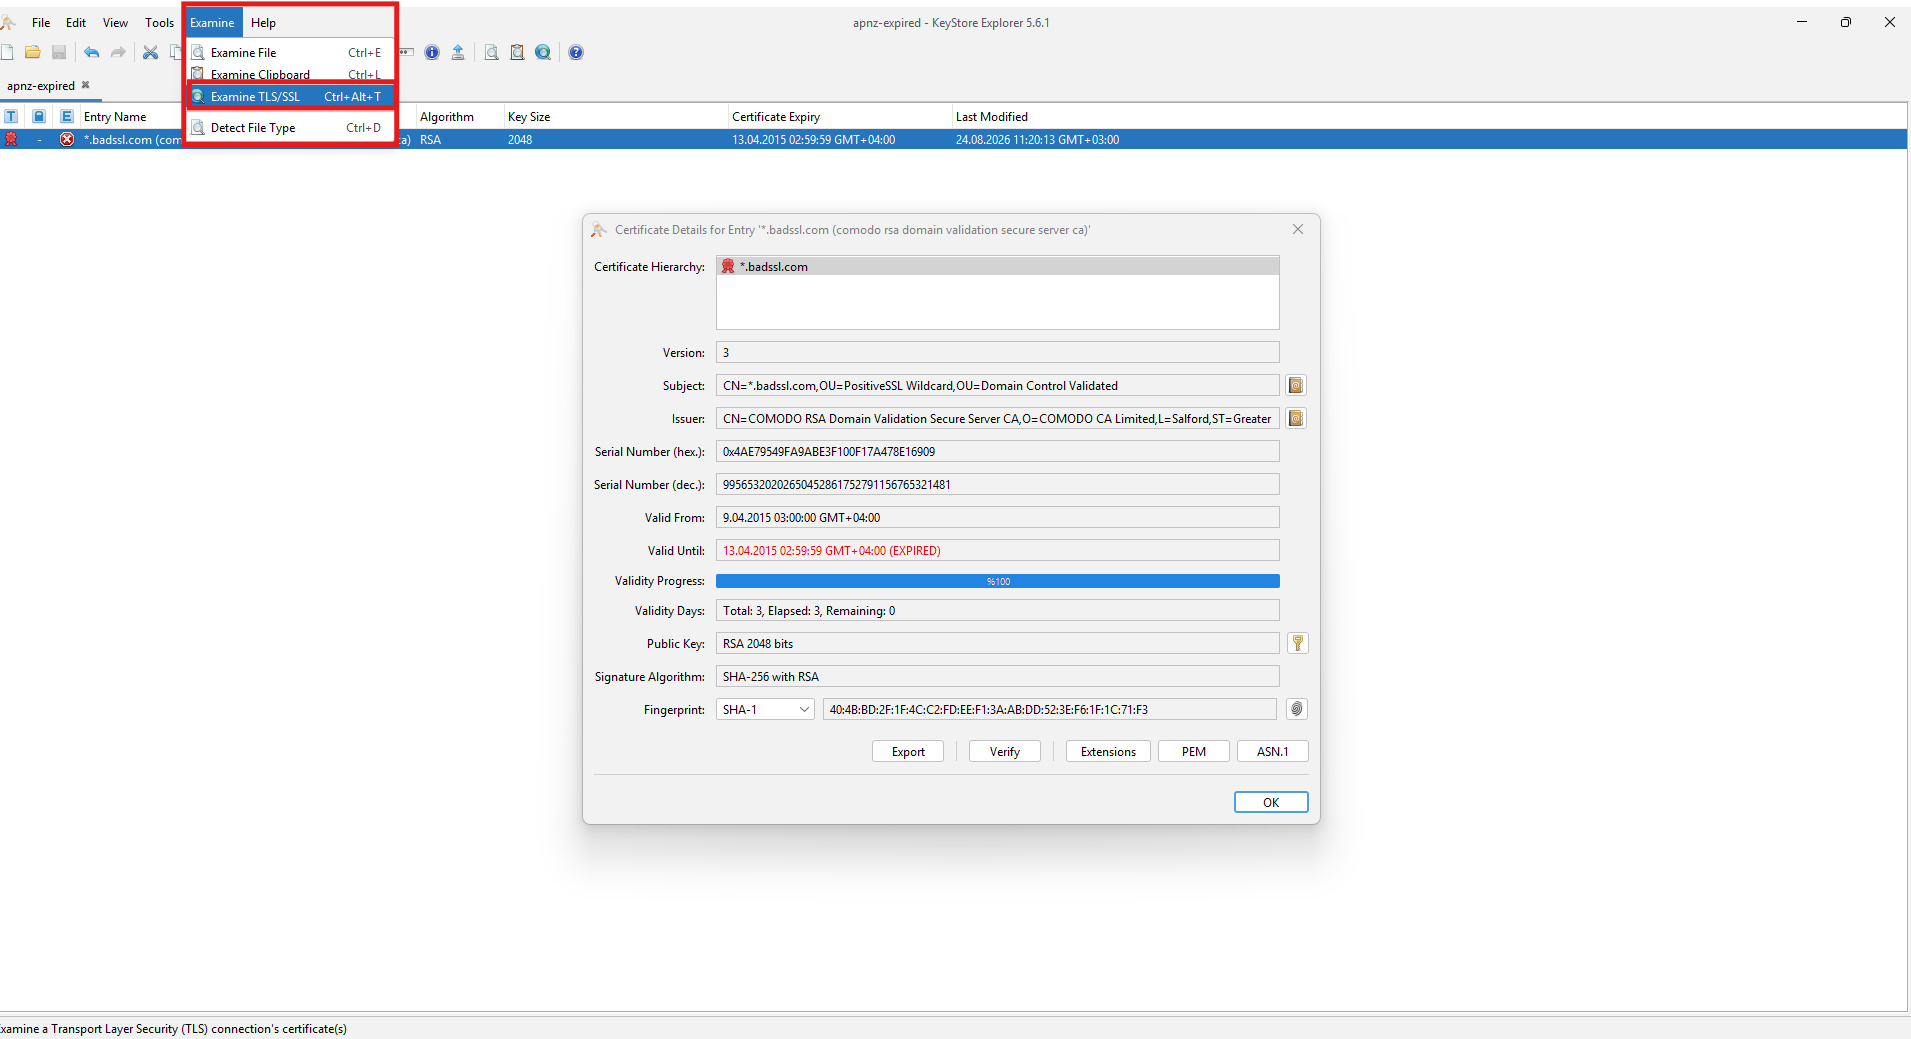
Choose Examine → Examine TLS/SSL from the top menu.
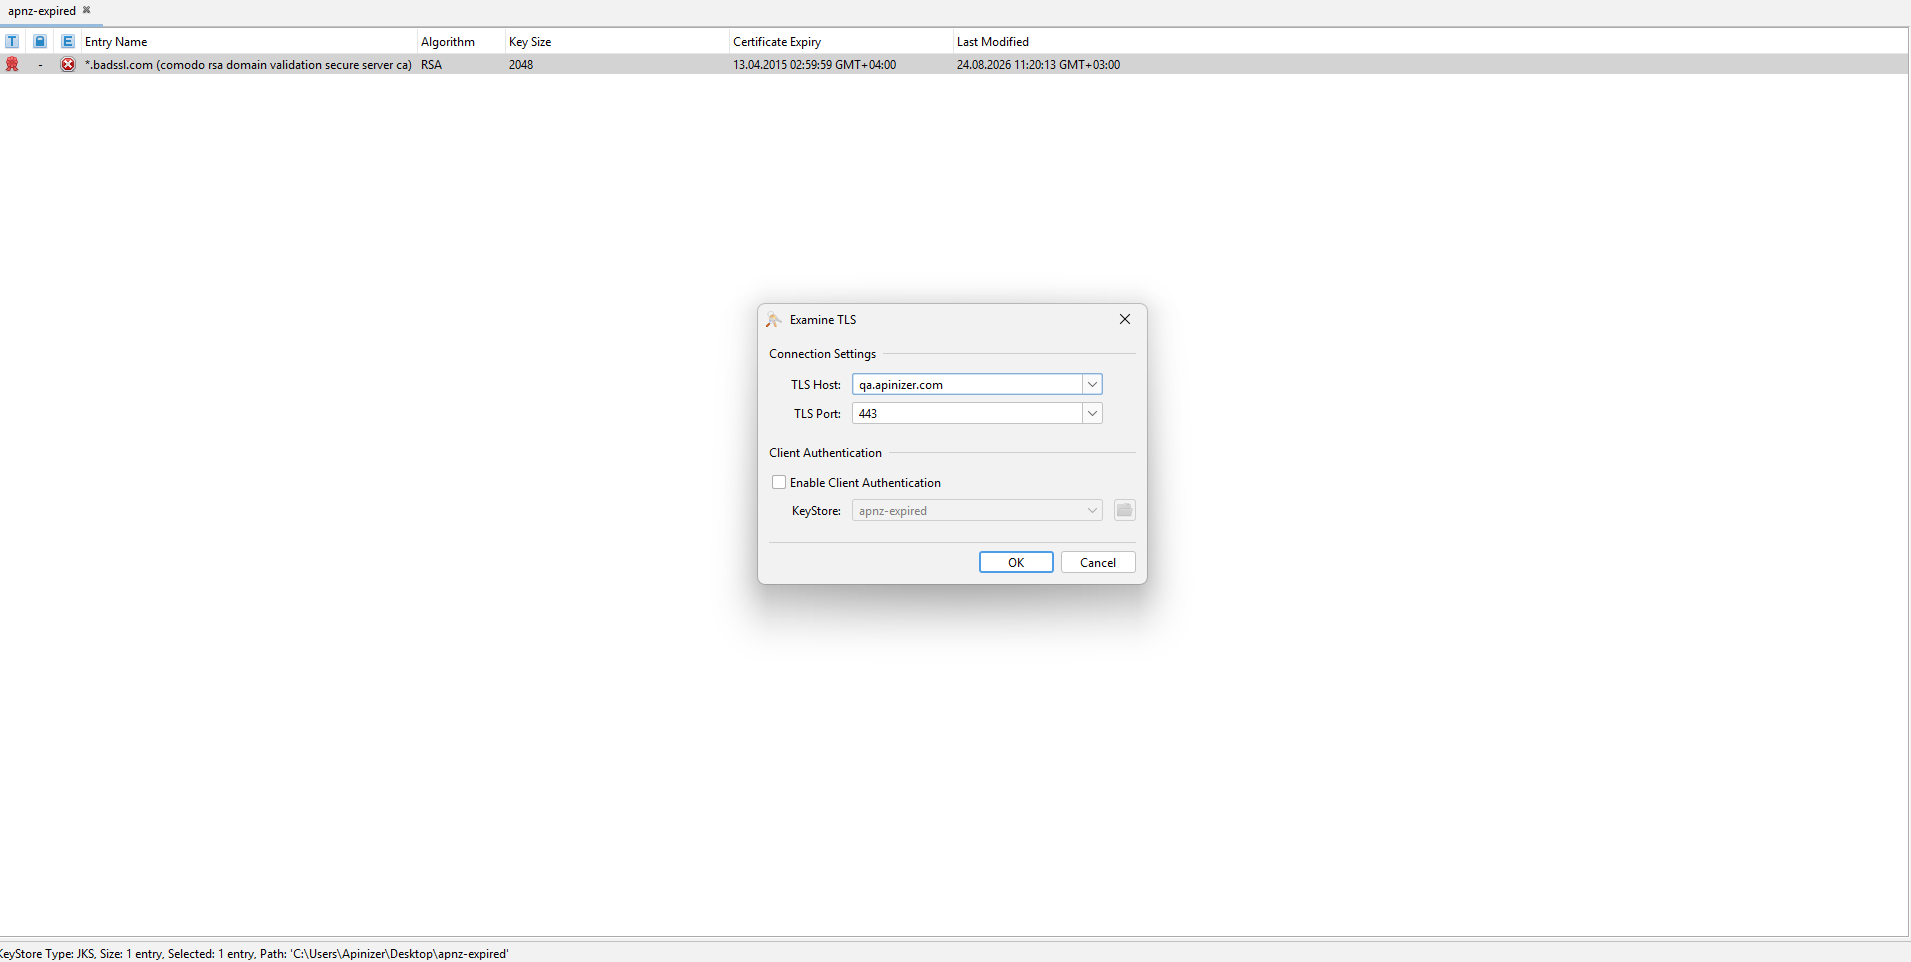
Enter TLS Host and TLS Port (for example qa.apinizer.com, 443) and click OK.
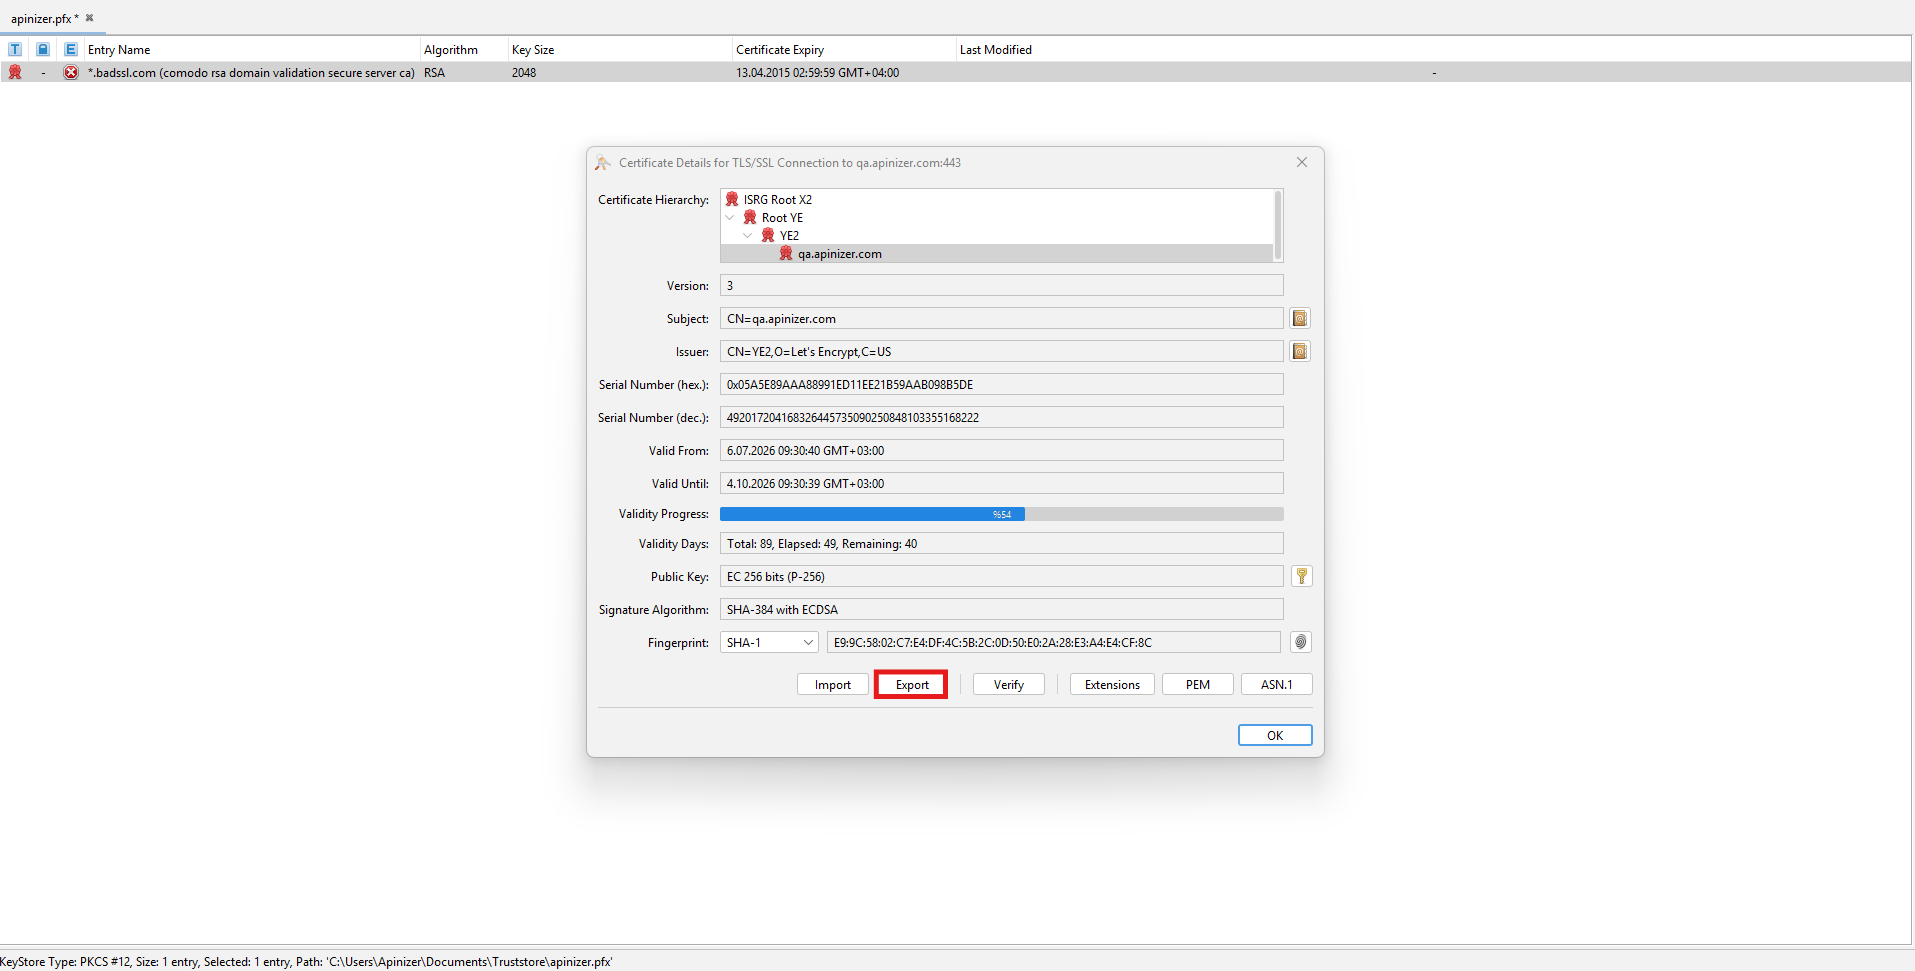
In the chain, leave the site's own certificate selected (the leaf at the bottom, qa.apinizer.com in the example). Do not select the root or intermediate CA rows. Click Export and save the certificate as a .cer file.
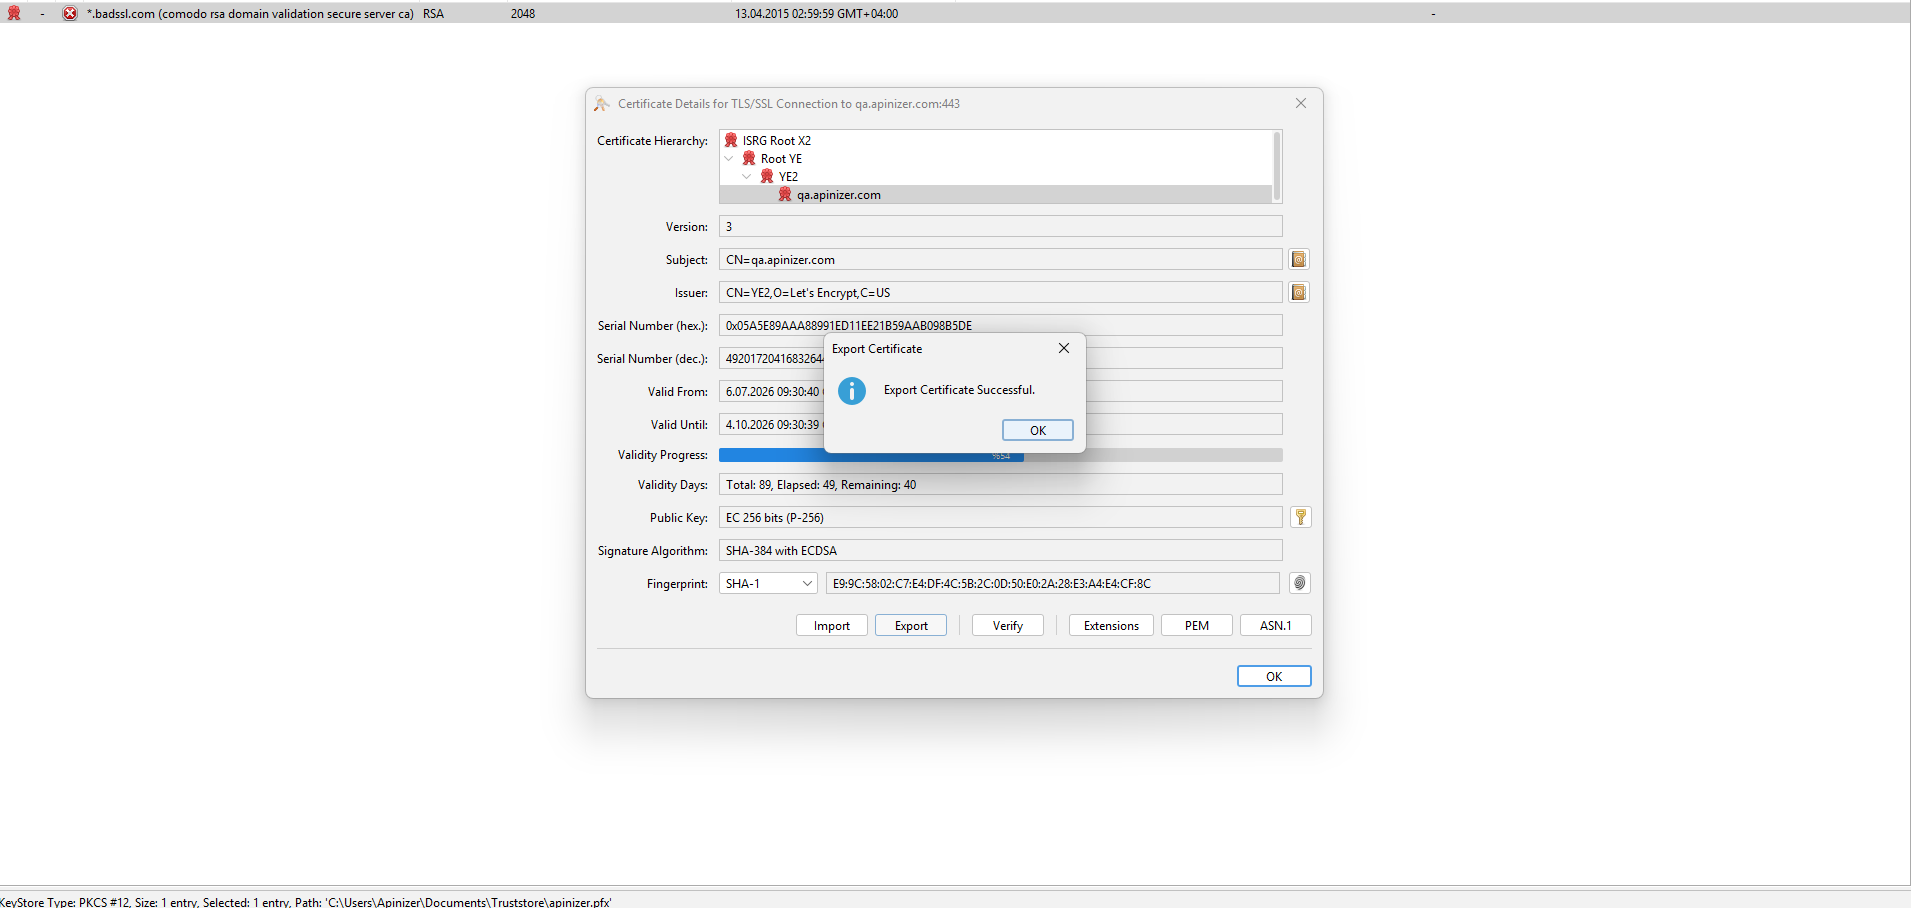
If you already have the file (X.509 / PEM .cer), skip this step and go to Step 4.
Step 4: Add the New Certificate to the Truststore
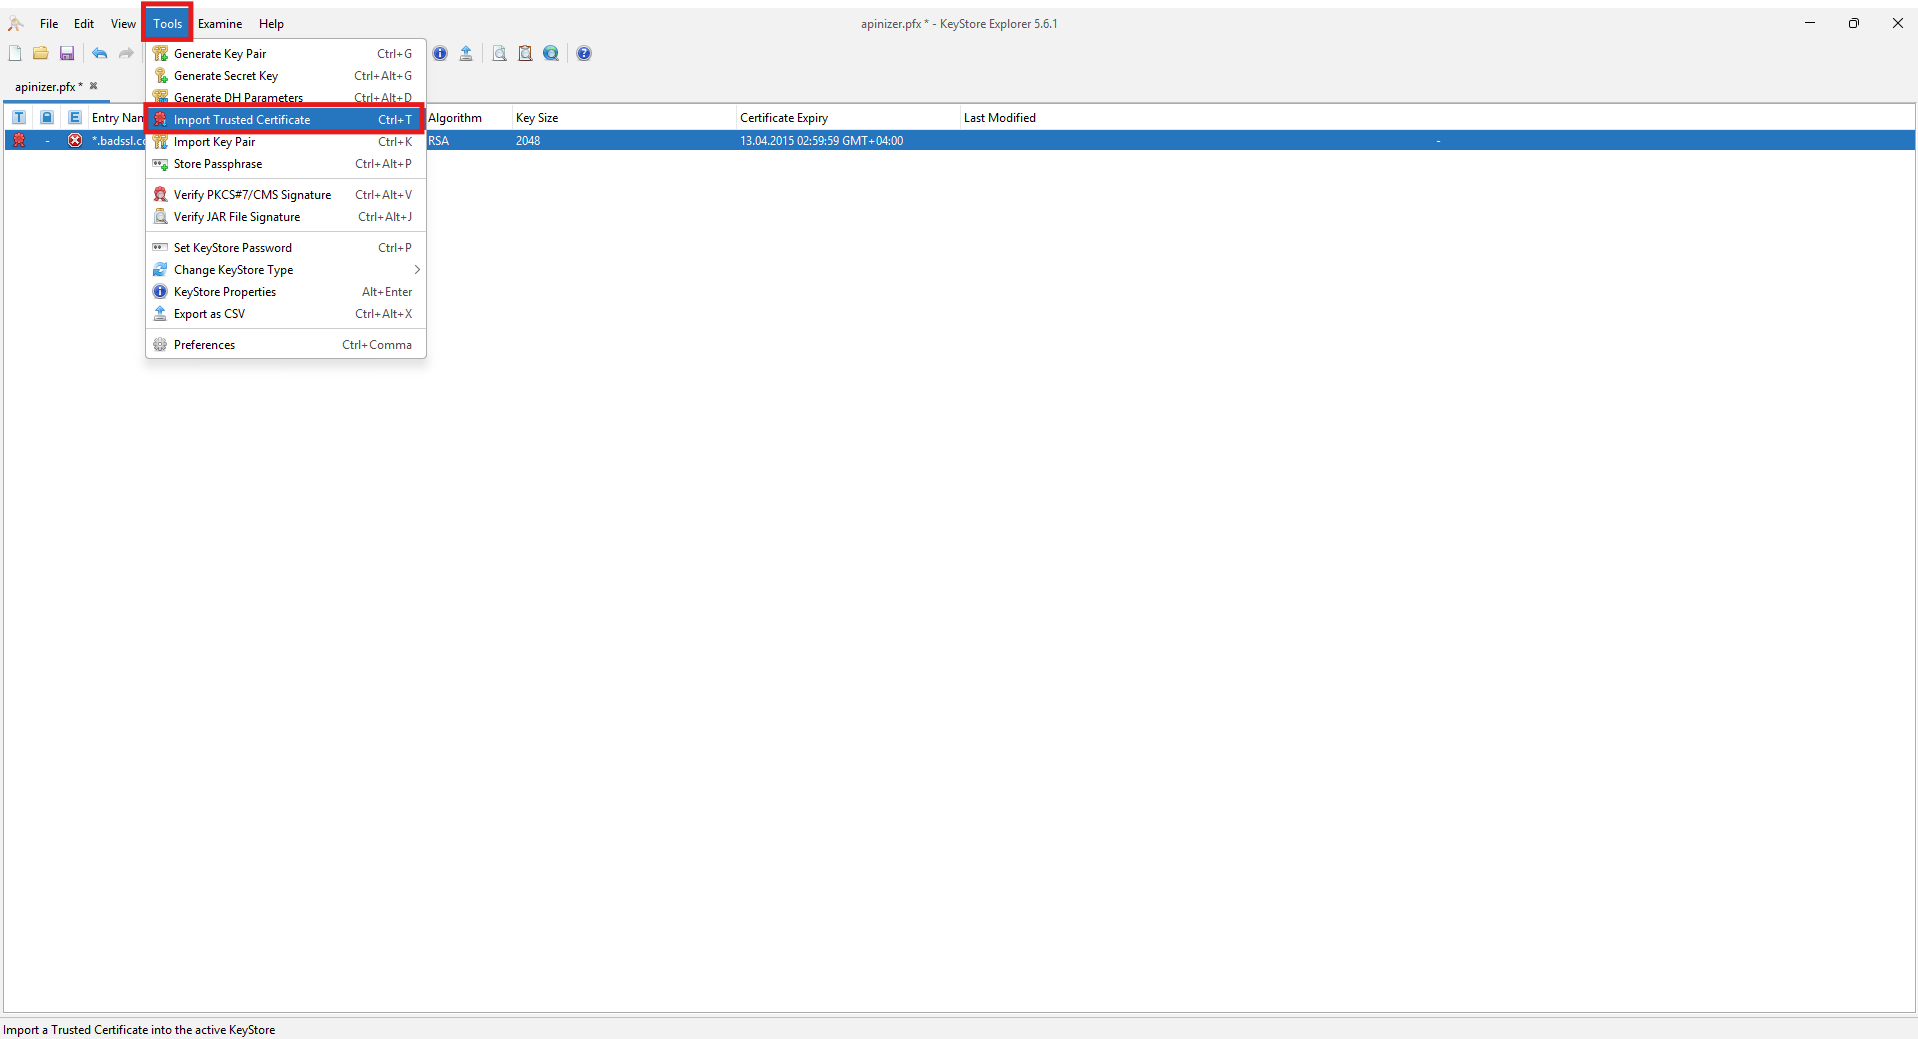
Choose Tools → Import Trusted Certificate. Do not use Import Key Pair; that adds a private key.
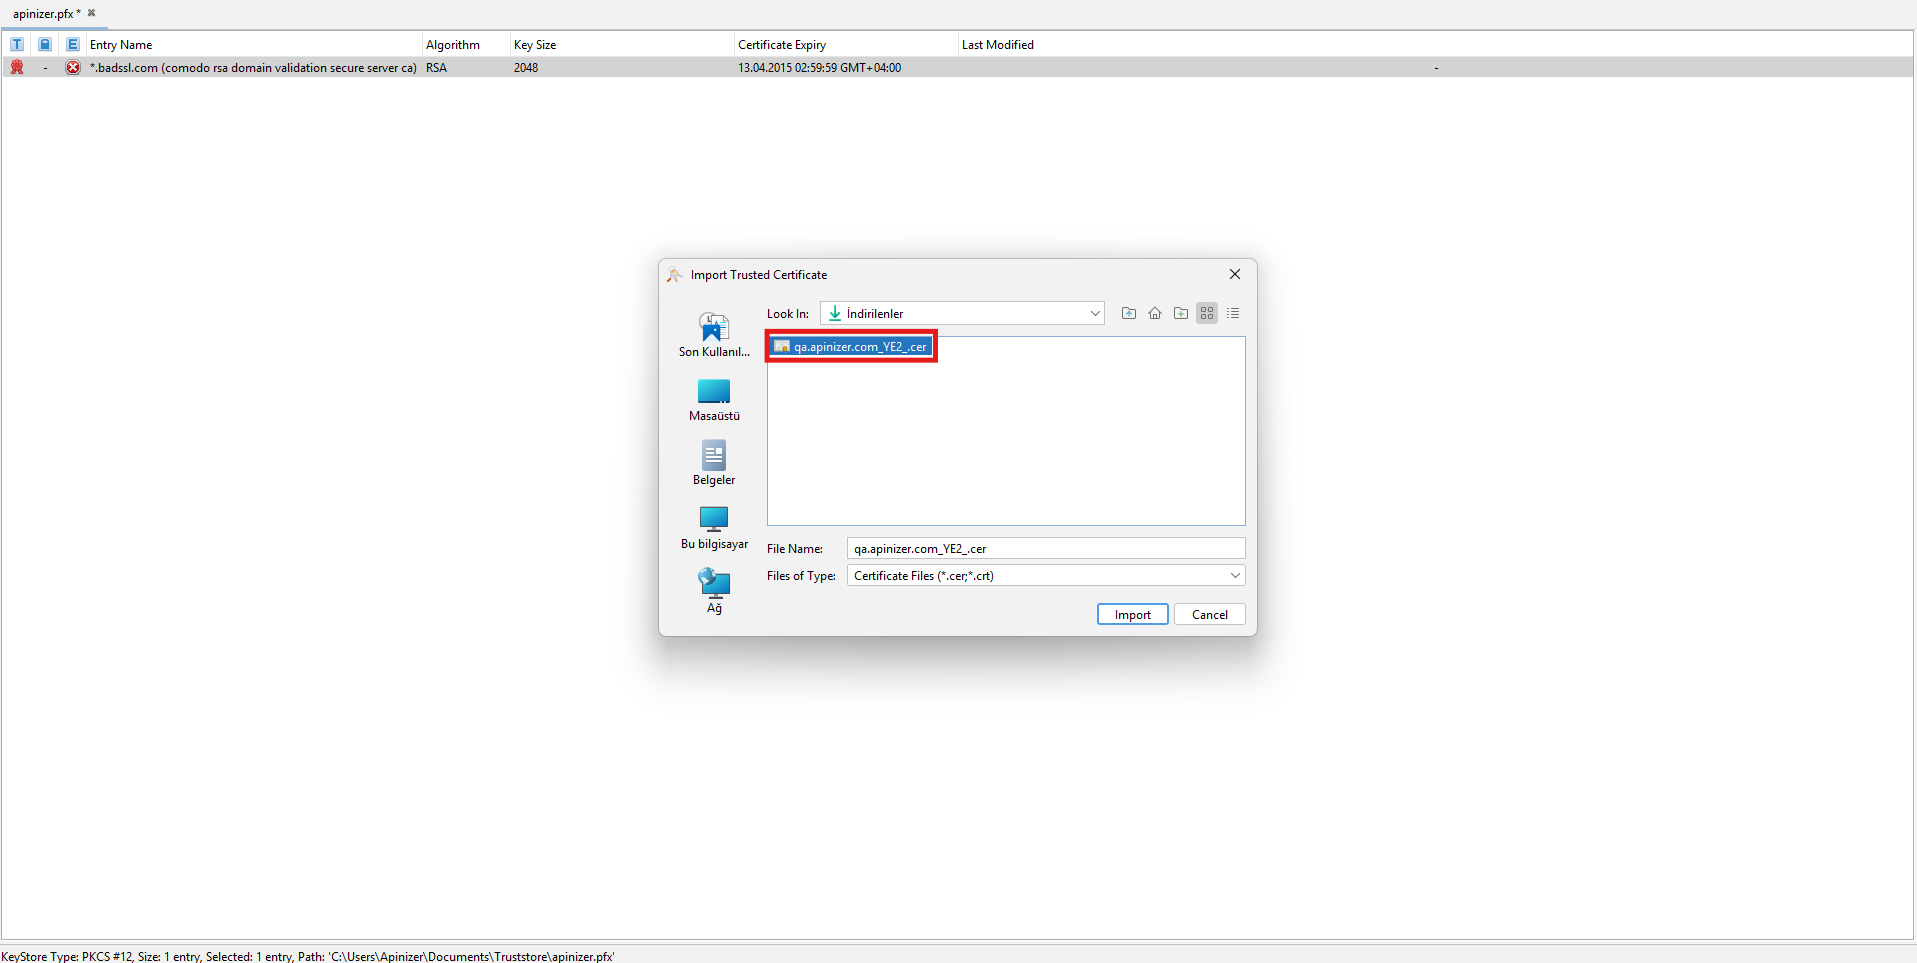
Select the .cer file you just saved and click Import.
In the preview, confirm that Valid Until is in the future. Enter an alias. The list now shows both the old entry (red cross) and the new one (green check).
Step 5: Back Up the Old Certificate
Right-click the old entry and choose Export → Export Certificate. Use X.509 and enable PEM. Save the backup in a safe location.
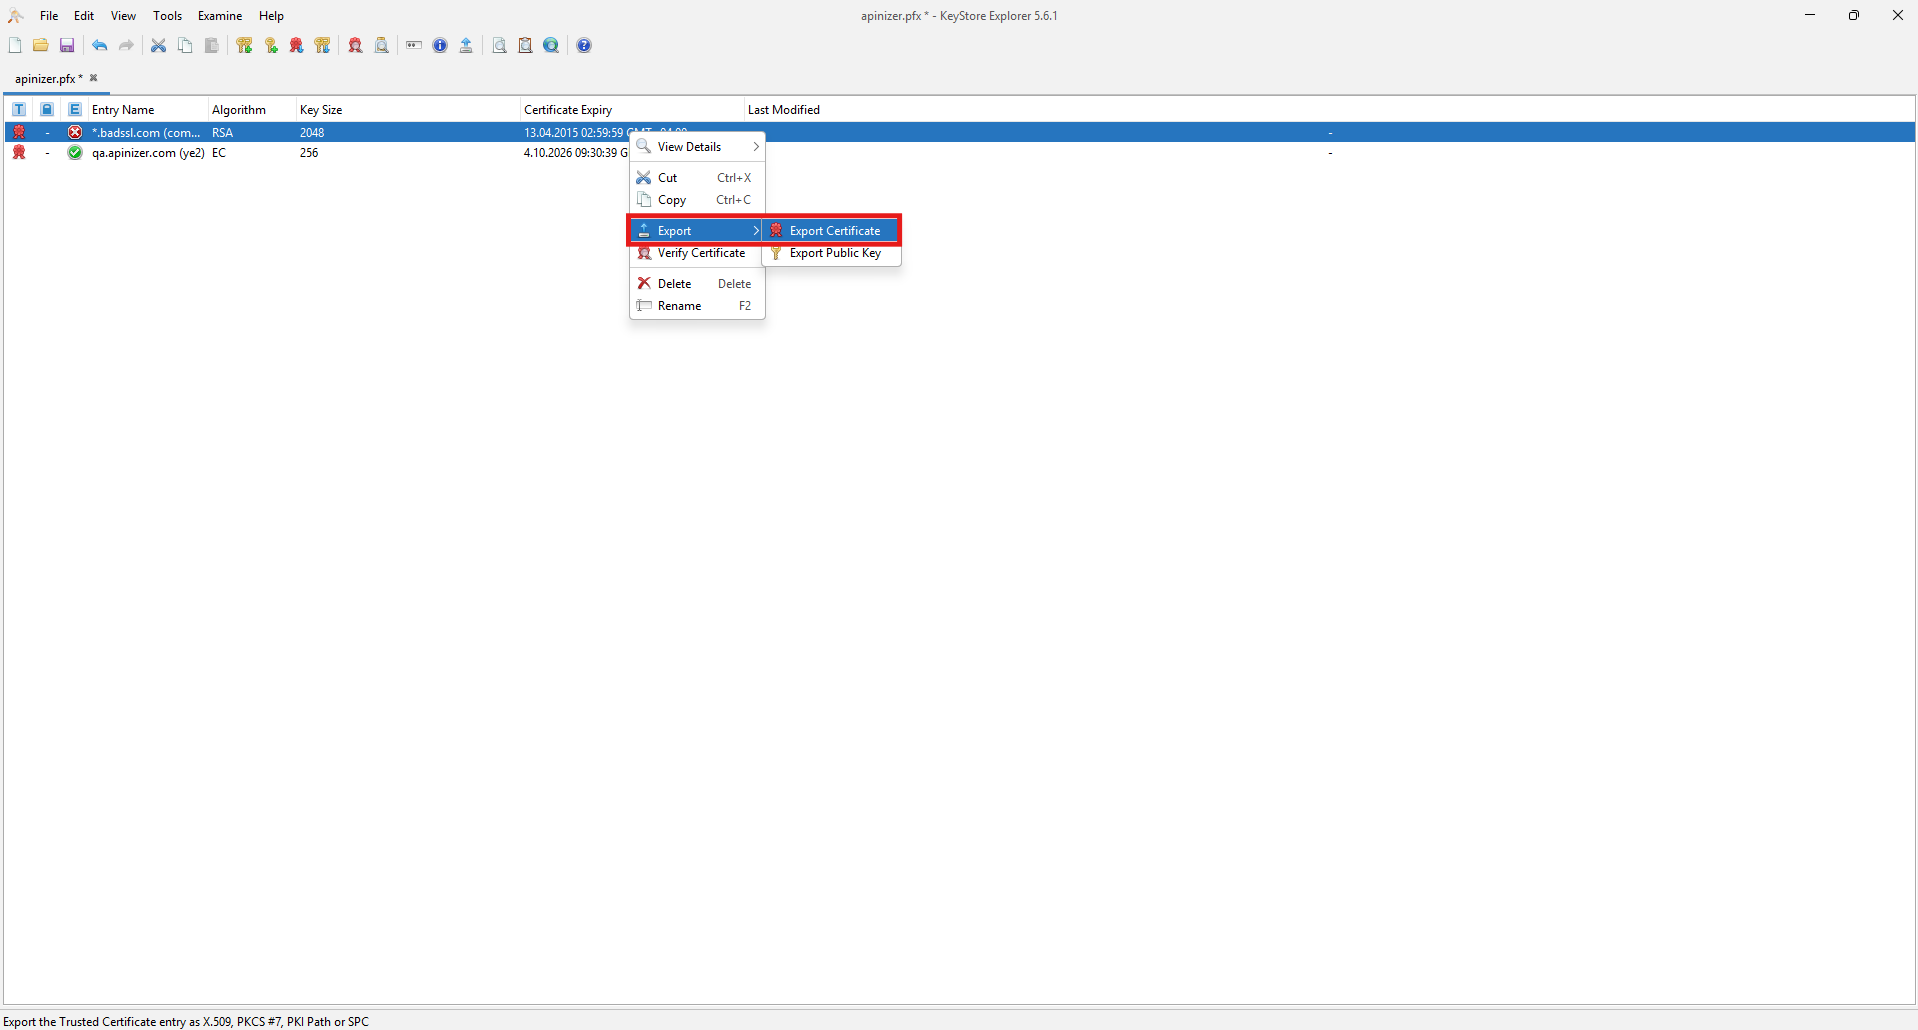
Step 6: Delete the Old Certificate
Right-click the old entry and choose Delete. Confirm. Only the new Trusted Certificate remains in the list.
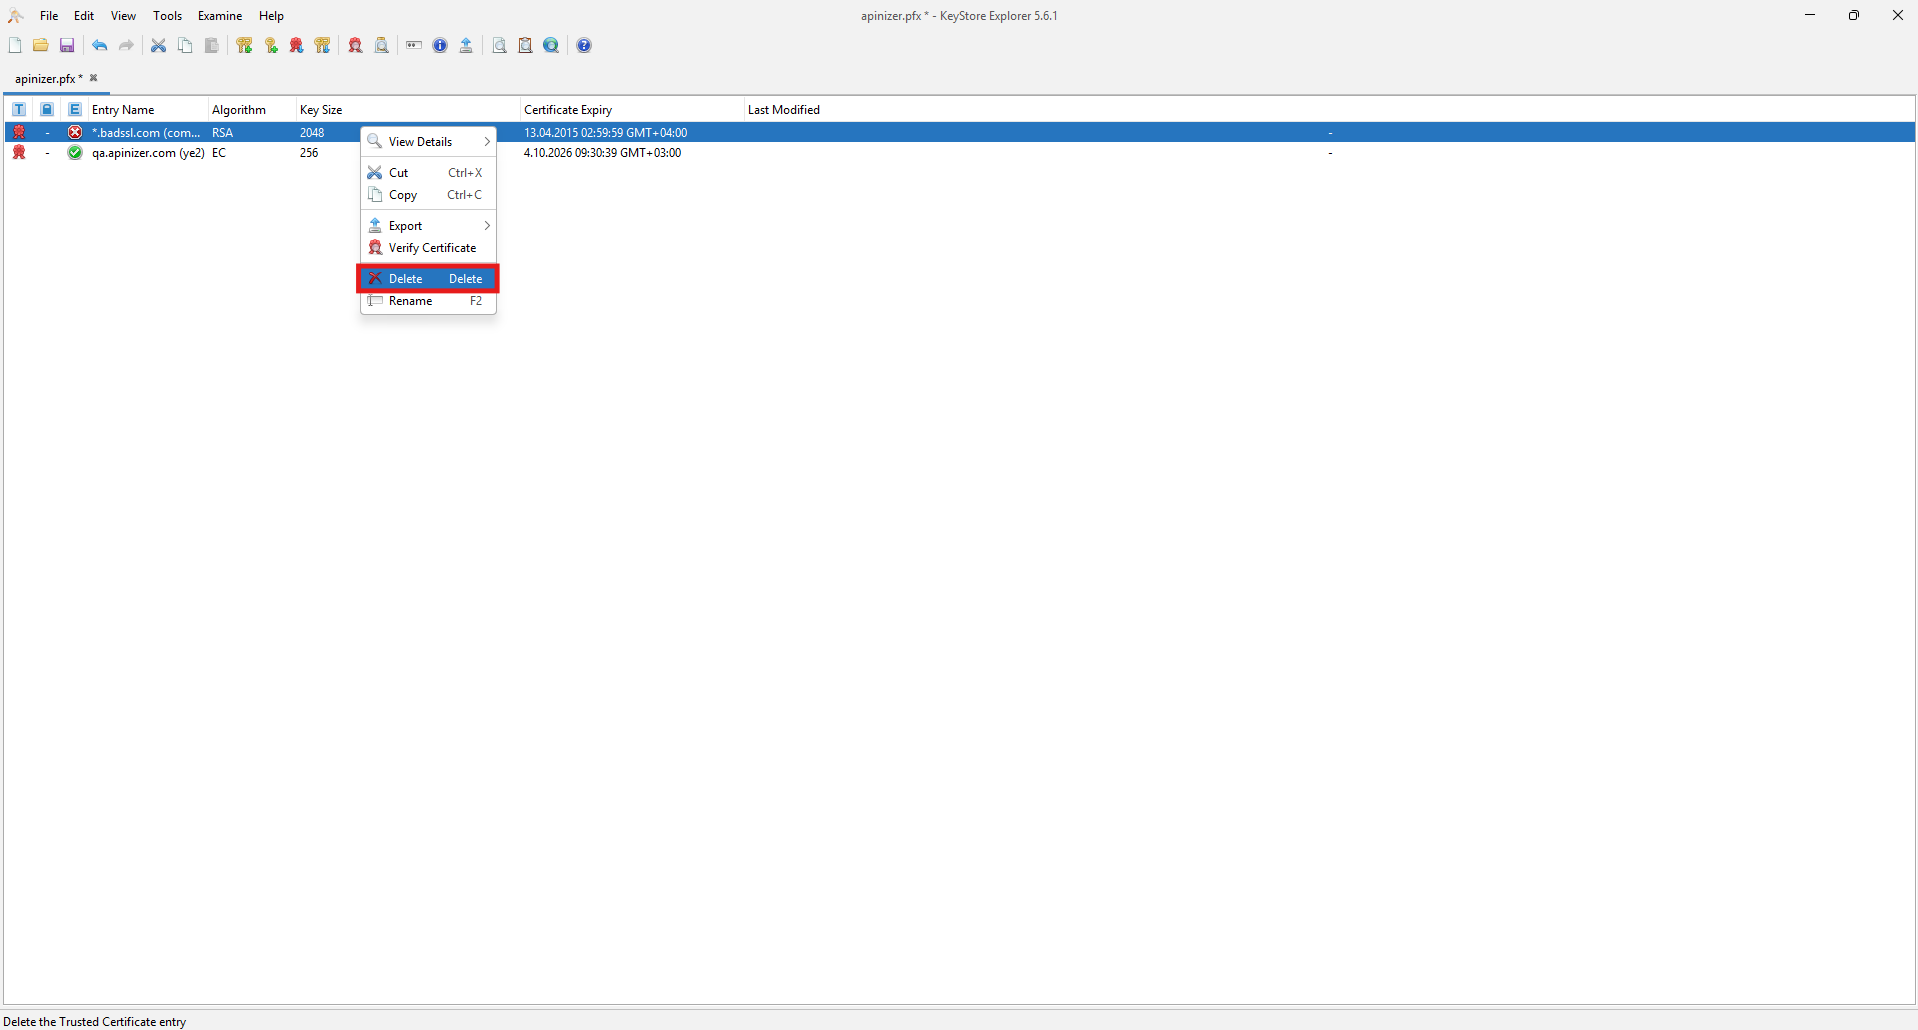
Step 7: Save the Truststore File
Choose File → Save As. KSE does not add the extension for you. Type .p12 or .pfx (PKCS #12) or .jks (JKS) at the end of the file name. Apinizer rejects a file saved without an extension.
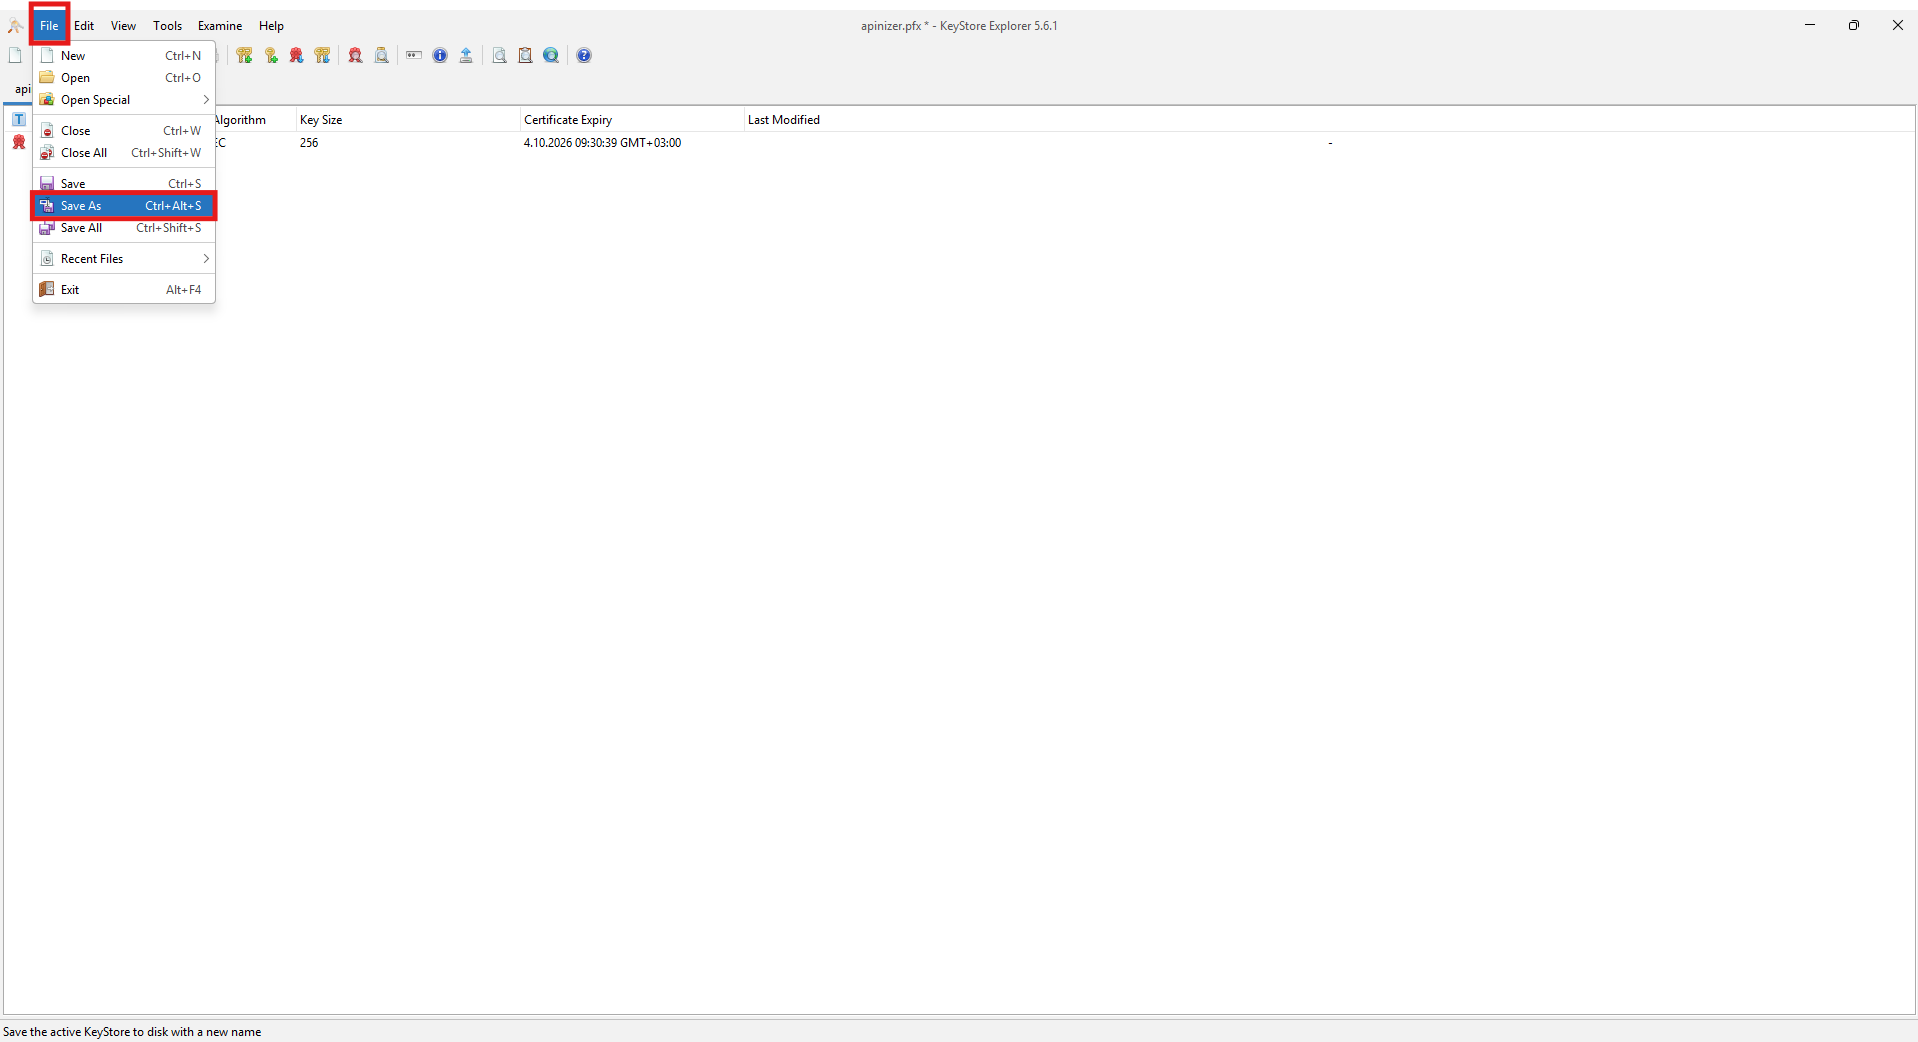
The password you save with must match the password on the Apinizer Key Store definition. If you change the password, update the Password field in that definition as well.
Step 8: Upload the Updated Truststore to Apinizer
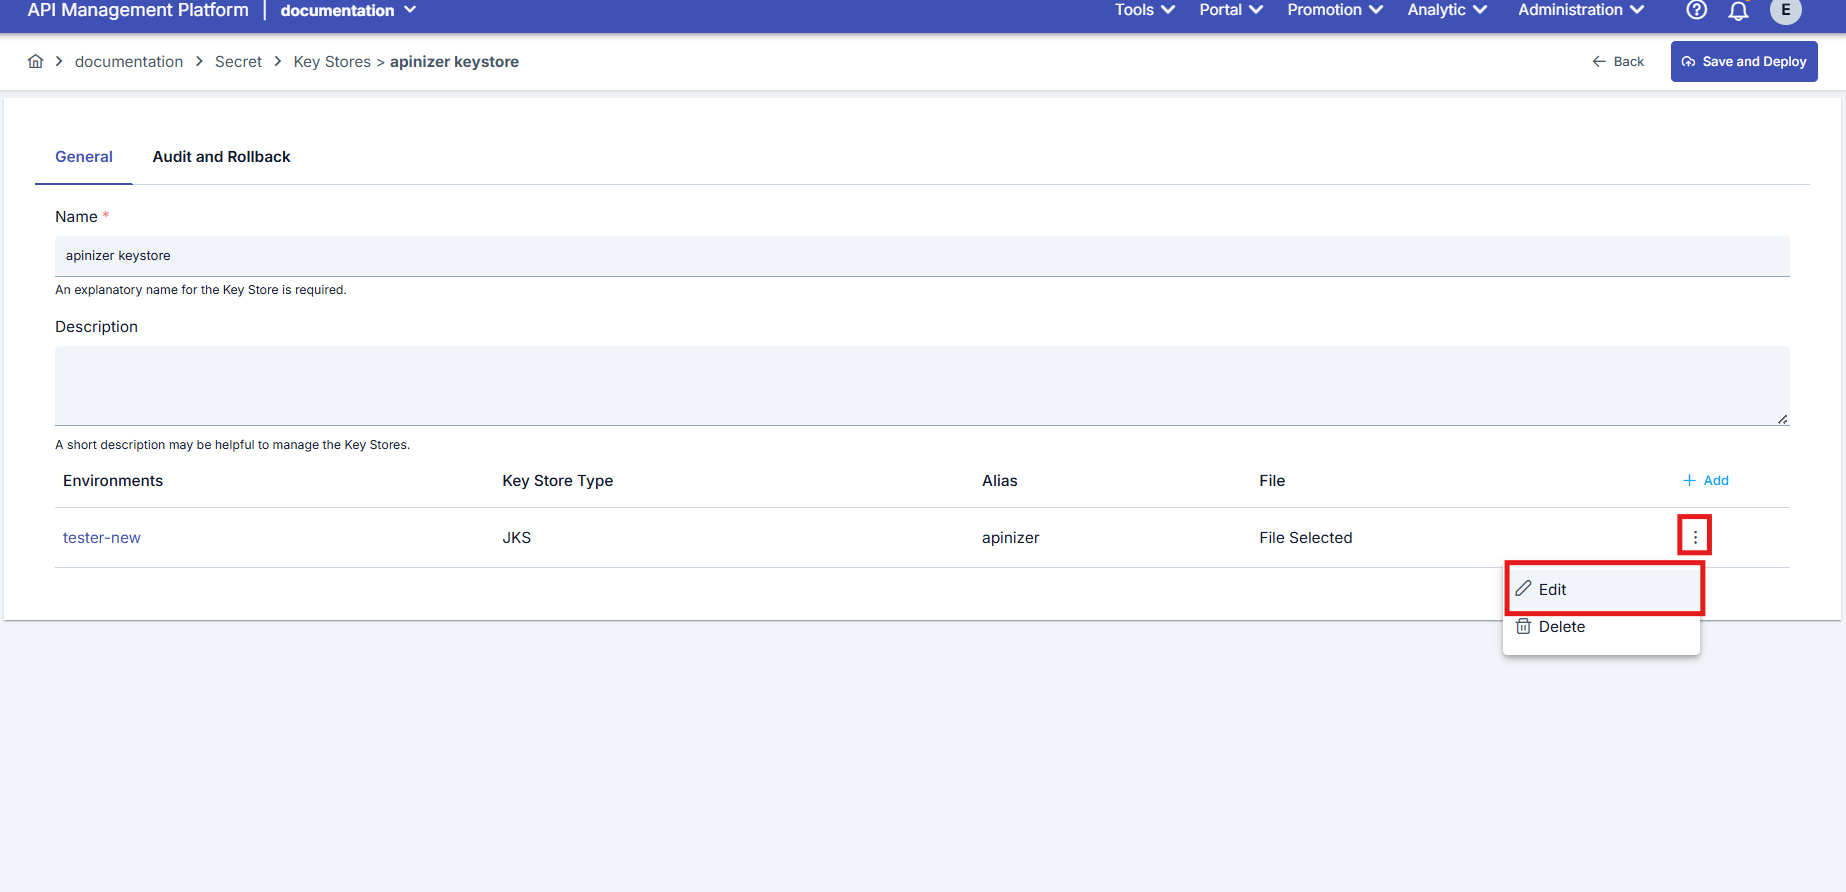
Upload the .p12 / .pfx / .jks container on Administration → Secret Management → Key Stores. The Certificates (Certificate Definition) screen expects a raw .cer / .pem file; do not put the truststore file there.
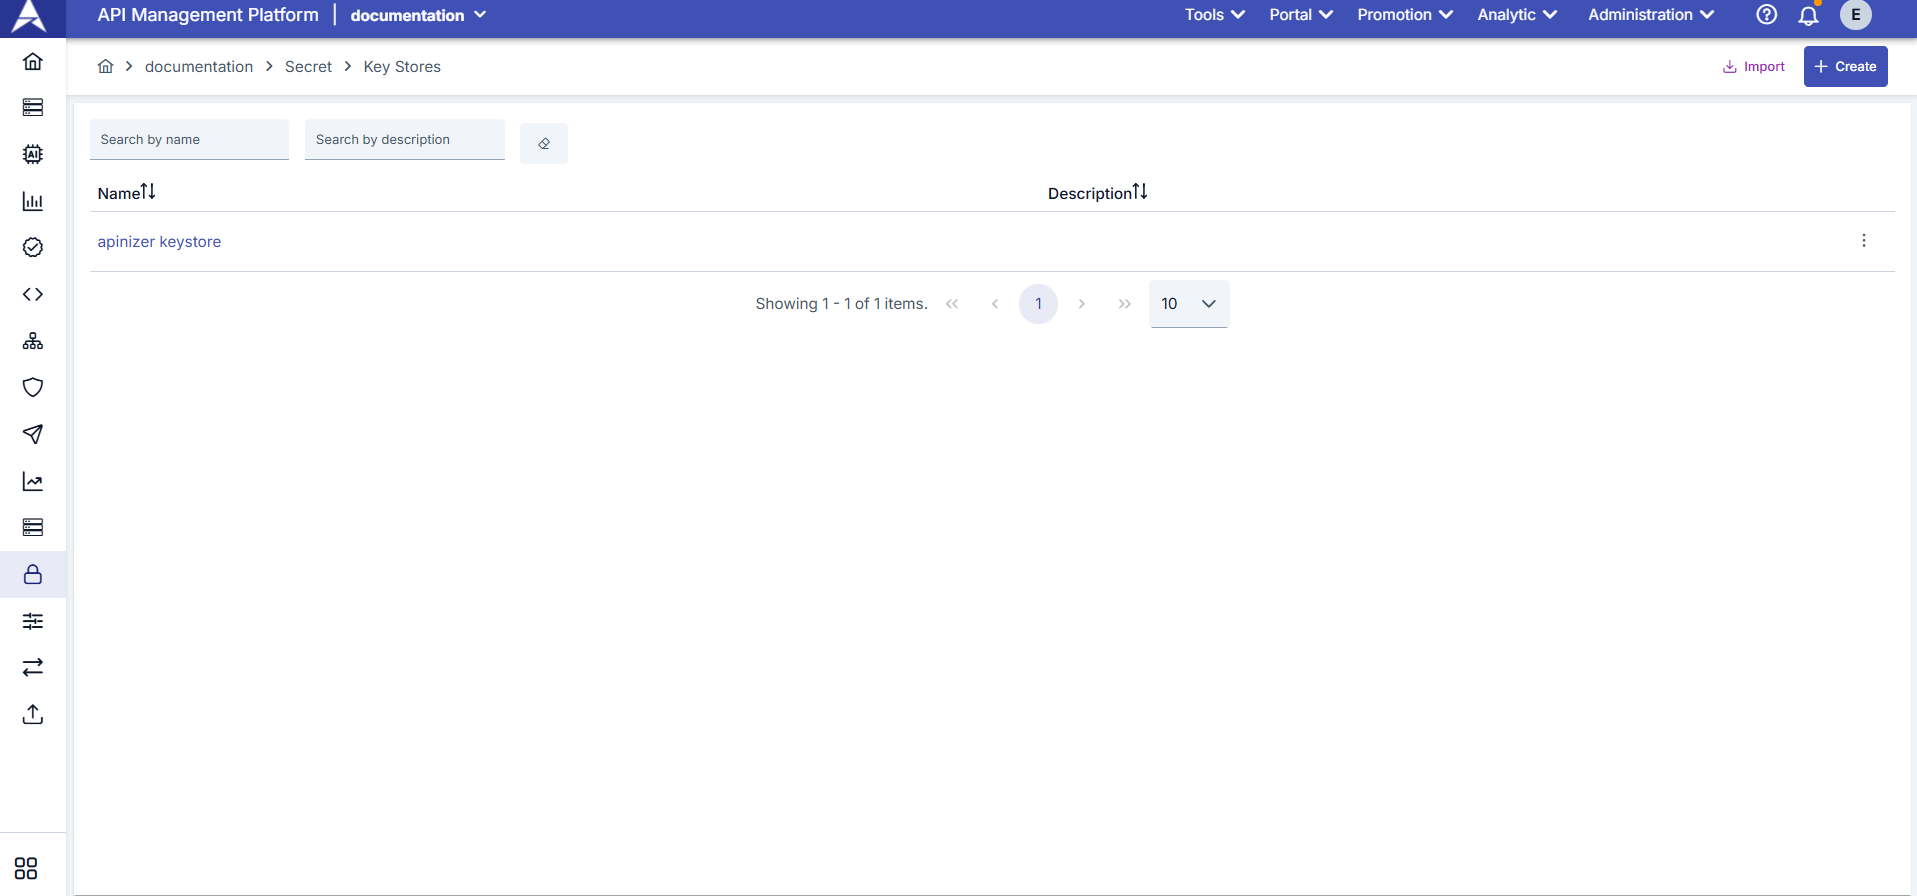
From the existing record's menu, choose Edit.
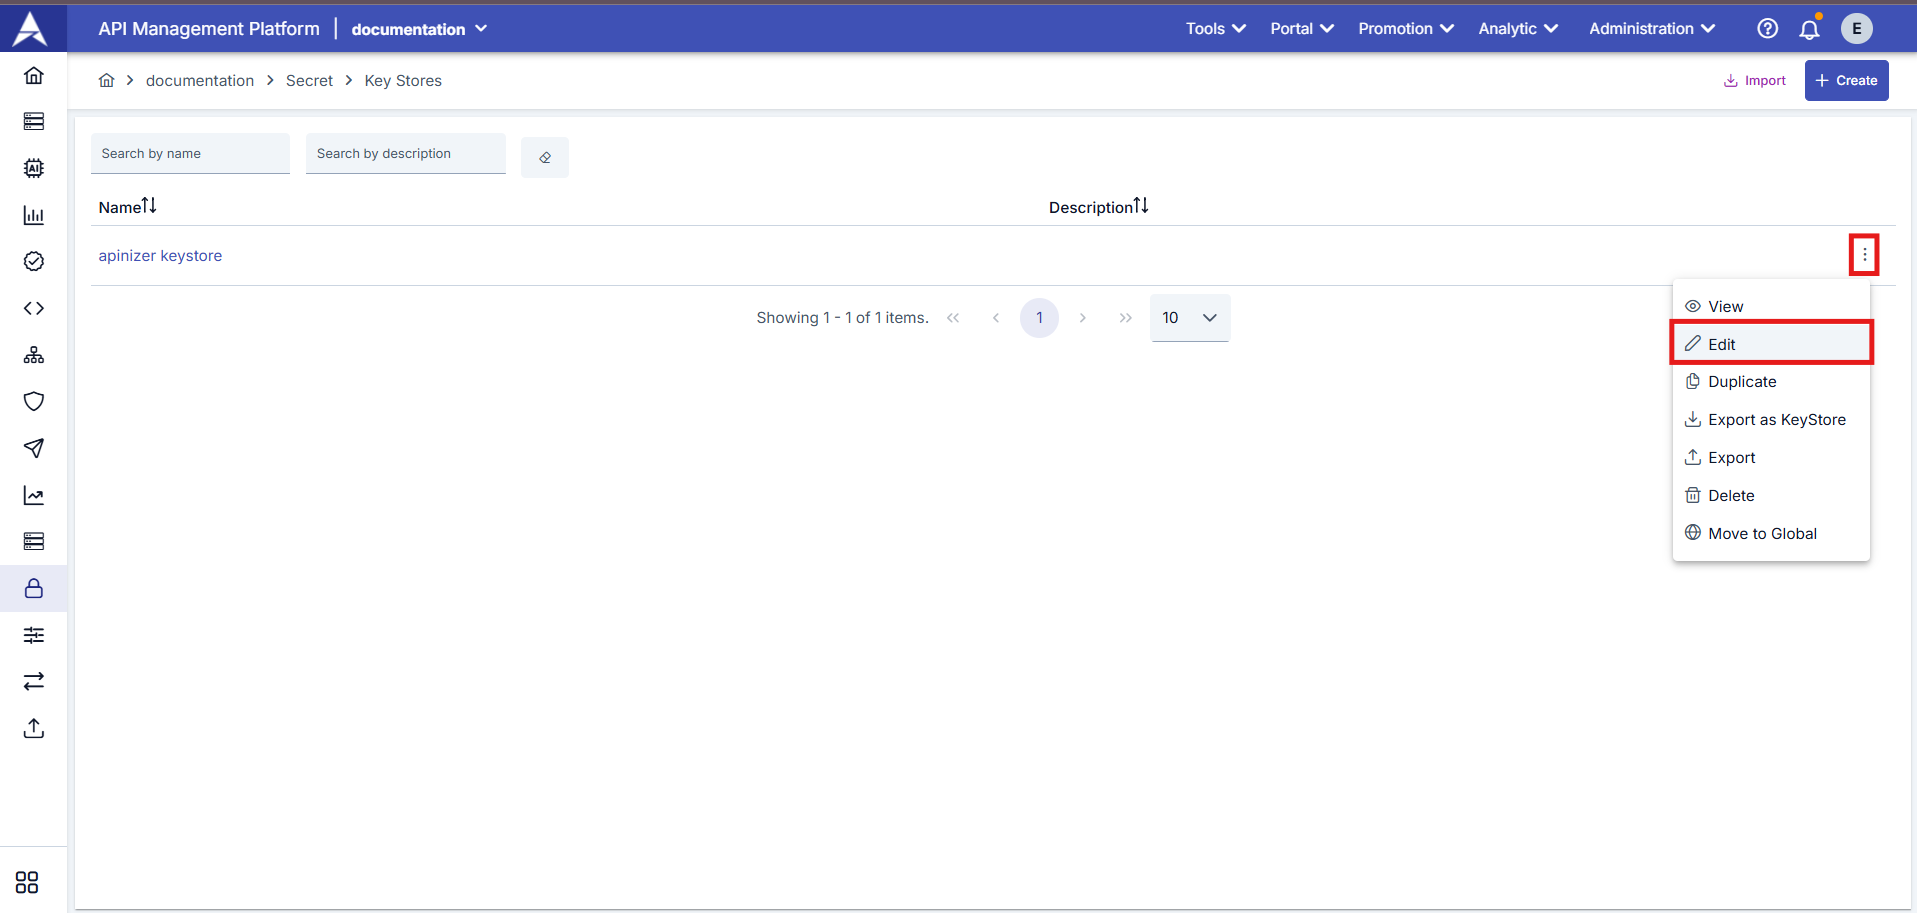
Open the environment row menu and choose Edit again.
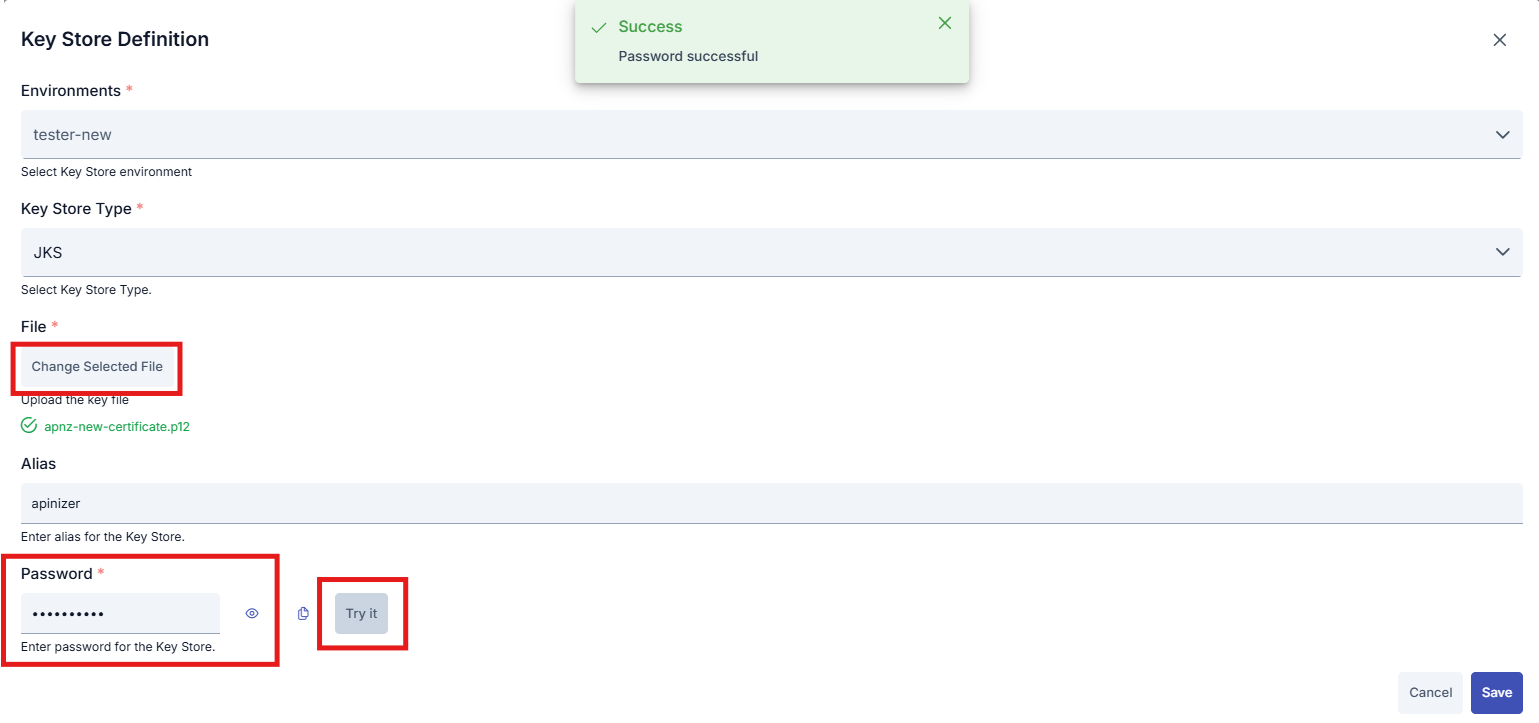
Use Change Selected File to pick the new truststore. Key Store Type must match the file: PKCS12 for .p12 / .pfx, JKS for .jks. Enter Alias and Password. Verify the password with Try it, then Save and Save and Deploy.
For the Key Store fields, see Keystore Management. For creating an mTLS truststore, see mTLS Authentication.